2.8 Synchronization Server 
On Production this section is managed by the Support Team.
2.8.1 Import Group Types
| Click on Menu Administration 1, Synchronization 2, Configuration 3, Type of Group 4, click on the double-arrow icon to import the file 5. Import file grouptype.csv This file contains all the groups required to install an HQ with two missions. | 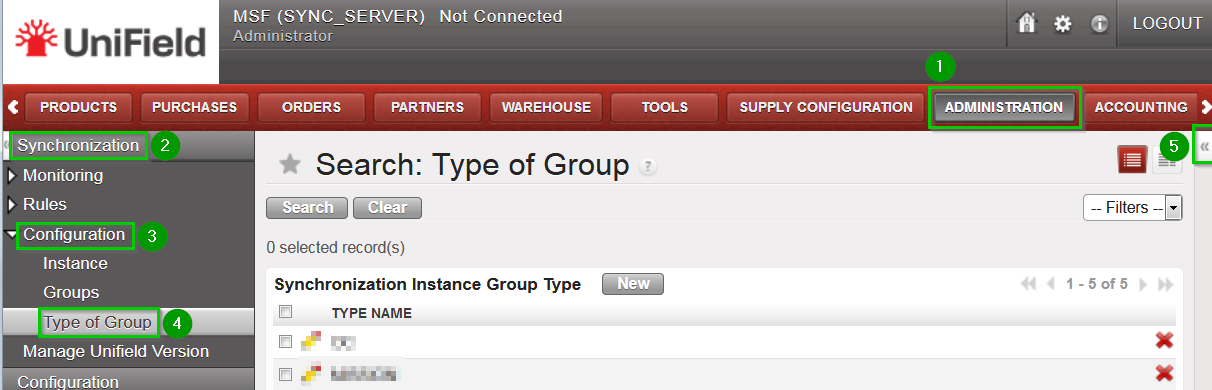 |
2.8.2 Create Groups
The number of groups depends on the structure of the network as defined in the Installation Checklist. The groups are used to determine how the data is to be exchanged between instances.
In order to create a group, proceed as follows:
| Click on Menu Administration 1, Synchronization 2, Configuration 3, Groups 4 Click on New 5 | 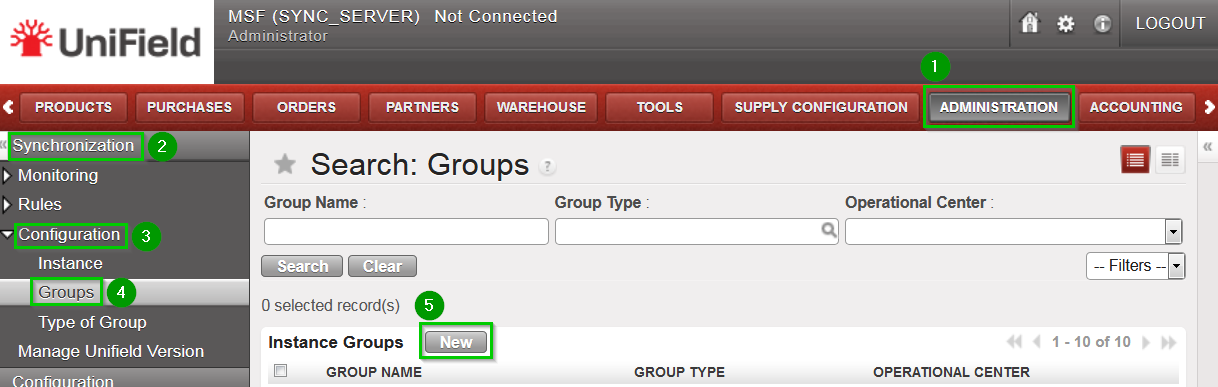 |
| Fill in:
Click on Save 4 | 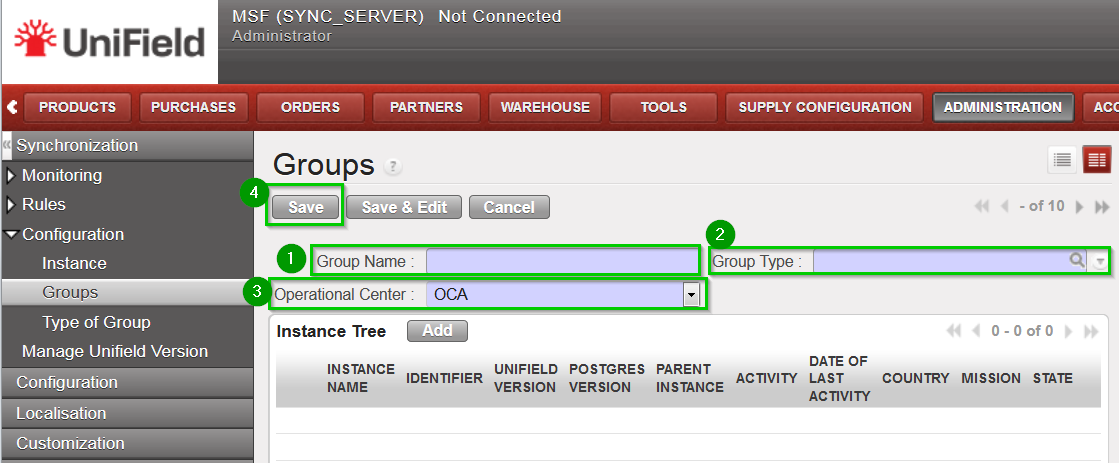 |
The following groups needs to be created:
| Group Name | Group Type |
OCx | OC |
OCx_COORDINATIONS | COORDINATIONS |
OCx_MISSION_AAA | MISSION |
OCx_HQ_MISSION_AAA | HQ + MISSION |
Group OCxrepresents your whole OC and should be named according to your OC (OCA, OCB, OCBA, OCG or OCP). You should have 1 and 1 only group type OC.Group OCx_COORDINATIONSis a standard group to be present in any setup – it is used mainly for intermission accounting processes. You should have 1 and 1 only group type COORDINATIONS.
You will then have as many MISSION and HQ + MISSION groups as you have Missions. We suggest you put the same name as the ones in the Installation Checklist.
