2.9 HQ Instance
All steps described in this section are to be performed with the admin user in the HQ instance.
2.9.1 Import cost centers
| Click on Menu Accounting 1, Configuration 2, Analytic Accounting 3, Analytic Accounts 4 Click on the double arrow icon 5 and import file account.analytic.account_to update.csv | 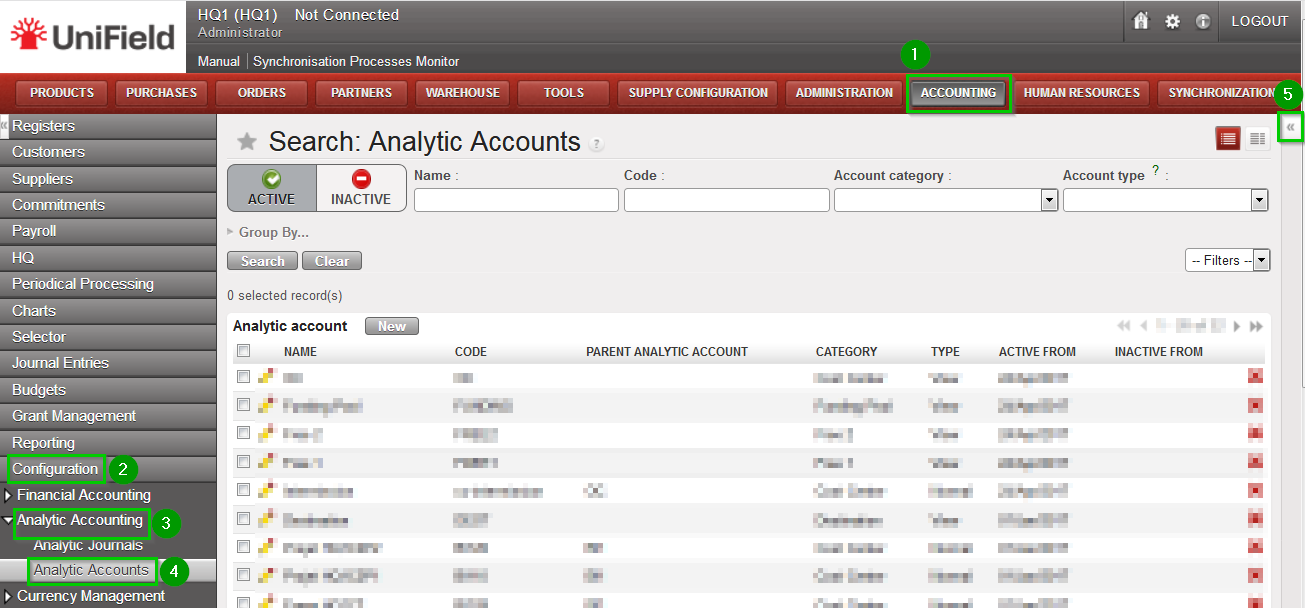 |
2.9.2 Create Proprietary instances
Use the information contained in the Installation Checklist to create the proprietary instances for all instances: HQ, Coordinations and Projects. This data is then synchronized from HQ to the other instances.
| Click on Menu Administration 1, Configuration 2, Proprietary Instances 3. Click on New 4 | 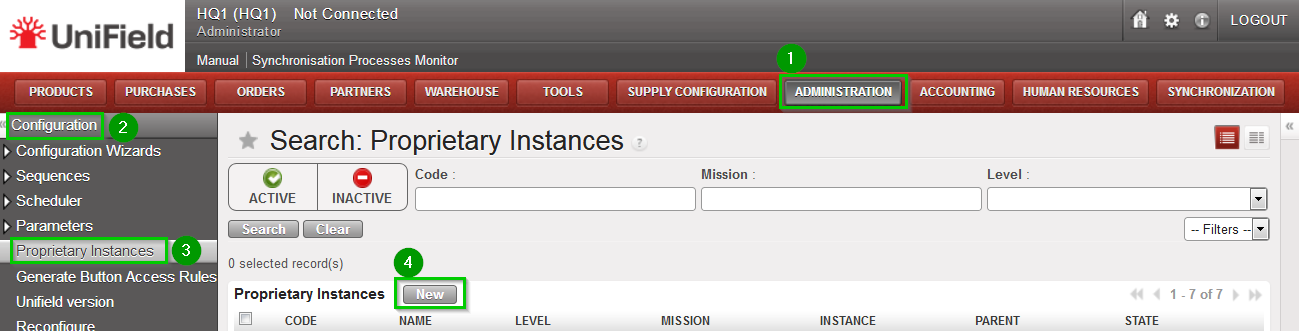 |
Enter the following information:
Click on Save 8 | 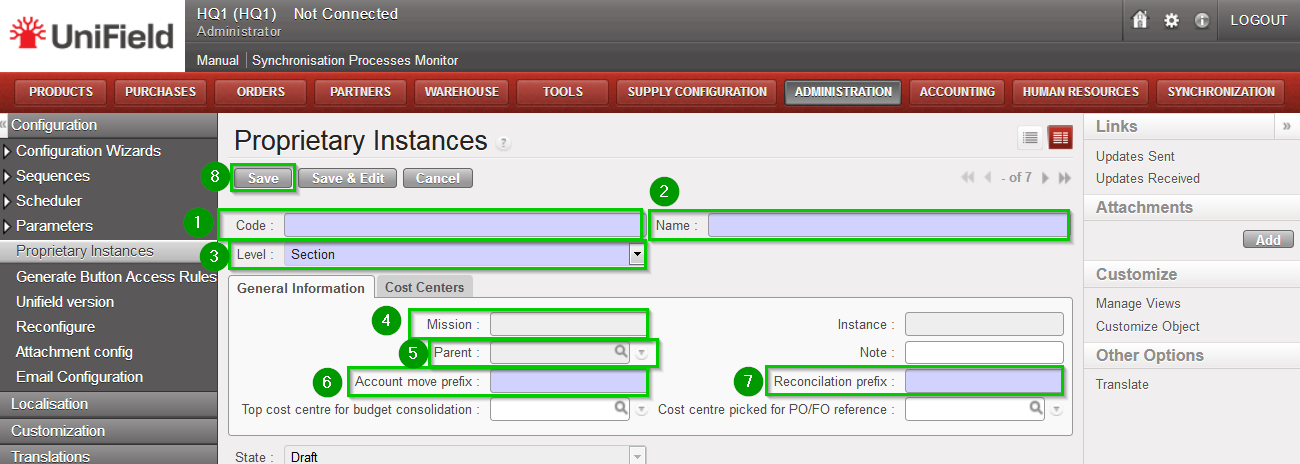 |
 If you are installing a sandbox you can import If you are installing a sandbox you can import Prop instances_to update.csv This file contains all the proprietary instances required to install an HQ with two missions and two project instances in each of them. | 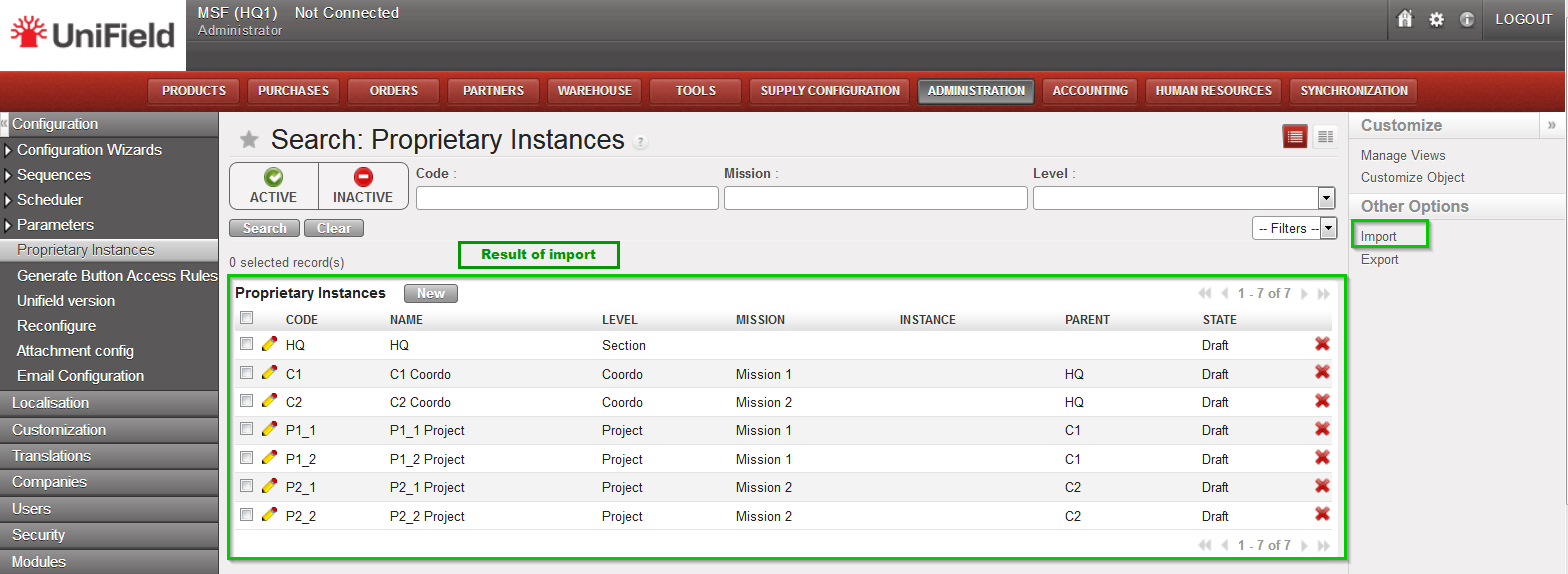 |
2.9.3 Perform Reconfigure
| Click on Menu Administration 1, Configuration 2, Reconfigure 3 A new wizard will open and you would then navigate to various screens. | 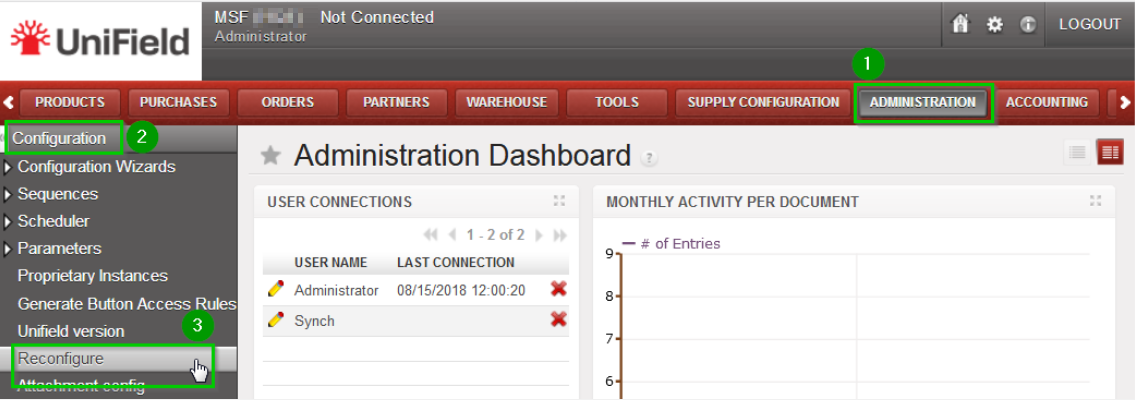 |
| Instance Configuration Choose the proprietary instance corresponding to the HQ 1 (as created in step 2.9.2). This step cannot be re-done; if the wrong proprietary instance is chosen, the database needs to be dropped and re-created. Choosing a proprietary instance already in use in your OC could lead to corruption of other instances. Click Next 2 | 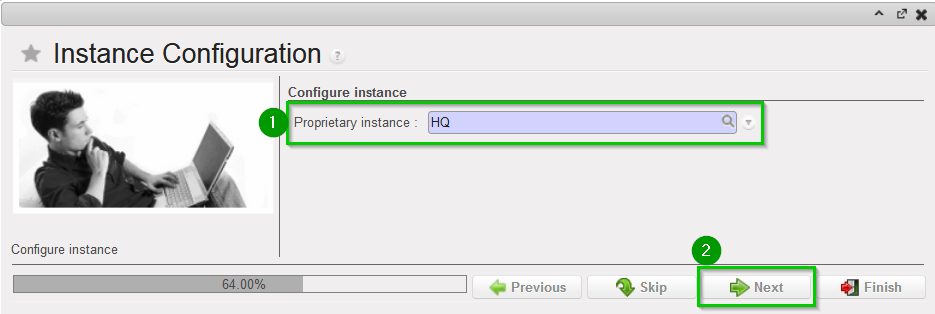 |
| A confirmation message window opens asking you to confirm the choice of the proprietary instance. If its correct click on Next 1, if not click on Previous | 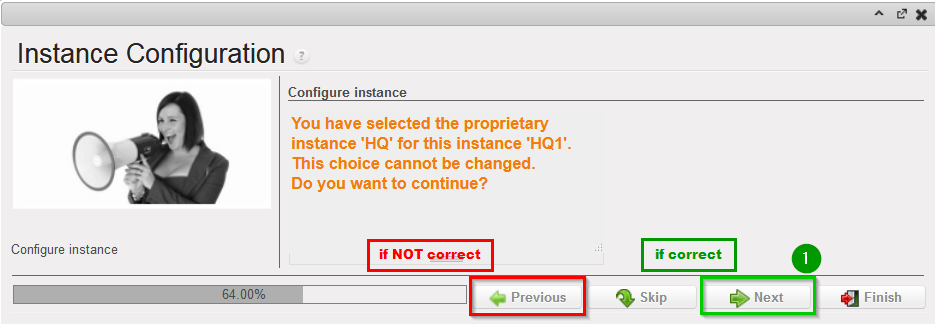 |
| Most of the time the property instance’s name matches the instance’s name. If it’s not the case a warning message is displayed. The only exception applies to instances at HQ level. Please be extremely cautious before proceeding after this warning message. |  |
Activate the International Commitments Import
Click Next 2 | 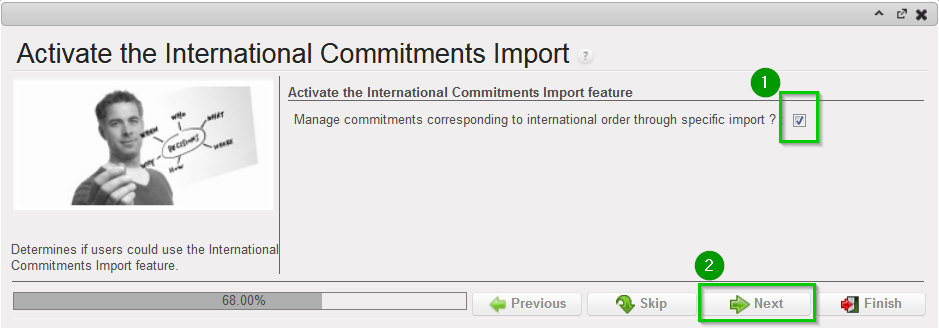 |
| Activate the Fixed asset configuration Leave default options. Click Next 1 | 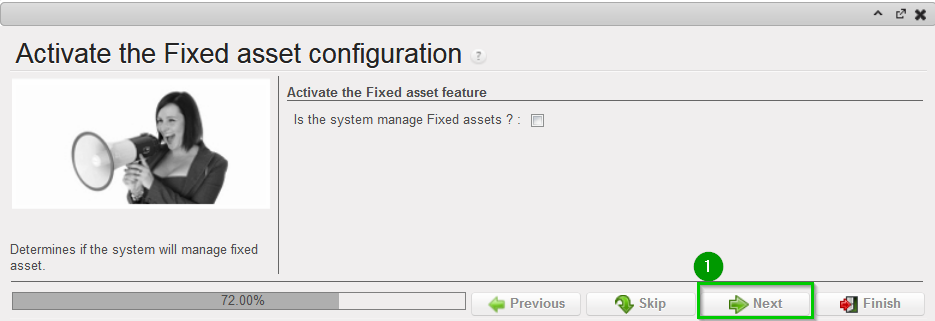 |
| Activate the Payroll configuration Check the box if you use Homere “Does the system manage Payrolls import from Homere?” Click Next | 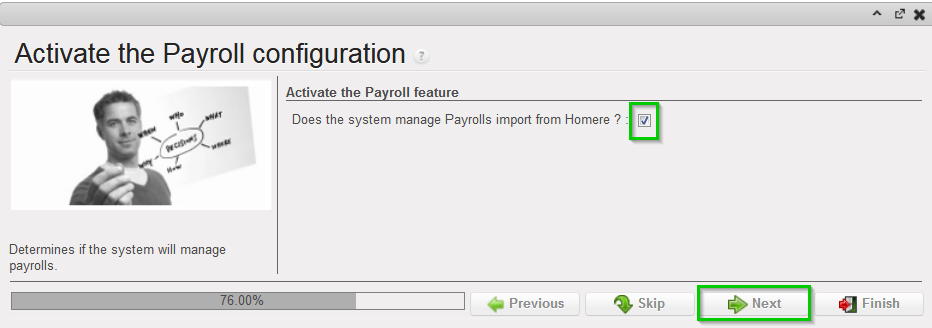 |
Currencies Configuration
Click Next 2 | 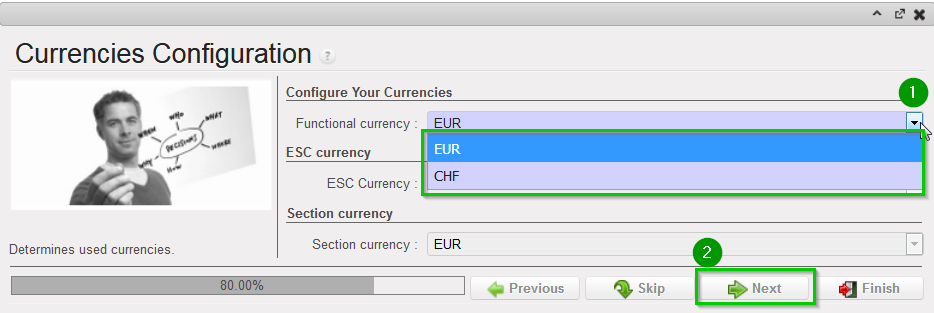 |
| Company Configuration Fill in the different values 1 2 3 Click Next 4 | 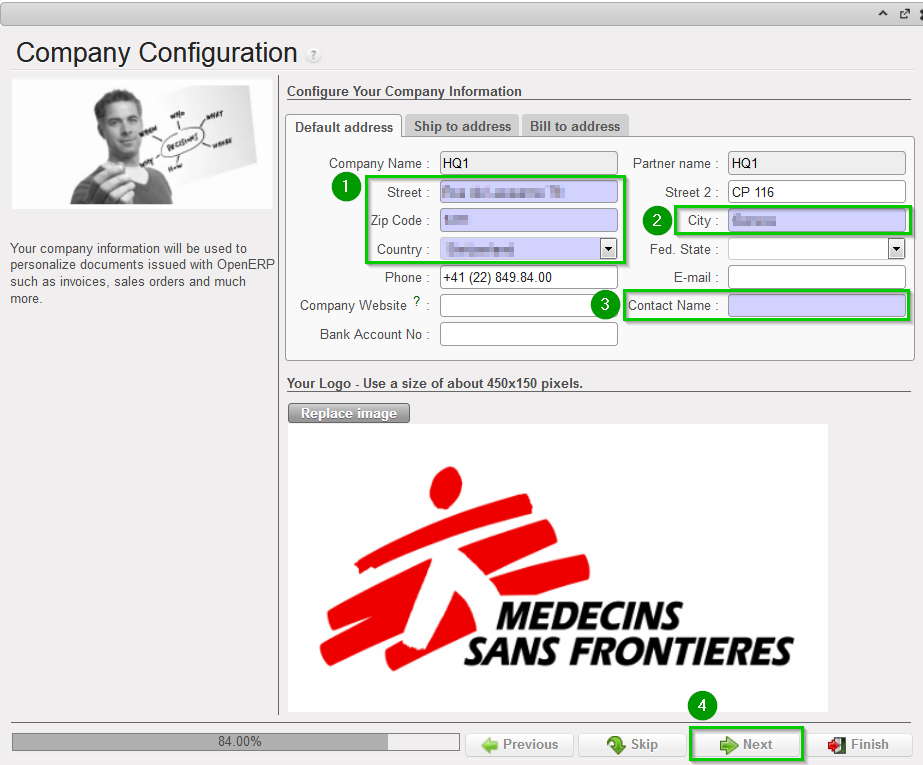 |
| Delivery Process Configuration Choose the appropriate shipping method 1 (you may leave the default value). Click Next 2 | 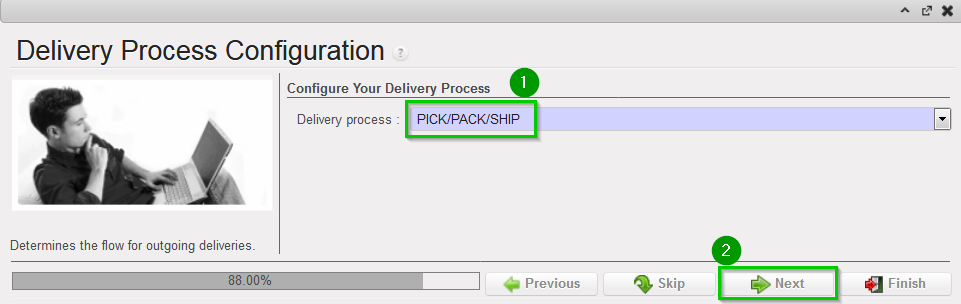 |
| Allocation Stock Configuration Leave default values. Click Next 1 | 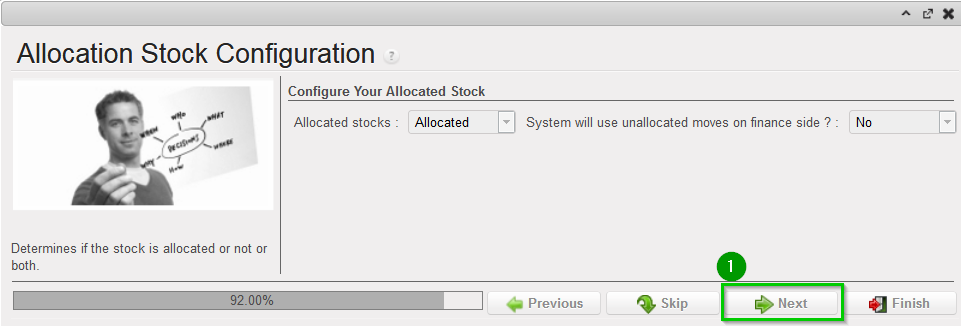 |
| Country restrictions Configuration Leave default values Click Next 1 | 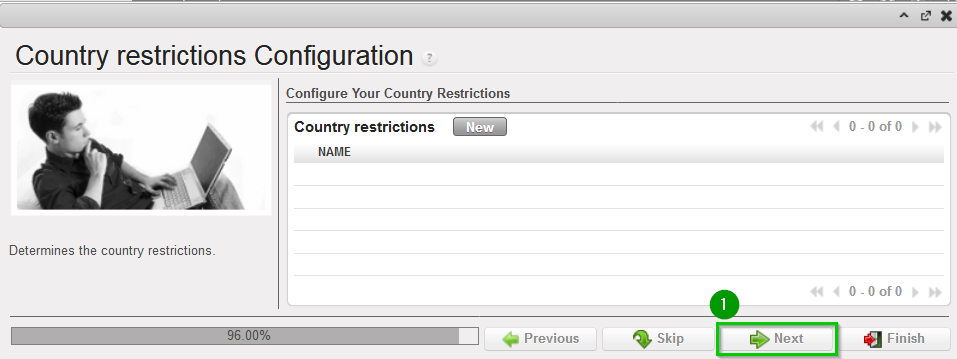 |
| Allow previous Fiscal Year dates Does the system allow document dates on previous Fiscal Year?: 1
Click Next 2 | 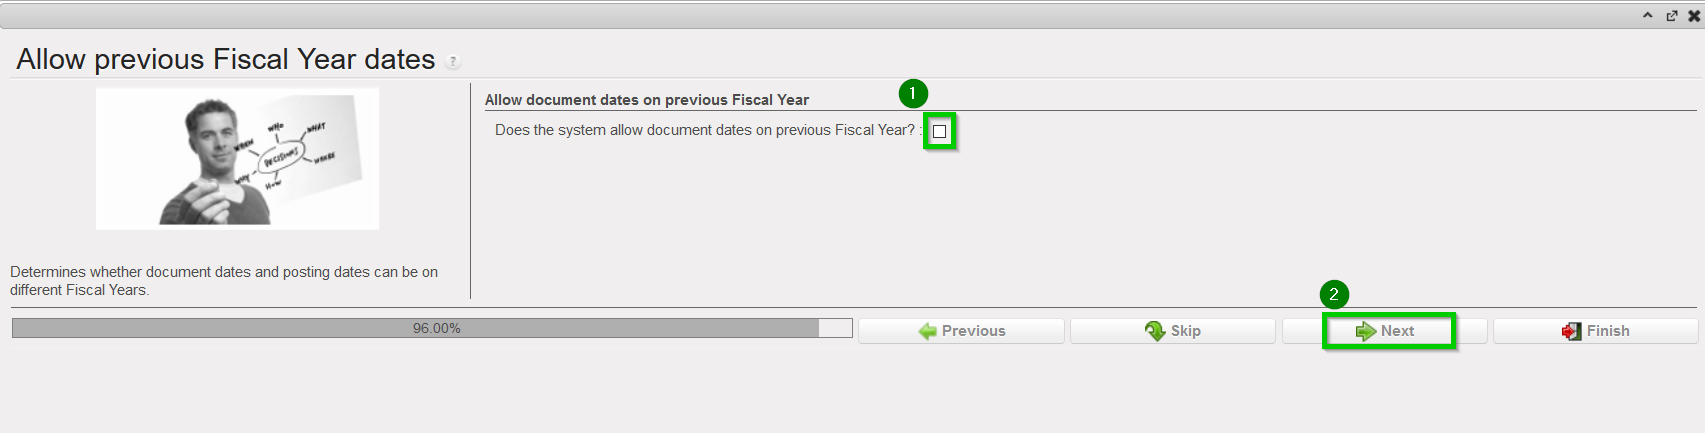 |
