3.2 How to “synchronize” a User (only at HQ)
This feature allows you to synchronise a user from the HQ to all its children instances. It is only available at the HQ level and restricted to the “admin” user.
Please note that the user only sync from top to down.
As user account management is sensitive and to prevent a user to be synchronised wrongly, there is a need to perform a two-step process for the configuration of the user.
First step the user will be added into a white-list. The checkbox “Synchronise” would be available in its “User’s details” and would be enabled. If the user is not in the white-list the user won’t be able to synchronise.
Second step there is a need to tick the checkbox “Synchronise” [2] in the “User’s details” and Save it.
| First step Log in your HQ. Click on Menu Administration 1, Users 2, Synchronisation white-list 3. Click on the double Arrow icon 4 in the right panel Under Actions click on Add Users 5 | 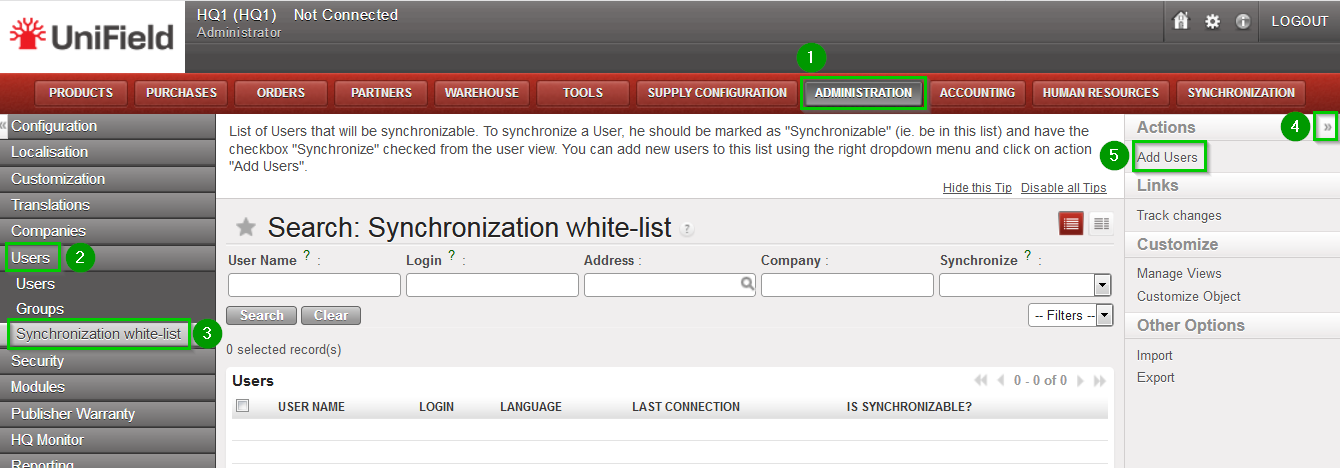 |
| The following pop up window opens. Click on Add 1. | 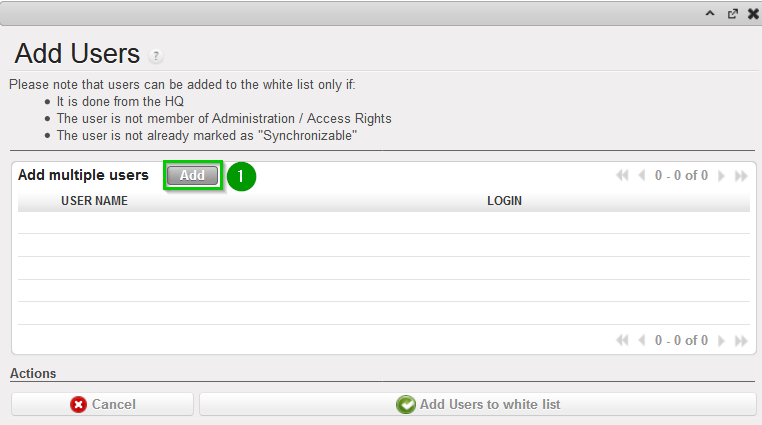 |
| The following window will open Select the user to synchronise by ticking the box 1.You may select as many as you would like. Click on Select 2 | |
| Review that the selected users appear in the list as shown (Check). Click on Add users to white-list 2. Now your user has the option to be synchronised. However you have to enable manually this option. | 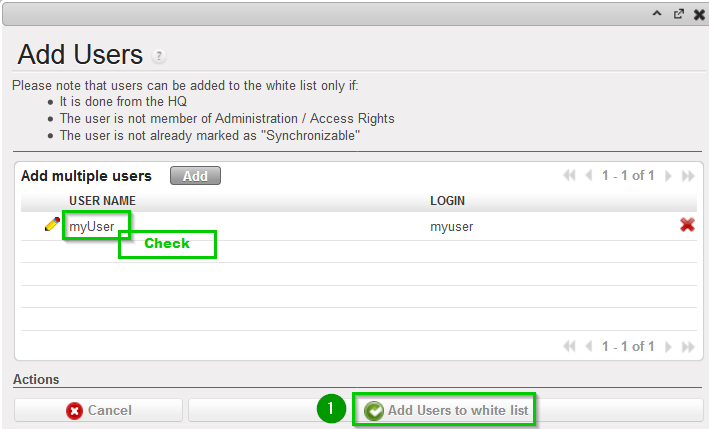 |
| Second step Click on Menu Administration 1, Users 2, Users 3 Click on the edit button icon next to the user you just added in the white-list 4. |  |
| A new window opens with the details of the user. Tick the box Synchronise 1 and click on Save 2 The user will now synchronise to the other instances during the next synchronisation. | 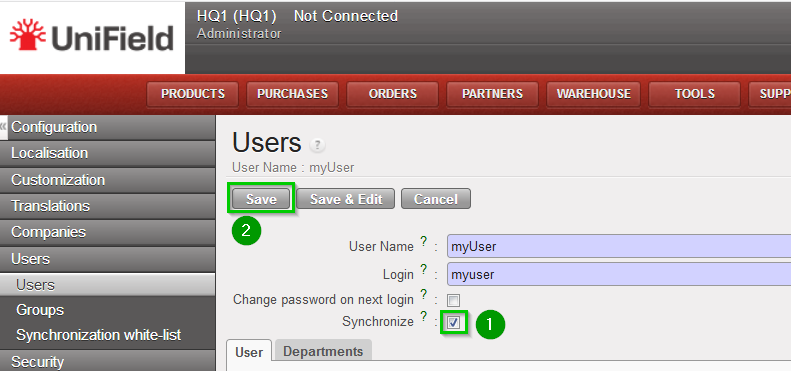 |
