This feature has been developed in order to ease our work and decrease human error mistakes during the instance creation phase. In a nutshell it will create new instances from scratch (Coordination and project instances only) according to a configuration file (previously filled and approved by the Support team) and csv files needed for its initial configuration.
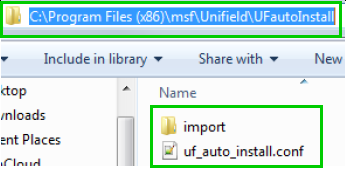
In C:\Program Files (x86)\msf\Unifield create a folder named UFautoInstall and insert the following files/folder: 1. A folder named import with the following files:
account.analytic.journal.csv
account.journal.csv
2. A file named uf_auto_install.conf
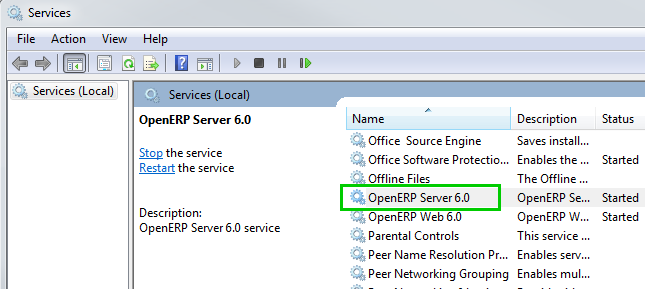
Open Services Right click on OpenERP Server6.0 and restart
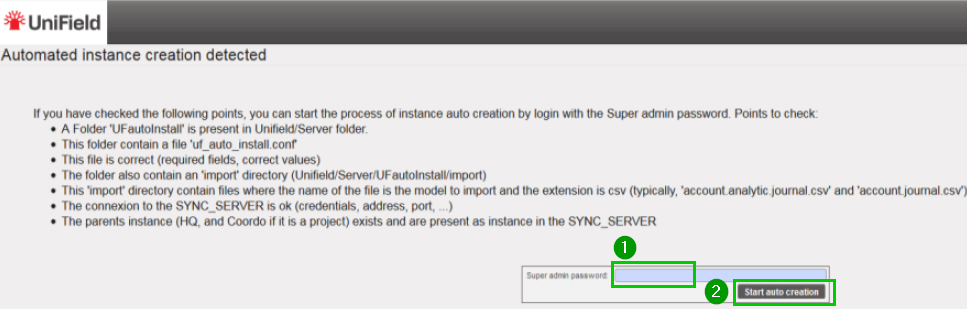
Refresh the UniField page in your browser and you would be redirected to the following page Read the instructions Fill in you Super admin password 1 Click on Start auto creation 2
Example of an uf_auto_install.conf file. Please note that the information you will have to provide remain the same as if you were doing an install from scratch following the step by step procedure in this IT manual. Fill the different line as per your OC specific configuration and according to your checklist validation Data showed in this print screen is for an example purpose.
Each [sections] in the file represent specific data that is needed for the configuration of your instance. Below complementary information to keep in mind while filling the file (choices, syntax):
General file options:
yes OR no false OR true Date/time: 2020-08-01 22:00 Interval unit: days OR hours
[instance]
sync_port = 8069 OR 443 sync_protocol = xmlrpc OR gzipxmlrpcs group_names = group1,group2,group3,group4 instance_level = coordination OR project sync_host = sync.unifield.net (for production)
[reconfigure]
functional_currency = EUR OR CHF delivery_process = complex (by default)
We use cookies to ensure that we give you the best experience on our website. If you continue to use this site we will assume that you are happy with it.