2.9.12 UniData Products Creation
Since September 2016, UniData types of products as well as their updates are sent by the UniData Team automatically to HQs. That means a specific configuration is needed to be done only at the HQ instance.
This step is required and is part as initial production HQ configuration.Please follow the latest procedure on how to configure your HQ: procedure_UniData_VX.pdf ![]()
2.9.13 Configure Destination / GL accounts link –> TO REVIEW
This step depends on the configuration chosen by each OC for its accounting setup. This data cannot be included in the standard installation (it relies on the data imported in steps 2.9.1 and 2.9.7).
| Click on Menu Accounting 1, Configuration 2, Analytic Accounting 3, Analytic Accounts 4 Click on the double arrow icon 5 and import file destination.GL.link.csv | 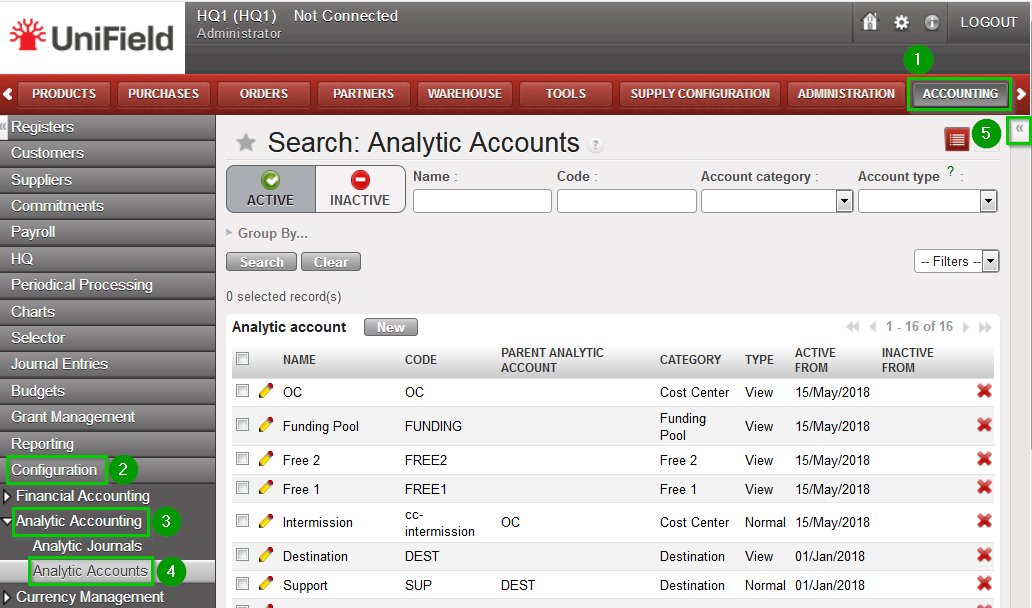 |
The following combinations may be used for
test purposes in section Annexes 2.9.13_Destination_GLaccountlink_example.csv ![]()
| To create (if you don’t import the destination.GL.link.csv file) or modify manually: Click on Menu Accounting 1, Configuration 2, Analytic Accounting 3, Analytic Accounts 4 Choose account Expatriates (EXP) and click on the edit icon 5. | 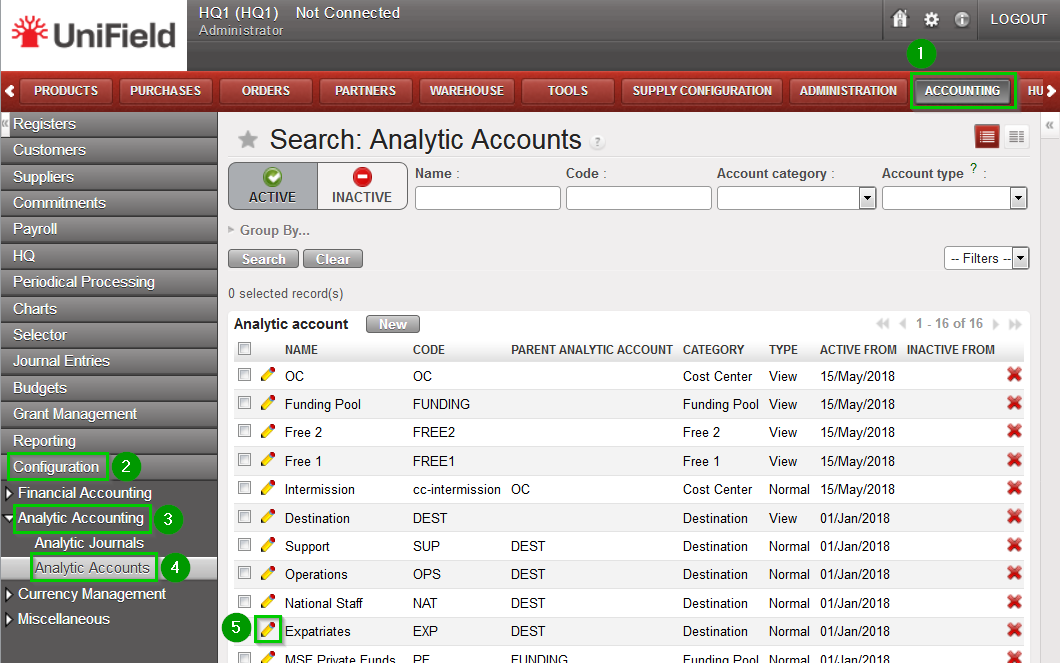 |
| Click on tab Expense Accounts 1 Click on “0-0 of 0” 2 on the top right of the Expenses accounts list. Change the limit to 100. Click on Add 3. Select the GL accounts to be added (see text above) Click on Select and Click on Save Repeat until all necessary GL accounts are added to the destination Repeat operation for accounts National Staff (NAT), Operations (OPS), Support (SUP) | 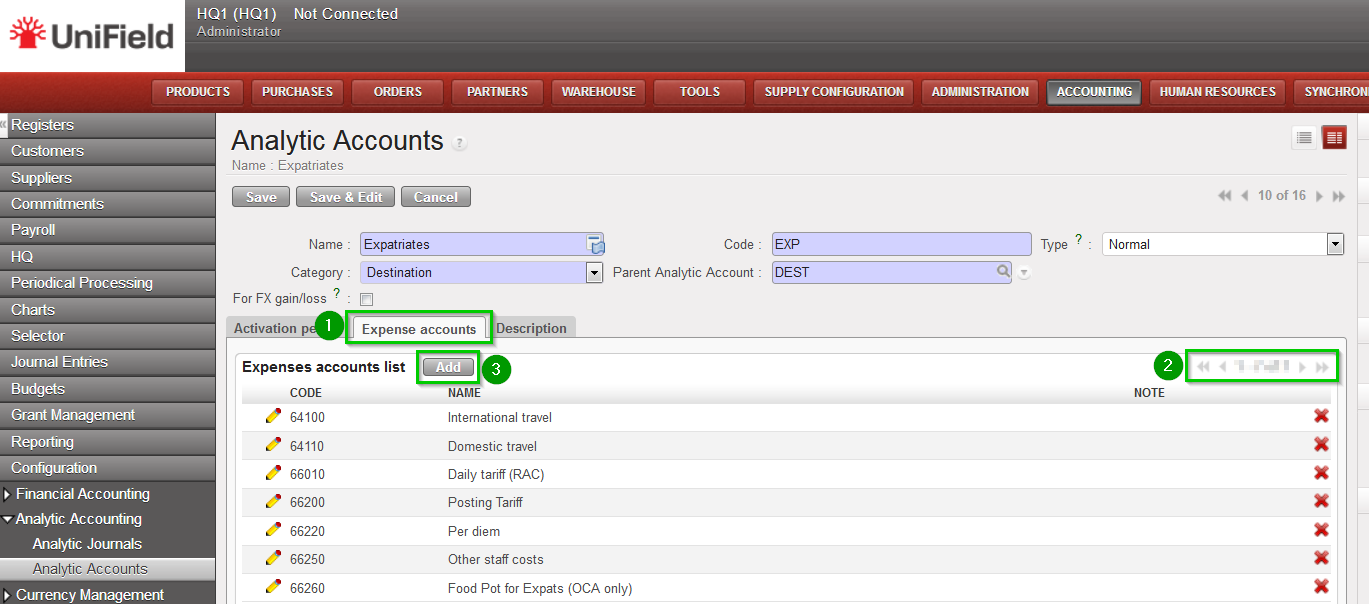 |
2.9.14 Import user rights
User rights are managed through restriction to menus. Since version 11.0 User Right are not imported anymore through your HQ.
From now on User Right are uploaded by the Support Team in the production SYNC_SERVER and are synchronised to the HQ and then to its children Coordinations and Projects.
For Sandboxes please refer to section 9.7 How to import User Rights in the sand box
2.9.15 Connect and register to Synchronization Server
| Connect: Click on Menu Synchronization 1, Registration 2, Connection Manager 3 Click on the edit icon 4 and to edit the Current Connection Host:
Port:
Protocol:
Database Name:
Login on synchro server:
Password:
Max Packet Size: 500 | 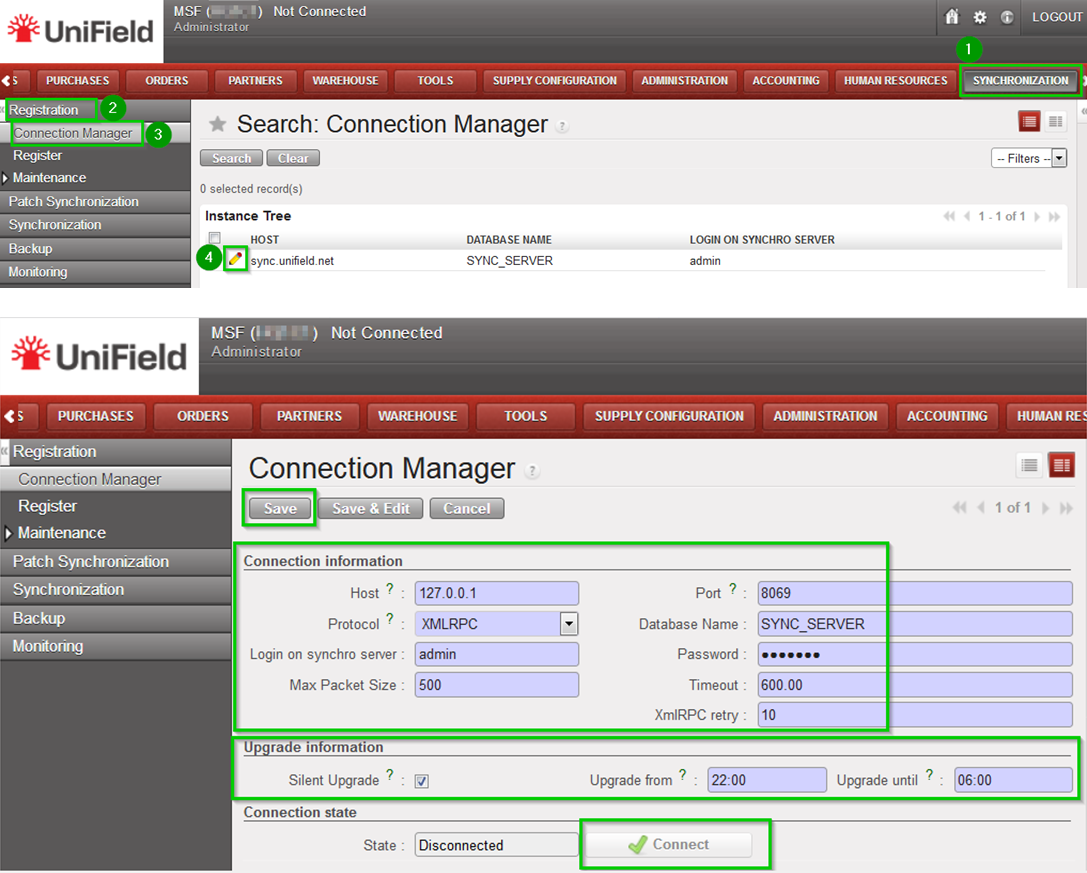 |
| Register: Click on Menu Synchronization 1, Registration 2, Register 3 A new wizard will open Check that the instance name matches the HQ database name as defined in the installation checklist Enter contact email www 4Click on Next 5 | 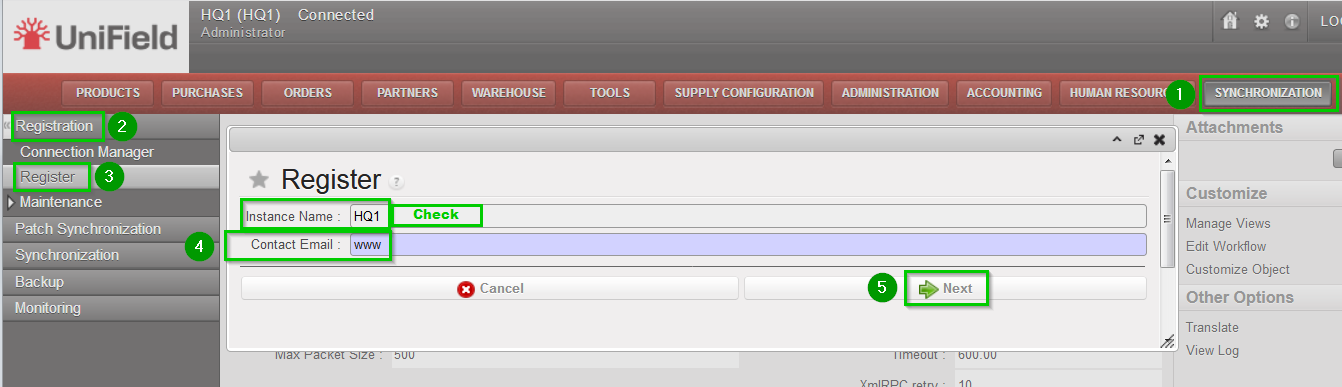 |
| Leave Parent Instance empty1 Select your Operational Center 2 Click on Next 3 | 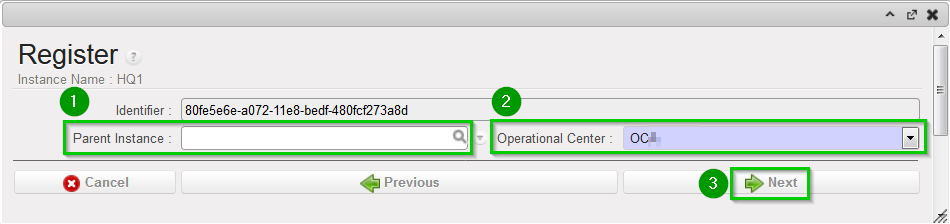 |
| Click on Add 1 Choose groups 2:
Click on Select 3. | 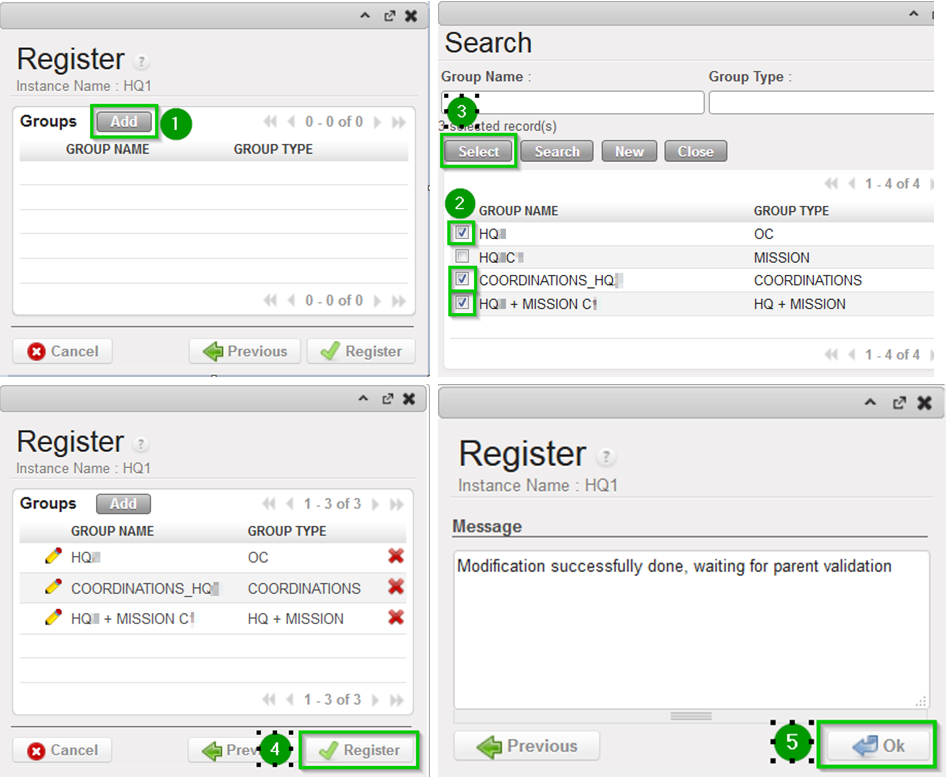 |
