Supply User Manual ENG -> 5. Warehouse -> 5.13 LU-SU4206: Inventories -> B. HOW TO CREATE AN INITIAL STOCK INVENTORY
B. HOW TO CREATE AN INITIAL STOCK INVENTORY
Initial Stock Inventories are usually used when an instance is created but not after that. They help to transfer stock levels from a legacy system (e.g. LogistiX) to a UniField instance. It is a one shot operation during which accurate stock levels are introduced in UniField.
This is a process which is part of the migration when a new instance is being set up, or if a new stock location is created. This is a tool to initiate the project stocks with the relevant details (stock levels, location where the goods are, cost valuation of each product and, according to the PMD sheet settings the BN/ED if relevant).
The products, quantities and all other relevant information entered should be validated according to OC procedures.
Go to: Warehouse / Inventory Management / Initial stock inventory
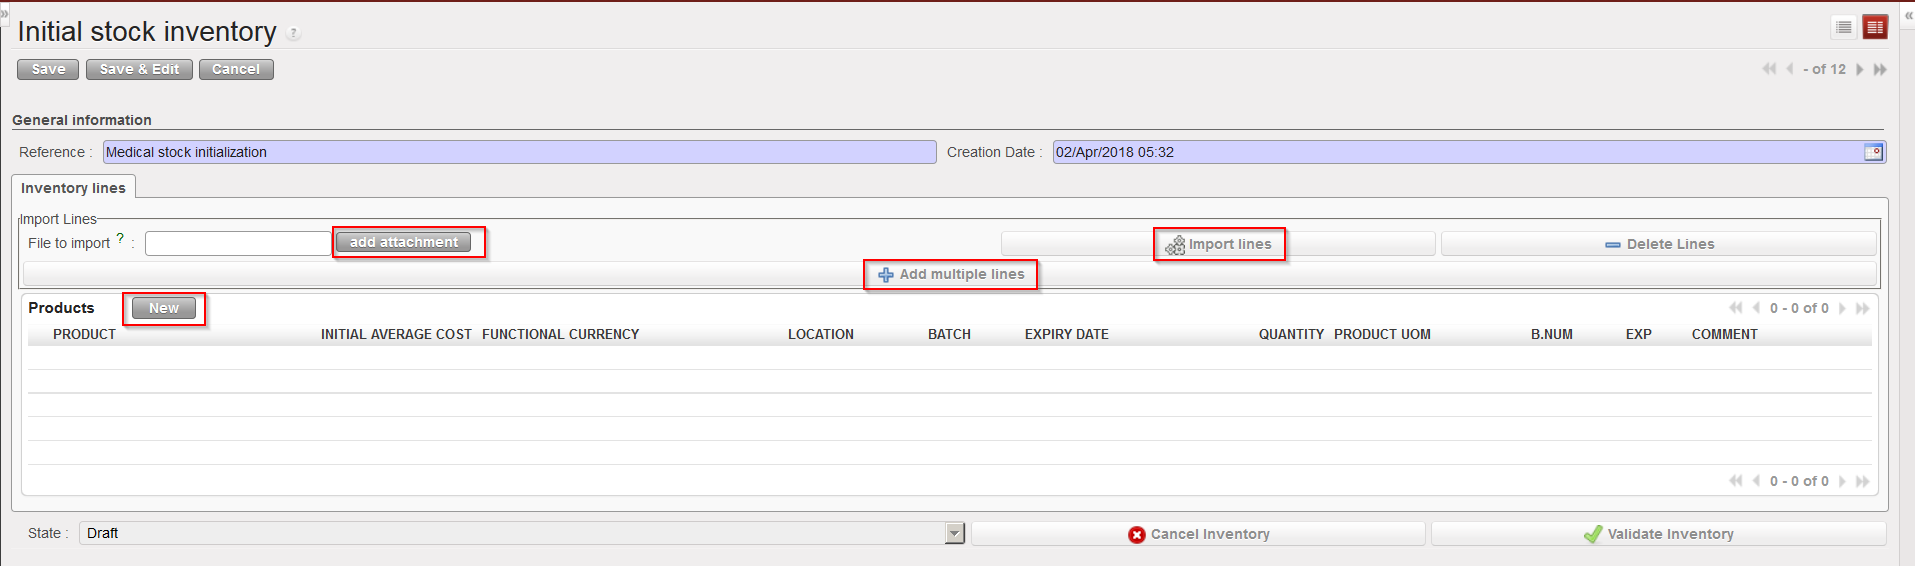
- Click on the “New” button to create a new ISI.
- Enter a “Reference” (name of the ISI).
- The “Creation Date” is set to the current date/time by default. Change it if needed.
- Add products using any of the following methods:
a) Adding products individually (by clicking on the “New” button, searching for and selecting the products).
b) Adding multiple lines by selecting  .
.
c) Importing a file (by clicking on the “add attachment” button, browsing and selecting the file, then clicking “Import lines”). BN and ED products can be created at import, however, checks will be done at import and warning/error messages will be raised in case of conflict (existing product with same BN/ED; wrong format, missing information,…).
 |
| Methods to insert lines in an Initial Stock Inventory |
Note that imported files must have a specific format (XML Spreadsheet 2003). You may get a file template by exporting an existing ISI via the option “Stock Initial Excel Export” available in the action menu. In this file, each separate batch, expiry date or location for a product should have its own line/row.
 |
| Excel file format to import on an Initial Stock Inventory |
 |
| Inserting a line manually on an Initial Stock Inventory |
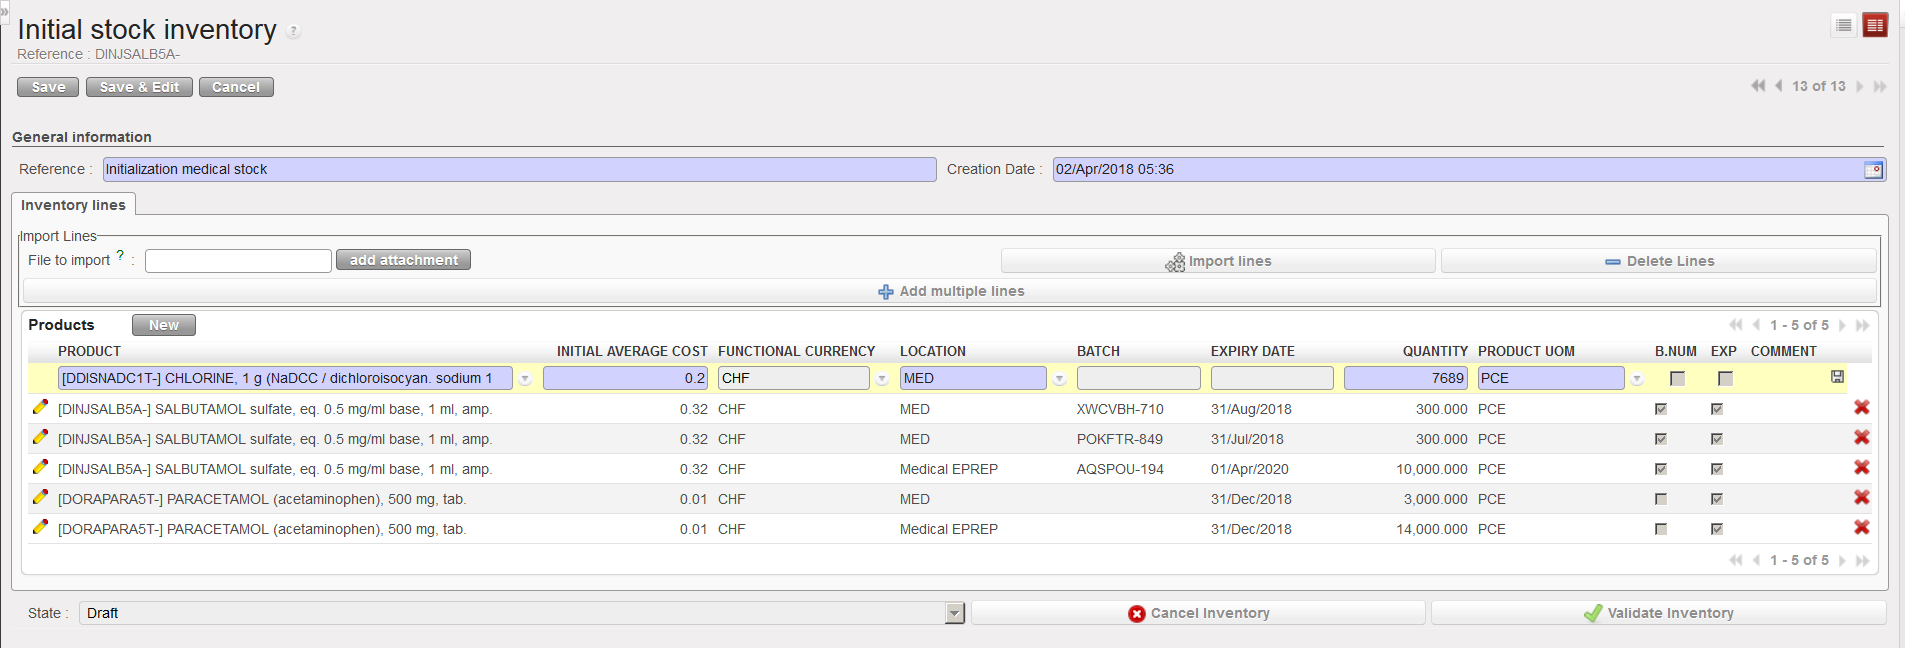
5. Unless you used the import function (“add attachment” button) to add products and all their details, you will need to add these details manually line by line.
I.) Click on the pencil icon next to each product line to edit it.
II.) Add all relevant information (location, batch number, expiry date, quantity,…). Note that location such as Input,Output, Packing, Shipment, Distribution, Stock and Quarantine are not allowed.
III.) Click on the floppy disk icon to save each line.
6. For every product which has more than one batch number or expiry date, or is found in multiple locations, a new line with this product needs to be created.
7. Click on the “Validate Inventory” button to confirm all lines are correct, this will mean no more changes can be made.
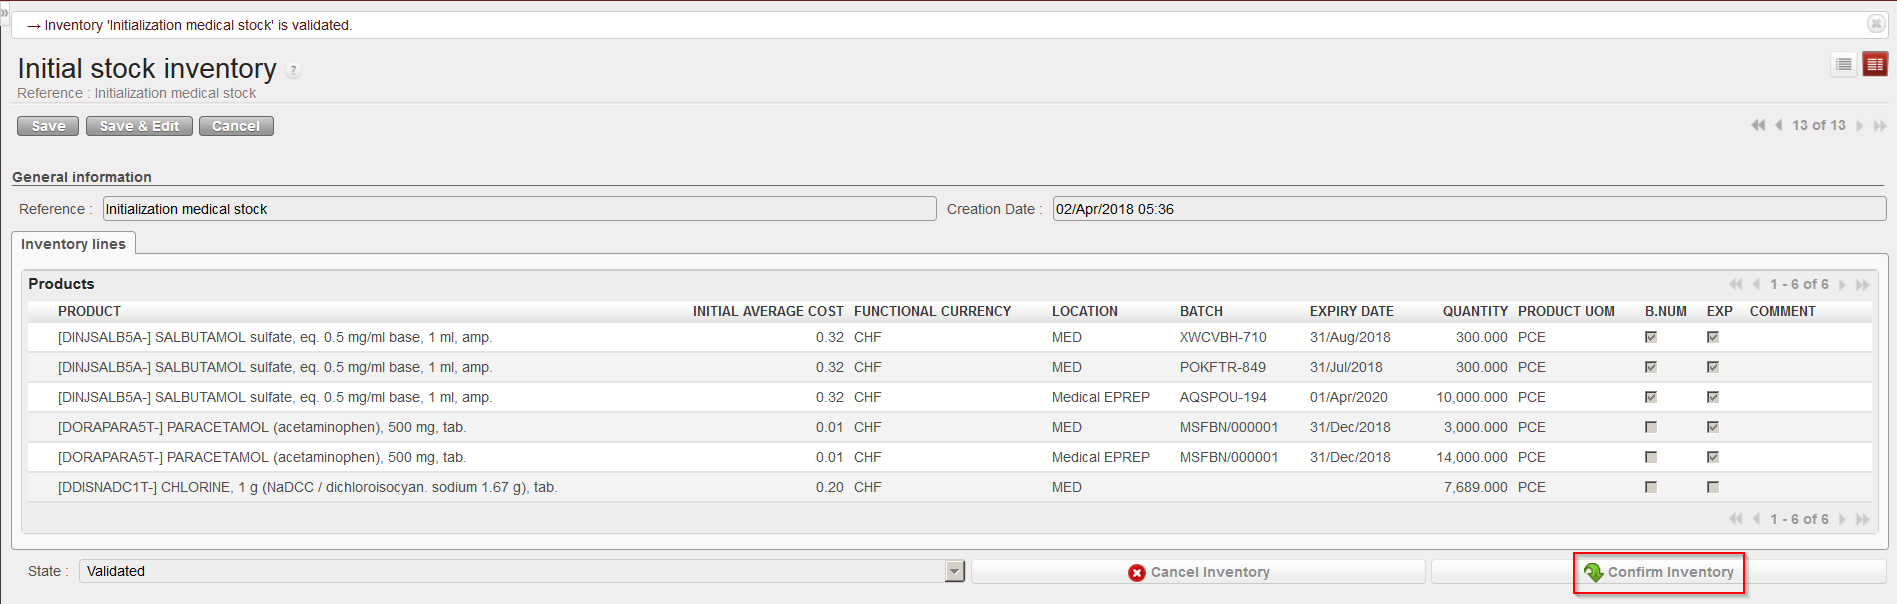
8. Once the inventory has been validated, click on the “Confirm Inventory” button to add these products into the indicated stock locations on the UniField instance.
 |
| Confirming an Initial Stock Inventory |
Note that the “initial average cost” entered on the ISI will update the cost price of the PMD sheet. This means that the ISI will actually impact how stocks are valued in different reports and how subsequent orders will be valued. If several lines of an ISI relate to the same product, you will be forced to enter and identical unit price on the different lines.
It is not impossible to do Initial Stock Inventories several months after a go live (i.e. after an instance has been used for several months) but this should be done with great care, especially regarding price valuation of products.
