Supply User Manual ENG->Supply Configurations->2.2 LU-SU1102:Partners(customers and suppliers)-> B. LU-SU1102: How to create a new partner
B. LU-SU1102: How to create a new partner
The creation process for customers and suppliers is quite similar. The partner type selected will trigger the system to request specific information and will also impact processes in which partners can be involved. The partner type can be:
- Internal, MSF entities which are on the UniField network within the same MSF mission are considered customers/suppliers and are created by the synchronization.
- Intermission, coordination instances of your OC on the UniField network, they are created by the synchronization but need to be activated when needed. They are also considered as customers/suppliers.
- Inter-section, coordination instances from other OCs on the UniField network, they are created by the synchronization but need to be activated when needed. They are also considered as customers/suppliers.
- External, refers to all suppliers and customers outside of the UniField network. They must be created manually. Note that all external partners created on a coordination/project instance will be synchronized (as inactive) to all instances belonging to the same mission. This means that before creating an external partner manually, a check should be carried out to see if it has already been created (by the synchronization) and should simply be activated. Note that finance is also creating suppliers. Supply and finance should work in collaboration in partners creation/maintenance to avoid duplicates or data base hic-ups.
- ESC, European Supply Centers such as such MSF Logistique, MSF Supply or APU are considered suppliers. They must be created on the HQ instance, are synchronized down to all coordinations and projects and need to be activated manually.
Internal, Intermission and Inter-section partners always correspond with a UniField instance. They are created automatically via the synchronization during the instance. Intermission and Inter-section partners must be activated if needed.
If you want to create a supplier, go to: Partners / Suppliers/ Suppliers
If you want to create a customer, go to: Partners / Customers / Customers
The example below shows how to create an external supplier.
Go to: Partners / Suppliers / Suppliers
- Click on the “New” button to create a new supplier. A supplier form appears (the Supplier checkbox is automatically ticked).
- Enter the supplier name in the “Name” field. A supplier name must be unique. You cannot name an external partner with the name of an existing instance.
- Enter the reference in the “Reference” field. This field is usually used to enter the acronym of the partner.
- As “Partner type”, select “External”.
- Set the “Language” of communication. All documents related to this partner will be printed in this language.
- Set the “Zone” field to “National”. “National” is for all-in country partners while “International” is for all partners based abroad.
- The field “Order creation mode” is actually used by the Order Sourcing Tool (which is explained in details in the Procurement chapter). By default, when creating a Purchase Order, UniField will always try to gather all requests sourced to the same supplier on the same Purchase Order. However, you might prefer to segregate you requests on different POs according to the project which issued the request, the category of the request or even make sure that each request will be managed on a separate Purchase Order. This field helps to pilot this.
- “All requirements” is set by default. All requests (even if for different projects) sourced to a same supplier are merged on a single PO.
- “Requirements by project”. All requests from a same project sourced to a same supplier are merged on a single PO.
- “Requirements by Category”. All requests with the same category sourced to a same supplier are merged on a single PO.
- “Requirements by Category and Project”. All requests from a same project and with the same category sourced to a same supplier are merged on a single PO.
- “Requirement by Order”. Different requests are never merged on a single PO. The relationship between request and PO is 1:1.
- The “Active” checkbox is ticked by default. The partner becomes operational as soon as you save the form.
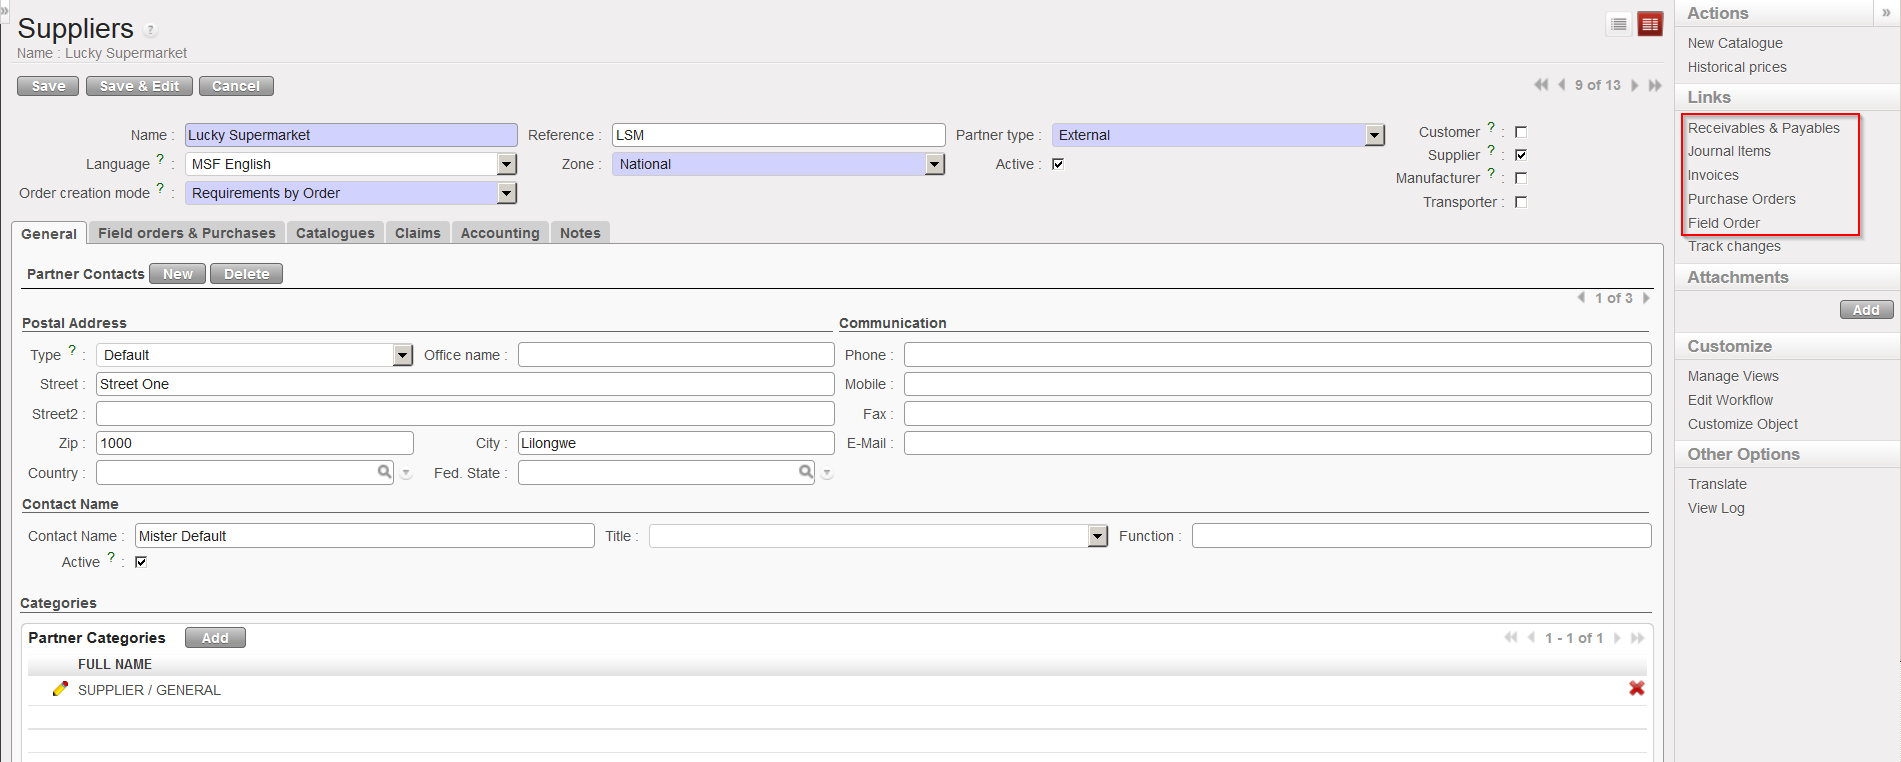
- In the “General” tab, in the “Postal address” section, complete the address of the supplier.
- On the same tab, in the “Communication” section, enter phone numbers, e-mail address,…
- On the same tab, in the “Contact Name” section, enter the name of your contact in “Contact Name” and his/her “Title” and “Function”
- Note that it is possible to enter multiple contacts/addresses, by clicking on the “New” button next to “Partner Contacts”. This option is important, as a partner can have different addresses for delivery invoice,… (e.g. in the case where the warehouse is not in the same location as the office).
- In the “Categories” section, it is possible to link a supplier/customer to partner categories which can be defined in configuration. Click on the “Add” button and select the partner categories related to the partner. You can select as many categories as needed. If you use this section, you will be able to retrieve your partner using the filter “Categories” available on the partners search screens.
|
|
|
Partner – General tab |

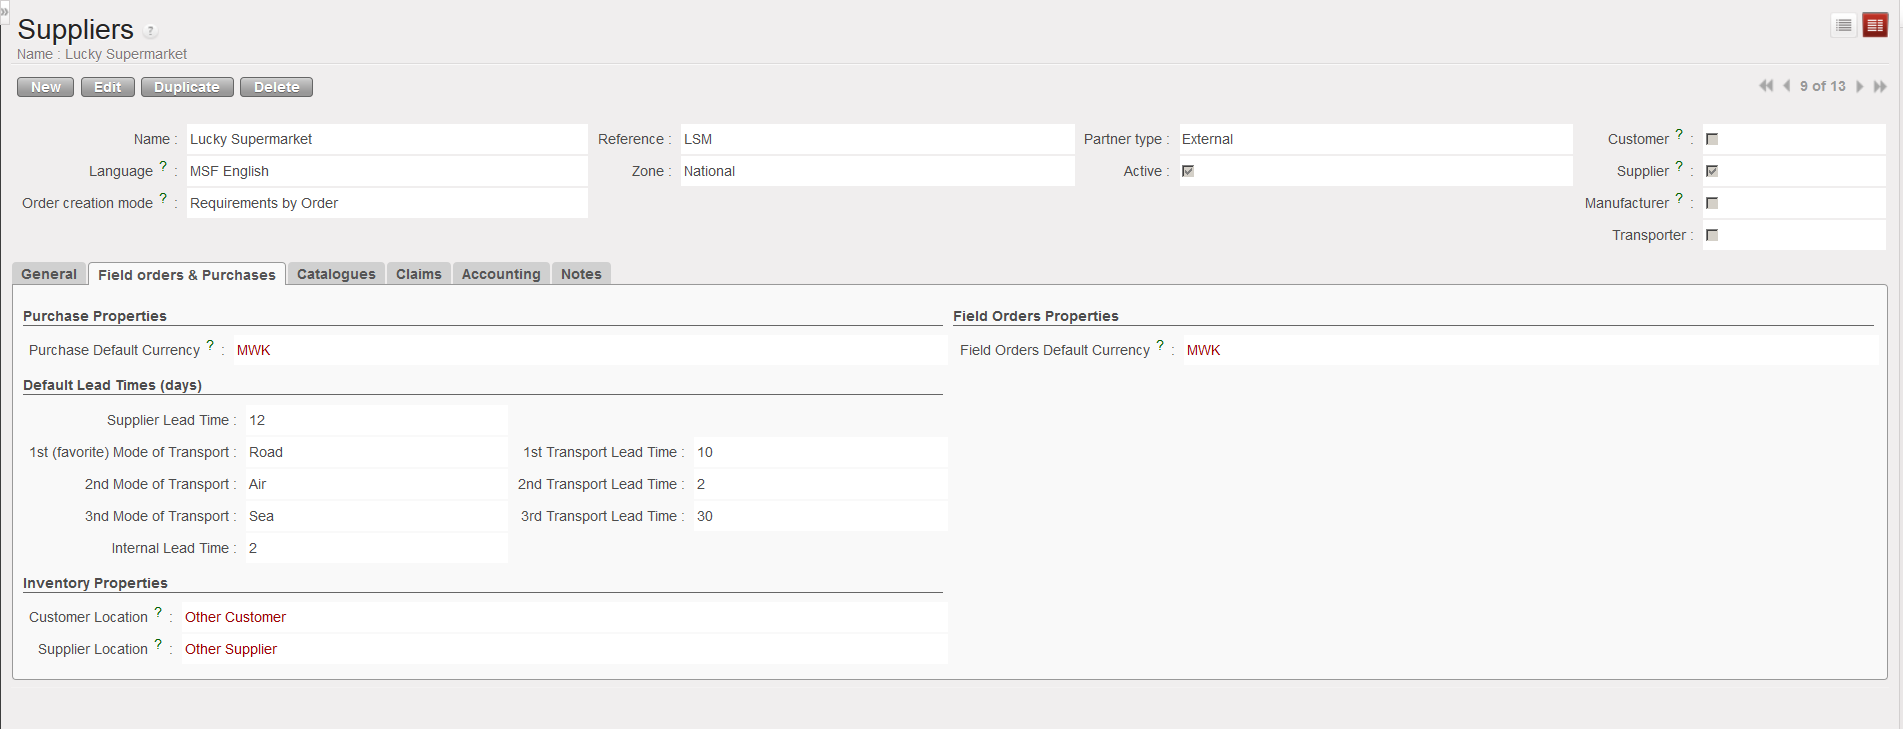
14. On the “Field orders & Purchases” tab, section “Purchase Properties”, select the currency used by the supplier, for both “Purchase Default Currency” and “Field Orders Default Currency”.
Please note that this currency have to be defined thoroughly (functional, local or other) according to your needs especially for Internal, Inter-mission and Inter-section partners which are subject to synchronization. Indeed, this currency cannot be changed at document level (PO or FO) and in case of discrepancy form one instance to the other, a blocking synchronization message (Not Run) can be generated and therefore prevent the creation of an expected new document in the other instance.
This is why it is extremely important that within the same mission, all instances (intra-mission) are all defined with the same currency.
15. In the “Default Lead Times (days)” section enter information about the default lead times of the supplier and the preferred transport methods. This information is required for the system to estimate delivery dates.
16. The “Inventory Properties” section is usually left as default. The “Customer Location” is the destination location which will be used when goods will be distributed to this partner. The “Supplier Location” is the source location which will be used when goods will be received from this partner.
|
|
|
Partner – Field orders & Purchases tab |
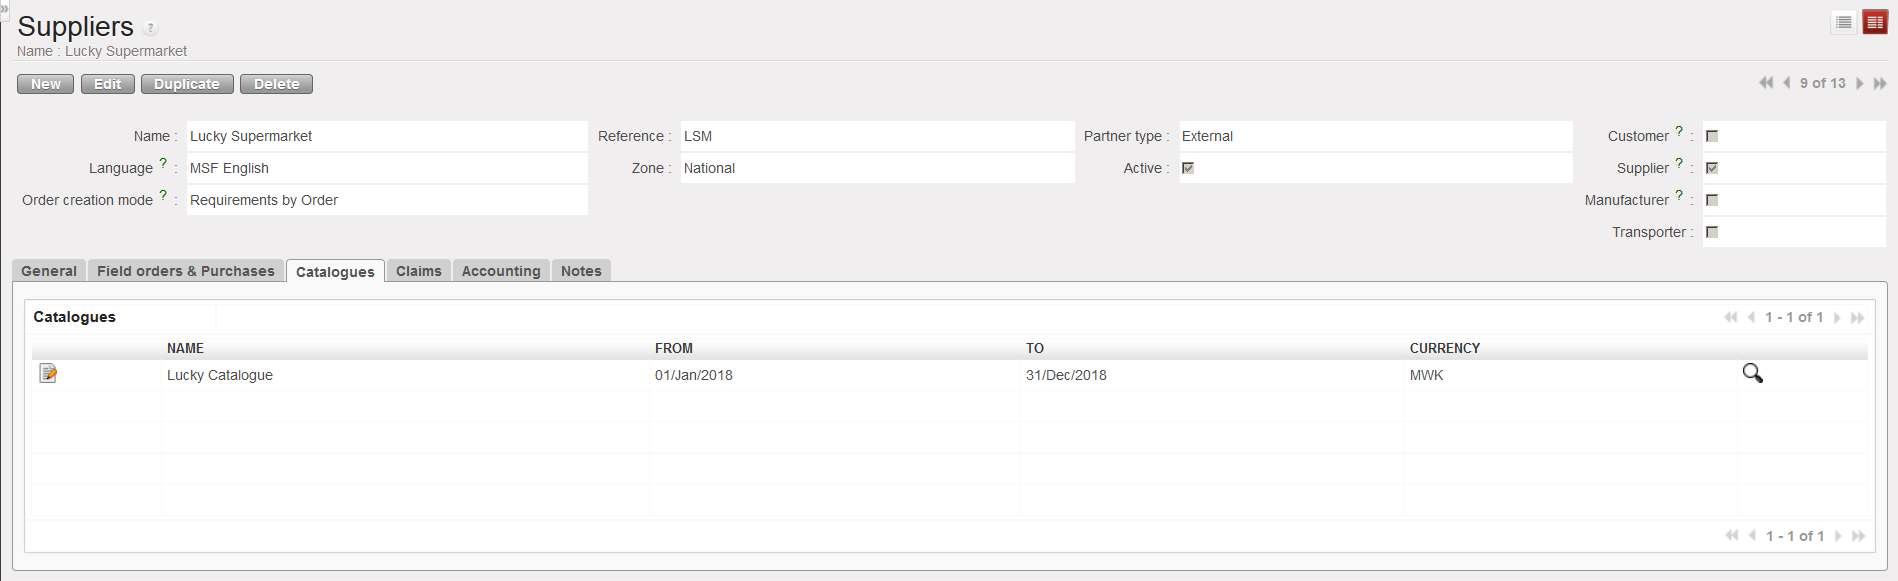
17. If catalogues are created for the supplier, they will appear on the “Catalogues” tab. See chapters on Products and Procurement for further details.
|
|
|
Partner – Catalogues tab |
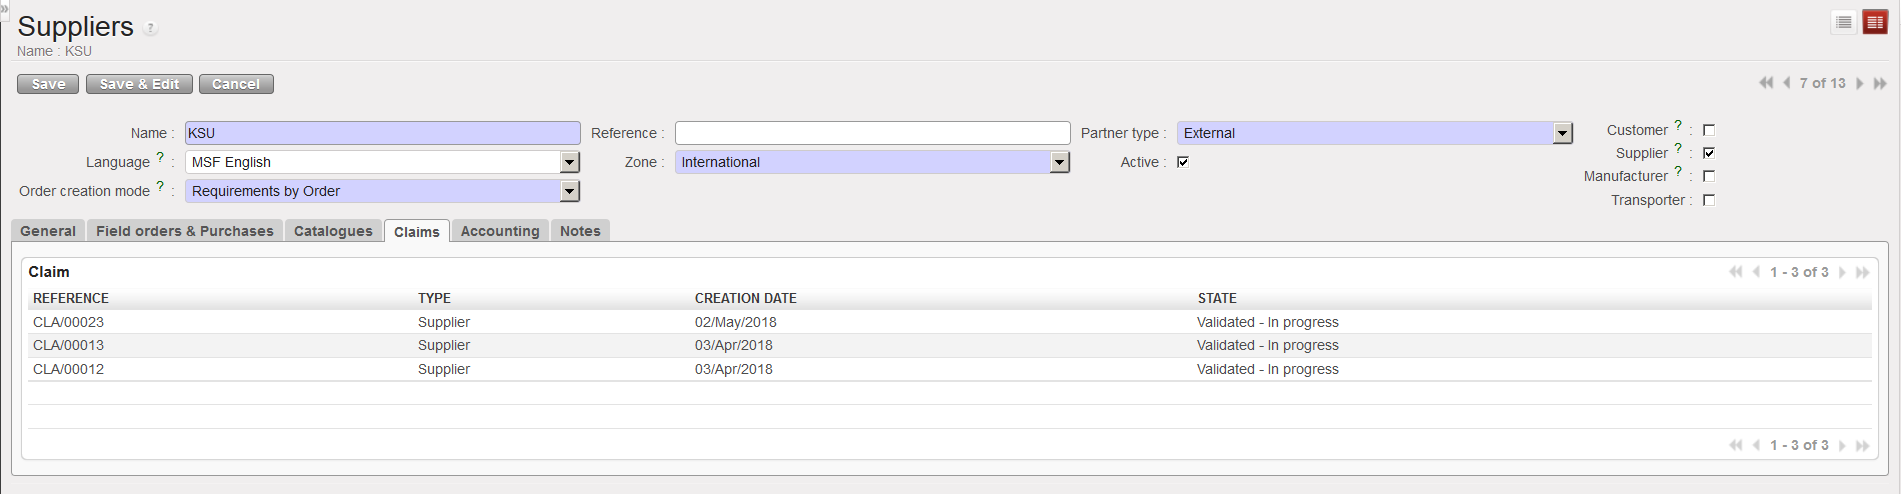
18. The “Claims” tab will list all claims which have been raised to a partner. See section on claims in the Warehouse chapter for further details.
|
|
|
Partner – Claims tab |
19. On the “Accounting” tab, enter the appropriate account codes provided by Finance. These codes will vary according to the partner type. Do not enter any codes without being advised by Finance before as a wrong account will impact the accuracy of the financial statements.
|
|
|
Partner – Accounting tab |
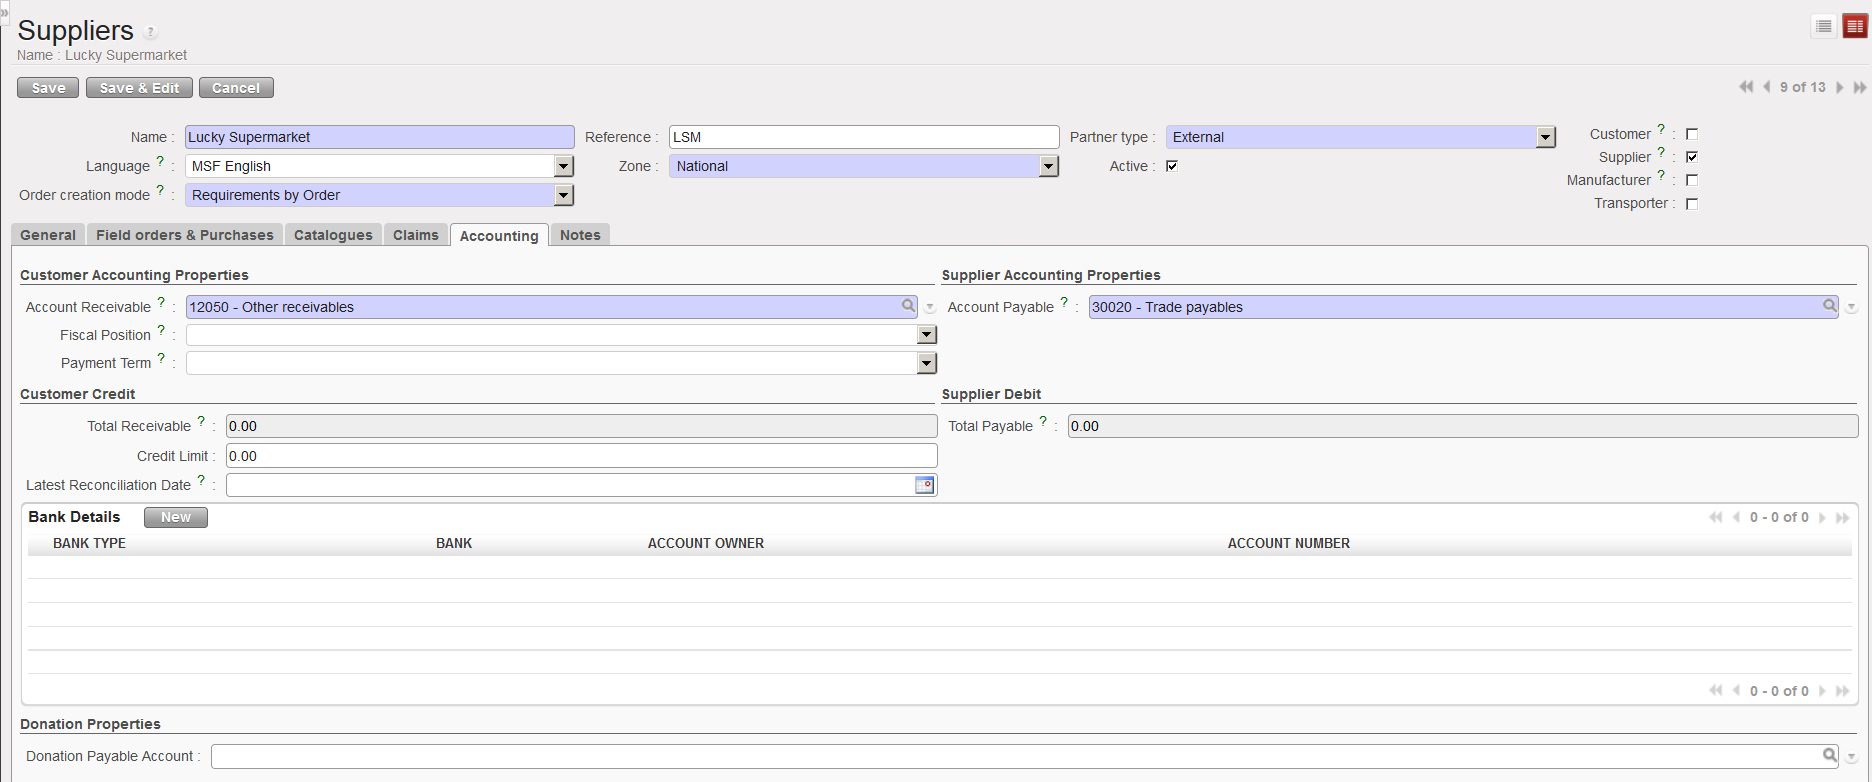
20. Complete the “Accounts Receivable” and “Account Payable” fields. The fiscal position remains blank as well as the payment term.
21. In the “Customer Credit” section, the “Total Receivable” is automatically computed and shows the outstanding debt your customer owes you. “Credit Limit” remains blank, as well as “Latest Reconciliation Date”. In the “Supplier Debit” section, the “Total Payable” indicates the outstanding debt you owe to your supplier.
22. Finally, you can complete the partner “Banking Details” upon input from Finance.
23. In the “Donation Properties” section, you need to complete the “Donation Payable Account” to record extra-accounting transactions (e.g. in-kind donations) for this supplier if relevant.
24. In the “Notes” tab, enter any additional relevant information related to the partner.
|
|
|
Partner – Notes tab |

25. Click on the “Save” button.
The Action Menu on the right-hand side contains additional links to other transactions such as Purchase Orders, Field Orders and Invoices which may involve the partner.
|
|
|
Partner – Action menu |
Via the action menu, you also have the possibility to create a catalogue for the partner via the option “New Catalogue“.
