Supply User Manual ENG -> 4. Procurement -> 4.6 LU-SU3201: Purchase Orders (POs) - Generals -> B. How to create a regular Purchase Order
B. How to create a regular Purchase Order
A Purchase Order can be created from scratch (i.e. not by the OST). This is the scenario that we are introducing here.
Go to: Purchases / Purchase Management / Purchase Orders
1.Click on the “New” button.
2. Complete the header of the PO (Order Type, Order category, Priority, Details).The “Show PO Default Message” can be ticked only in Draft or Validated mode. If ticked a default message will be displayed on the PO PDF print out (see details to configure this message in LUSU3401 Procurement Advanced Features -J.How to configure a PO customized default text)
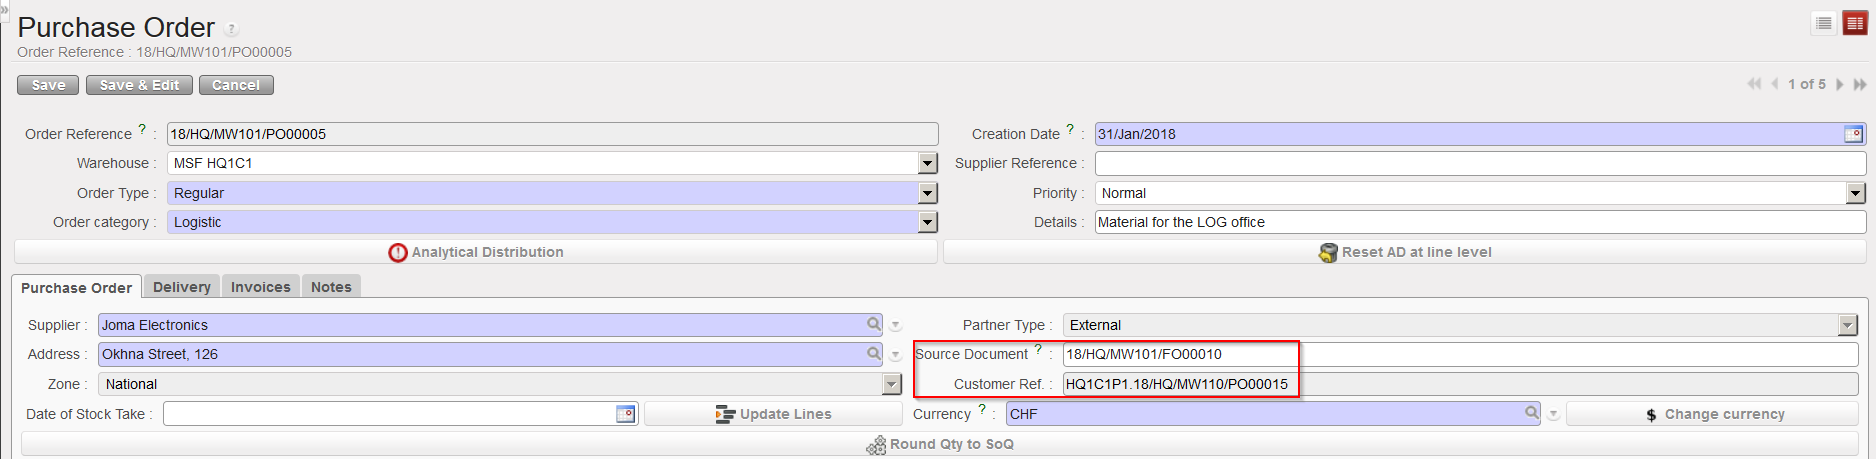
3. Enter a supplier on the “Purchase Order” tab. This can be done by typing directly in the “Supplier” field or by using the magnifying glass next to this field. The Address, Partner Type, Zone and Currency are automatically populated from the partner master data form. Note that for Internal Partner, currency cannot be changed manually once partner selected.
|
|
|
Purchase order header |
|
|
|
Supplier selection |


If the PO was created by the OST:
- The “Source Document” will indicate the reference of the order that has been sourced (automatically populated when PO created by OST.
- The Destination location at line level will be pulled from the destination in the IR or FO (Input, Crossdocking, Service, Non Stockable)
- The “Customer Ref.” will indicate the reference of the document originating from the requesting instance (auto populated when PO created by OST via pulled-FO sourcing).
- The “Details” will be pulled from the info filled in the source documents (IRs, FOs).
|
|
|
PO created by OST, after sourcing of FO which was created by synchronization |
4. On the “Purchase Order” tab, click on the “New” button located on top of the “Lines” table to enter a product line manually. Note that you may also insert several lines in a few clicks if you use the “Add multiple lines” button or import a file via the “Import lines button“.
a) “New” button: enter (part of) the product’s code or (part of) the description in the “Product” field or click on the magnifying glass icon ![]() to open the “Search Products” screen. Search the product using the filters such as the description or by the nomenclature.
to open the “Search Products” screen. Search the product using the filters such as the description or by the nomenclature.
b) “Add multiple lines” button: click “Add” on the “Add multiple products” pop up screen and search for the products you want to add on the “Search Products” screen. Use the relevant filters: Nomenclature, Description, Code, Lists, Catalogues,… Select the products you need by ticking the box at the beginning of the product line and click on “Select“. Once you have all your products click on the button “Add products” on the “Add multiple products” pop up.
|
|
|
3 options to insert product lines on a PO |

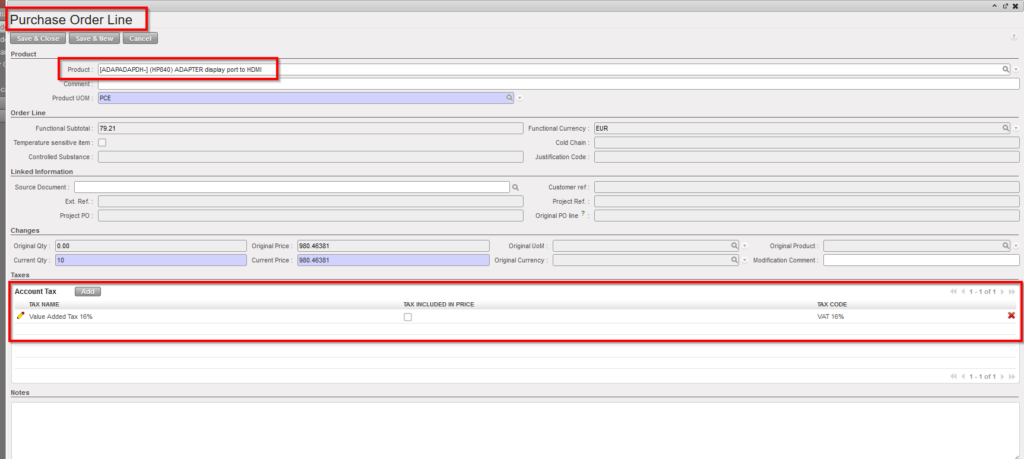
5) If you have selected the “New” option (to add product lines one by one on the PO), on the Purchase Order product Line , enter a product, a quantity and adjust the unit price if needed. Note that “Quantity” and “Unit Price” can not exceed a certain number of digits (but still quite large numbers are allowed and a warning message will be displayed in case you reach that maximal capacity).
|
|
|
Inserting a line on a PO |

Note that the fields “Supplier Code” and “QTY” seemed to be merged, however only the “Qty” should be entered.
If Taxes needs to be added for any particular line, you can add them when the line pop-up is open, in the “Account Tax” section, see below explanation for adding Taxes for the whole document/all lines.
6) Click on the floppy disk ![]() if you want to save your line and enter another one.
if you want to save your line and enter another one.
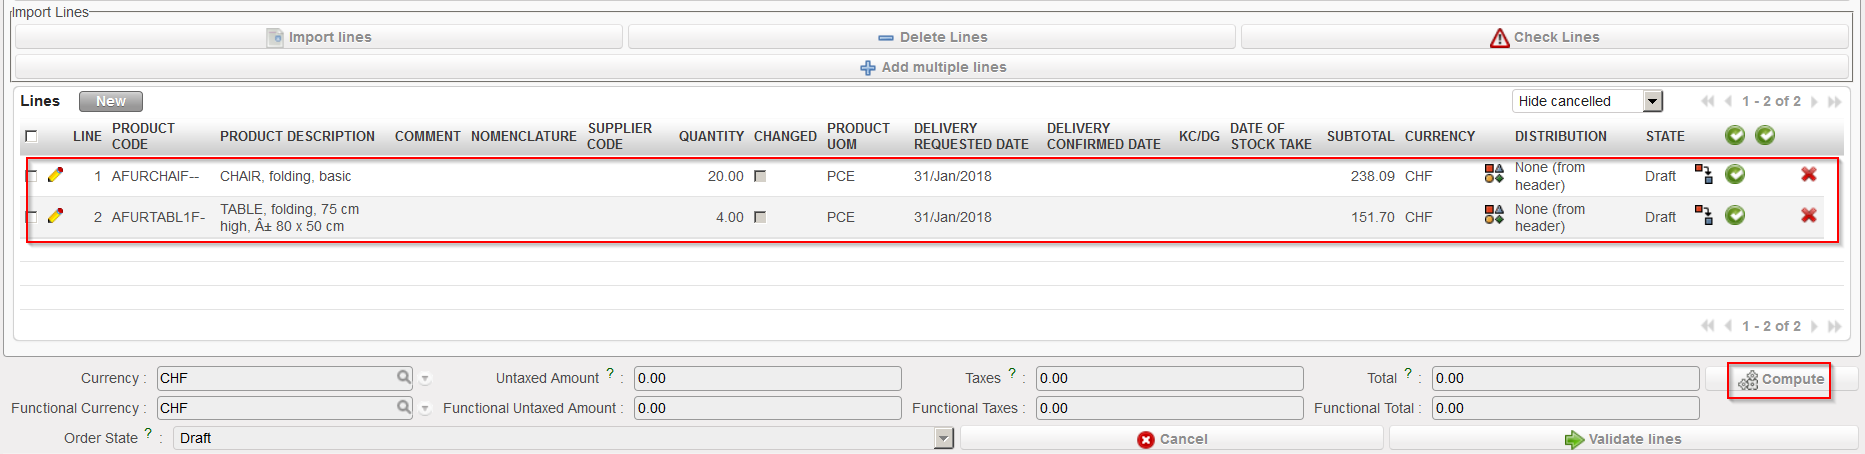
7) Click on “Compute” if you want to update the total fields.
|
|
|
PO lines inserted on PO, click “Compute“ |
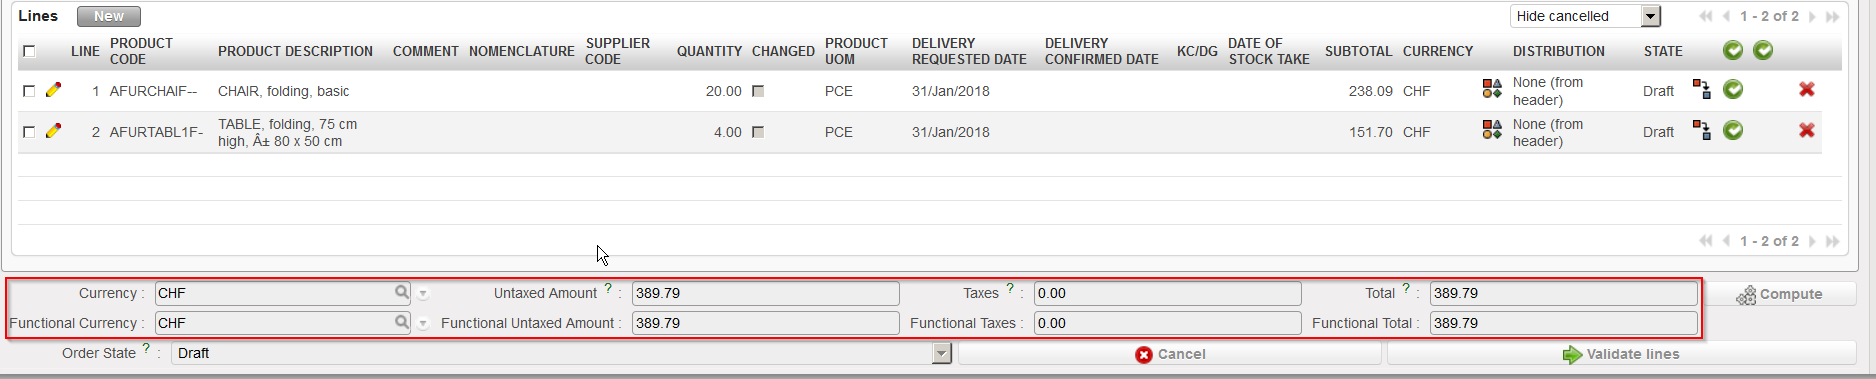
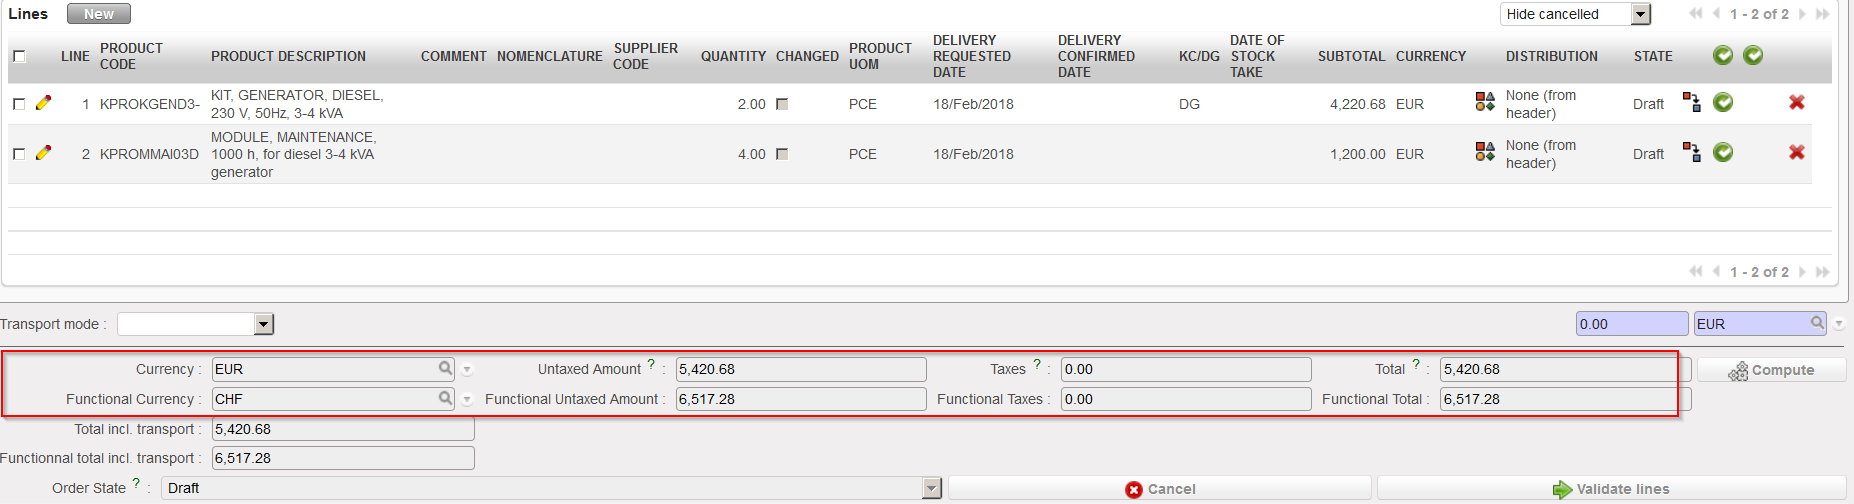
The total costs related to the PO have been recomputed. Note that total costs always appear in the currency of your supplier and in the currency of your OC (also called functional currency).
|
|
|
Total costs updated – supplier currency and functional currency are the same |
|
|
|
Total costs updated – supplier currency and functional currency are not the same |
On the “Delivery” tab, you may include information such as the requested delivery date or the transport mode. Please note that the Delivery Requested Date can also be populated at line level and can be updated from the header to all lines using the « Apply to lines » button.
|
|
|
PO – “Delivery” tab |

Please note that in order to facilitate the management of pipeline there are now 2 DRD. The pipeline used to be taken into account when PO line was confirmed and now it is done at after line validation. The first DRD is active until the PO lines are validated. After this the second DRD field “Delivery Requested Date (modified)” becomes active and can be used to push the RDD value down to the lines.
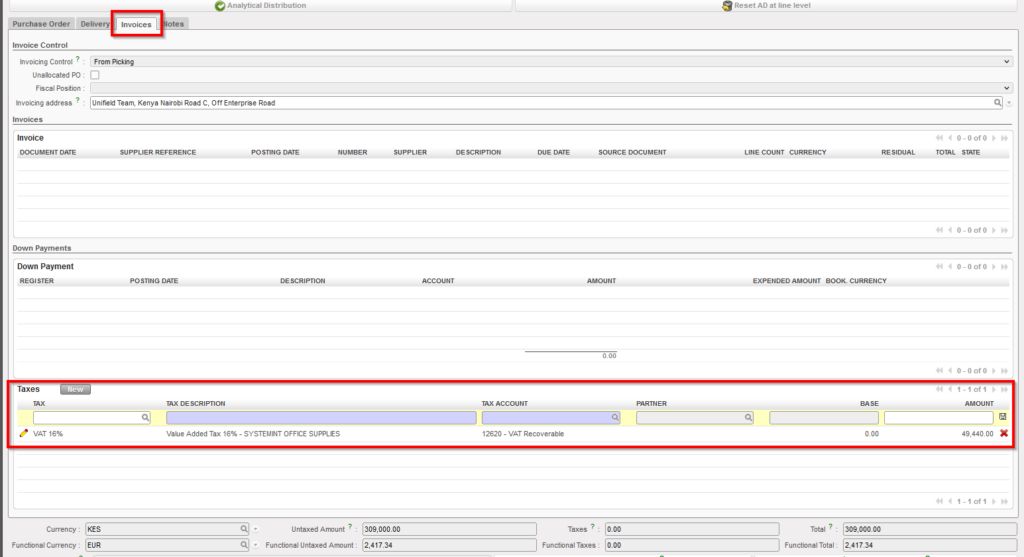
The “invoice” tab will be used to store financial (payment) information, and to add “Taxes” to the whole document/all lines for POs to external partners only. (ESC POs cannot have taxes applied).
|
|
In the “Taxes” section, you can add one or more types of taxes, and any type of added tax will be applied to all lines of the PO.

You can add/cancel the “Taxes” on whole document or on line level while the PO status “Draft” or ‘Validated“, Deletion of taxes can be done via red “X” or for line level taxes via the button “Remove taxes on lines”
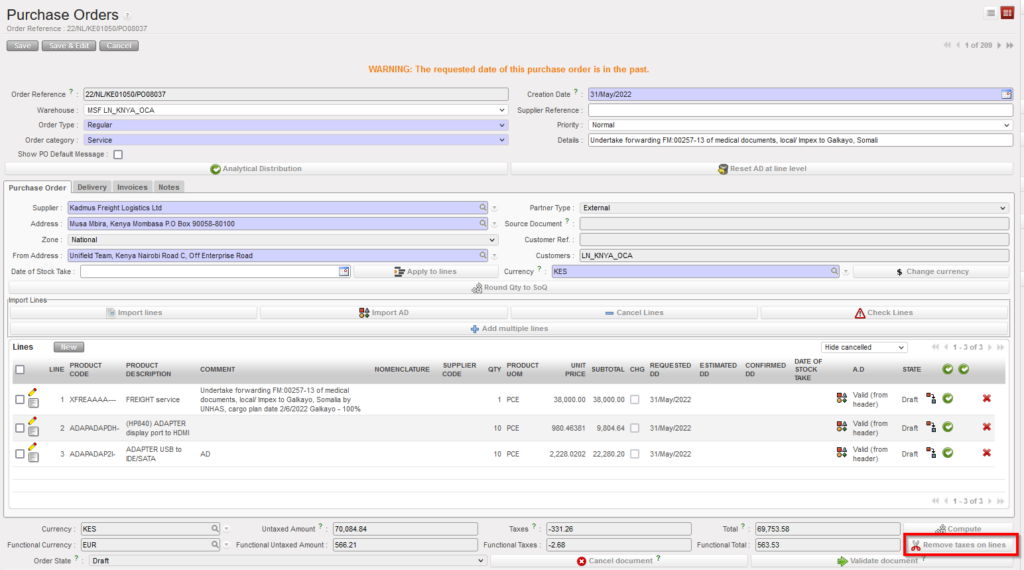
To consider below points:
- Adding tax line or removing will affect in the total amount of PO.
- SI Tax corner is populated from PO Tax box.
- After adding or removing taxes, “Compute” button should be used to insure the totals fields are up to date.
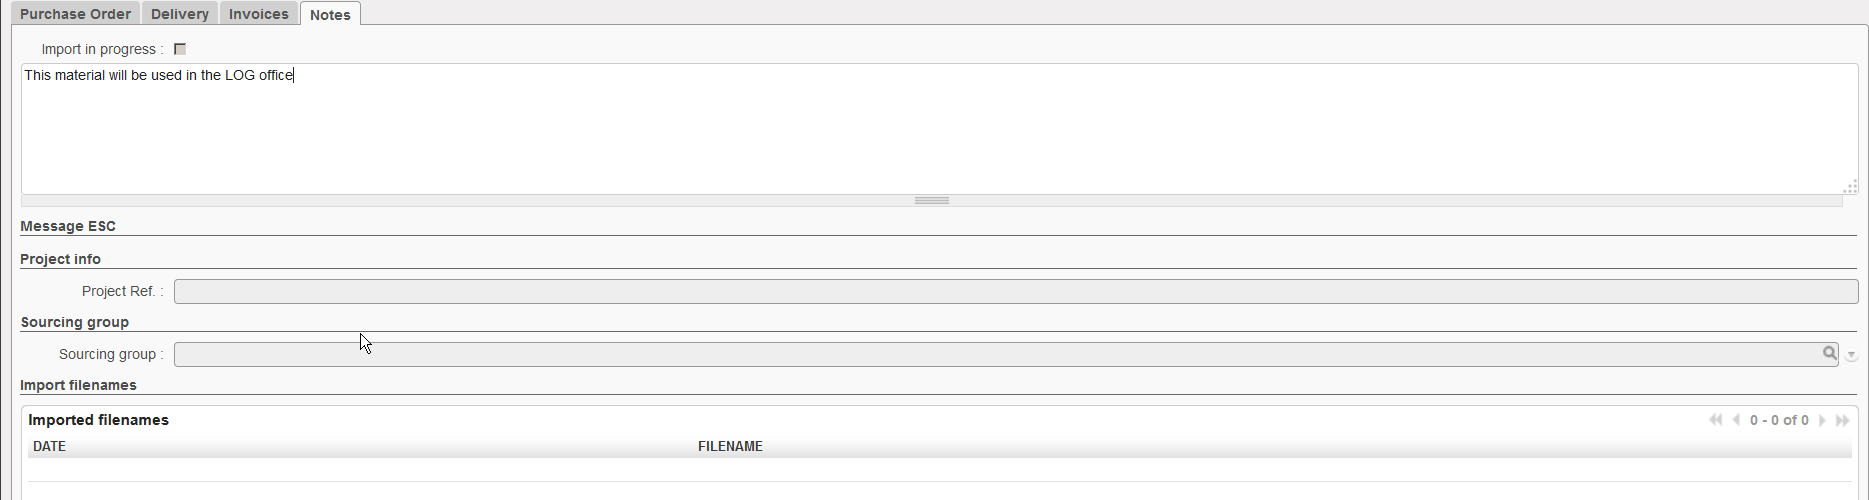
You may use the “Notes” tab if you want to insert additional information about the PO.
|
|
|
PO – “Notes” tab |
On the “Supplier Catalogue” tab, when the PO’s supplier has valid and confirmed catalogue, you will have immediate information about the conformity of the PO lines with the supplier catalogue, in the case that there are lines which do not conform (so adherence is less than 100%), adherence for lines which do not match and lines (Products) which do not exist in the catalogue will be displayed in this tab, as well as information for each of the lines which has a mismatch, and the reason for the mismatch (Unit price / Order Qty).
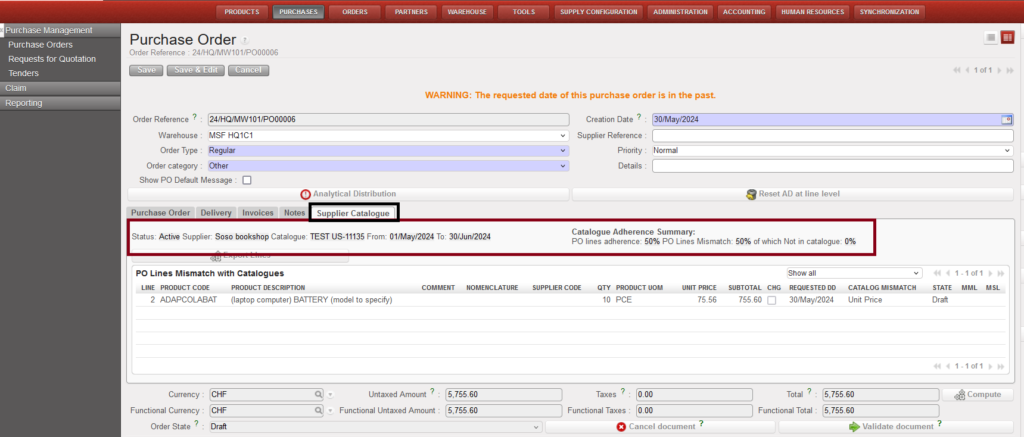
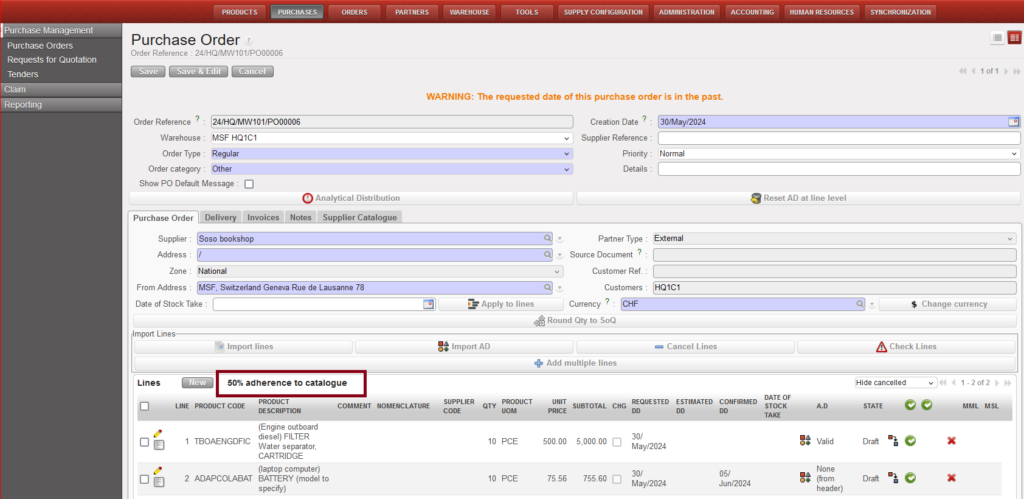
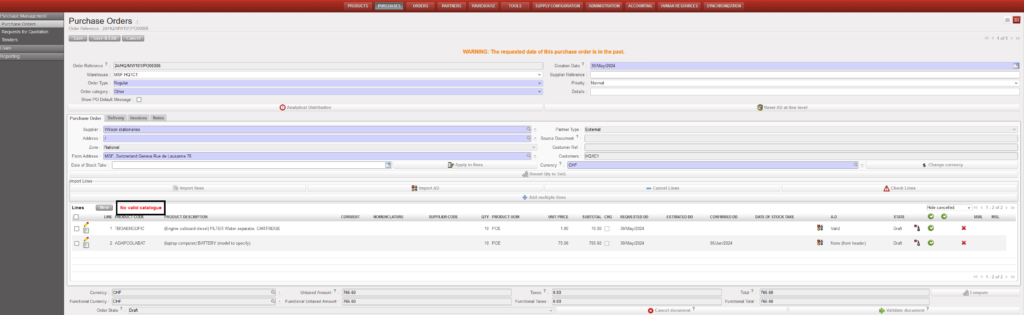
the percentage of the adherence lines to catalogue will be shown in the first tab “Purchase Order” on the top of the Lines section, if PO’s supplier doesn’t have valid/confirmed catalogue, “No valid catalogue” will be displayed.
The adherence information on the PO is automatically refreshed (rechecked) each time the PO is viewed or the new tab is clicked on.
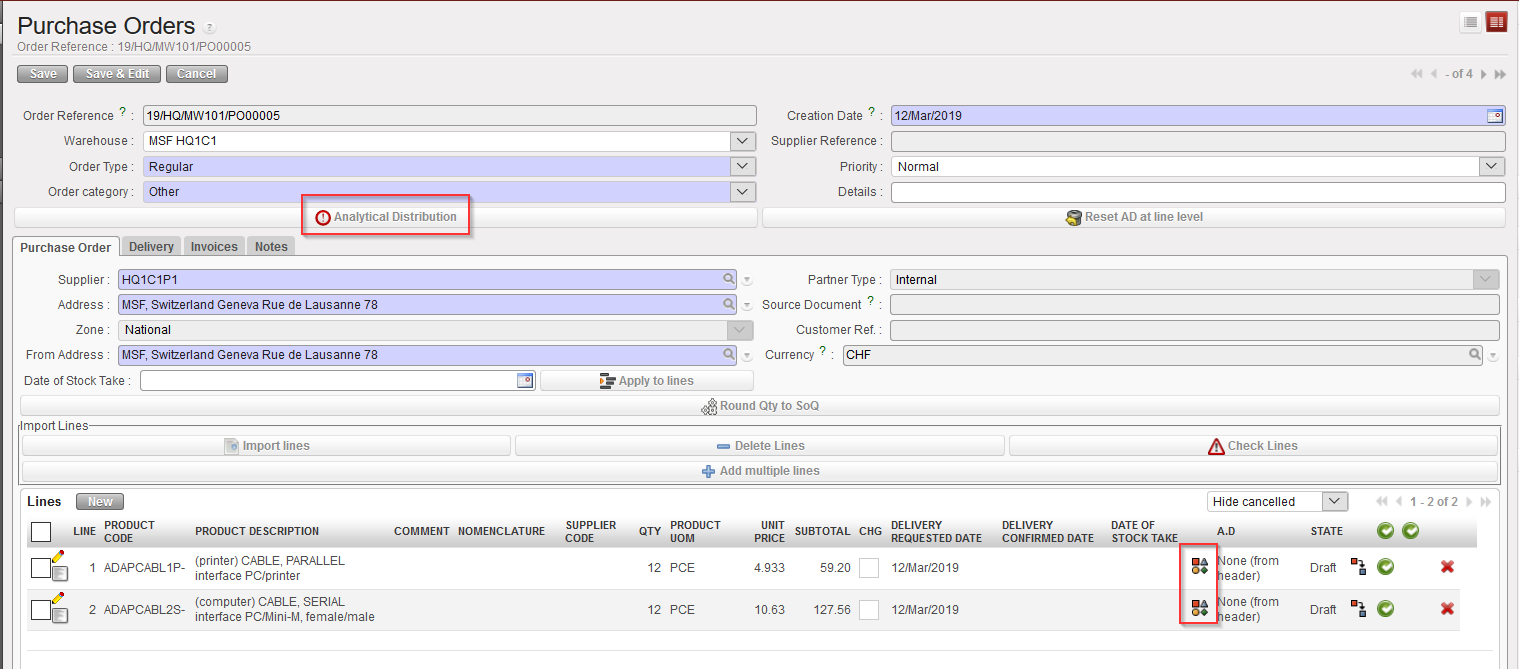
8. Add the analytical distribution
-
- In the header if all lines have the same analytical distribution.
- At line level if the AD is different according to the line, click the
 icon.
icon.
|
|
|
Entering the Analytical Distribution on a PO |
9. Save the PO by clicking on the “Save” button at the top of the screen.
10. The PO should be printed and signed for approval by the person responsible as per OC procedures. It can be printed by clicking on “Purchase Order” in the action menu.
Purchase Orders will usually be automatically created in “Draft” status through the Orders Sourcing Tool when the purchase will follow an expression of a need (through an Internal Request for example).
A Draft PO can also be automatically generated by the Replenishment Rules functionality (see Replenishment Rules LU in the Warehouse chapter).
However, a Purchase Order might also be created manually (from scratch) to replenish the stock or depending on the OC procedures.

Please note: A PO will be printed in the language specified in the Supplier master data form.
