Supply User Manual ENG -> 5. Warehouse -> 5.3 LU-SU4102: Picking -> B. HOW TO PACK PRODUCTS
B. HOW TO PACK PRODUCTS
The pre-packing lists are prepared in the state “Available” after validation of (sub) Picking Tickets. They have to be processed manually to transfer the picked goods to a Packing List. Processing them will transfer the products from the “Packing” location to the “Dispatch” location.
One Pre-Packing List is created per sub Picking Ticket (1:1 relationship). This is illustrated with the reference of the PPL. The PPL with the reference PPL/000XY-AB is linked to the Picking Ticket with the reference PICK/000XY-AB
Note that Pre-Packing lists can be split or merged during the Shipment process.
Go to: Warehouse / Warehouse Management / Deliveries / Packing
- Locate the Pre-Packing List you wish to process. Filters can be used to facilitate the research.
 |
|
“Search: Pre-Packing Lists” screen |
2. Edit the Pre-Packing List you wish to process using the pencil icon.
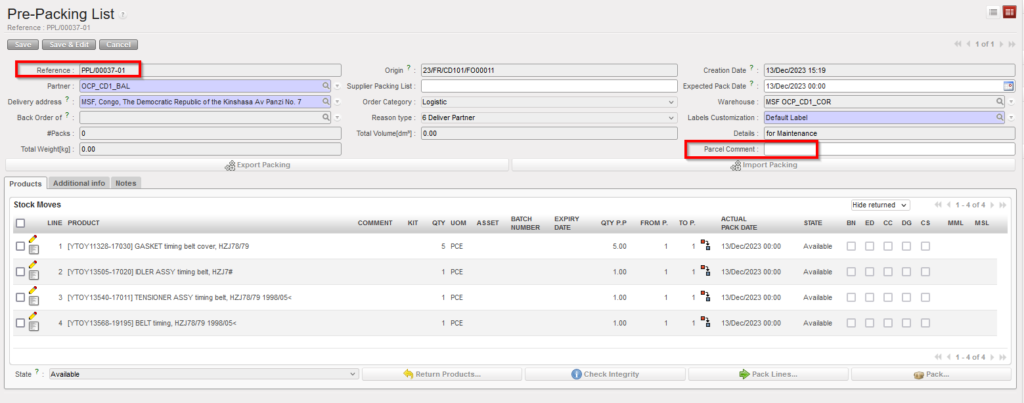
3. If needed add a “Parcel Comment” for this PPL. This “Parcel Comment” will be transferred through to the Shipment and its related documents (Freight Manifest, Packing list,…)
|
|
|
Entering a Parcel Comment on a PPL |
4. By default all items are put in a single box. All boxes/parcels are in the same line (“From P.=1” “To P.=1” where “From P.” represents the number of the first box in which you will find the product and “To P.” the number of the last box) and identical with the same size and weight.
You have 2 options to Edit the line:
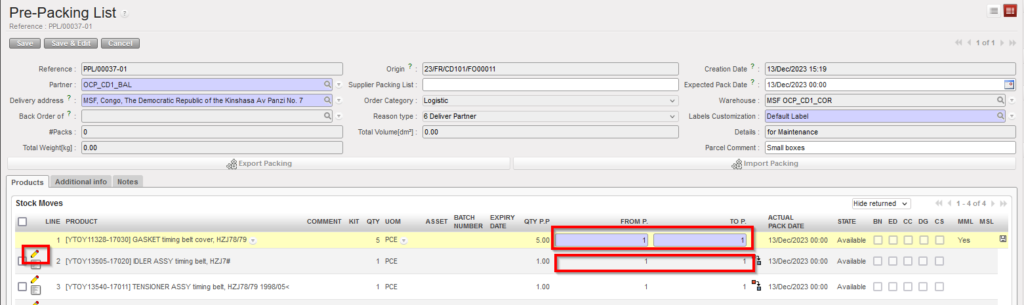
a) Using the Pencil icon ![]() : enables to update the packing product line by product line
: enables to update the packing product line by product line
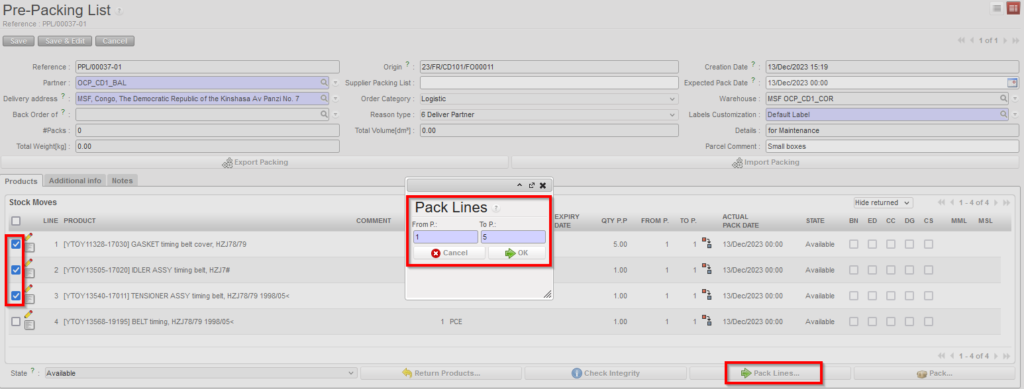
b) Using the “Pack lines” button , after having selected the requested product lines (using the check boxes): enables to update the packing for several product lines at a time
|
|
|
Updating line by line – using pencil icon |
|
|
|
Updating several product lines at a time – using “Pack lines” |
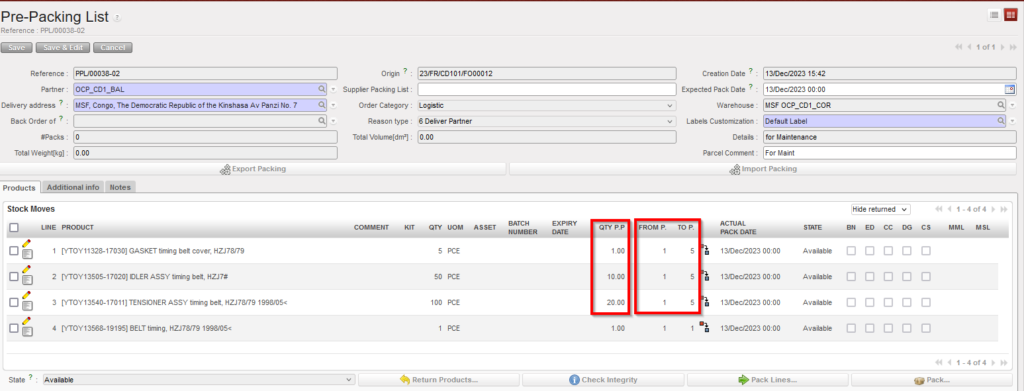
Note that if you change the number of parcels, the system automatically computes the quantity per parcel (see “QTY P.P” column: 12 and 16 in screenshot below) and splits the quantity equally across the number of parcels on that line range .
|
|
|
“QTY P.P.” updated automatically – quantity split by 5 (nb of parcels) |
This split might impact integer products that might result on decimal quantities per parcel (nb: this is coherent with the current use of kit product). Therefore, decimal quantities per parcel are allowed for integer (PCE) products and PPL can be processed further but a non-blocking message will be displayed for user.
|
|
|
“QTY” of 20 has been split in 3 boxes (form 2 to 4) resulting in non integer QtyP.P. = 6.67 |
|
|
|
This resulting message will be displayed when trying to Pack – non blocking |


This message is a warning for later stage in case user try to “Return” partial range of boxes with decimal quantities from a PPL or from a Ship. In case of return, a blocking message will be displayed.
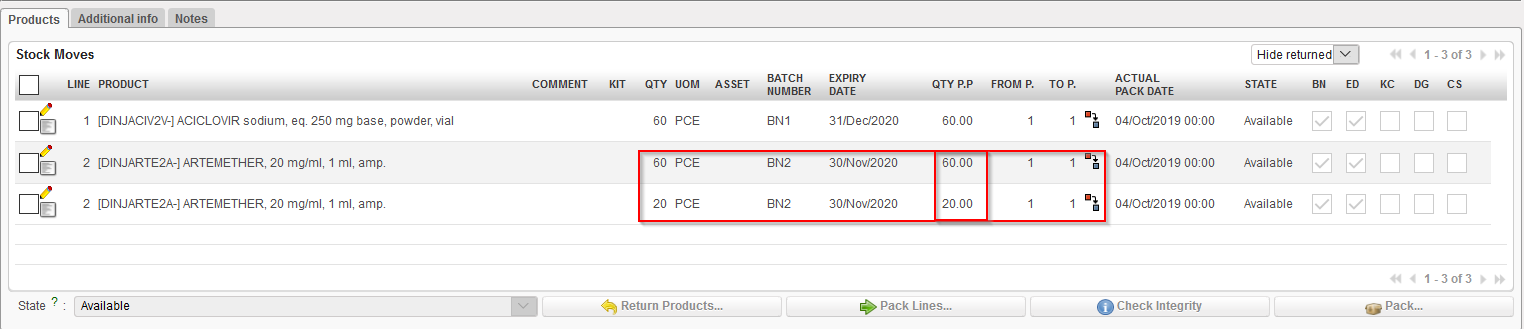
5. If one line needs to be split in several parcels, you may use the split icon ![]() to split the line as much as needed.
to split the line as much as needed.
|
Split product line |
|
|
|
Initial quantity of 80 has been split to 60 and 20 |
|
|
|
Quantity 20 has been packed on a 2d Box 2 and the other products remain in Box 1 |

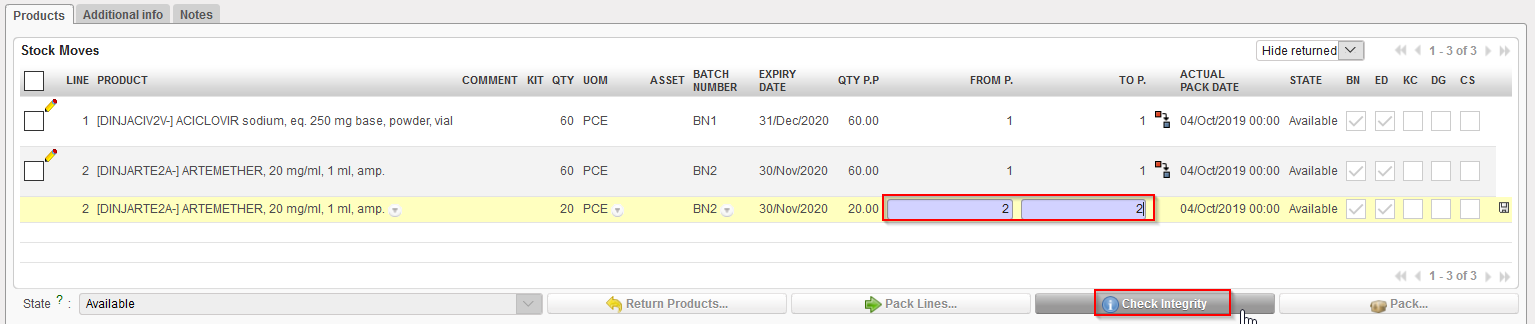
6. The “Check integrity” button may help you to see if you did a mistake (overlapping boxes…)
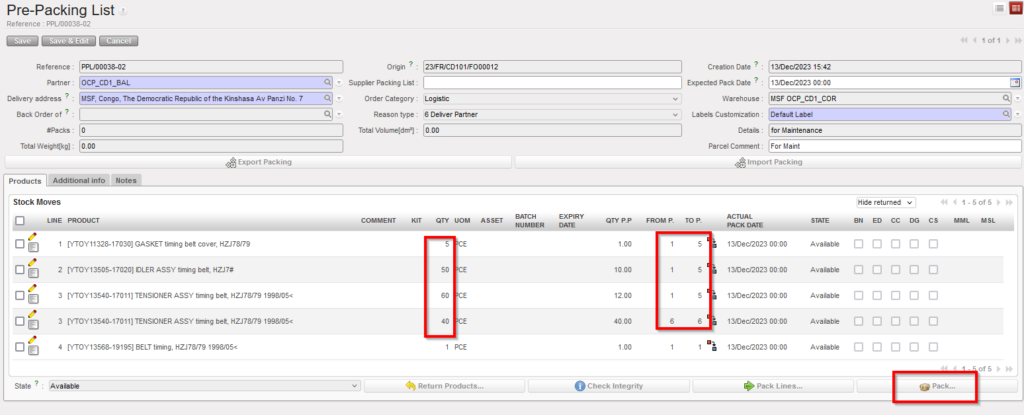
7. Click on the “Pack…” button ![]() located at the bottom of the screen to initiate the packing process.
located at the bottom of the screen to initiate the packing process.
 |
|
Updated Pre-packing List with items in 6 boxes “From P” =1 to “To “P=6 |
8. You reach the “Packing details: Volumes and Weights” where sizes and weight of the different parcels must be specified. Use the pencil icon to edit each line and specify length/width/height/weight for each parcel. Save each line after update using the floppy icon.
|
|
|
Packing details: Volumes and Weights” |

If pack types have been defined in configuration, you may use them to facilitate the process. Note that if your user has the requested rights, you may also define them at this stage. Behind a pack type, you find sizes (length/width/height). None of this field is mandatory but it is recommended to fill them whenever possible.
Note that if in the previous step, items have been distributed evenly in several boxes (e.g. from P1 to P5 in the example above) all these boxes will have the same sizes and weight.
Please also note that the “Save as draft” button will enable you to save this information in case you need to complete it later before processing.
9. Once all lines have been updated, click on the “Process” button. This will open the next document from the flow – Draft Shipment
|
|
|
Shipment |
|
|
|
Updated PPL |
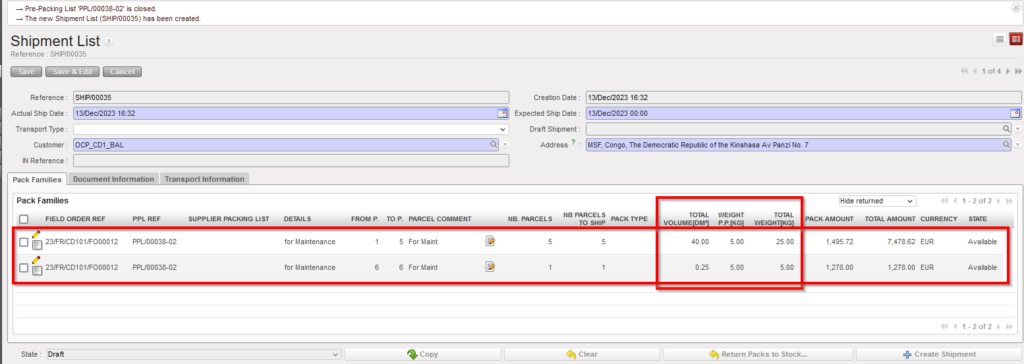
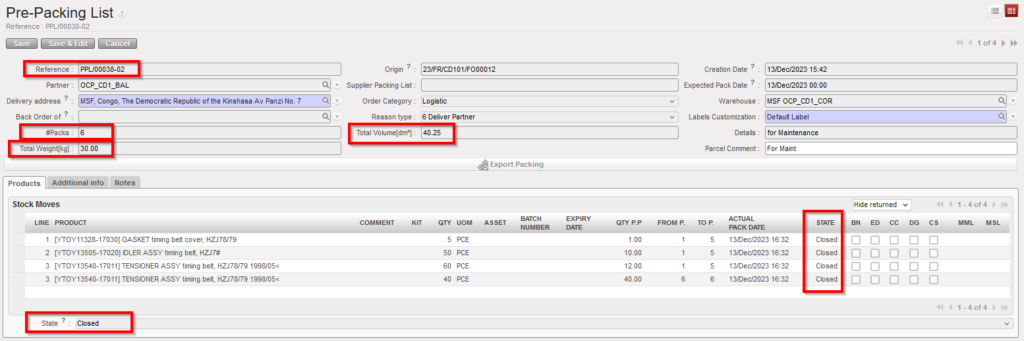
The PPL is now updated and turns to the state “Closed“. Splits done at step 1 of the PPL process, parcel distribution, total volume and total weight appear on the PPL but parcels detailed information (sizes and weights) indicated at step 2 are not visible here.
UniField jumps to the “Shipment” screen in order to allow you to process the next step, the shipment of the packed items to the customer.
If a “Draft” Shipment for the involved customer is available, the PPL is added on it (as it is the case in the above example). Otherwise, a new Shipment is created by the system.
Note that if you need to put a same product/batch in boxes with different sizes and/or weight, the split ![]() option should be used at step 1 when processing the PPL ( as detailed previously).
option should be used at step 1 when processing the PPL ( as detailed previously).
It is also possible to merge different products/batches in a same box (even if they are on lines in the PPL) by encoding them in the same box (“From P.” “To P.”). However, it can be tricky and you need to be very careful not to make the number of the boxes to overlap. Hence, the parcels numbers should be in sequential order from top product line to bottom product line. As already said, the “Check Integrity” button can help you with this.
