Supply User Manual ENG -> 5. Warehouse -> 5.6 LU-SU4105: Delivery Orders -> C. HOW TO CREATE A DELIVERY ORDER FROM SCRATCH
C. HOW TO CREATE A DELIVERY ORDER FROM SCRATCH
Most of the Delivery Orders are generated automatically after confirmation of an IR-line with an External Consumption Unit as “Location Requestor” or after conversion of Picking Ticket to Simple Out.
However, UniField offers the opportunity to create Delivery Orders from scratch in specific cases. Note that this is not the standard process. Refer to your OC processes to know if and when creation of OUT from scratch should be done.
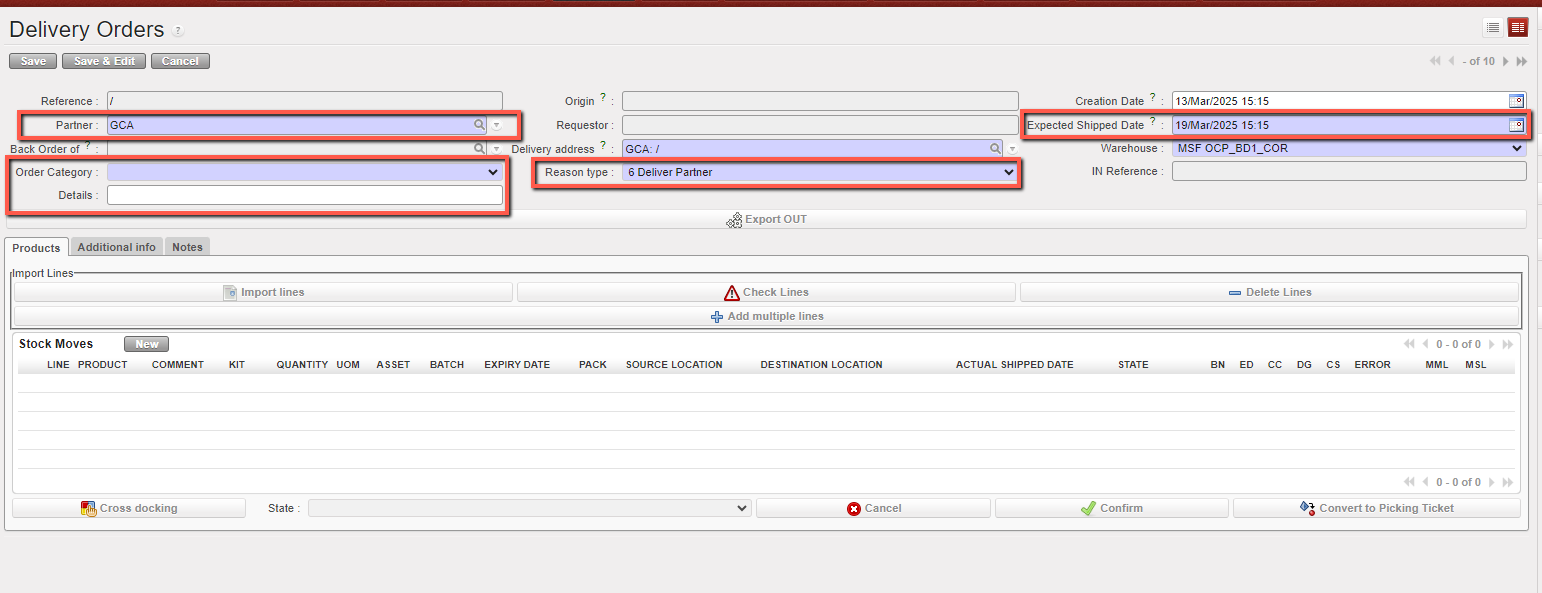
Go to: Warehouse / Warehouse Management / Deliveries / Delivery Orders
- Click on the “New” button.
- Enter a “Partner“.
- Enter an “Expected Shipped Date“
- Check the “Reason type” is correct, the default is “6 Deliver Partner” but at line level will be sending good to an External partner “Reason type” should be “6 Deliver Partner”.
- Select Order Category. The default value is empty, and the user can select one of the following options: Logistic, Medical, Service, Transport, or Other.
- You can enter the OUT’s name, or any details related in the “Details” field.
|
|
|
Creating a Delivery Order from scratch |
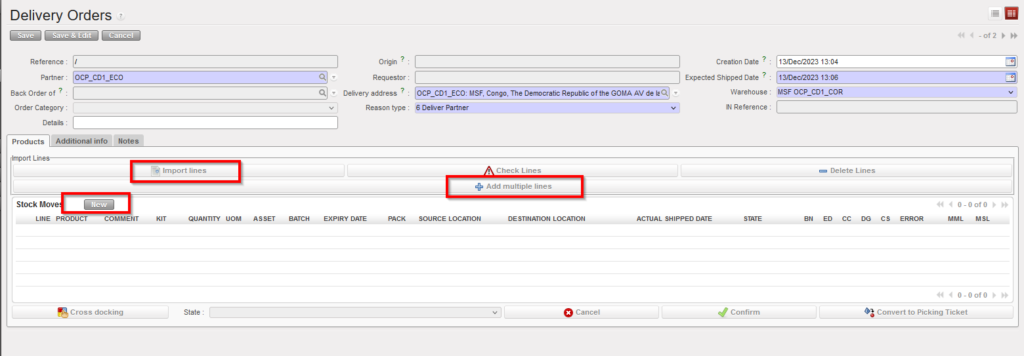
7. Create product lines by clicking on the “New” button, on top of the “Stock Moves” table. Alternatively, you may also use the buttons “Add multiple lines” to add several lines to the OUT in one step or “Import lines” to import an Excel file.
|
|
|
Creating a Delivery Order from scratch |
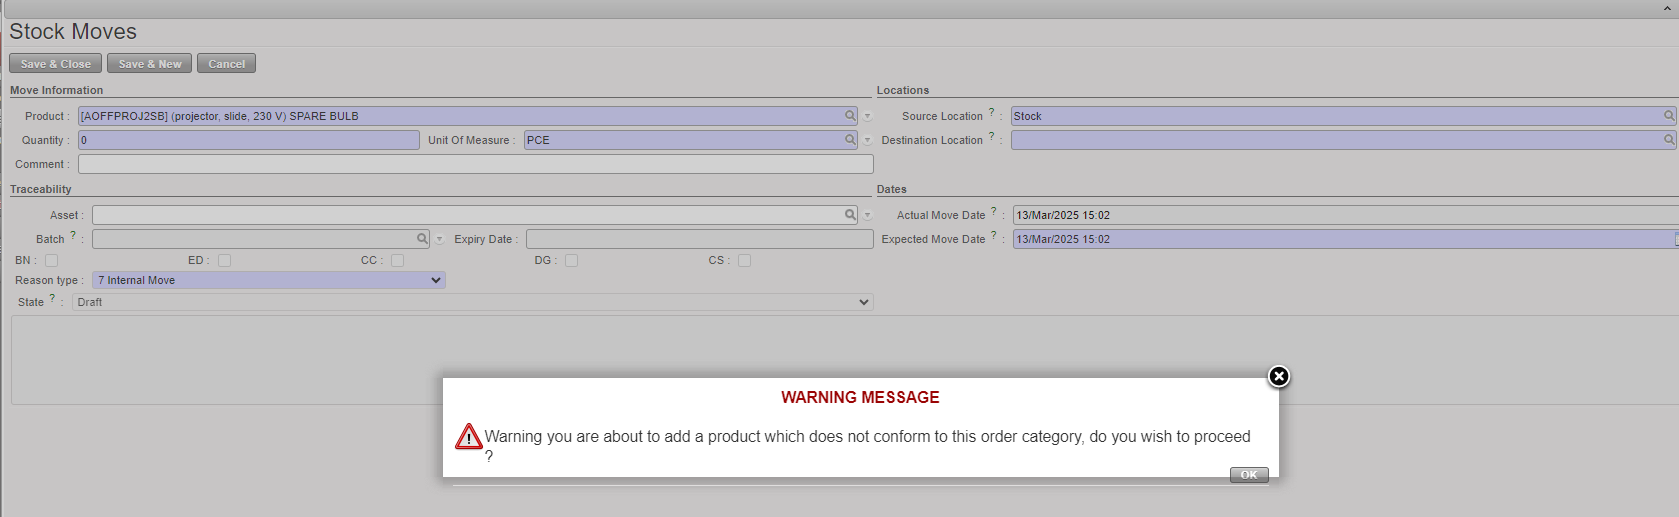
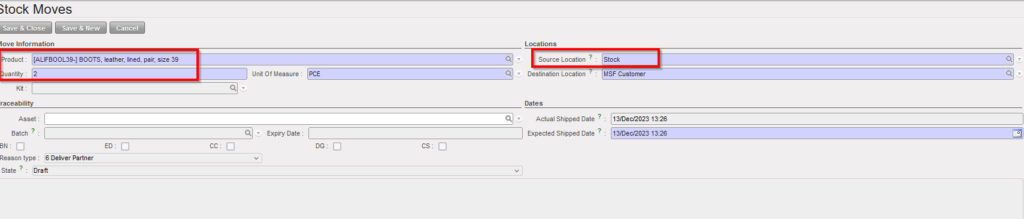
8. On the “Stock Moves” window, enter a product, a quantity and a destination location. Note that the default source location is “Stock“.
If a product does not correspond to the selected category, the user will receive a non-blocking warning message.
9. Click on the “Save & Close” button to save the line and return to the main OUT screen or on the “Save & New button” to save the line and add a new one.
|
|
|
Inserting a line on a Delivery Order |
10. Once back on the main OUT screen, you have several options.
|
|
|
Main OUT screen |
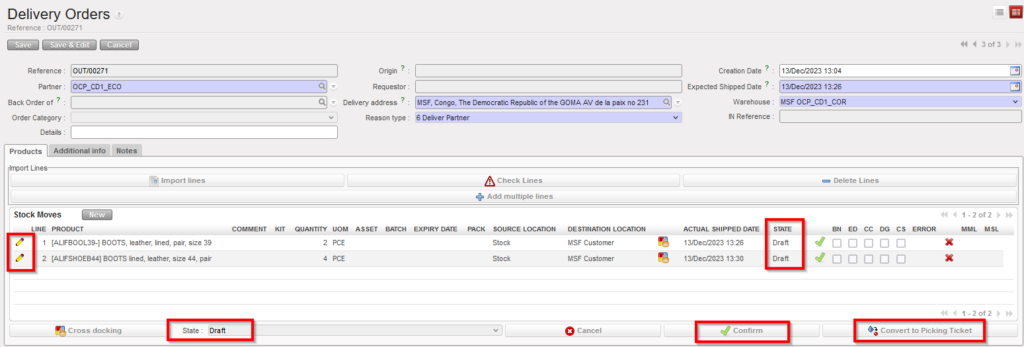
You may edit the lines via the pencil icons and change source and destination location if needed.
You may also convert the OUT into a PICK if you click on the “Convert to Picking Ticket” button. This is the opposite functionality to the one described in the previous section.
The Delivery Order is created in the state “Draft” as well as all its lines. It is not possible to check the availability of the products if the OUT is in this state.
11. Click on the “Confirm” button.
|
|
|
Confirmed Delivery Order |
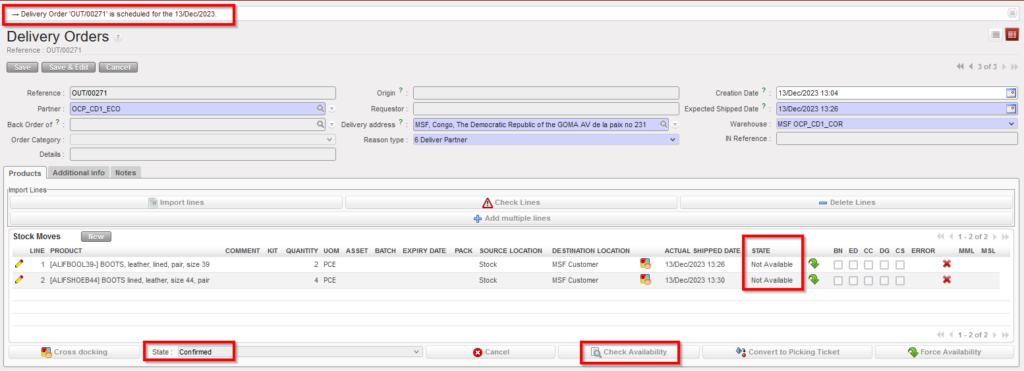
The state of the Delivery Order switches to “Confirmed“. Note that the state of the lines is “Not Available“. It is now possible to check the availability of the products.
12. Click on the “Check Availability” button located at the bottom of the screen.
|
|
|
Available Delivery Order |
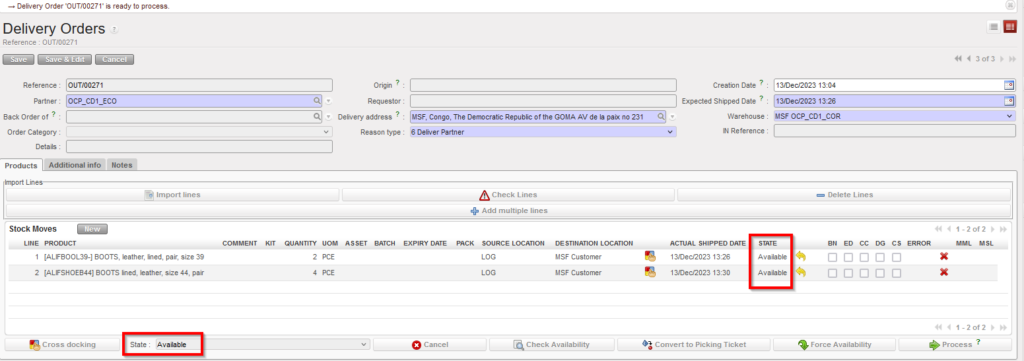
If at least one product line from the OUT is “Available“, the state of the OUT switches to “Available” and you will then be able to process this OUT (see next section).
Remember that creating Delivery Orders from scratch should only be done in exceptional circumstances.
