Supply User Manual ENG -> 5. Warehouse -> 5.8 LU-SU4201: Internal Moves -> C.HOW TO CREATE AND PROCESS AN INTERNAL MOVE
C. HOW TO CREATE AND PROCESS AN INTERNAL MOVE
An Internal Move can be created manually to transfer products from one location to another. You will have to specify source and destination locations. Note that all locations cannot be used as sourced or destination on an INT as this document should only be used to transfer goods internally within the warehouse (e.g. you will not be able to put an ECU as destination location on an INT).
Go to: Warehouse / Warehouse Management / Internal Moves
- Click on the “New” button to create a new Internal Move.
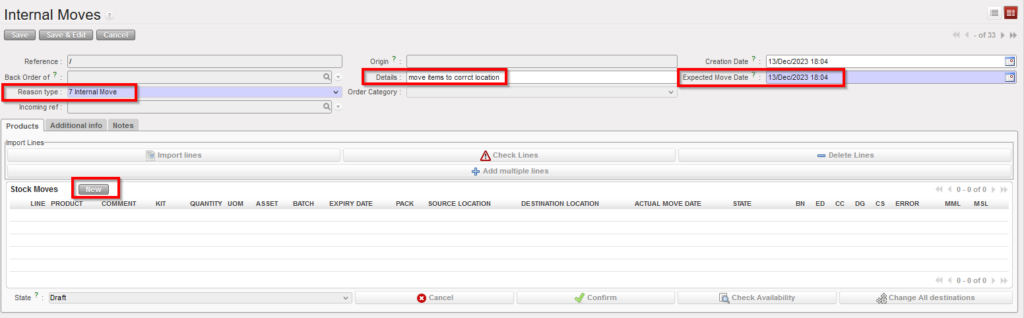
 |
| Creating a new Internal Move |
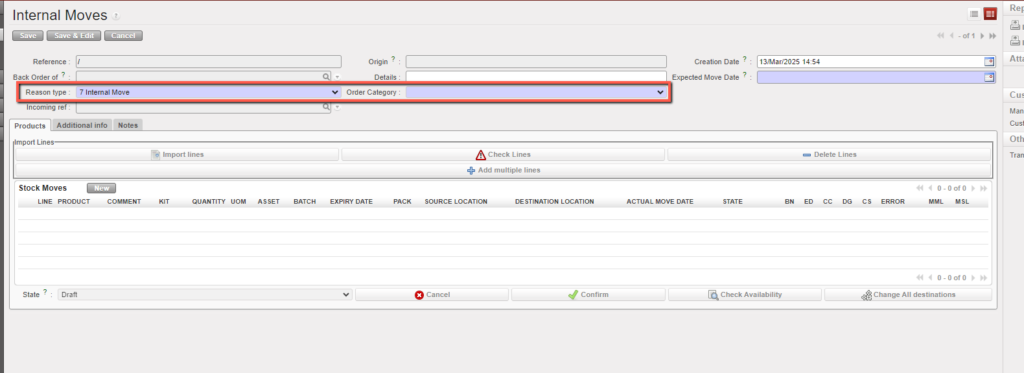
2. Enter the appropriate reason for the movement in the “Reason type” field and the “Expected Move Date“. In addition, you may add information in the “Details” field, on the “Additional info” tab or on the “Notes” tab.
 |
| Completing the Internal Move header |
- “Reason type” drop list includes “Internal Return” this is for products which have been returned from another internal location and this will be used in RR-AMC calculations in the same way as INs with RT “Return from Unit”.
- Select Order Category .The default value is empty, and the user can select one of the following options: Logistic, Medical, Service, Transport, or Other.
3. Click on the “New” button at the top of the “Stock Moves” table to insert a product line on the INT. Note that product lines may also be inserted via the “Add multiple lines” button or the “Import lines” button.
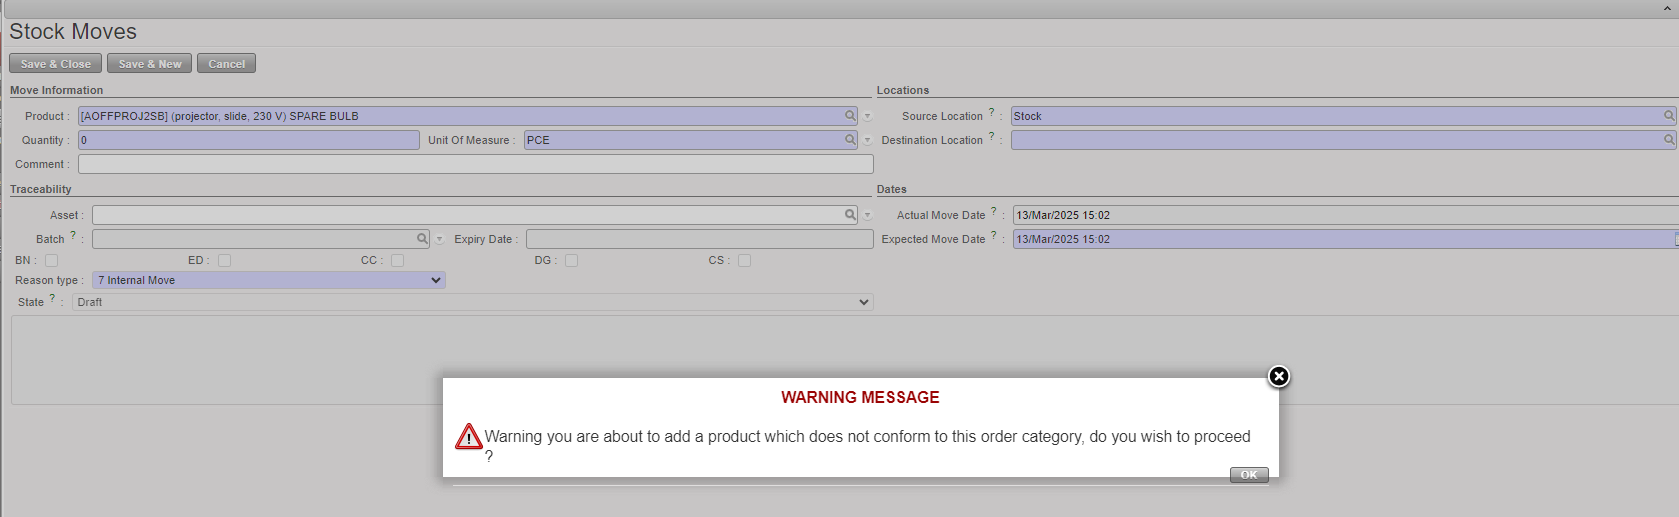
4. Enter a product code, a quantity and a unit of measure if needed. Note that if the product entered is managed by BN/ED, the system will warn you about this.
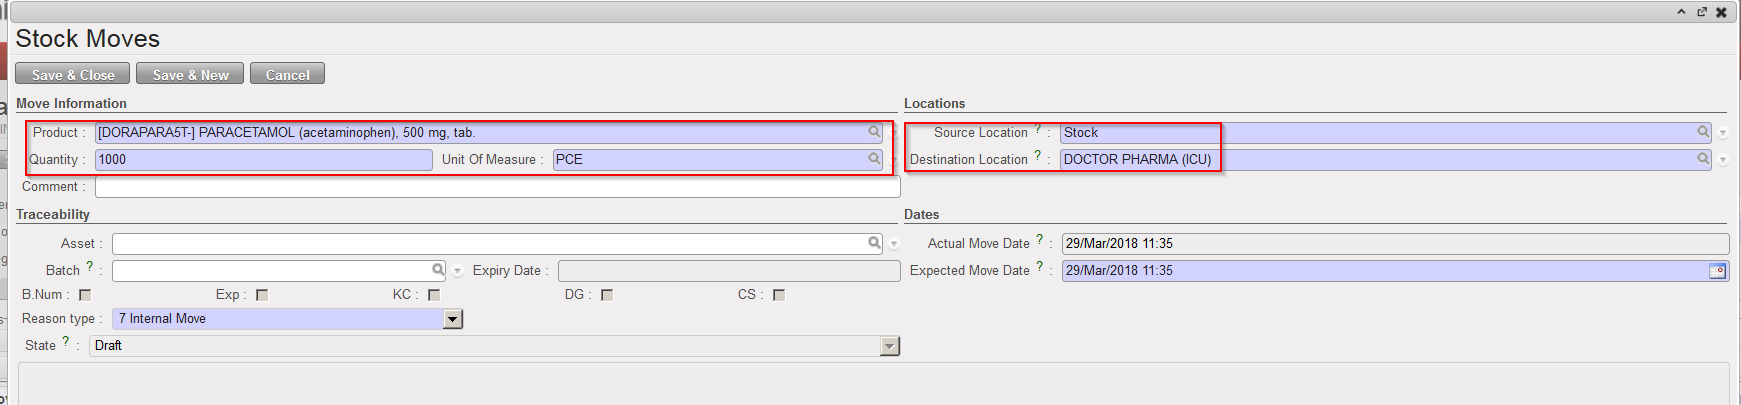 |
| Inserting a line on the Internal Move |
If a product does not correspond to the selected category, the user will receive a non-blocking warning message.
5. Select the “Source Location” (from where the product has to be taken) as follows:
- “Input” to transfer a received product (this stock move should be automatically created)
- “Stock” to transfer the product out of the stock
- “MED” / “LOG” or another stock location to transfer the product out of this specific location
- An Intermediate Stock to transfer the product out of this specific location
- An Internal Consumption Unit to transfer the product out of this ICU
- “Cross docking” to transfer the product out of the “Cross docking” location. This can be used to transfer a product to a client other than the one who ordered it (e.g. product initially purchased for a project but finally delivered to an Internal Consumption Unit)
6. Select the “Destination Location” (where the product has to be delivered) as follows:
- “Stock” to transfer the product to the stock – it will be transferred to the “MED” / “LOG” location according to the product main type
- An Intermediate Stock to deliver the goods to an intermediate stock location
- An Internal Consumption Unit to deliver the product to an ICU
- “Cross docking” if you need to transfer received products (from the “Input” location) to the “Cross docking” location to reimburse an exchange
Please note that “Input” location can never be used as a “Destination location” for INT from scratch.
7. If the product is managed by BN/ED, you may already select the batch master data on this screen.
8. Click on the “Save & Close” button to save your line and return to the main INT screen. Another option is to click on the “Save & New” button to save your line and add another one or on the “Cancel” button to discard your changes.
9. Once all lines have been inserted, click on the “Confirm” button located at the bottom of the main INT screen.
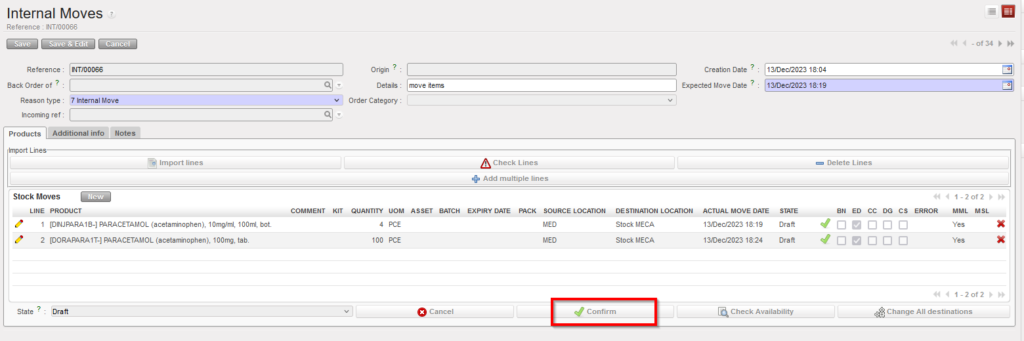 |
| Confirming the Internal Move |
10. The INT switches from “Draft” to ”Not Available”. Click on the “Check Availability” button located at the bottom of the main INT screen.
 |
| Checking the availability of the products on the Internal Move |
11. The availability check has been done. Batches have been selected if needed. The INT switches from ”Not Available” to “Available“. Click on the “Process” button located at the bottom of the main INT screen.
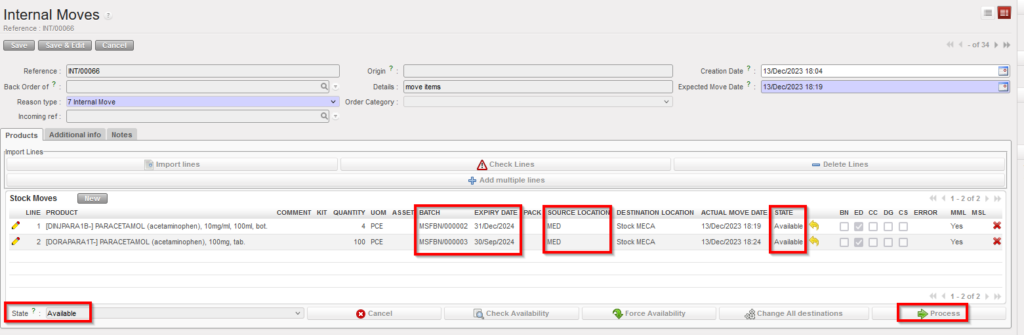 |
| Internal Move ready to be processed |
12. On the “Products to Process” screen, click on the “Copy all” button and on the “Process” button.
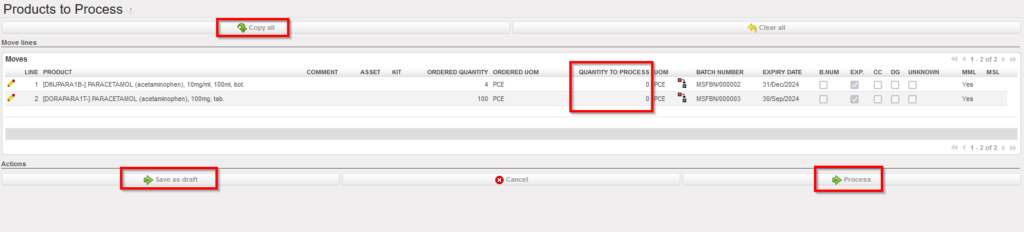 |
| Processing the Internal Move |
Please note that all the encoded information can be saved in case you need to process the INT at a later stage using the “Save as draft” button.
13. The INT is now “Closed” all products/batches have been transferred from source to destination location(s).
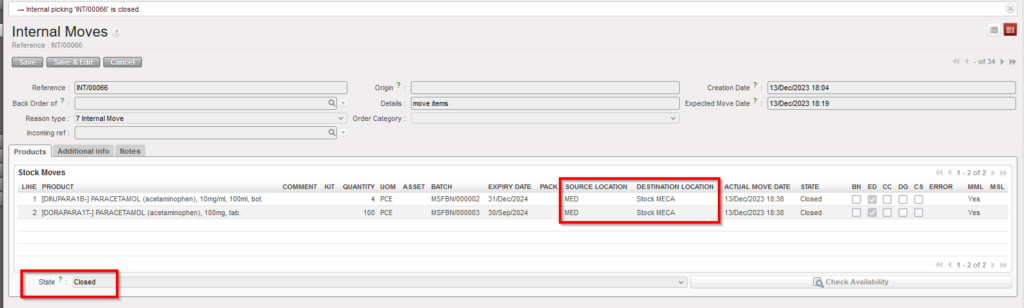 |
| Internal Move in state “Closed” |
Note that INT can be confirmed at line level. However, you should not do this as it will block the process.
Some product lines could be in the state “Not Available” following the availability check. These product lines won’t be transferred to the “Products to Process” screen when you will process the INT.
An INT can be partially processed. In this case, processed product lines will be registered on a new “Closed” INT while product lines left behind (back-order) will stay on the initial INT, ready to be processed. That’s what will happen if some lines of an INT are “Available” while others are “Not Available“.
An INT takes the state “Available” if at least one of its lines is in the state “Available“.
If a product line is “Not Available“, its availability may be forced (and this action can be done at line or header level). However, if you force the availability of a product which is managed by BN/ED, you could be blocked at the next step. If the product is not managed by BN/ED, you will be able to proceed but could create negative stocks. In any case, forcing the availability should only be done with great care.
The button “Change All destinations” which is located at the bottom of the main INT screen (if the INT is “Draft“, ”Not Available” or “Available“) allows changing all the destination locations in one step.
If you want to update an INT-line on a ”Not Available” or “Available” INT, you may only do this if the line has the state “Not Available“. Therefore, if the line is “Available” but you still want to change it, click on the yellow arrow  to cancel the availability of the line and update the line as needed. After this you may recheck its availability.
