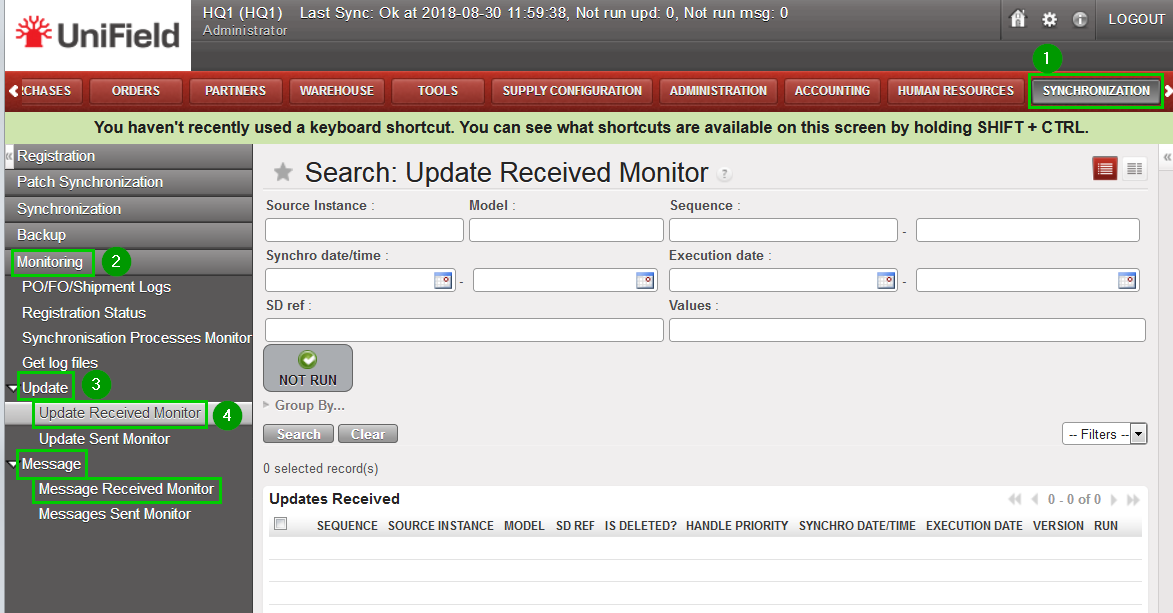
5.5 Monitoring the Data and Messages Exchanged (only at client instance)
Click on menu Synchronization 1, Monitoring 2, Update or Message 3. The sub-menu Update Received 4 displays the data exchanged and Message display the messages exchanged between the current instance and other instances.
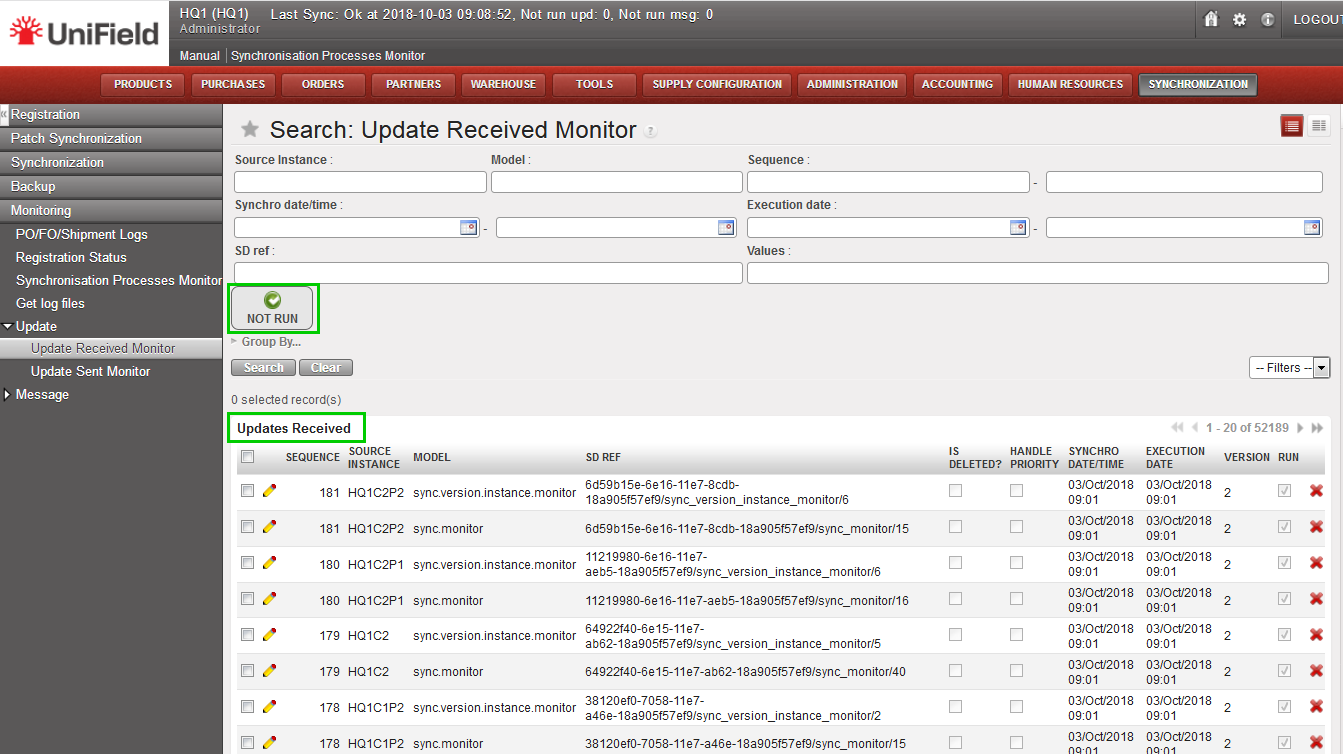
Click/Unclick the Not Run button 1 to show the lines that successfully executed or not; the entries that were exchanged but failed to be executed are highlighted in red.
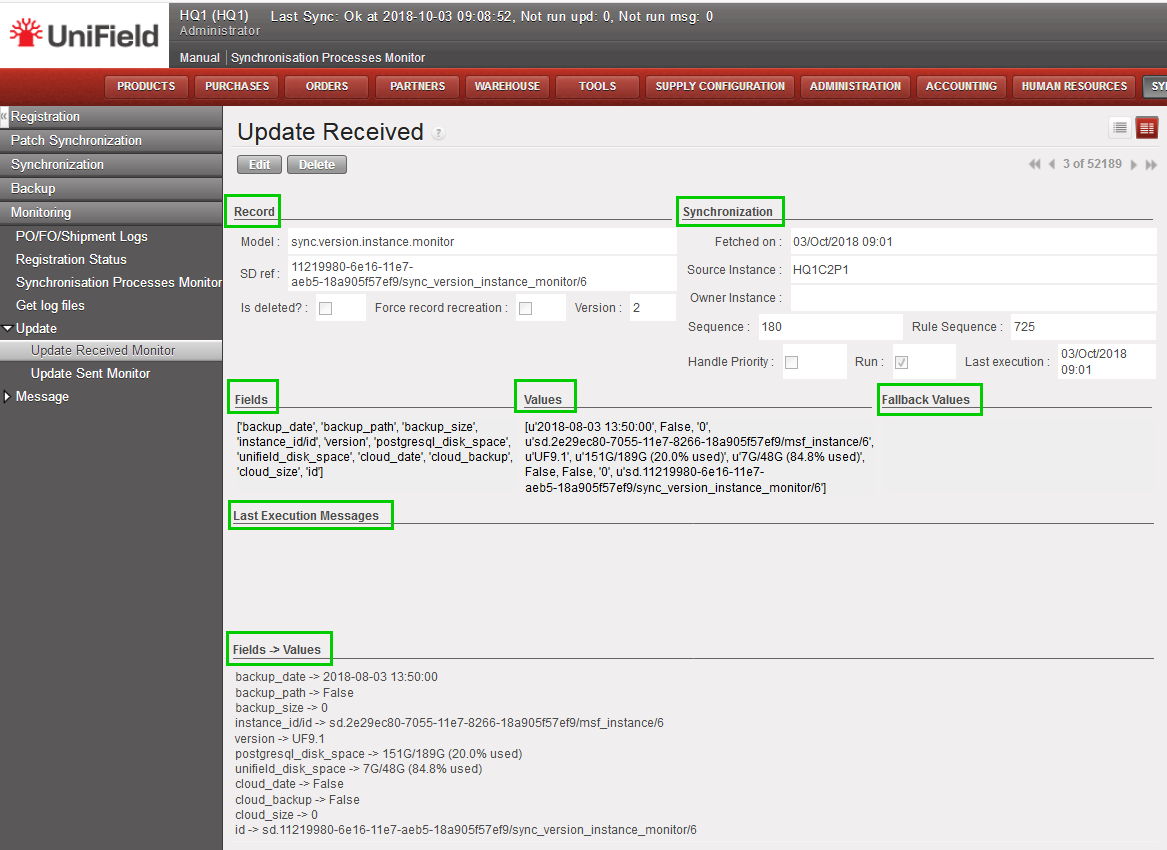
Click on a line of this list to show the content of the data or message exchanged with all relevant information to the run status and error message. More information on what to do with the Not Run lines in the troubleshooting section.
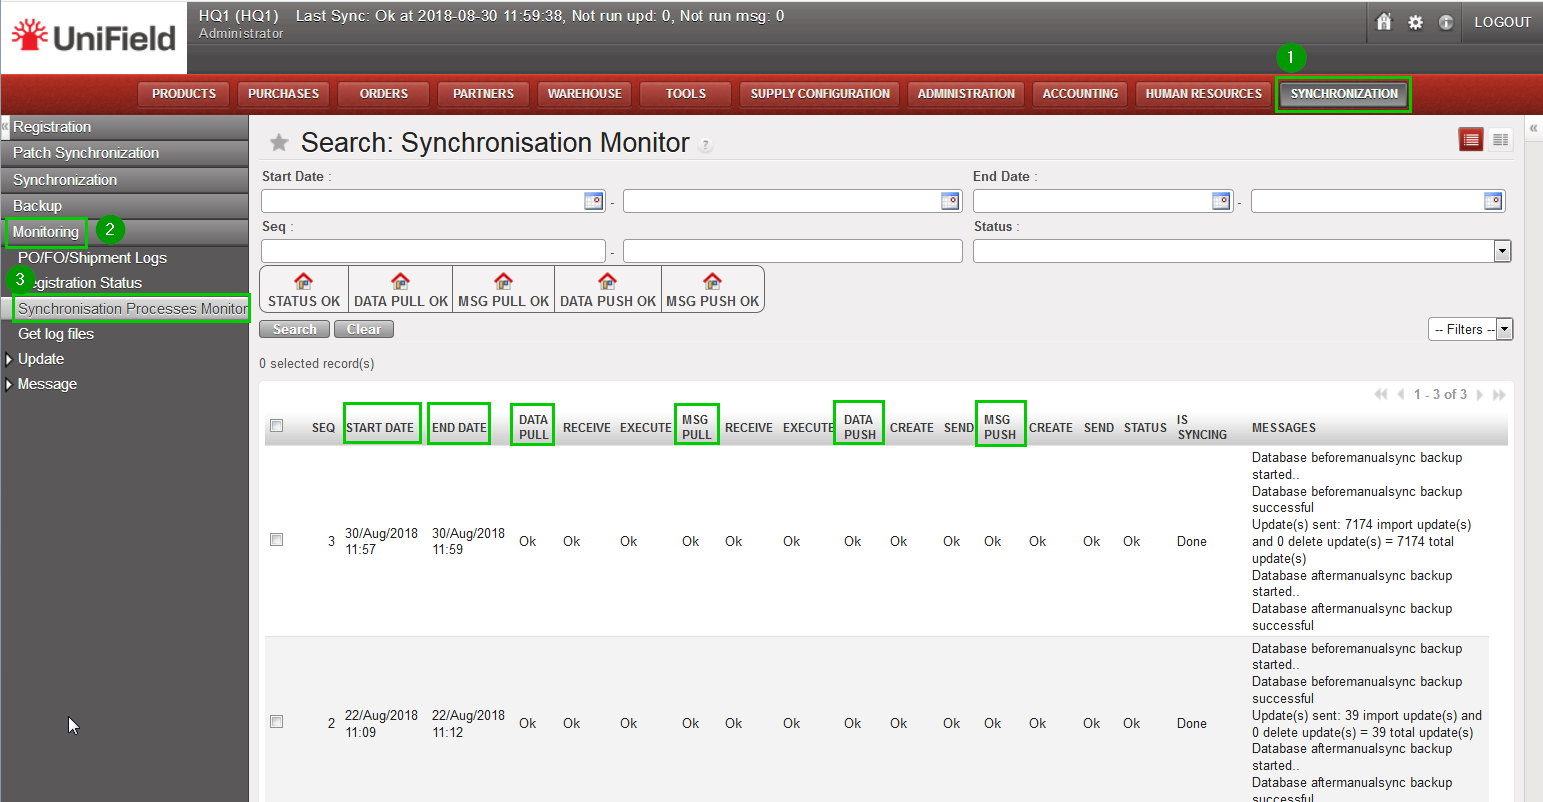
5.4 Synchronization Task Status (only at client instance)
Click menu Synchronization 1, Monitoring2, Synchronisation Processes Monitor3. The Synchronization Processes Monitor shows a list of all synchronization rounds that have been made from this instance with the timestamp of the synchronization tasks. The first line in the list indicates the status of the very last synchronization round. For each synchronization round, there are 4 synchronization tasks and the order of the columns is also the order of executing the tasks: Pull Data, Pull Message, Push Data, Push Message.
There are 3 statuses’: Fail, OK and In Progress:
In Progress: the task is currently running.
OK: the task has been successfully executed.
Fail: some problem occurs during the execution of the task. An error message to explain the failure is also added in the Error Message column.
In some cases, there is another special status: “/” —not applicable . The Error Message is explained in the column. The column “Status” indicates the final result of the synchronization round: one of the 3 possible values will be shown for the single task described above.
5.3 Instance Hierarchy Information (only at sync_server instance)
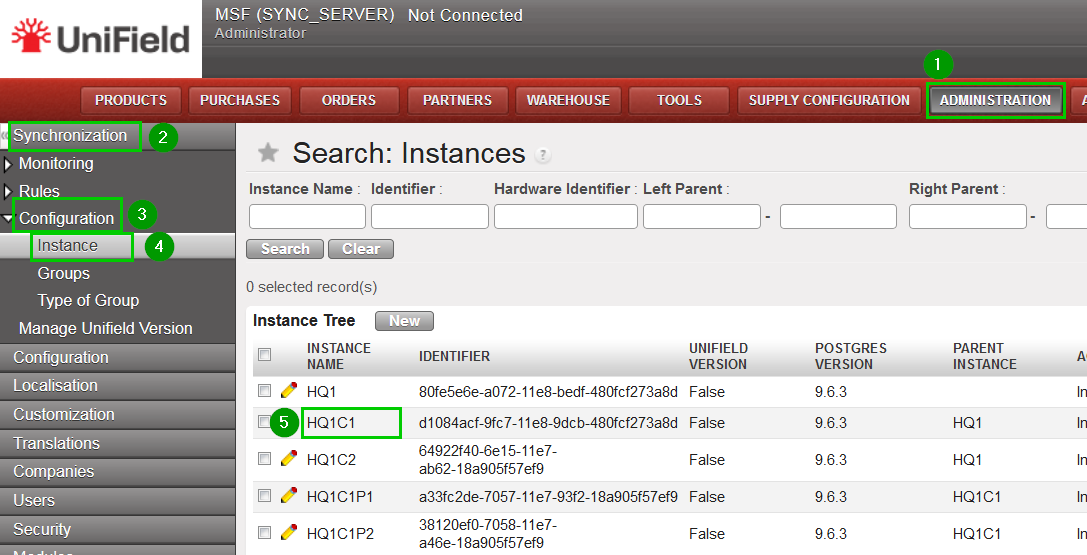
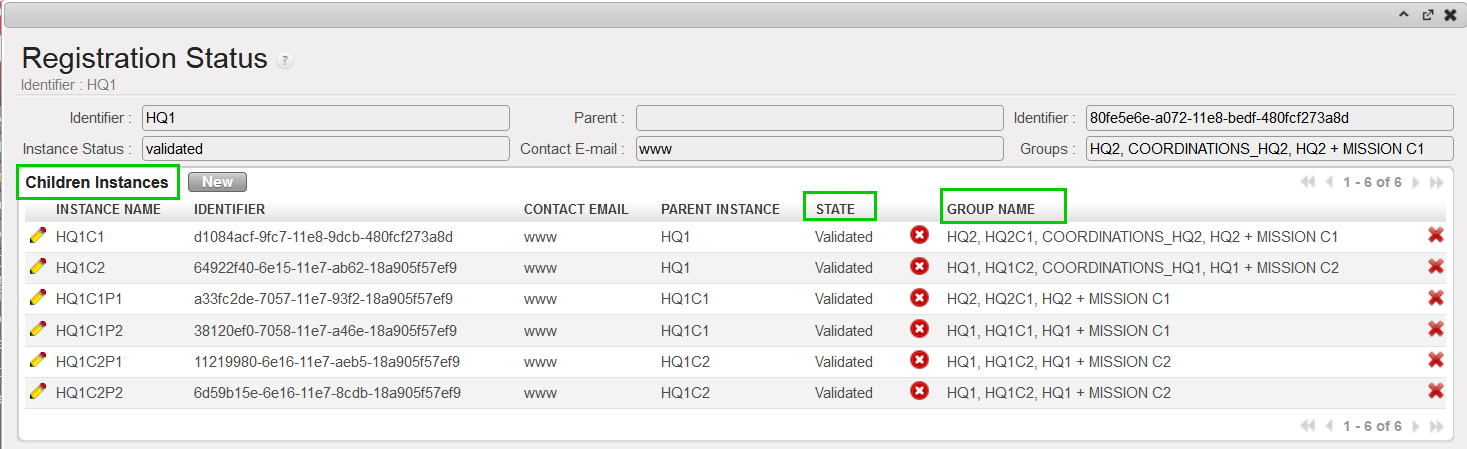
Click on menu Administration 1, Synchronisation 2, Configuration 3, Instance 4. This view shows different information about each instances. To have more detailed information about an instance click on the line of an instance 5
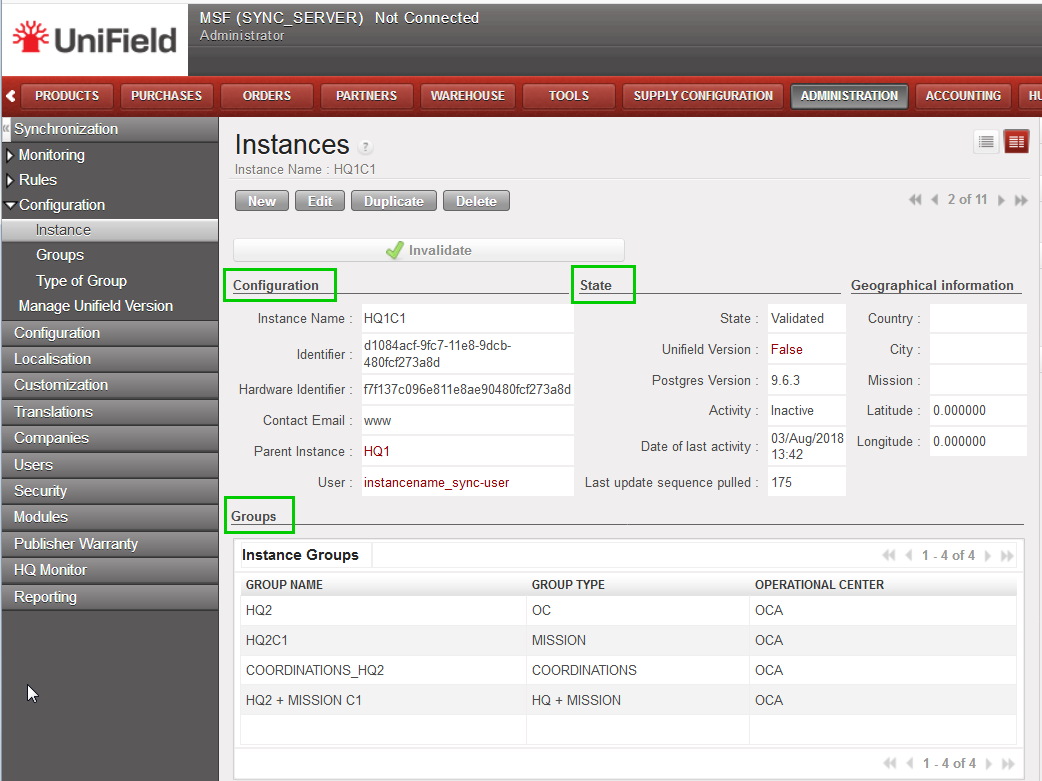
This print screen show you important information about an instance such as its state, parent instance, groups it belongs and children under it.
5.2 Connection Status of an Instance (ready to synchronize)
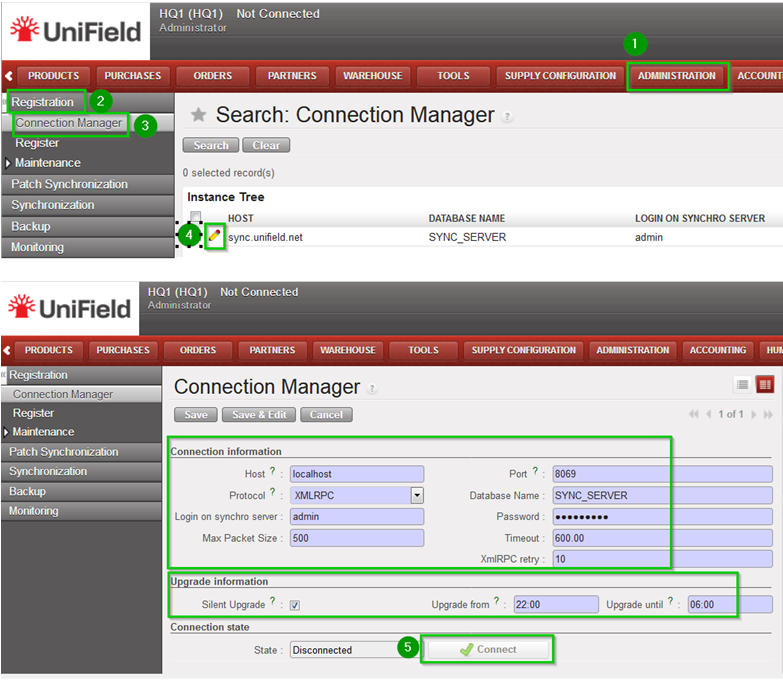
Click on menu Synchronization 1, Registration 2, Connection Manager 3 Click on the edit button 4 to see the details Among others you can see the connection status (connected, disconnected) and a button to allow connecting to or disconnecting from the server. You also have the possibility to enable the Silent Upgrade option to allow patching during a slot time defined.
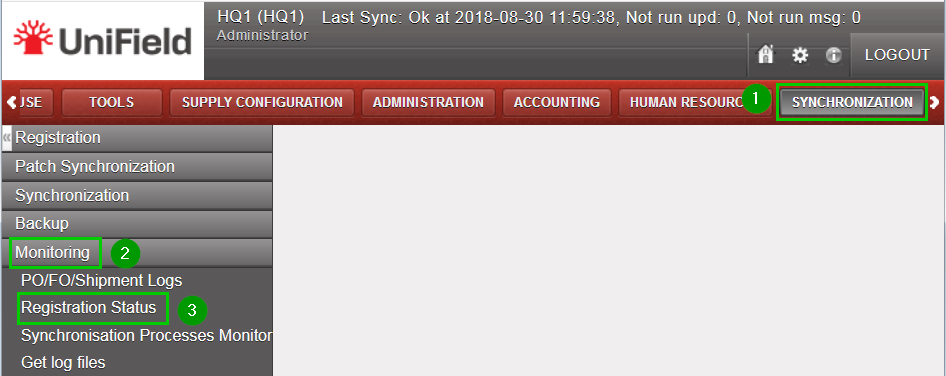
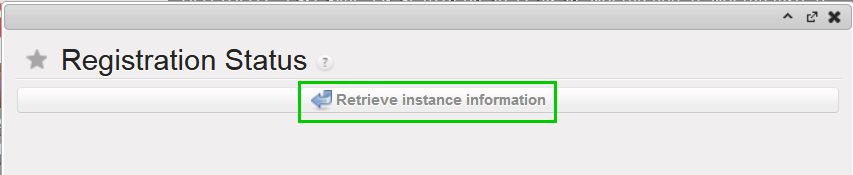
Click on menu Synchronization 1, Monitoring2, Registration Status 3
A new popup appears, click on Retrieve instance information button.
The result shows the registration status of the instance. It includes the validation status, the groups that the instance belongs to, the children instances, etc.
By default groups synchronise top-down from the HQ to all its children instances. This is only configurable at HQ level and restricted to the admin user.
Click on Menu Administration 1, Users 2, Groups 3. Click on the edit button icon 4 next to the group.
Click on the drop down menu button named Levels 1. Select the level 2 the group would synchronise to. In this example we choose Coordination and Click on Save 3. In our example this grop will only synchronise down to the coordination level but not at project level
This group will synchronise down only to Coordination level at the next synchronisation.
3.3 How to Remove the “synchronize” Option of a User (only at HQ)
Depending your needs, you have two different option to remove the synchronize option as shown below.
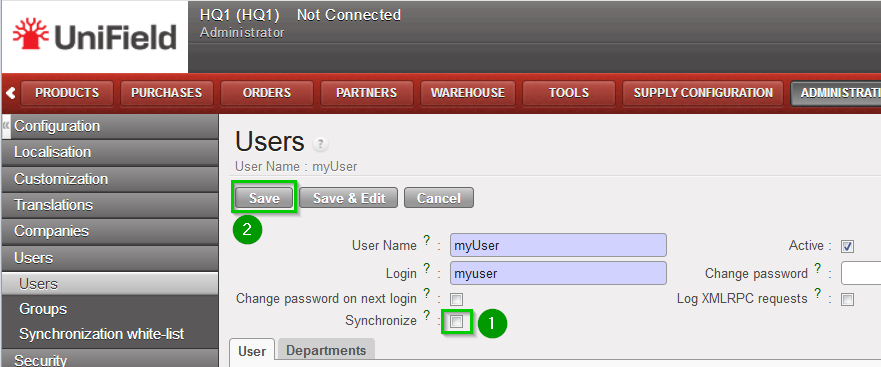
Option 1: On Menu Administration, Users, Users click on the edit button icon next to the user. Un-tick the box Synchronize and click on Save. The user won’t synchronise anymore until you tick the box again.
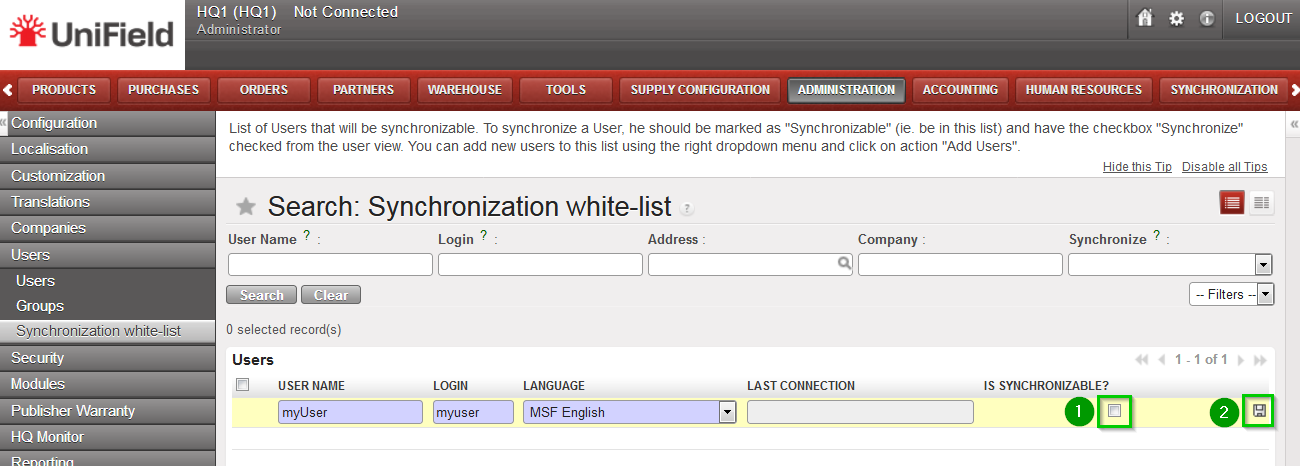
Option 2: On Menu Administration, Users, Synchronisation white-list. Click on the edit icon next to the user. Un-tick the box 1 and click on the Save icon 2.
In this way the user is removed from the white-list. The tick box option Synchronise on its user’s profile under Administration, Users, Users will disappear.
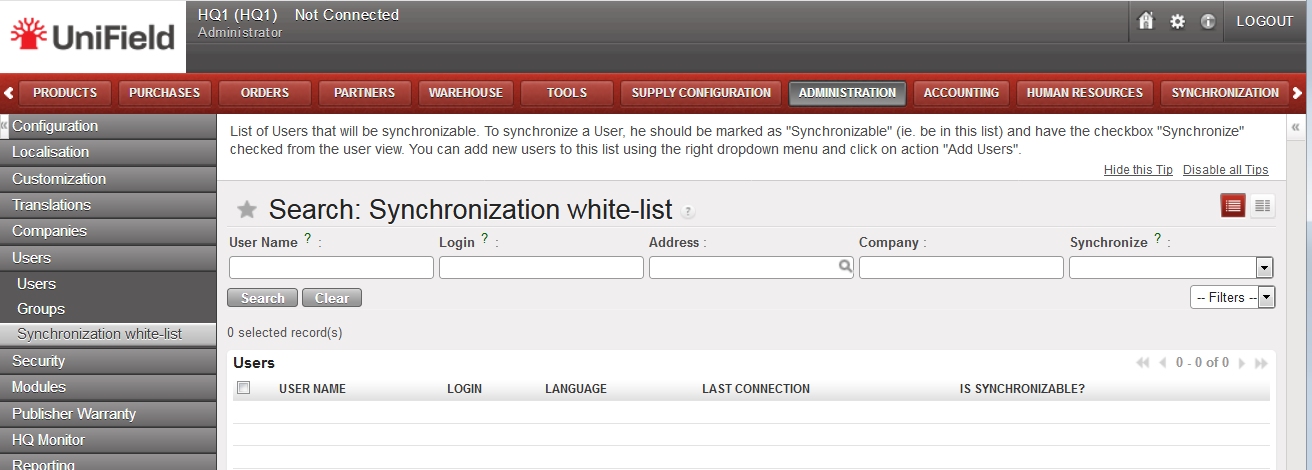
This feature allows you to synchronise a user from the HQ to all its children instances. It is only available at the HQ level and restricted to the “admin” user. Please note that the user only sync from top to down. As user account management is sensitive and to prevent a user to be synchronised wrongly, there is a need to perform a two-step process for the configuration of the user. First step the user will be added into a white-list. The checkbox “Synchronise” would be available in its “User’s details” and would be enabled. If the user is not in the white-list the user won’t be able to synchronise. Second step there is a need to tick the checkbox “Synchronise” [2] in the “User’s details” and Save it.
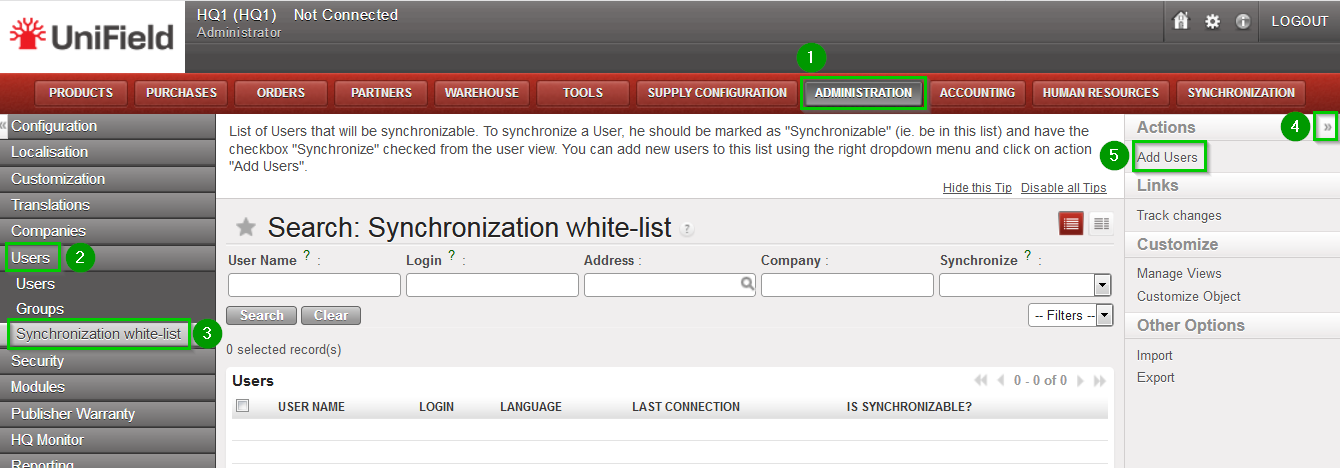
First step Log in your HQ. Click on Menu Administration 1, Users 2, Synchronisation white-list 3. Click on the double Arrow icon 4 in the right panel Under Actions click on Add Users 5
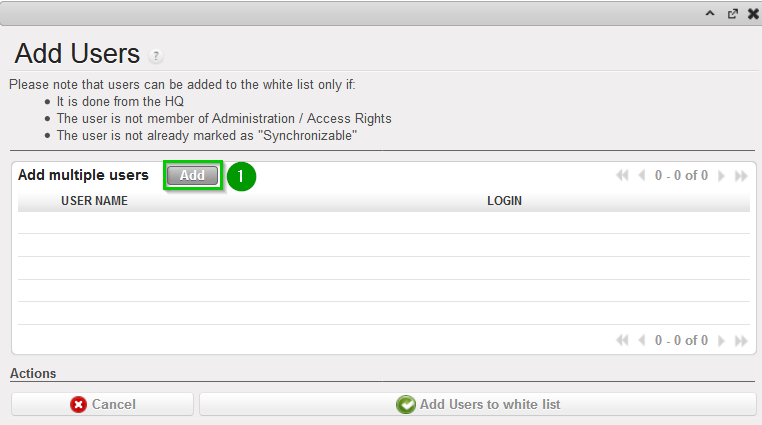
The following pop up window opens. Click on Add 1.
The following window will open Select the user to synchronise by ticking the box 1.You may select as many as you would like. Click on Select 2
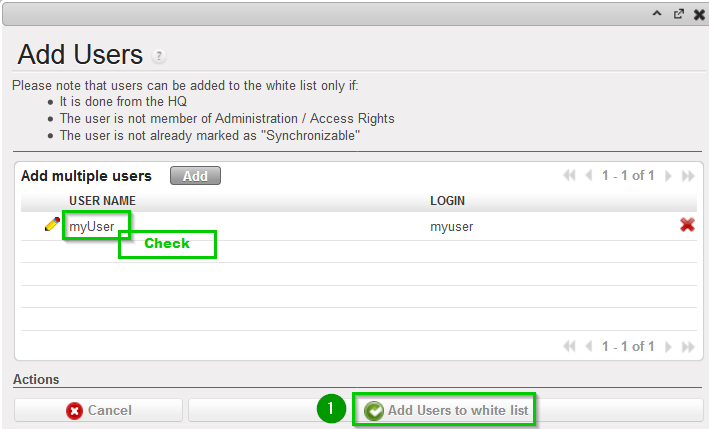
Review that the selected users appear in the list as shown (Check). Click on Add users to white-list 2. Now your user has the option to be synchronised. However you have to enable manually this option.
Second step Click on Menu Administration 1, Users 2, Users 3 Click on the edit button icon next to the user you just added in the white-list 4.
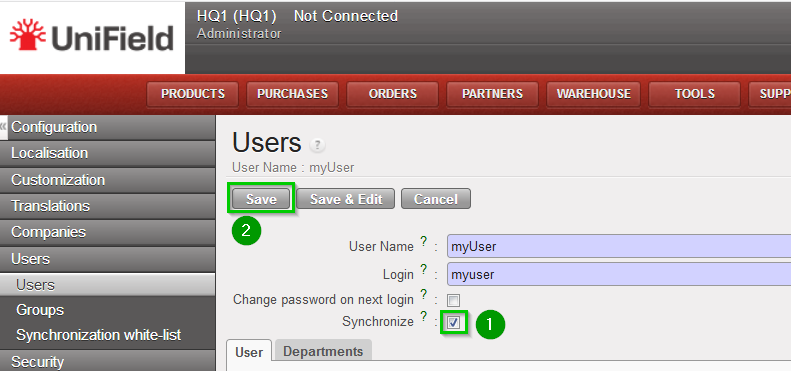
A new window opens with the details of the user. Tick the box Synchronise 1 and click on Save 2 The user will now synchronise to the other instances during the next synchronisation.
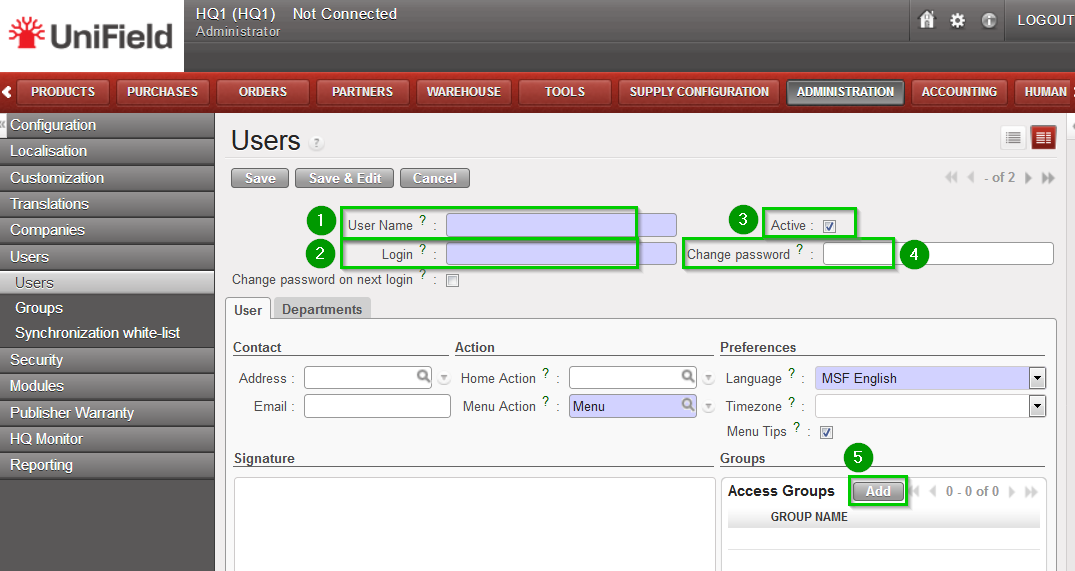
Login your UniField instance with the user admin Click on Administration 1, Users 2, Users 3. To create a new user click on New 4
Fill in the following fields:
User name 1
Login 2
Active 3: box is ticked
Change password 4
Access Groups: click on Add 5 to define the user rights by indicating which groups he/she belongs to.
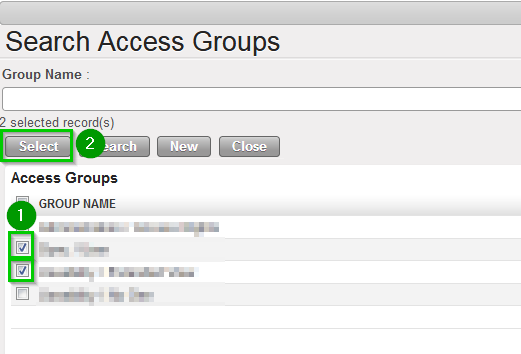
A pop up window appears. Add the groups the user belongs to by ticking the boxes 1 in front of them and click on Select 2 when you are done.
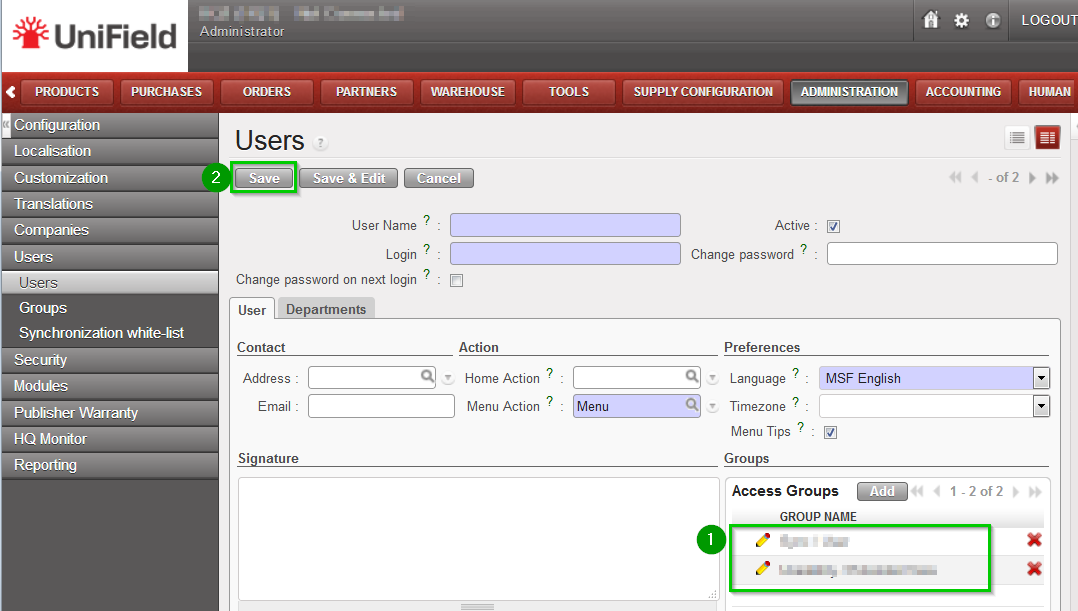
The groups have now been added 1 Click on Save 2
We use cookies to ensure that we give you the best experience on our website. If you continue to use this site we will assume that you are happy with it.