I. LU-SU1101: How to create or convert to EPREP Location
For creating new configurable location with “EPREP” type, it will be flagged automatically as “EPREP” type, and automatic check will be made to the name to contain the word “Eprep” in Eng / Fr. in the first step “Select the Location usage“
“Location usage” must be “EPREP” in creating new EPREP Location, and the “Location name” should include the word “EPREP”.
Supply Configuration>Warehouse configuration>Regular Warehouse Management>Create new stock location
For converting per-existing intermediate location to be “EPREP” type, according to user rights via the menu:
Supply Configuration>Warehouse configuration>Regular Warehouse Management>Convert Intermediate Stock to Eprep
Once a location has been created as Eprep type or converted to it, this cannot be reversed. The Eprep type of location now is reflected as a sub type of location under Configurable Locations in the warehouse structure, and appears in pink. MSR report has an additional column which shows Eprep stocks qties.
D. How to add one or multiple Analytical Distribution (AD) to Field Orders Line/lines
This functionality enables users to add or update the Analytical distributions (ADs), (Cost Centers and Destinations) the Draft FO lines, users have 3 options to use for adding or updating the ADs:
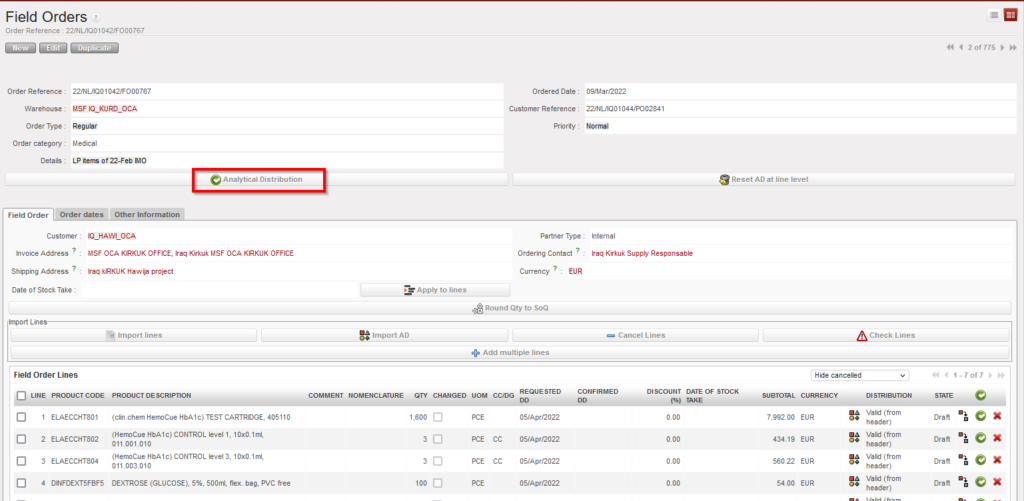
1- Adding AD/ADs at the header level:
Go to:Orders > Field Order > Analytical Distribution
FO AD at header level
by clicking on the “Analytical distribution”, new screen will be opened, and then by clicking on “New” user can add one AD or more to be applied on all FO lines same way.
2- Adding AD/ADs at line level manually:
User can add the AD to the line manually by clicking on AD icon on the line level, new screen will be opened, and then by clicking on “New” user can add the AD to the line:
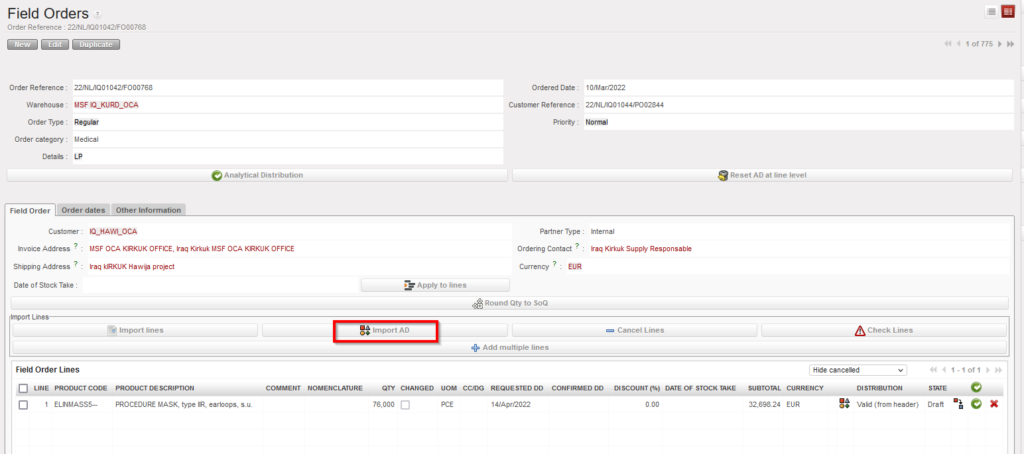
3- Adding AD/ADs by importing
This option makes it easier for users to add one or more ADs to a single line or to add different ADs to multiple lines in the same Draft FO. Unlike with the first option (adding AD at header level), this option can be used to add different ADs to different lines,
This can be done by clicking the “Import AD” button, exporting the template shown from the page that pops up and entering the Cost Centre, Destination and Percentage information for each line in the exported document. If a line has multiple ADs, the values in these three columns must be separated by semicolon (;).
If a line has been split and AD information is entered in the import document, the values entered in the first line will be used to fill all lines split from the same line number.
In the import file, only the AD values will be imported. No other information can be modified or added via the import file. Percentages must add up to “100%” and the total number of semicolons in the Percentage, Cost Center and Destination columns must be the same. The system will check that Line number and Product Code match those of onscreen PO.
If there is already an AD added in onscreen FO, the exported template will show entered values. It is possible to remove (delete) AD values that were already entered on screen by importing a file where the line’s AD values are blank. At import, there is a check that AD values exist, but the main/secondary check will remain after import, when line/FO is validated.
R. How to Cancel one specific Purchase Order line or multiple lines.
To cancel a specific line of a PO, click on the red cross (cancel) located on the right of the line you want to cancel and confirm the action on the pop-up screen
Cancelling a PO-line
Confirming the cancellation of a PO-line
The cancelled PO-line switches to the state “Cancelled“. Note that you have to use the filter located on the top of the “Linestable” to see the cancelled line.
Cancelled PO-line
To cancel multiple lines of the PO, select the lines you want to cancel from the right side of the lines, then click on “Cancel Lines”, and confirm the action on the pop-up screen
Cancelled PO LinesConfirm the Cancellation of the PO Lines
The cancelled PO-lines switches to the state “Cancelled“. Note that you have to use the filter located on the top of the “Linestable” to see the cancelled lines.
Cancelled PO Lines
A validated PO Lines can also be cancelled one by one or as a whole PO document, except if the PO supplier is an internal partner supplier (another instance). In this case, the cancel button won’t be available at the bottom of the PO screen and the cancellation should be done on the supplier instance.
It is possible to cancel / C&R multiple (Draft/validated) lines, in Draft-p / Validated/ Validated-P POs with supplier type ESC or external, (It is not possible to Cancel / C&R validated lines in PO with Internal/Intermission/Intersection type suppliers if they are beyond “Draft” status Because if PO lines are validated they may have been synced and should not be cancelled or C&R by the requesting instance.
5.5.2 Statuses of Field Orders (see also process flow document + Table of document and product line status)
02.Dec.25
(US-14296) Intersection flows – unblock the restrictions on local code
5. Warehouse
39.0
5.17 LU-SU4303: Management of Expiry Dates B. Products likely to expire
02.Dec.25
(US-14001) Products Likely to Expire Report – AMC Calculation Revision
4. Procurement
39.0
4.8 LU-SU3203: Tenders (CFTs) and Requests for Quotations (RFQs) How to update a sent RFQ via an import file
02.Dec.25
(US-12542) RFQ – new export / import to include header on excel file export
UF 38.0
File
Version
LU
Date
Modifications
3. Product
38.0
3.2 LU-SU2101: General Product Management: H. How to merge 2 Local products (Coordination only)
12.Sept.25
(US-13333) Merge 2 Local codes
3. Product
38.0
3.4 LU-SU2103: Products in Supplier Catalogues: E. How to configure auto-deletion of ESC supplier catalogue
12.Sept.25
(US-13069) a new feature to delete ESC supplier catalogues with validity dates older than 6 month
5. Warehouse
38.0
5.16 LU-SU4302: Stock Inventory Reports: J. Export Stock and pipe Report (HQ Only)
12.Sept.25
(US-13189) HQ tools improvements on Export Stock and pipe Report.
Digital Signature
38.0
Digital signature
12.Sept.25
(US-12722) E-Validation : drafting signature
5. Warehouse
38.0
5.2 LU-SU4101: Incoming Shipments: G. How to import Vertical Integration files on Incoming Shipments; 5.5 LU-SU4104: Shipment: C. HOW TO RETURN PARCELS FROM A “Ready to ship” shipment; D. HOW TO RETURN PARCELS TO STOCK FROM A “Draft” shipment
12.Sept.25
(US-9592) New Pack ID can be used in system
UF 37.0
File
Version
LU
Date
Modifications
4. Procurement
37.0
4.3 LU-SU3102: Orders Sourcing Tool (OST): B. How to source individually an IR/ FO line to a Purchase Order
03.Jun.25
(US-13952, US-13741) Supplier rankings information displayed in PMD / OST
4. Procurement
37.0
4.2 LU-SU3101: Internal Requests (IRs) B. How to create an Internal Request
03.Jun.25
(US-13308) IR: Change name of “Request Date” Field
3. Products
37.0
3.7 Products Reports: A. Report for product inconsistencies – Batch/Expiry Date D. Report – Product Status Inconsistencies
03.Jun.25
(US-11801) Modification of Product Inconsistency report and Product Status inconsistency report
5. Warehouse
37.0
5.17 LU-SU4303: Management of Expiry Dates B. PRODUCTS LIKELY TO EXPIRE
03.Jun.25
(US-11802) Change columns in the report ” Product likely to expired”
5. Warehouse
37.0
5.10 LU-SU4203: Consumption Reports E. HISTORICAL CONSUMPTION REPORTS
03.Jun.25
(US-13190) Historical Consumption Report – Include Customer Type Partners in RR-AMC
UF 36.0
File
Version
LU
Date
Modifications
5. Warehouse
36.0
5.2 LU-SU4101: Incoming Shipments D. How to create an Incoming Shipment from scratch
17.Mar.25
(US-13862, US-13476) New warning when document Category inconsistent with the product in document created from scratch ( IN/OUT/INT)
5. Warehouse
36.0
5.8 LU-SU4201: Internal Moves C. How to create and process an internal move
17.Mar.25
(US-13862, US-13476) New warning when document Category inconsistent with the product in document created from scratch ( IN/OUT/INT)
5. Warehouse
36.0
5.6 LU-SU4105: Delivery Orders C. How to create a delivery order from scratch.
17.Mar.25
(US-13862, US-13476) New warning when document Category inconsistent with the product in document created from scratch ( IN/OUT/INT)
5. Warehouse
36.0
5.6 LU-SU4105: Delivery Orders E. How to export an excel delivery order file
17.Mar.25
(US-13836) New function Export/Import for Delivery order (OUT)
5. Warehouse
36.0
5.6 LU-SU4105: Delivery Orders E. How to import an excel delivery order file
17.Mar.25
(US-13836) New function Export/Import for Delivery order (OUT)
5. Warehouse
36.0
5.6 LU-SU4105: Delivery Orders B. How to convert a picking ticket into a delivery order (simple out delivery / out); B.1. How to convert a delivery order (simple out delivery / out) into a picking ticket
17.Mar.25
(US-13836) New function Export/Import for Delivery order (OUT)
5. Warehouse
36.0
5.13 LU-SU4206: Inventories C. How to create a physical inventory
17.Mar.25
(US-13683) Physical inventory: Explicit message if the Unit of Measure (UoM) or Expiry Date is incorrect at the importation of the Counting Sheet.
UF 35.0
File
Version
LU
Date
Modifications
3. Products
35.0
LU-SU2103: Products in Supplier Catalogues. B.How to create a supplier product catalogue price list C. How to update a supplier product catalogue price list.
20.Dec.24
(US-12228, US-12912, US-13640) Possibility to add Supplier ranking directly in Catalogue + Track changes added
3.1 Products in UniField
35.0
A. Product in Unifield
20.Dec.24
(US-12228, US-12912, US-13640) Possibility to add Supplier ranking directly in Catalogue + Track changes added
4. Procurement
35.0
4.2 LU-SU3101: Internal Requests (IRs). D.How to import lines on an Internal Request. E. How to export an Internal Request.
20.Dec.24
(US-12415) New IR export/import template for Products in Product List
4. Procurement
35.0
4.4 LU-SU3103: Field Orders (FOs) L. How to follow-up Field Orders
20.Dec.24
(US-12564) Export FO Follow-up: Addition of line comment
5. Warehouse
35.0
5.6 LU-SU4105: Delivery Orders D. How to process a delivery order
The decision and process to destroy any product should be in adherence with your OC procedures. In UniField, the destruction process will usually be done in two steps. The first step will move the goods to quarantine. The second step will move the goods from quarantine to the “Destruction” location.
One of the likely triggers for this will be when a supplier claim has been created, and the decision has been taken to scrap the product. See previous section and LU on claims for details.
If the product being scrapped is not linked to any claim, it will still have to be moved out of the internal warehouse location to quarantine. This will be done through an Internal Move (INT) as explained in the previous section.
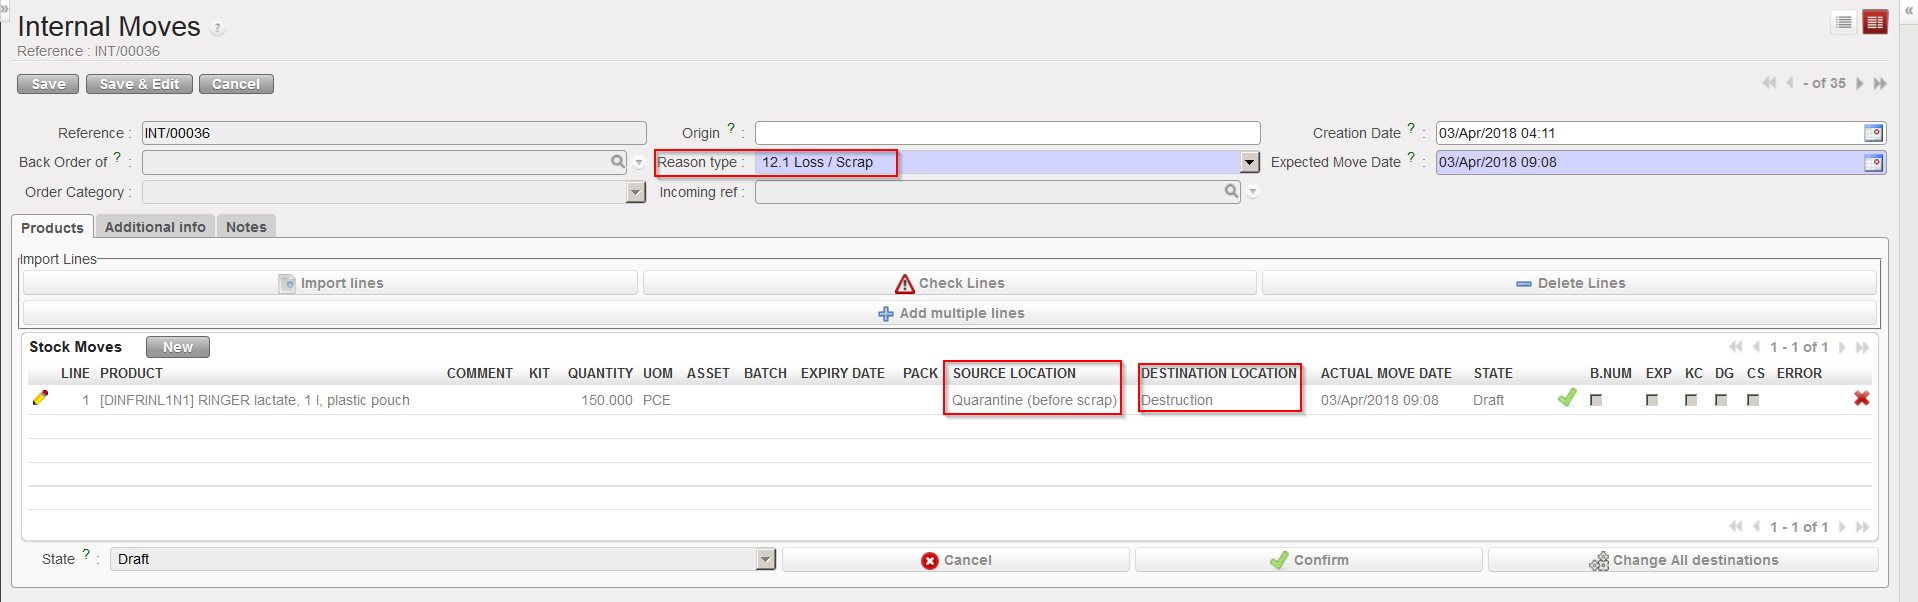
In order to complete the process of scrapping a product (second step), it is necessary to create an Internal Move to move the goods from quarantine to the “Destruction” location. Again, an appropriate “Reason type” should be selected on the INT.
Internal Move to destroy products
Note that it is possible to skip the first step and directly destroy products (i.e. moving them from stock to destruction via an INT) but this is not an advised process.
This may happen if you receive/have received products on which you have doubts. In this case you will most probably create a claim (see specific LU on claims above).
Claims with type “Move to Quarantine” will move the goods to the “Quarantine (analyze)” location. Claims with type “Scrap” will move the goods to the “Expired/ Damaged /For Scrap” location. Note that if a claim is created from scratch you will be able to add an event with type “Scrap” on this claim. When this event will be processed, goods will be moved to the “Expired/ Damaged /For Scrap” location.
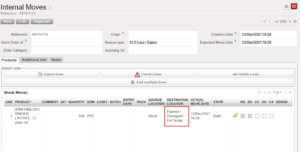
Another way to move goods to the quarantine location is via Internal Moves. This will be done when the quarantine is not related to a claim. Make sure to use the appropriate “Reason type” when you create the INT. As destination location you may choose between “Quarantine (analyze)” and “Expired/ Damaged /For Scrap)”.
Internal Move to isolate products in quarantine
Note that Internal Moves will also be used to transfer goods from Quarantine back to another location if you realize that these goods can actually be used.
They will also be used to destroy the goods as explained in the next section.
If you face problems with products, you can isolate them in quarantine or destroy them. Both options are possible in UniField where Quarantine and Destruction are defined as locations.
Quarantine is a (view) location which is part of the instance full view and this is where stock can be moved while awaiting a decision. This means that these products will not be seen as available for dispatch/use. The two types of quarantine are 1) for analysis and 2) before scrap.
In UniField, they are identified by 2 locations which are named “Quarantine (analyze)” and “Expired/ Damaged /For Scrap“. Both of them are located under the “Quarantine / For Scrap”. ” location view. The first is used when some time is needed to analyze and receive results for products before deciding if they are fit for use (commonly this will be used to analyze drugs). The second, “Expired/ Damaged /For Scrap“, is where goods will be moved while awaiting authorization that they can be disposed of or destroyed.
The “Destruction” location is a virtual location where goods will be moved once they are destroyed.
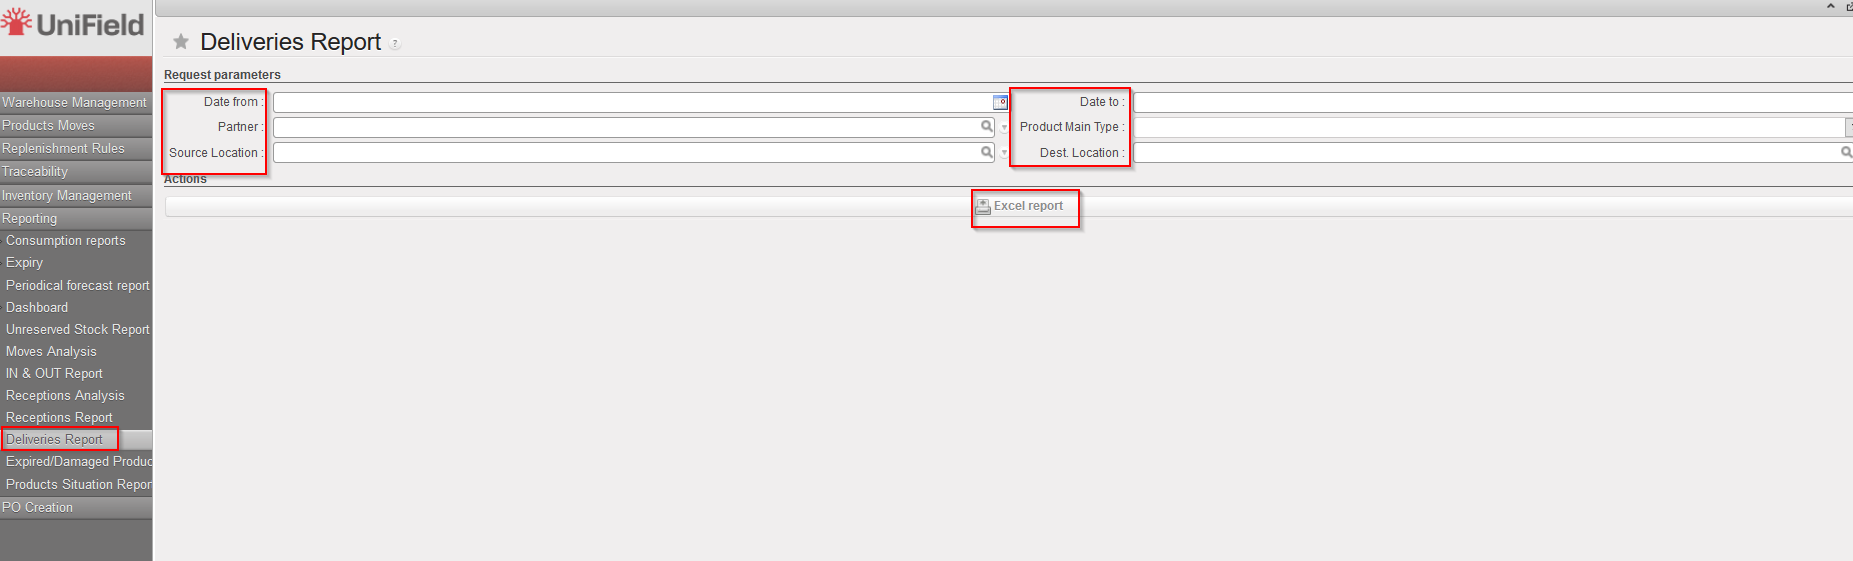
Following the development of the “Receptions report” (see section above), this new report mirrors this latest report by gathering all together all the major information regarding processed deliveries.
The report should only export lines from OUT(and OUT-CONDO) which are in the state Closed or Delivered and from SHIP which are in the state Dispatched or Received.
Go to:Warehouse / Reporting / Deliveries Report
Select any filter you need among the following: Date from; Date to; Partner; Source location; Product Main Type and/or Destination Location.
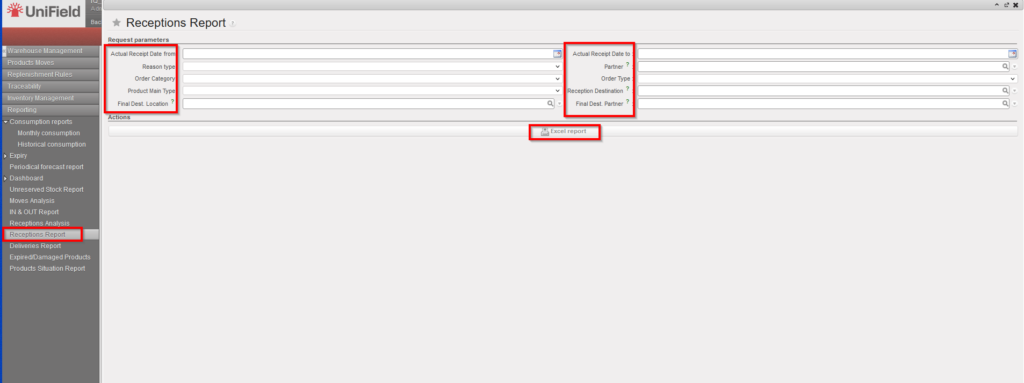
This feature is one of the latest development that enables to get the receptions information more easily thanks to the different filters and direct information.
Go to:Warehouse / Reporting / Receptions Report
Select any filter you need among the following: Actual Receipt Date from; Actual Receipt Date to; Reason type; Partner; Order Category; Order Type; Product Main Type, , Final Dest. Location, Final Dest. Partner.
Click on the “Excel report” button.
Receptions Report
Receptions Report – Excel Export
In case the user change the Destination location to “Ext CU” in the “IN” from the original location in the “IR”, this report will not reflect the new destination location.
IR > PO > IN > Ext CU which is changed is not reflected.
In case the user change the Destination location ” INT CU ” in the “IN” from the original location in the “IR”, this report will reflect the new destination location.
IR > PO > In > INT CU which is changed is reflected.
In case the user change the Destination location TO “Stock” in the “IN” from the original location in the “IR”, this report will reflect the new destination location
FO > PO > IN where destination of IN changed to Stock is reflected.
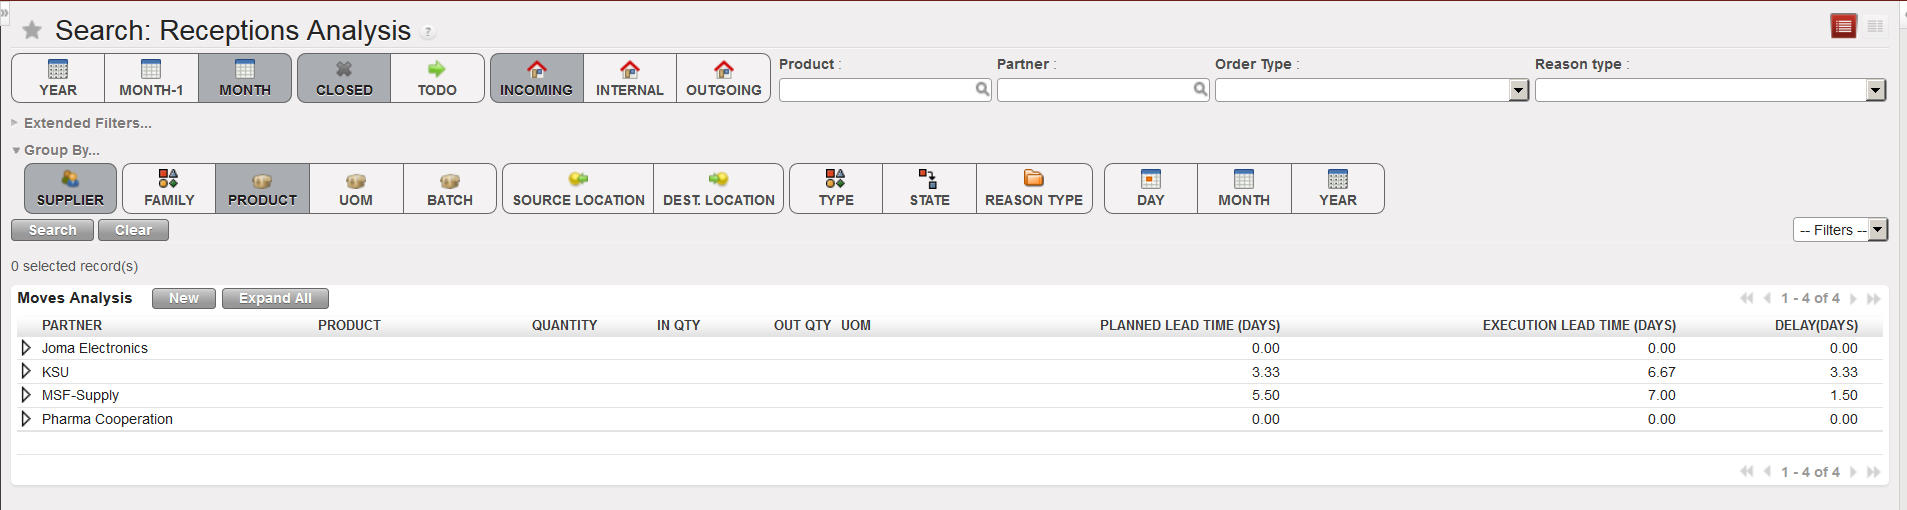
This functionality is similar to the “Moves Analysis” but focuses on Incoming Shipments.
Go to:Warehouse / Reporting / Receptions Analysis
Receptions Analysis
Clear the current filters by clicking on the “Clear” button
Use filters and “Groupby” options to select which Incoming Shipments you want to select and define how you want organize them.
Click on the “Search” button.
We use cookies to ensure that we give you the best experience on our website. If you continue to use this site we will assume that you are happy with it.