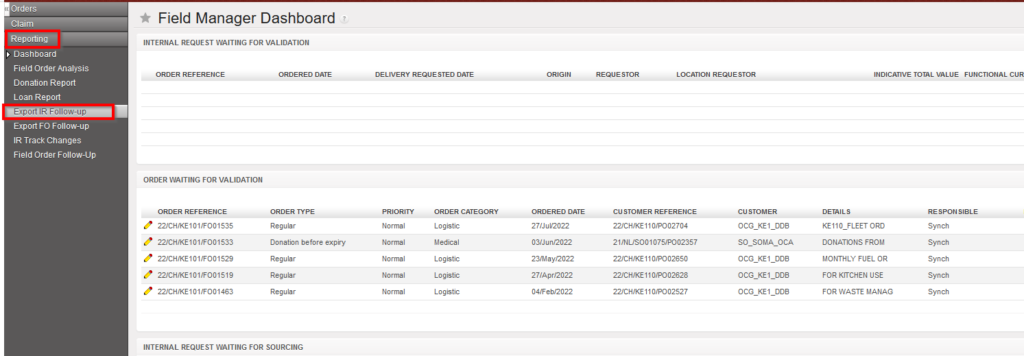
Go to: Orders / Orders / Reporting / Export IR Follow-up
Click on the “Export IR Follow-up” sub menu.
Export IR Follow-up
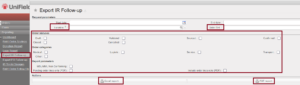
2. A pop up with several filtering option is displayed. User can choose to filter by “Location” (i.e.: Location requestor), “Order reference”, Status of document, order categories and report parameters.
Export IR Follow-up
3. The report can be exported in Excel or PDF via the corresponding buttons.
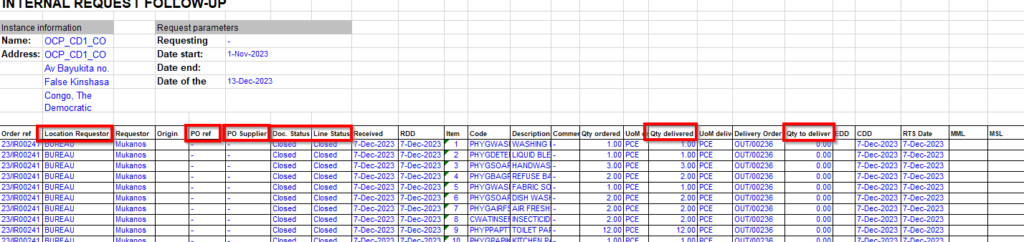
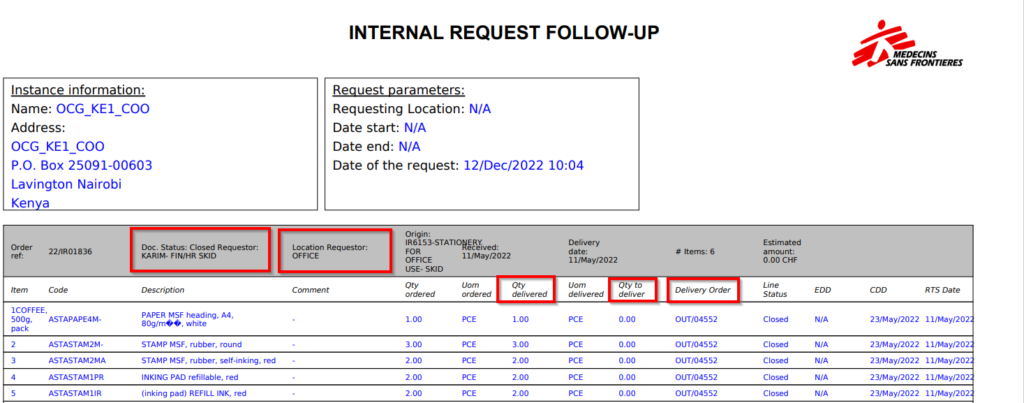
This report provides valuable information such as Document and line status; Qty ordered vs Qt delivered; Reference of sourced documents (PO; OUT)…
Export IR Follow-up to XLS
Export IR Follow-up to PDF
Note that the “Sourcing Documents” tab available on the IR will display the references of the related document following the sourcing of the IR.
Following a development done on UF6, there are now 2 options to follow up on IR, the historical one is the one from the right action menu named “Order follow up” and the other one which offers more filtering options and details is called “IR follow up per location” and can be found on the main left menu.
I. How to cancel a line or Multiple lines from an Internal Request.
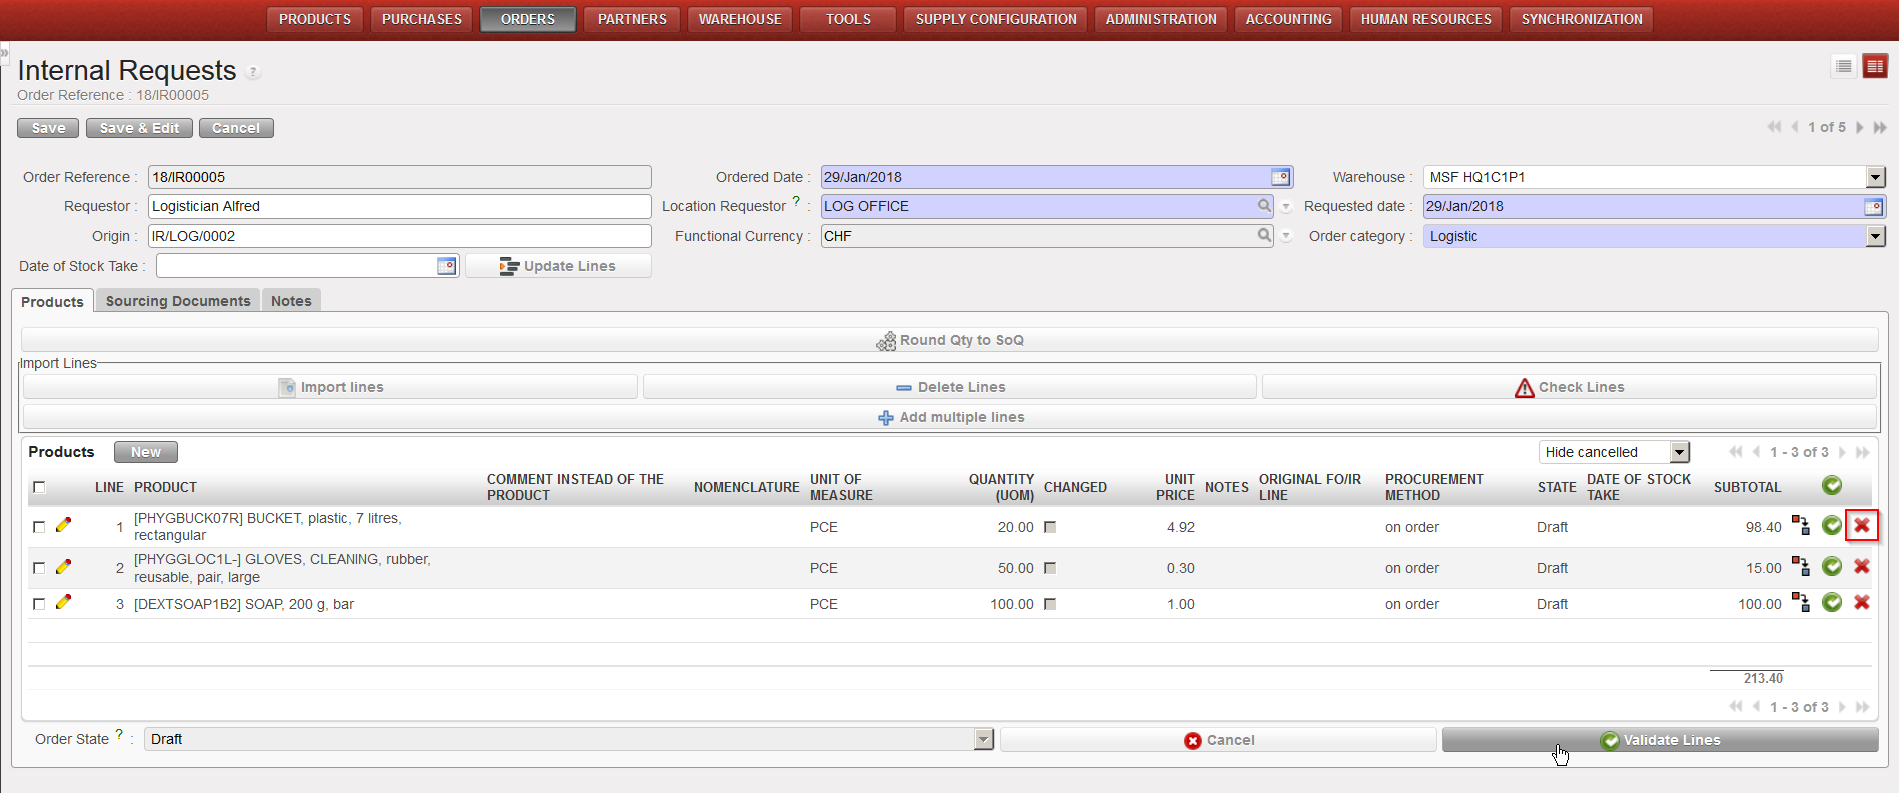
At the right of each line of an IR, a red cross is available. Clicking this red cross will cancel the corresponding line.
cancelling an IR line
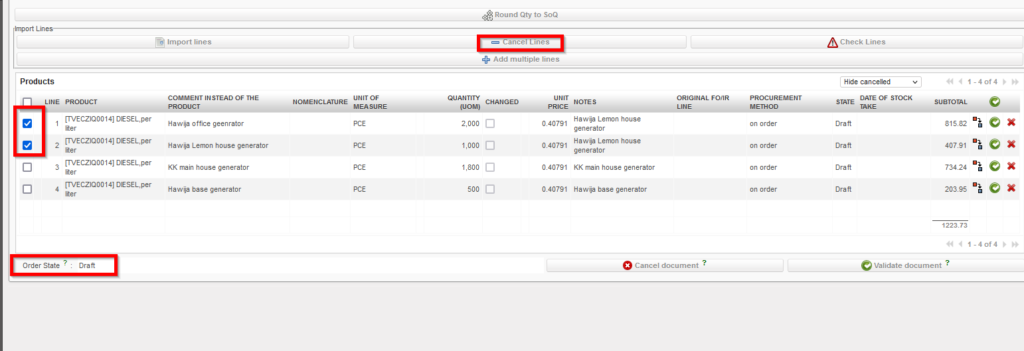
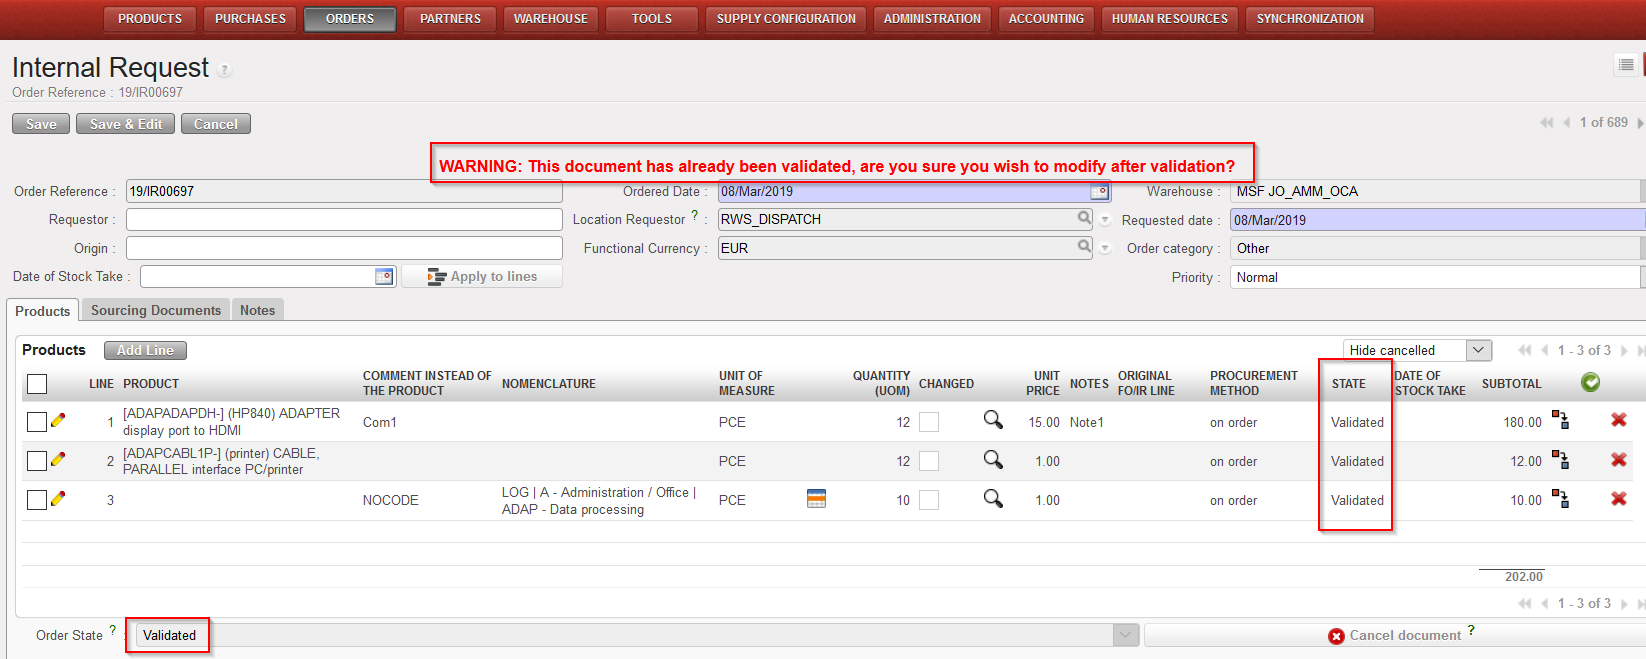
Only “Draft” or “Validated” lines can be “cancelled”. If you wish to cancel several lines at once, you may select them via the check boxes available on the left of the lines and click on the button “Cancel Lines” at the top of the Products table.
cancelling IR lines
Note that draft and validated IR-lines can be cancelled in Draft-p / Validated/ Validated-P IR. but an IR-line which has already been sourced cannot. At this stage you will have to do the cancellation on the next document (e.g. PO or OUT).
H. How to cancel or delete a whole Internal Request.
Internal Requests can be cancelled by clicking on the “Cancel document” button (with the red cross) in the lower part of the order.
Note that the “Cancel” button (only available in edit mode) at the top of the screen (without the red cross) will only cancel the changes you made in the document since the last time you saved it.
An IR can be cancelled if it is in either “Draft“, “Draft-p“, “Validated” or “Validated-p” state. After this, the IR can only be cancelled at another following stage (e.g. at PO stage). Please note that if Cancellation is done at OUT or PICK stage after IR has been sourced to a PO then the IR will be “Closed” whereas it will be “Cancelled” if the sourcing is done “from Stock”.
When an IR is cancelled, its status turns to “Cancelled” and all its lines also take the status “Cancelled“. Note that by default, cancelled IR lines are not showed. If you want to see them, use the filter drop-down box available at the top of the products table. This filter allows to hide cancelled lines, show all lines or show cancelled lines only.
IR cancellation
IR cancelled
Filtering lines appearing on an IR
An Internal Request can also be deleted. This can only be done if the IR is in the state “Draft” (at header level). Use the red cross located on the IR you want to delete on the “Search: Internal Requests” screen to delete a “Draft” IR.
Internal Request updates can be done manually in the IR in “Draft” , “Draft-p“, “Validated” or “Validated-p” status.
Go to:Orders / Orders / Internal Requests
Enter the necessary information in the filters to find your IR and click on Search, then click on the pencil icon next to the IR you wish to update to open it in edit mode.
Update some information on the header of the IR if needed (some header fields can only be updated when in Draft/Draft-p).
To update a specific line, click on the pencil icon at the left of the line you wish to update.
Update the line as needed (UoM, quantity, unit price, notes,…).
Save the line by clicking on the floppy disk at the right of the line or via a click on “Enter“.
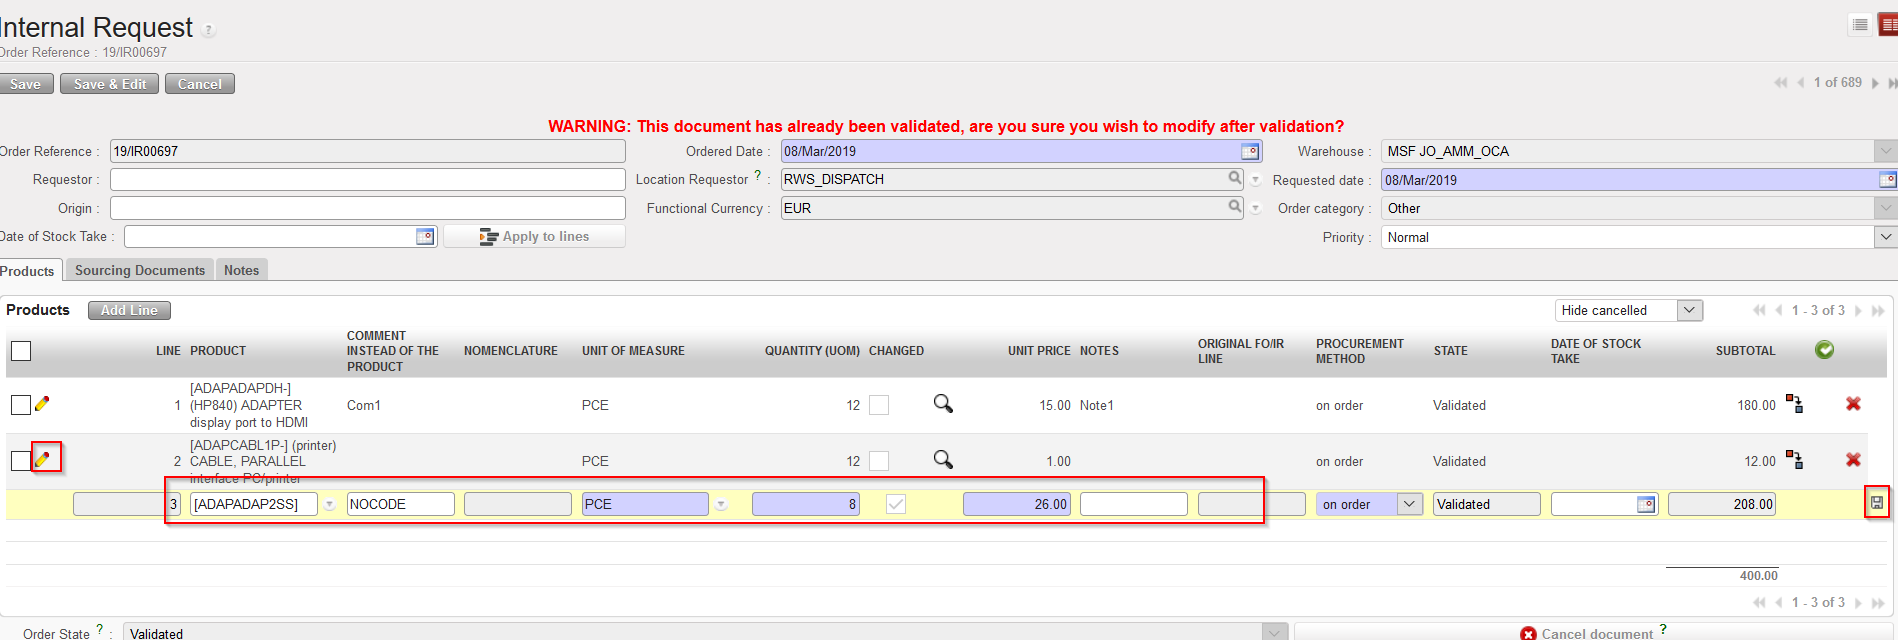
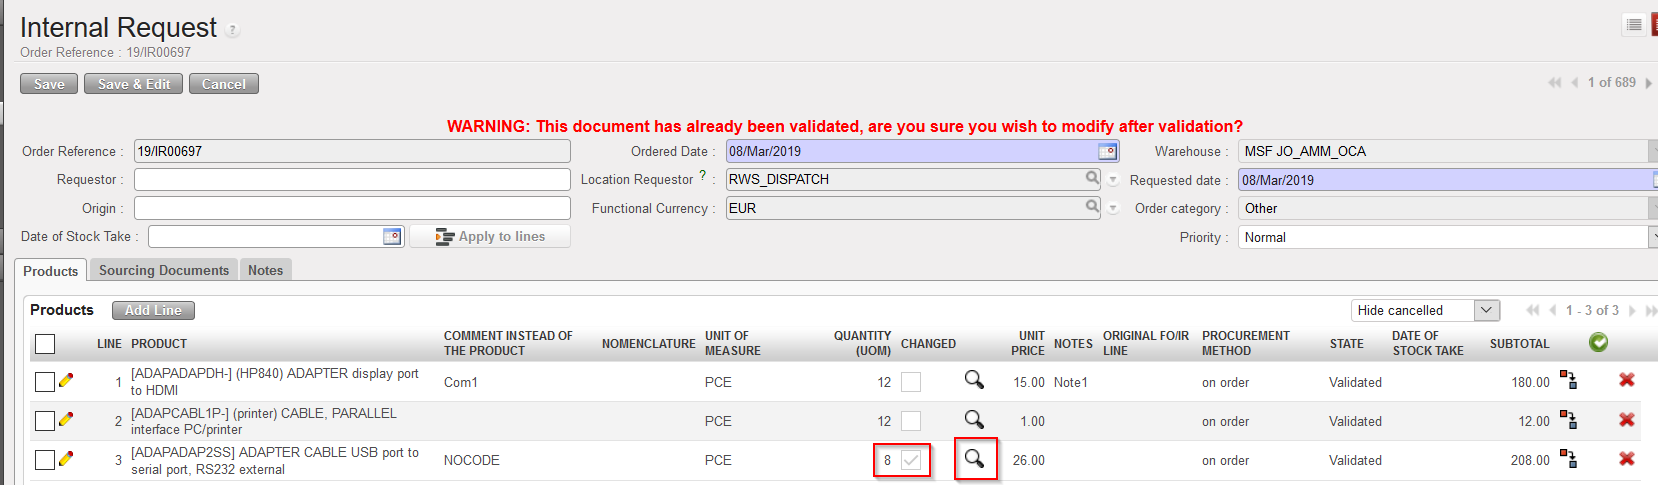
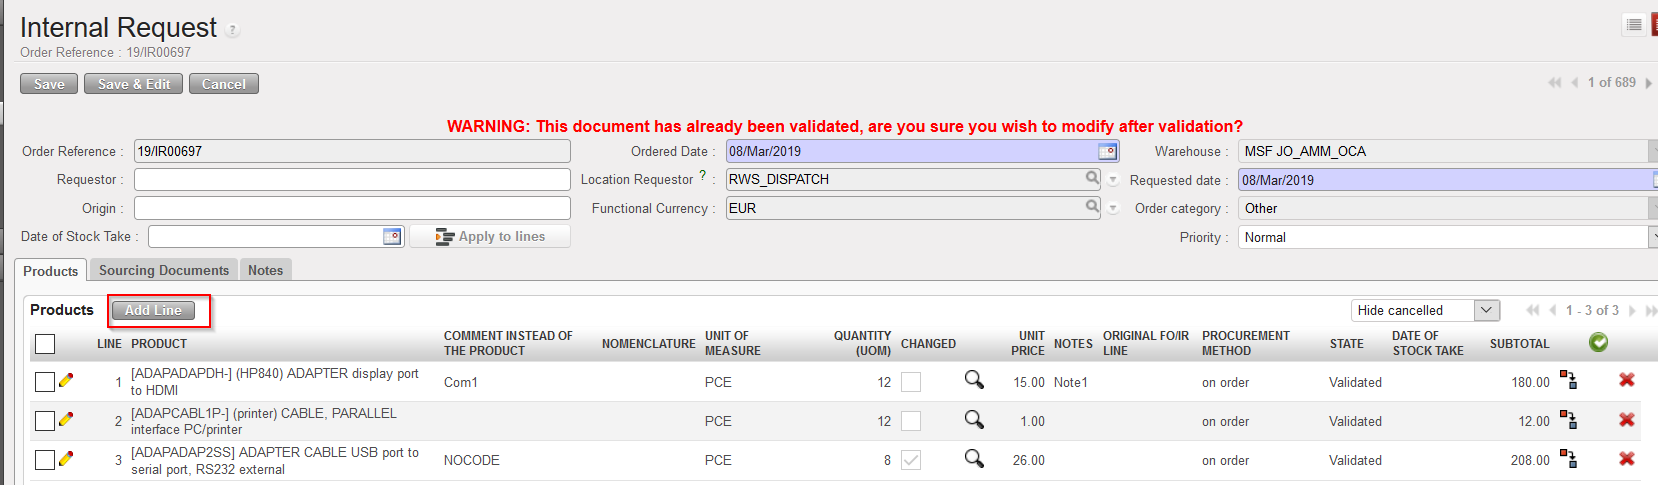
Please note that any change on “Product”, “Quantity”, “Price” and “UoM” to a “Validated” line will trigger the ticking of the “Changed” checkbox. Changes can be seen by clicking on the “Magnifier” icon; once clicked , a pop up will display the changes on the specific product line with “current value” vs “original value”.
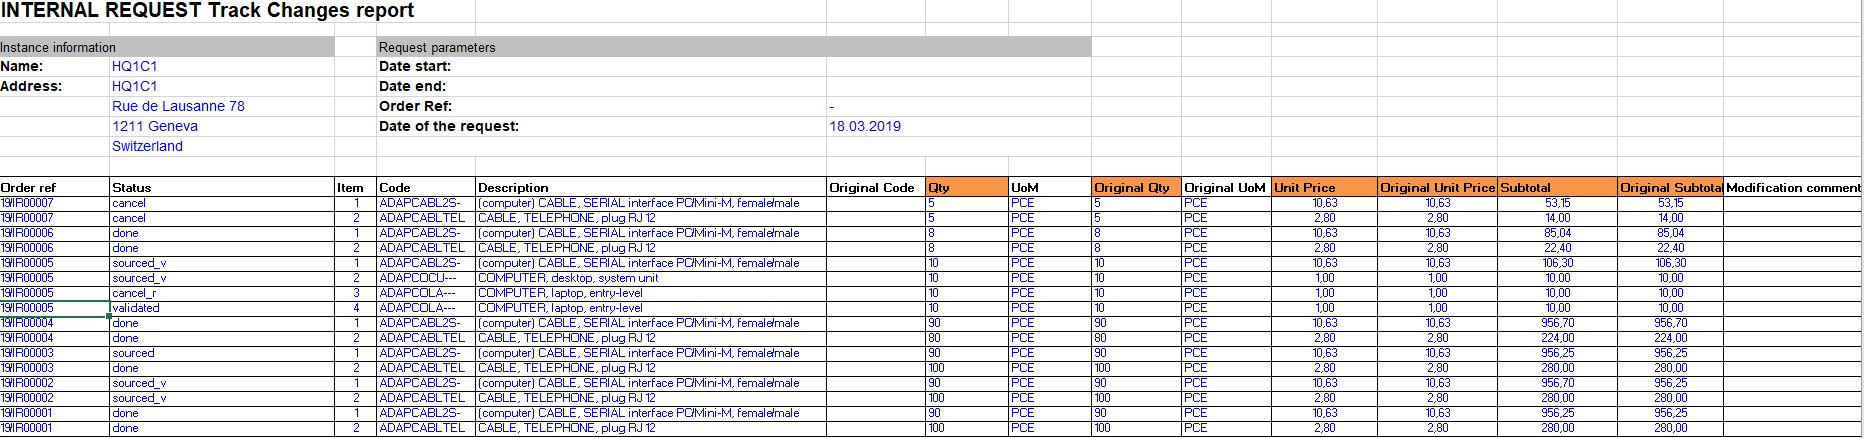
Please note that there is as well a new report that enables to see all these “track changes” which can be find under “Order> Orders” IR Track Changes”
As long as the IR is in “Validated” status, it is still possible to add new line to the order however this will trigger the “Changed” checkbox.
The addition of new lines to a “Validated” IR is conditioned by User rights. A new button named “Add line” will replace the “New” button which is only used for Draft IR. New lines added at “Validated” state will still be created as “Draft” and will need validation from authorized user.
F. b) How to validate an Internal Request at line level.
Search for and open (in edit or display mode) the IR you wish to validate.
You may then
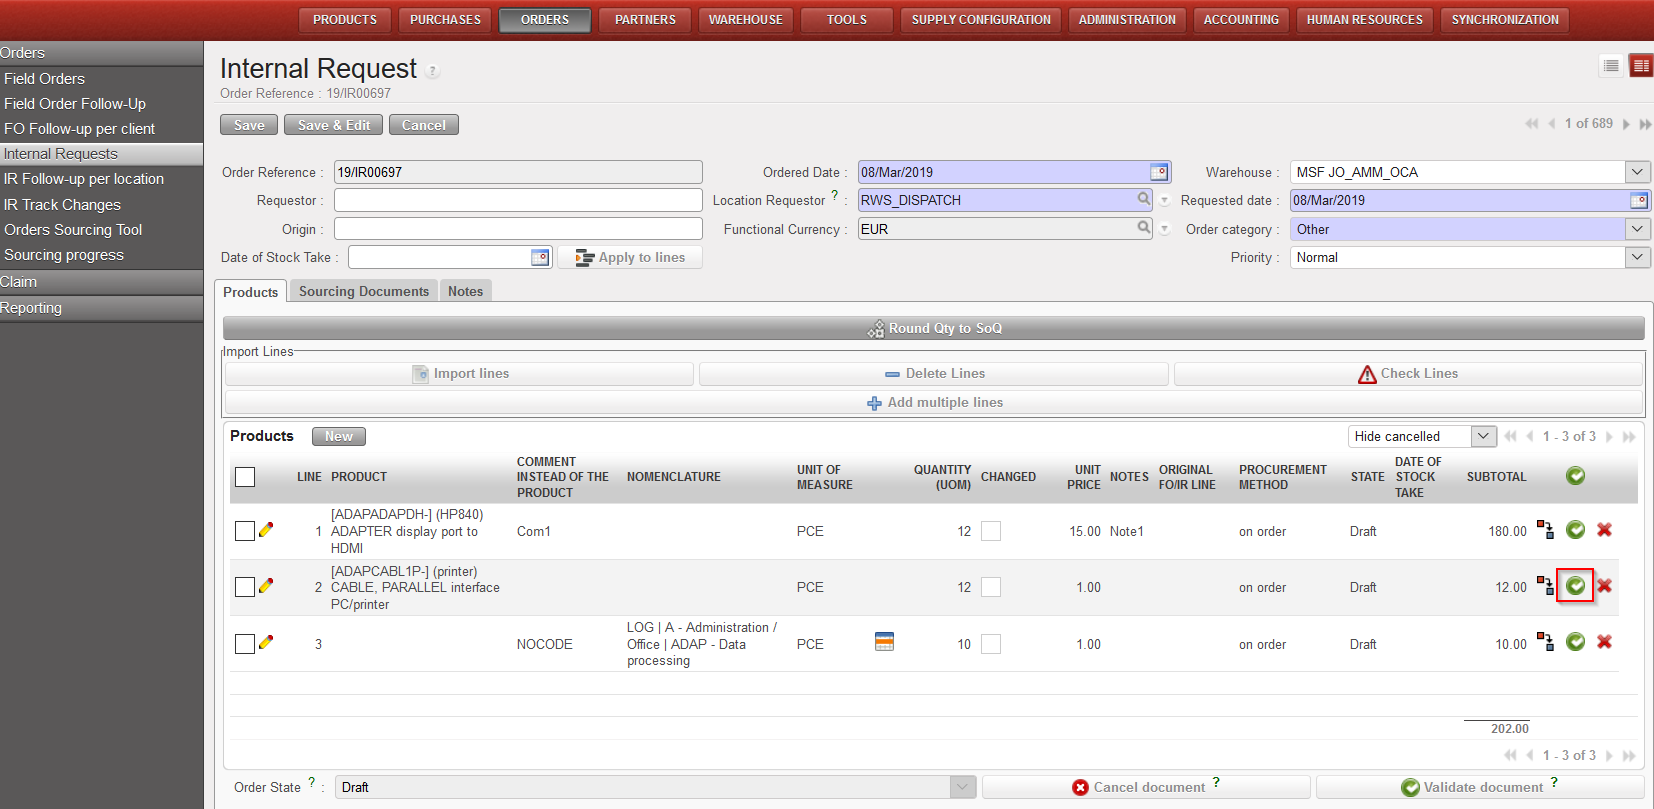
1.1 Validate only 1 line of the IR by clicking on the green icon at the right of the line you want to validate.
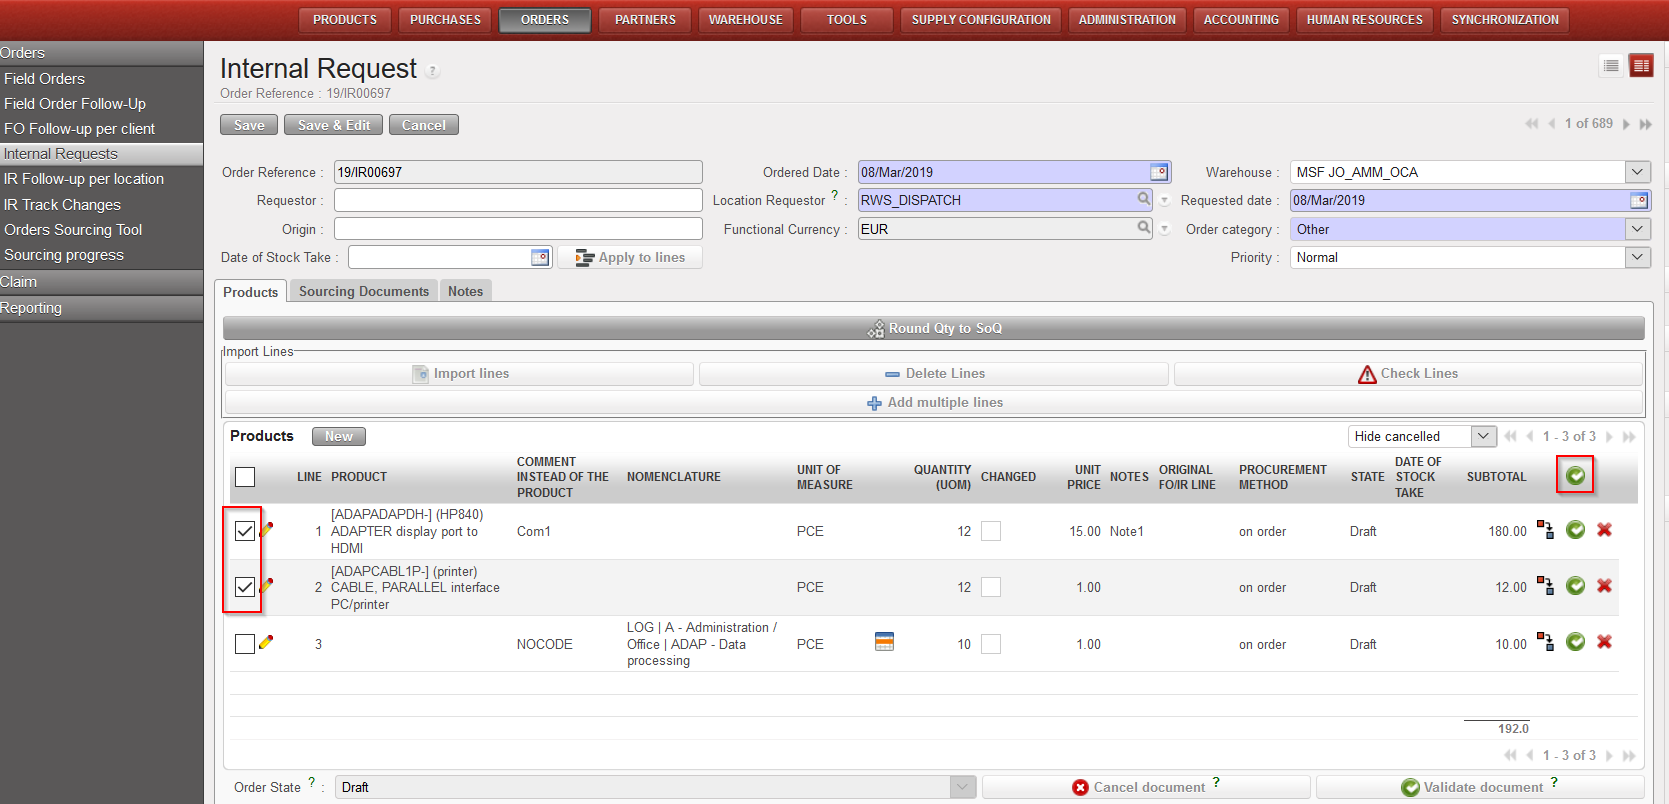
1.2 Validate several lines of the IR by selecting the lines you want to validate (use the check boxes on the left of the lines) and validating the selected lines (use the green icon at the top of the products table, next to “SUBTOTAL”).
Validate 1 line on an IR
Validate several lines on an IR
Once Validated:
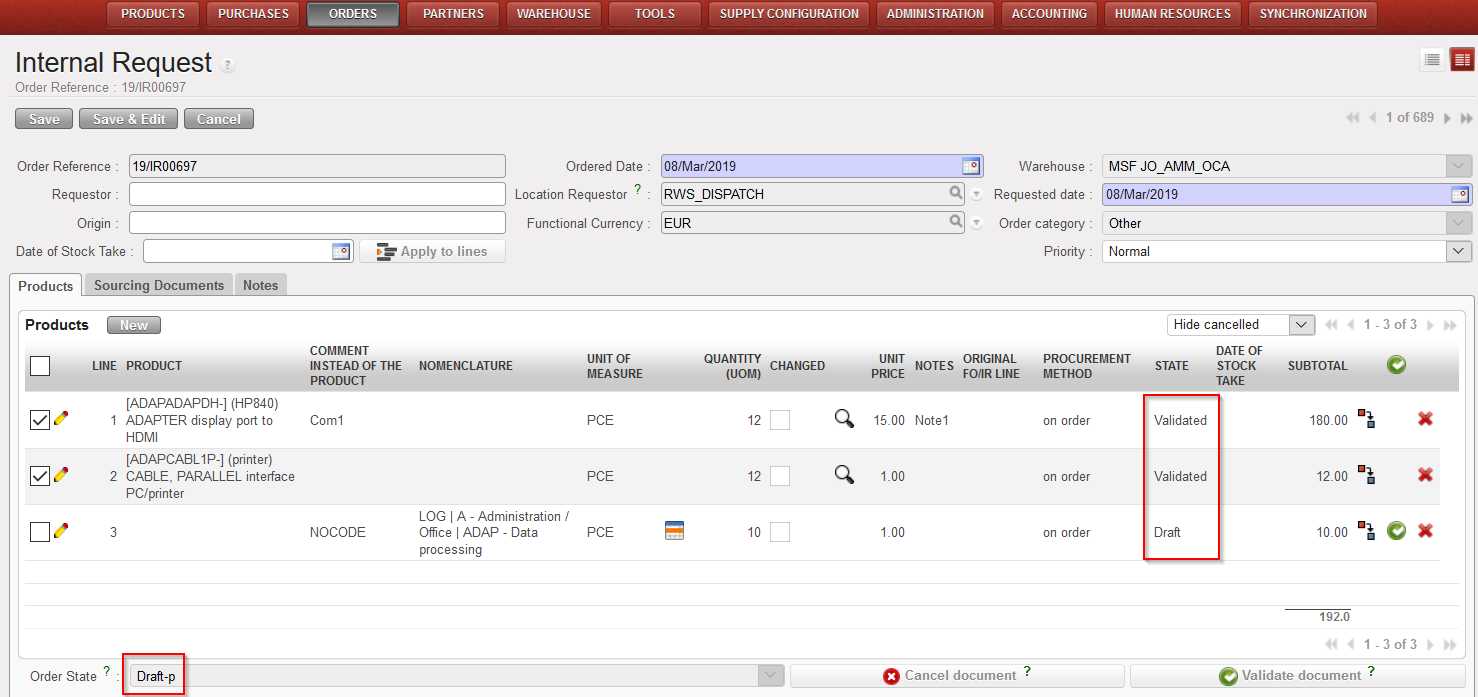
-The validated line(s) of the IR switch to the state “Validated” (while the other lines stay in the state “Draft”).
-The IR switches to the state “Draft-p“.
-No warning message is displayed as the lines of the IR which remain in the state “Draft” can still be modified.
IR partially validated
Remember that to be able to validate partially an Internal Requests, your user must have the appropriate user rights.
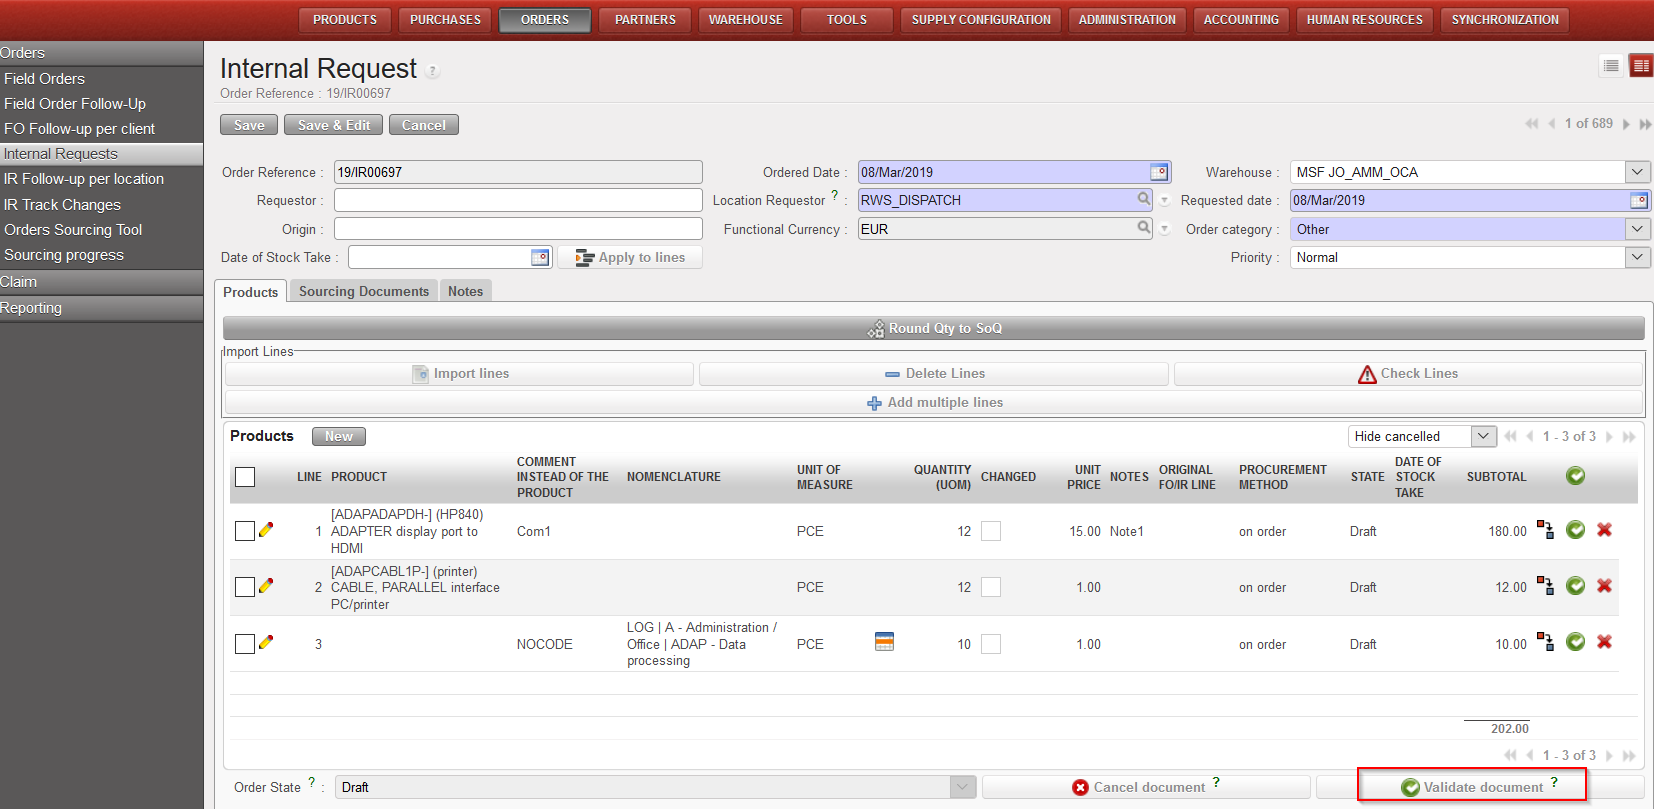
An Internal request can be validated at header level (validation done for all the lines of the IR in one click) or at line level (validation done for one or some lines of the IR only).
In the first case, the validation will have as consequence that all the lines of the IR will switch to the state “Validated” and the IR itself (at header level) will also switch to the state “Validated“. In the second case, the validation will have as consequence that one or some lines of the IR will switch to the state “Validated” while the IR itself (at header level) will switch to the state “Draft-p“.
Note that to be able to validate an IR at line level, a user must be granted specific user rights. User should have the group Sup_Valid_Line_IR.
As for the import, the system offers several options to export the lines from an Internal Request to an Excel file. Depending on whether you need to export only product lines or product lines AND header information you will need to choose the correct link in the right action menu.
Go to: Order / Order / Internal Requests
Click on the check box on the left side of the line corresponding to the Internal Request to be exported.
The Action menu on the right-hand side is displayed.
Click on the
3.1 “Internal Request Excel Export” link to export product lines only
3.2 “Export to IR Excel template” link to export product lines AND header information
3.3 “Export Product List IR Excel” can be accessed in the IR List view Action menu (without any IR being selected). In the intermediate pop-up, the user can select an existing Product list.
4. The IR will be exported to Excel.
3.1 Exporting an IR to Excel
All the information of the IR you chose will be exported to Excel with the following format:
3.1 IR Excel export
3.2 Exporting to IR Excel template
3.2 Export to IR Excel template
Do not mix-up these 2 export options with the “Export” option available at the bottom of the action menu which will export all the headers of the IRs appearing on the screen (without the details of the product lines).
3.3 Export Product List IR Excel template ( select Product list to export)3.3 “Export Product List IR Excel”
From the same screen, you can produce (and print) a PDF report for validation purpose using the option “Internal Request” also located in the action menu (under “Reports“). Note that these exports can also be done from within the IR.
Exporting an IR to PDF from the “Search: Internal Requests” screen
Exporting an IR to PDF from within the IR
Internal Request in PDF format
Note 1: It is possible to select several IRs at the same time on the “Search: Internal Requests” screen (using several check boxes) and export them in one click to Excel or PDF. In Excel, you will get one IR per sheet. In PDF, all the selected IRs will be exported on one PDF file.
Note 2: The export to Excel and PDF can also be done from within the IR as the “Internal Request Excel Export“, “Export IR Excel template” and the “Internal Request” options are also available in the action menu (under “Reports“).
Note 3: On the Excel, the comment included in the “Comment instead of the product” column of the IR will appear in the column “Comment“. Note that the notes included in the “Notes” column of the IR are not exported to excel.
Note 4: On the PDF, at header level, the notes inserted on the “Notes” tab of the IR will appear (at the bottom of the PDF, behind “REMARKS“). At line level, the notes included on each line of the IR will appear (in the column “Notes” of the PDF) but the “comment instead of the product” information won’t appear except for lines with “product by nomenclature“.
Note 5: On the PDF, “Cancelled” lines will not be displayed
We use cookies to ensure that we give you the best experience on our website. If you continue to use this site we will assume that you are happy with it.