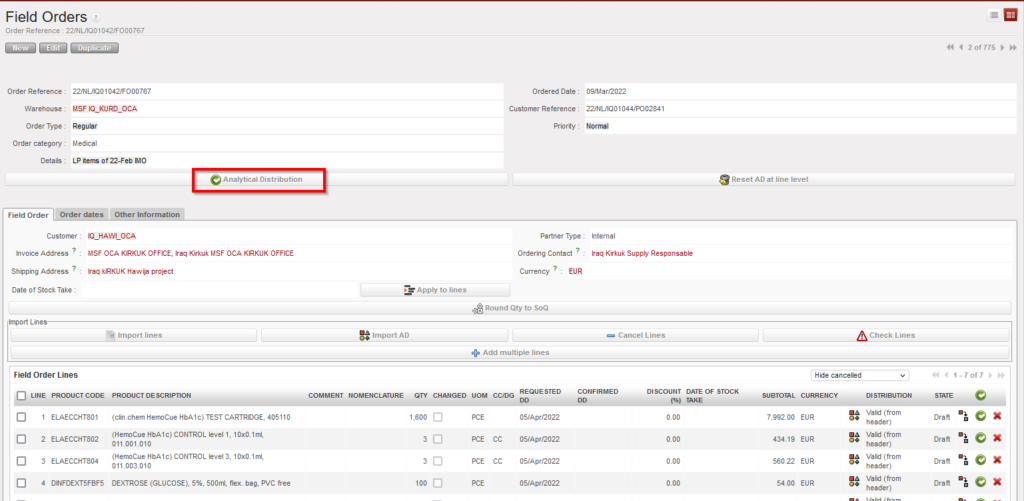
Supply User Manual ENG -> 4. Procurement -> 4.6 LU-SU3201: Purchase Orders (POs) - Generals -> H. How to add one or multiple Analytical Distribution (AD) to Purchase orders Line/lines
H. How to add one or multiple Analytical Distribution (AD) to Purchase orders Line/lines
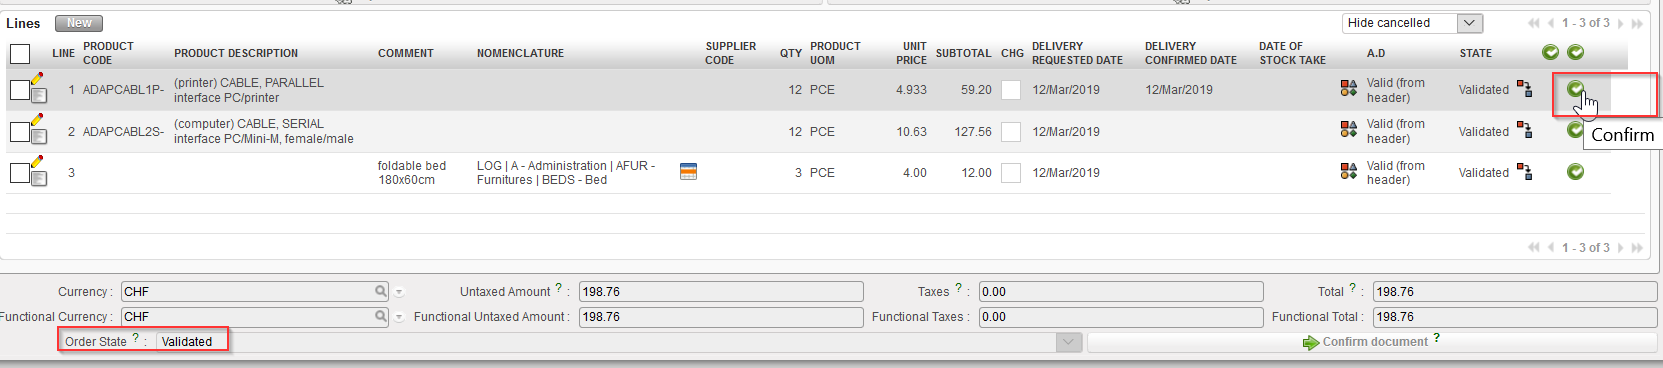
This functionality enables users to add or update the Analytical distributions (ADs), (Cost Centers and Destinations) the Draft PO lines, users have 3 options to use for adding or updating the ADs:
1- Adding AD/ADs at the header level:
Go to: PURCHASES > Purchase Orders > Analytical Distribution

by clicking on the “Analytical distribution”, new screen will be opened, and then by clicking on “New” user can add one AD or more to be applied on all PO lines the same way “Global analytic distribution”

2- Adding AD/ADs at line level manually:
User can add the AD to the line manually by clicking on AD icon on the line level, new screen will be opened, and then by clicking on “New” user can add the AD to the line:

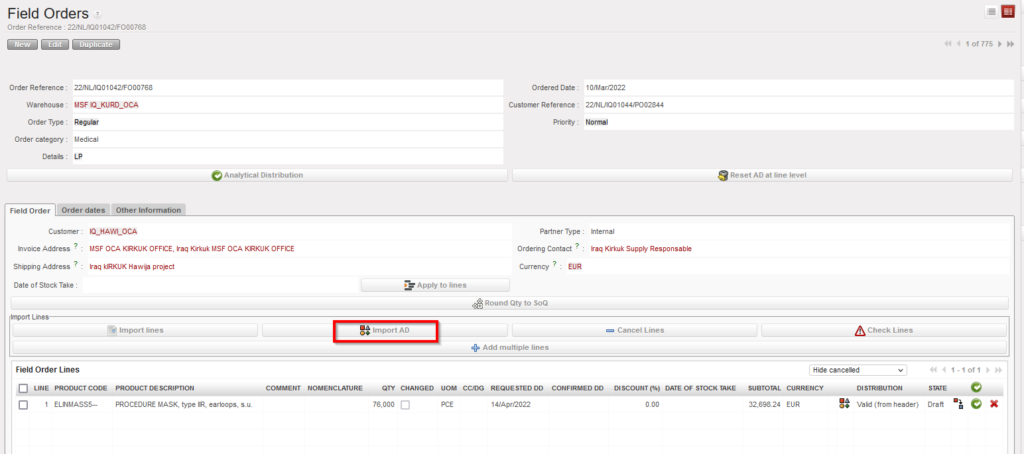
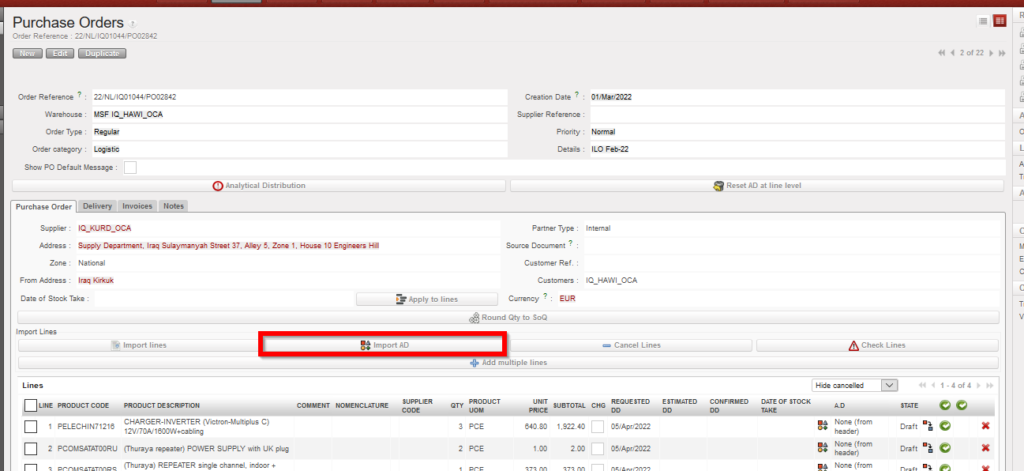
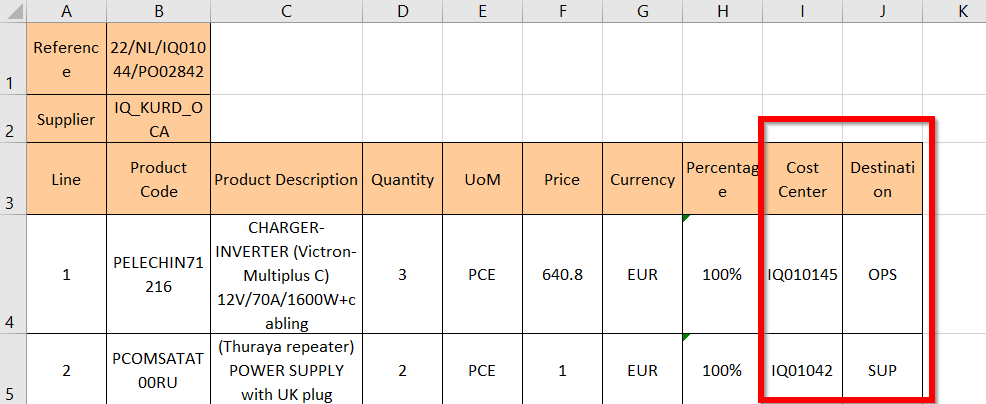
3- Adding AD/ADs by importing, this third option makes it easier for users to add 1 AD or multiple ADs to single line or to add different ADs to multiple lines in the same Draft PO, in case user wants to add different ADs to Different lines, Which means that not all lines have the same ADs, unlike the first option (adding AD at header level), this functionality could be done by using “Import ADs” button, 1 AD or multiple ADs (Cost Centre/s and Destination/s) can be added onto each line and must be separated by semicolon (;). The action to export / import templates are both via the “Import AD” button.
In case of splitted lines, when importing one or multiple ADs to the first line, the values entered in the first line will be used to fill all lines split from the same line number.
In the import file, only the AD values will be imported. No other information can be modified or added via the import file. Percentage must add up to “100%” and the total number of semicolons in the Percentage, Cost Center and Destination columns must be the same, and system will check that Line number and Product Code match those of onscreen PO.
If there is already an AD added in onscreen PO, exported template will show this. If at header level there are multiple ADs added, the exported template will show percentage values and ADs data. In the case that there are already ADs in the onscreen PO, it is possible to remove (delete) them by importing the file with blank AD values. At import, there is a check that AD values exist, but the main/secondary check will remain after import, when line/PO is validated.

*** Same options are available for Draft FO.