Supply User Manual ENG -> 4. Procurement -> 4.6 LU-SU3201: Purchase Orders (POs) - Generals -> O. How to import an XML VI file into a PO
O. How to import an XML VI file into a PO
The import will be possible when the ESC will confirm (part of) the PO.
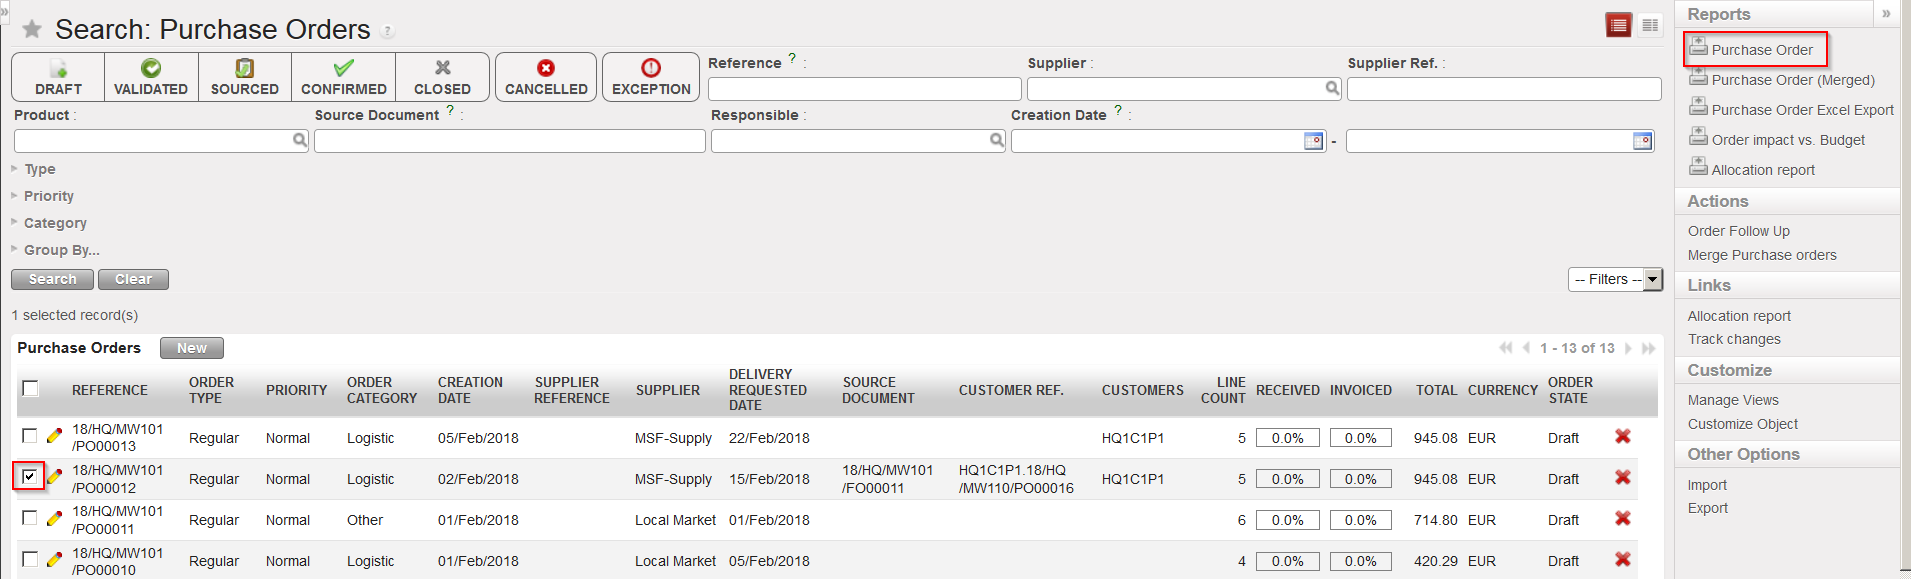
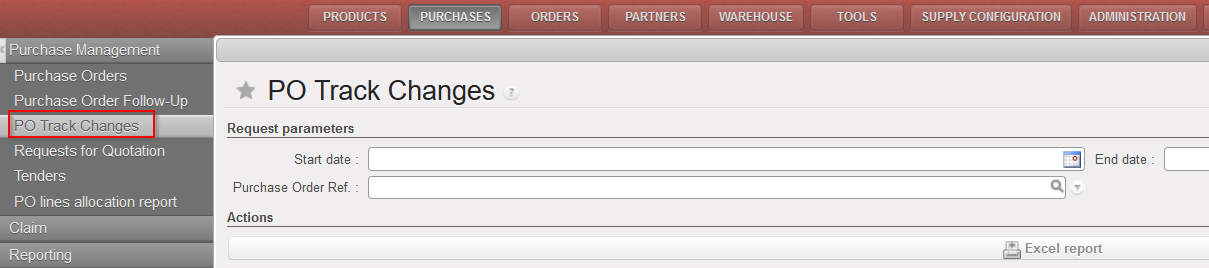
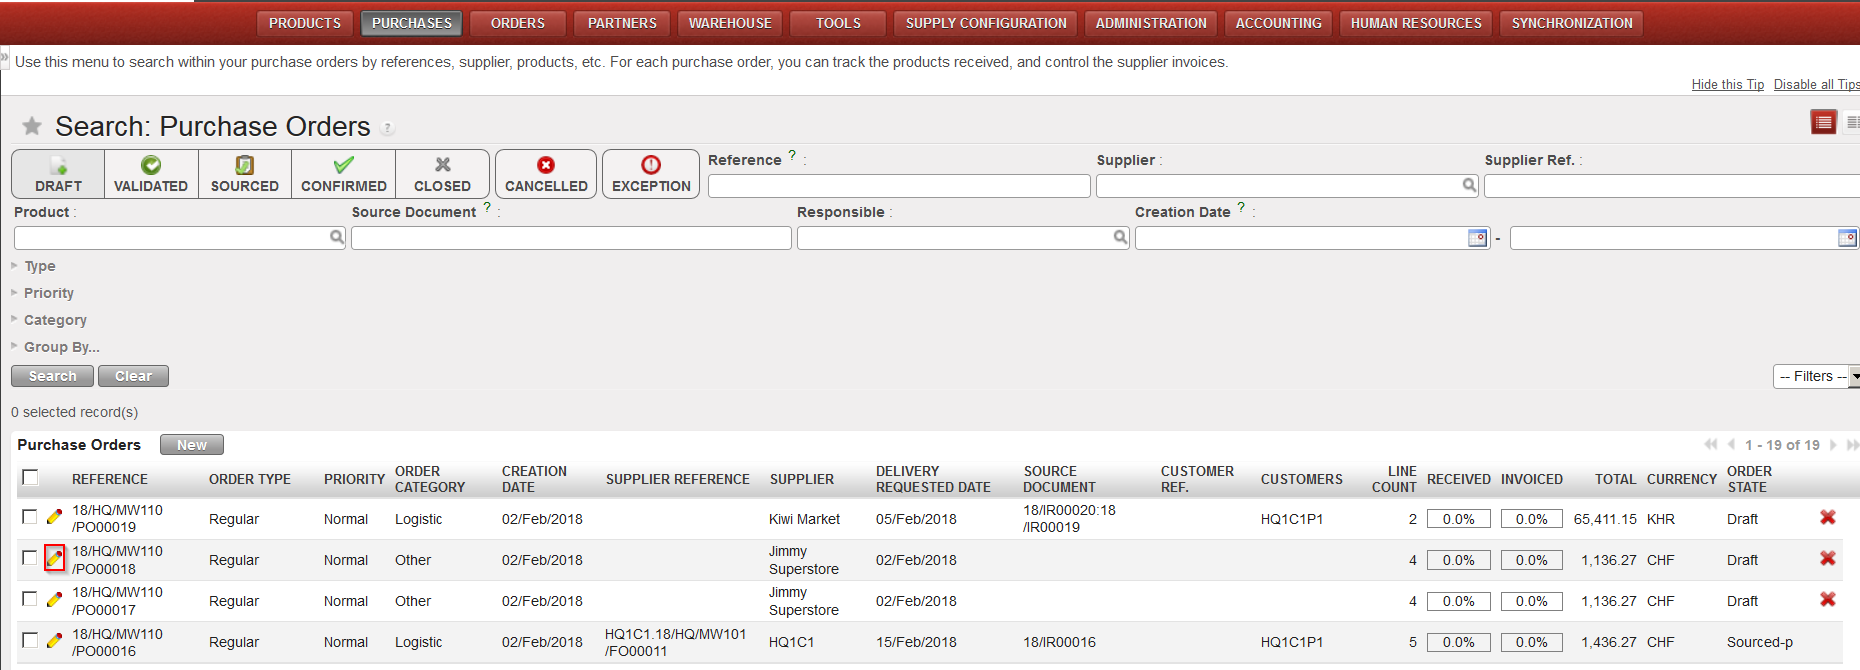
Go to: Purchases / Purchase Management / Purchase Orders
- Open the Purchase Order that you wish to update via file VI file import.
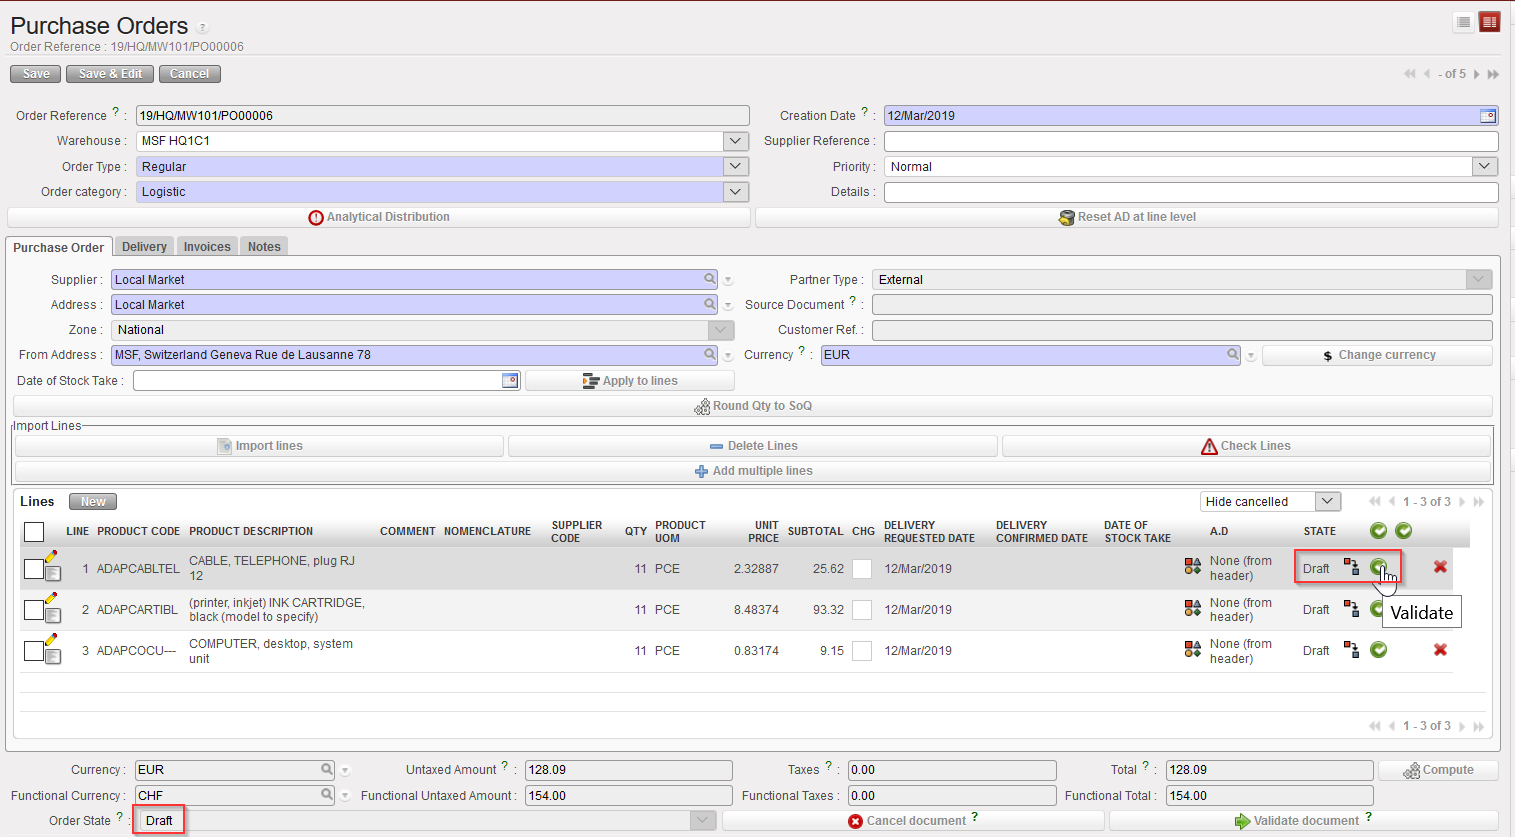
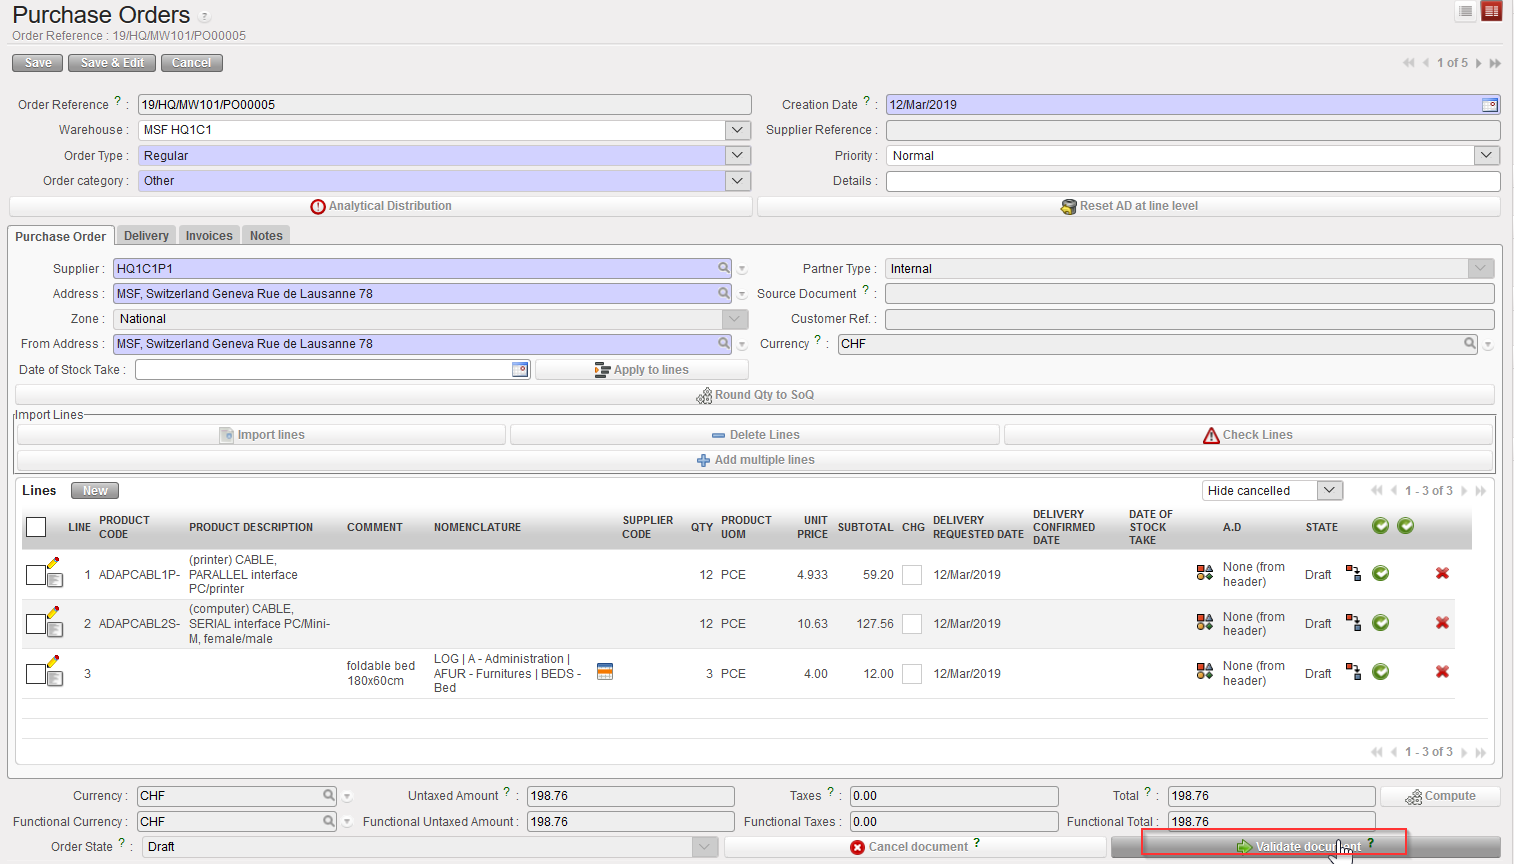
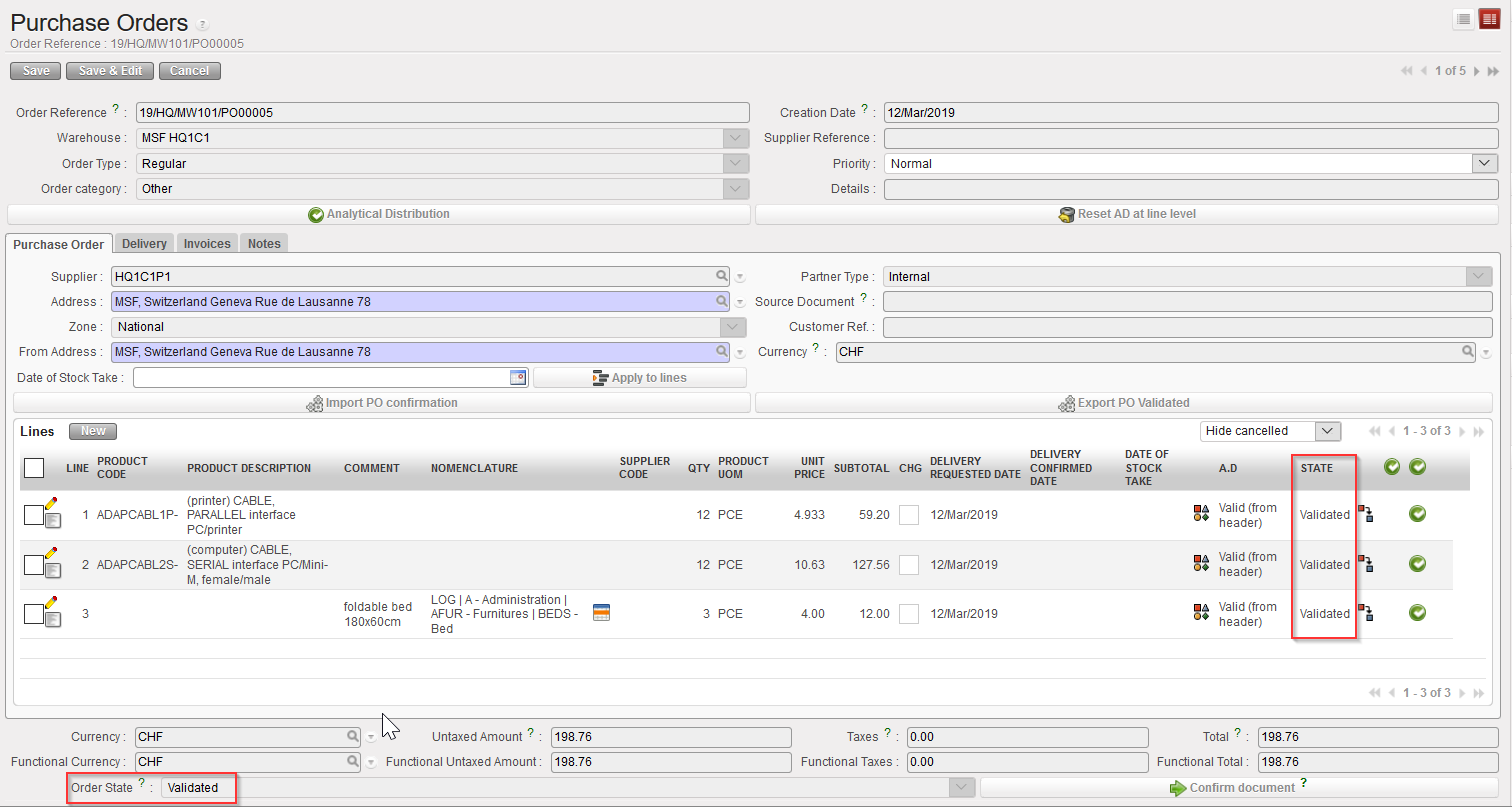
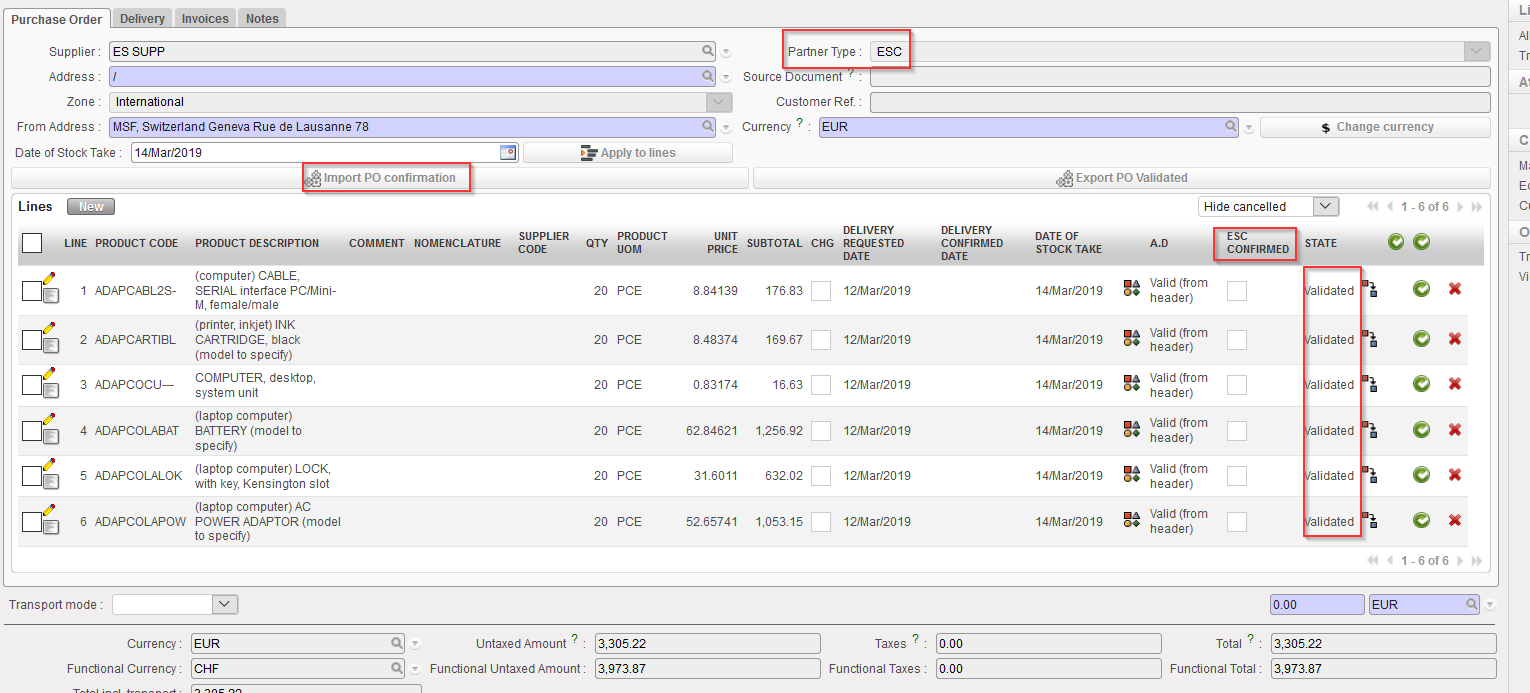
- Click on the “Import PO confirmation” button. Once again, this button will only appear if your PO is in the state “Validated” or “Validated-p” but not if your PO is “Draft“, “Draft-p” or “Confirmed” status.
 |
| Importing a PO confirmation via VI file |
3. Select the “Type of file” corresponding to the one used by your ESC.
 |
| Importing a PO confirmation via VI file |
4. Click on “add attachment“.
5. Click on “Browse” and select the file you want to import.
6. Click on “Simulate“.
7. The simulation screen is showing how the PO will be updated if you confirm the import (via a click on “Import“).
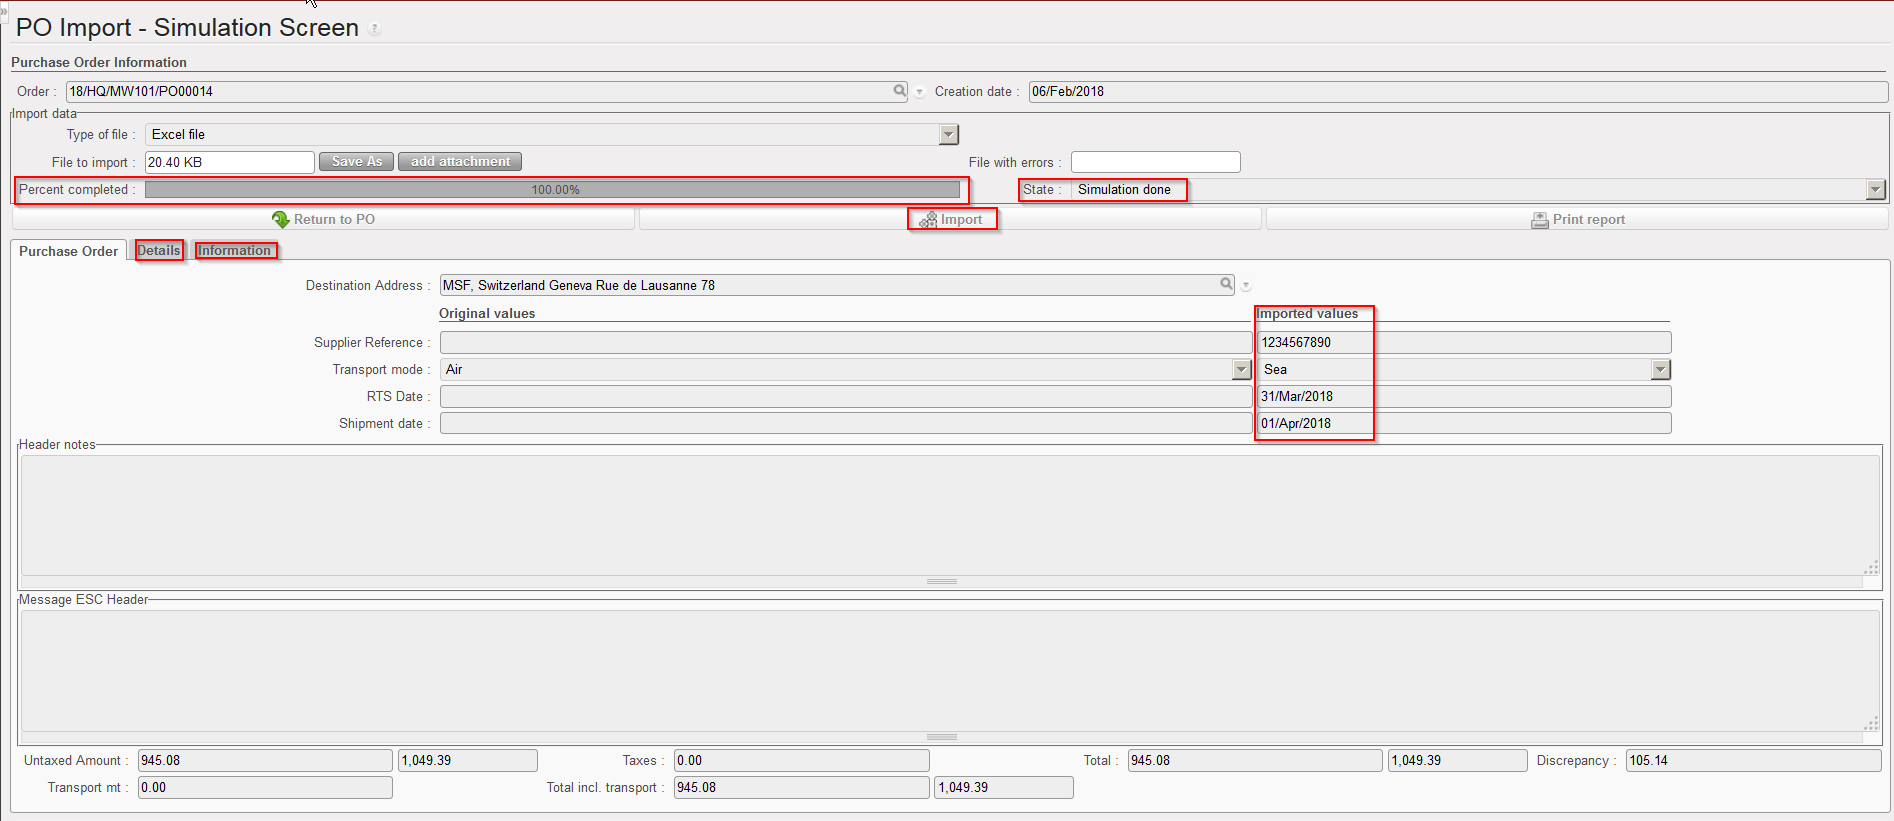 |
| VI PO import simulation screen |
-
- In the “Percent completed” field, you can check the progress of the importation (which can take long if you import a file with many lines).
- The “Original values” show (some) of the current content of the PO header. The “Imported values” show the update which will be done on the PO header if you confirm the importation.
- In the “State” field you can check the status of the import; it will indicate “Simulation done” if the import has been successful, otherwise it will indicate “Error“. In this last case, you should check the “Information” tab to get more explanations on the issue.
- The information tab gives information of what has been uploaded on the simulation screen.
- In order to check the results of the import simulation, you have 2 options:
i) Option 1: Click on the “Details” tab. All changes are highlighted in colors. On the left part of the screen, you see the original PO lines as they are currently in the system. On the right side of the screen, you see how the PO lines will look like if you confirm the importation.
-
-
-
- Changes on prices, products or quantities highlighted in yellow (see lines1, and 3 in the print screen below).
- Any line which does not change appears in black (see line 4 in the print screen below).
- Any Split line will be highlighted in blue and will appear as “Split” in the “CHG” column” (see lines 5 in the print screen below, note that we have 2 lines 5).
- Any cancelled line is highlighted in faded grey and will appear as “Del.” in the “CHG” column (see line 2 in the print screen below)
- Any line which is not imported (i.e. not present in the import file from the ESC) but which is not deleted will appear in black with “Ignore” in the “CHG” column (see line 6 in the print screen below).
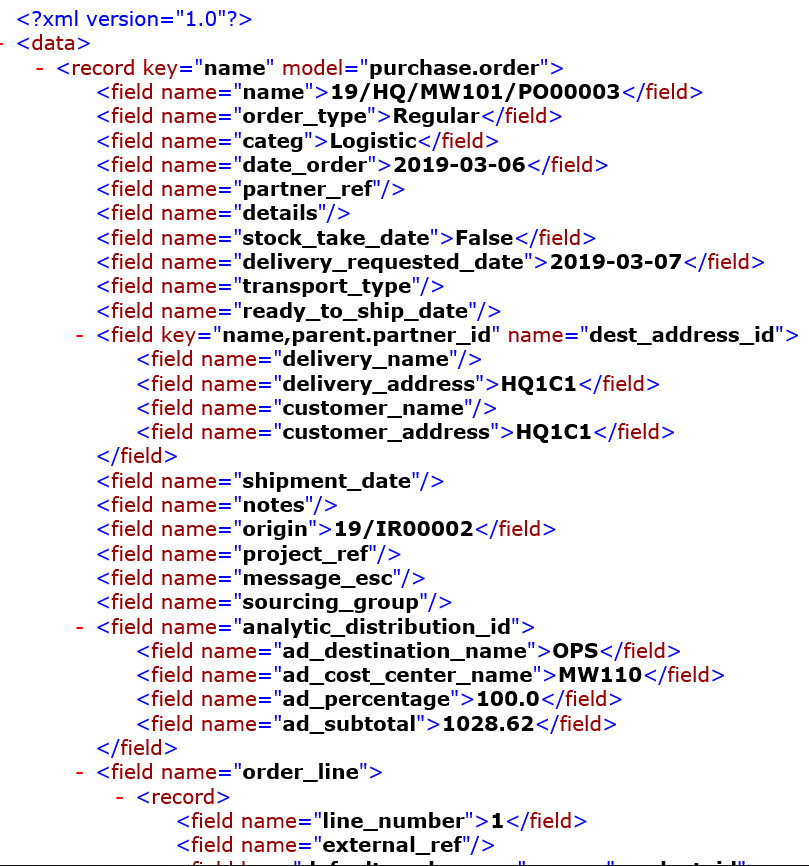
- Any new line added by the VI import will be highlighted in green and will appear as “New” in the “CHG” column. New product lines must have a reference in the column “External Ref.” (see last line in print screen below). Also for sourced PO, the field “Origin” should be filled with a “Source document” reference otherwise a warning message will be displayed to complete this field manually.
-
-
Please note that Analytical Distribution can also be imported for new line (even though it is not mandatory).
7. Lines filled with “Delivery Confirmed Date” will update the “ESC Confirmed” checkbox in the PO screen
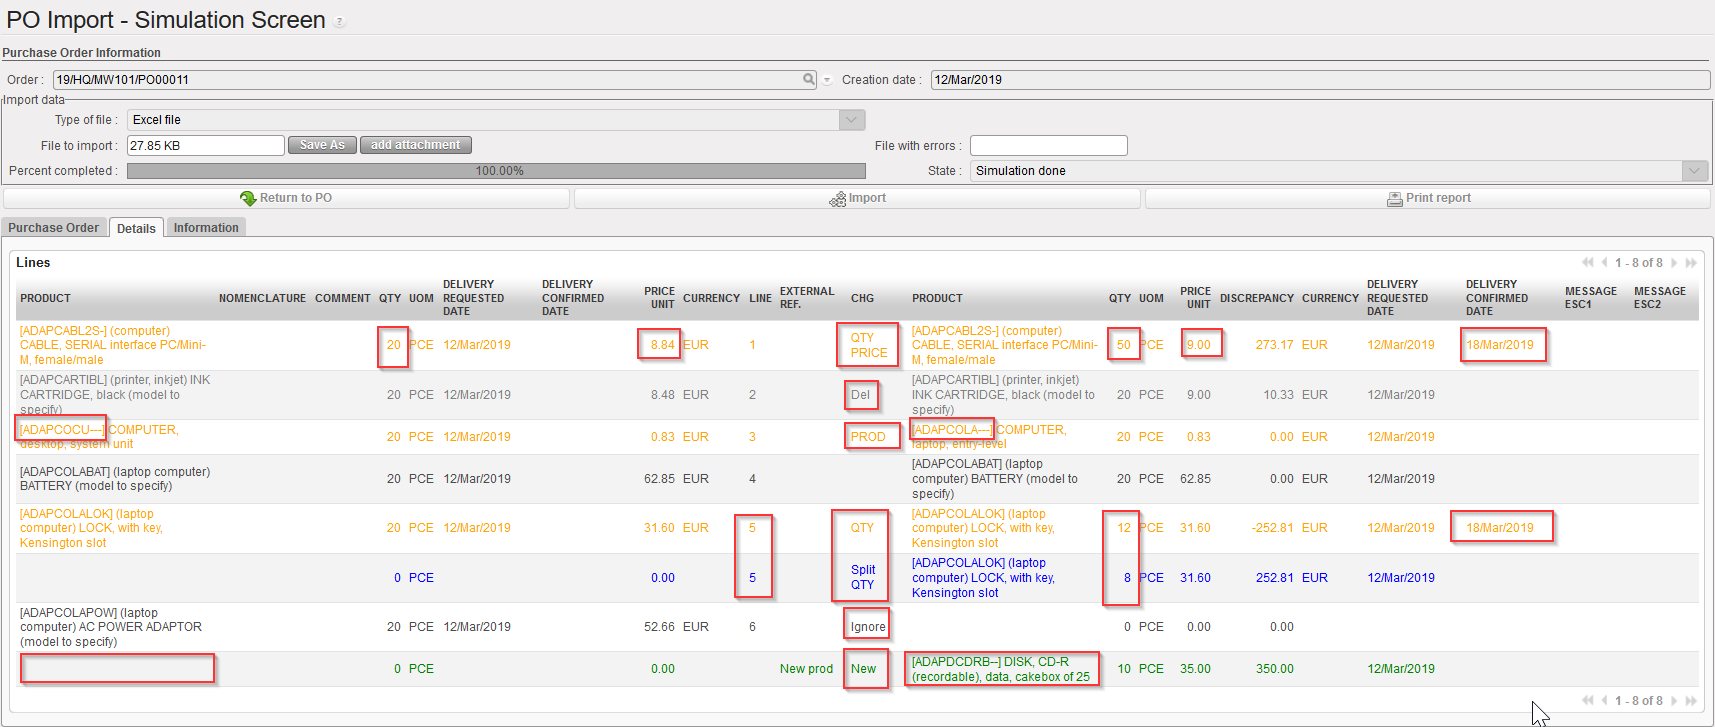 |
| VI PO import simulation screen with all cases |
ii) Option 2: Click on the “Print report” button available on the simulation screen. This will generate an Excel file highlighting all the changes in red cells. This file can be saved and kept for history purpose if needed.
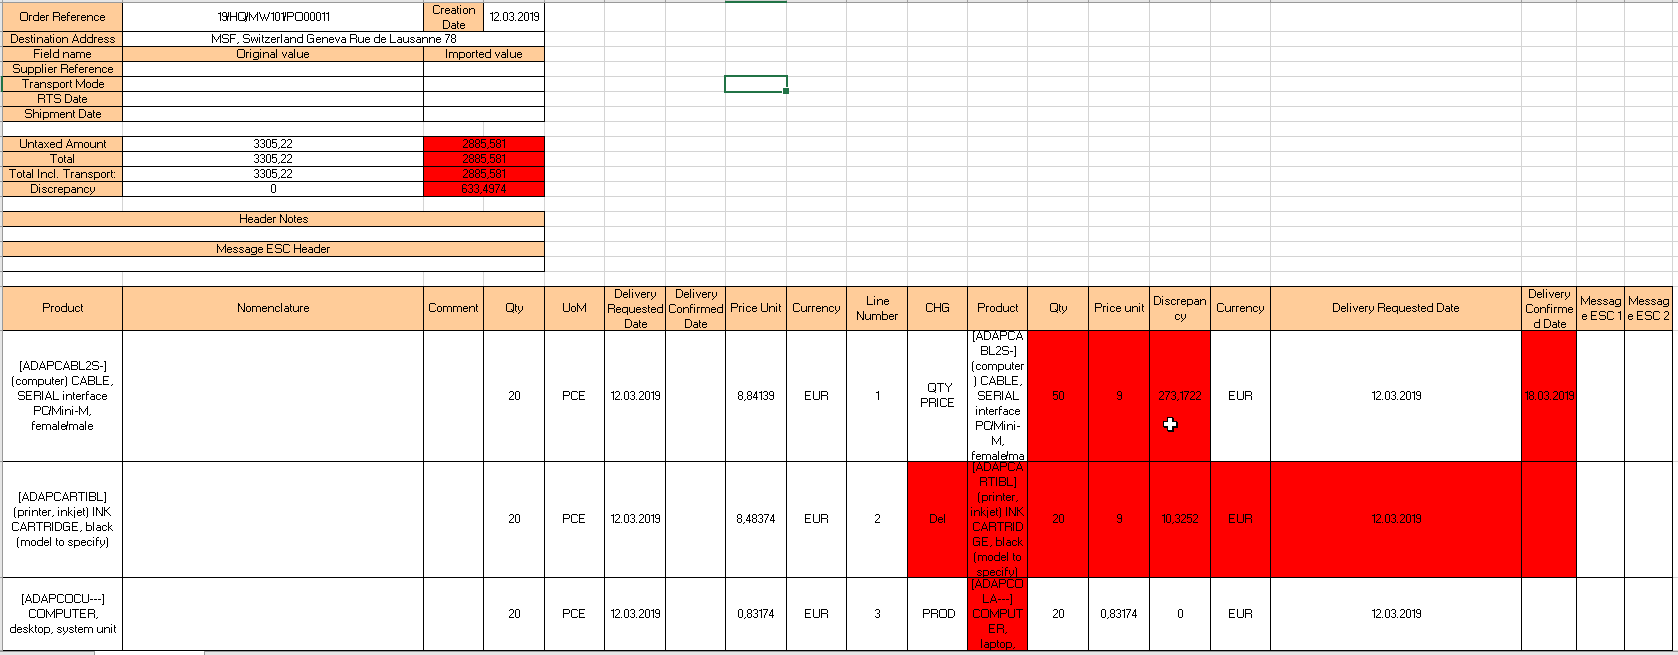 |
| Excel reported exported from the simulation screen |
8. Click on “Import” to actually import the file and update the PO. Note that if you do not want to import the changes, you may click on “Return to PO” instead.
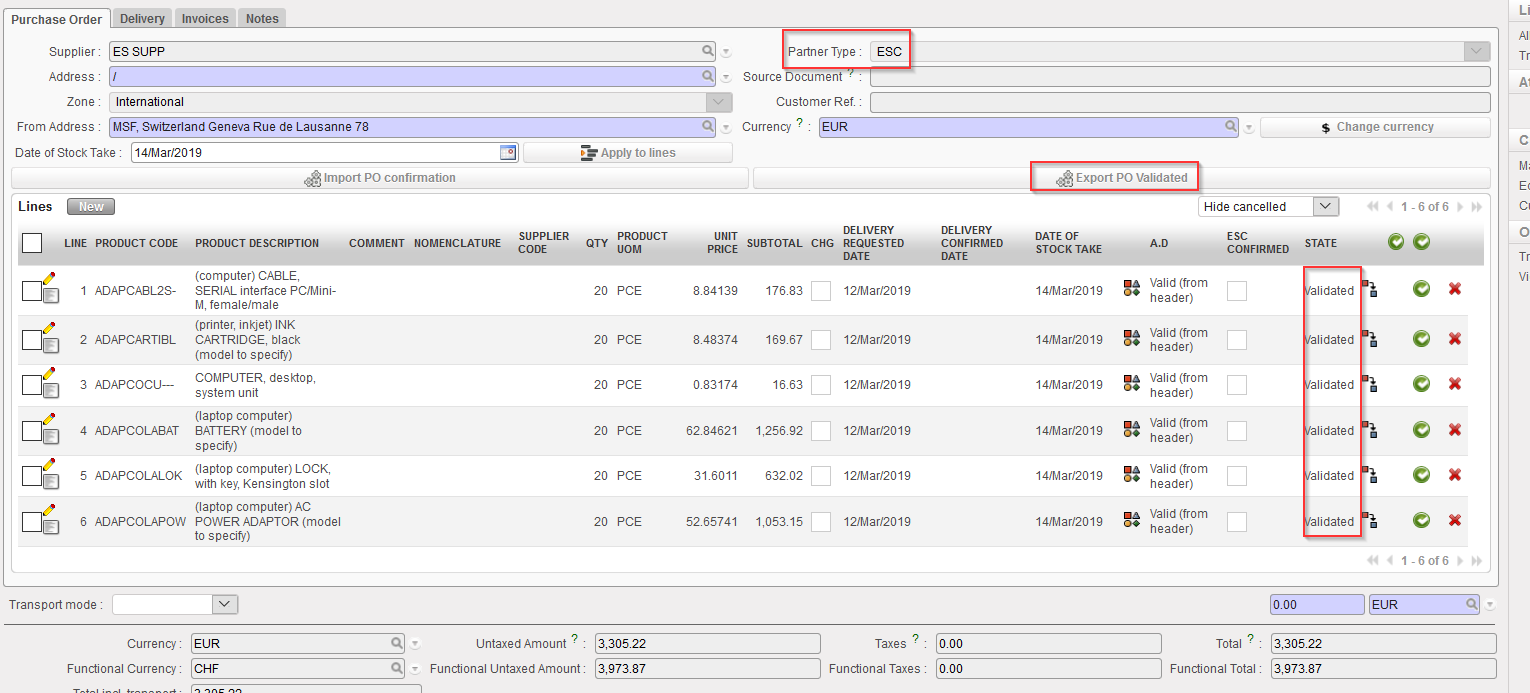
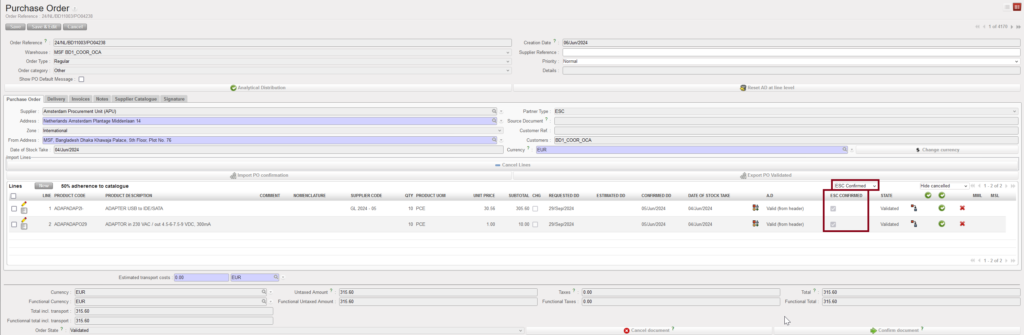
9. After import the system goes back to the PO main screen where the updates are visible.
-
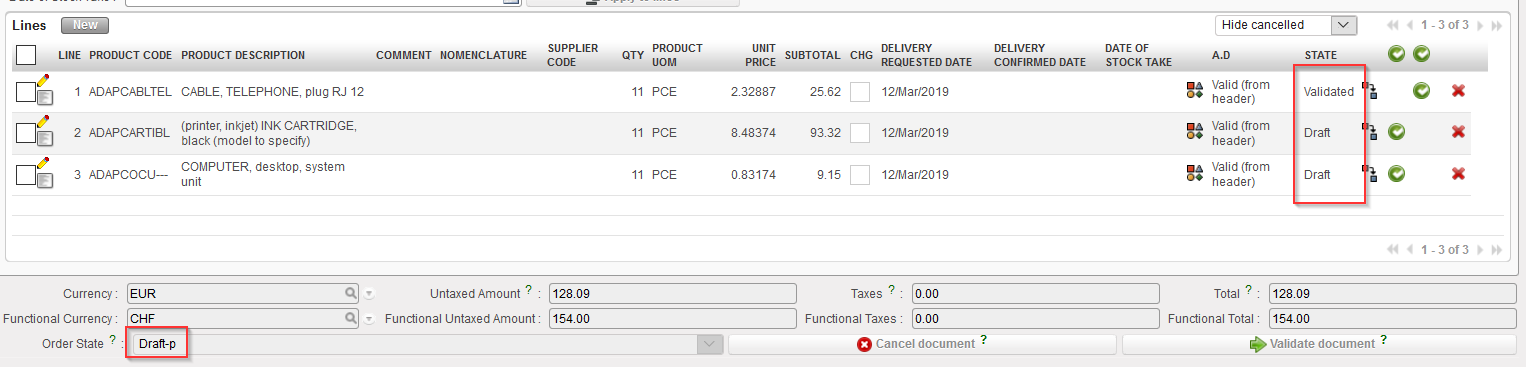
- Split lines keep the same line number as the original line. Note that the status new lines following split is “Validated“. See lines 5 below.
- New lines which have been added take a new line number (and their external reference is visible on the “Notes” tab of the PO-line). Note that the status of added lines is “Validated–n“. See line 7 below.
- Lines Ignored at simulation are still in the original PO with no change. See line 4 below.
- By default, cancelled lines do not appear on the updated PO (unless you change the filter to make them appear). Note the status of line 2.
- Lines with populated “Delivery requested date” at import have the “ESC Confirmed” checkbox ticked. This checkbox is only available for PO with ESC supplier. Please note that for manual import any confirmation (line or document level) will have to be done manually. For automated import the “ESC Confirmed” checkbox will trigger the automatic confirmation of the line (if not “validated-n”).
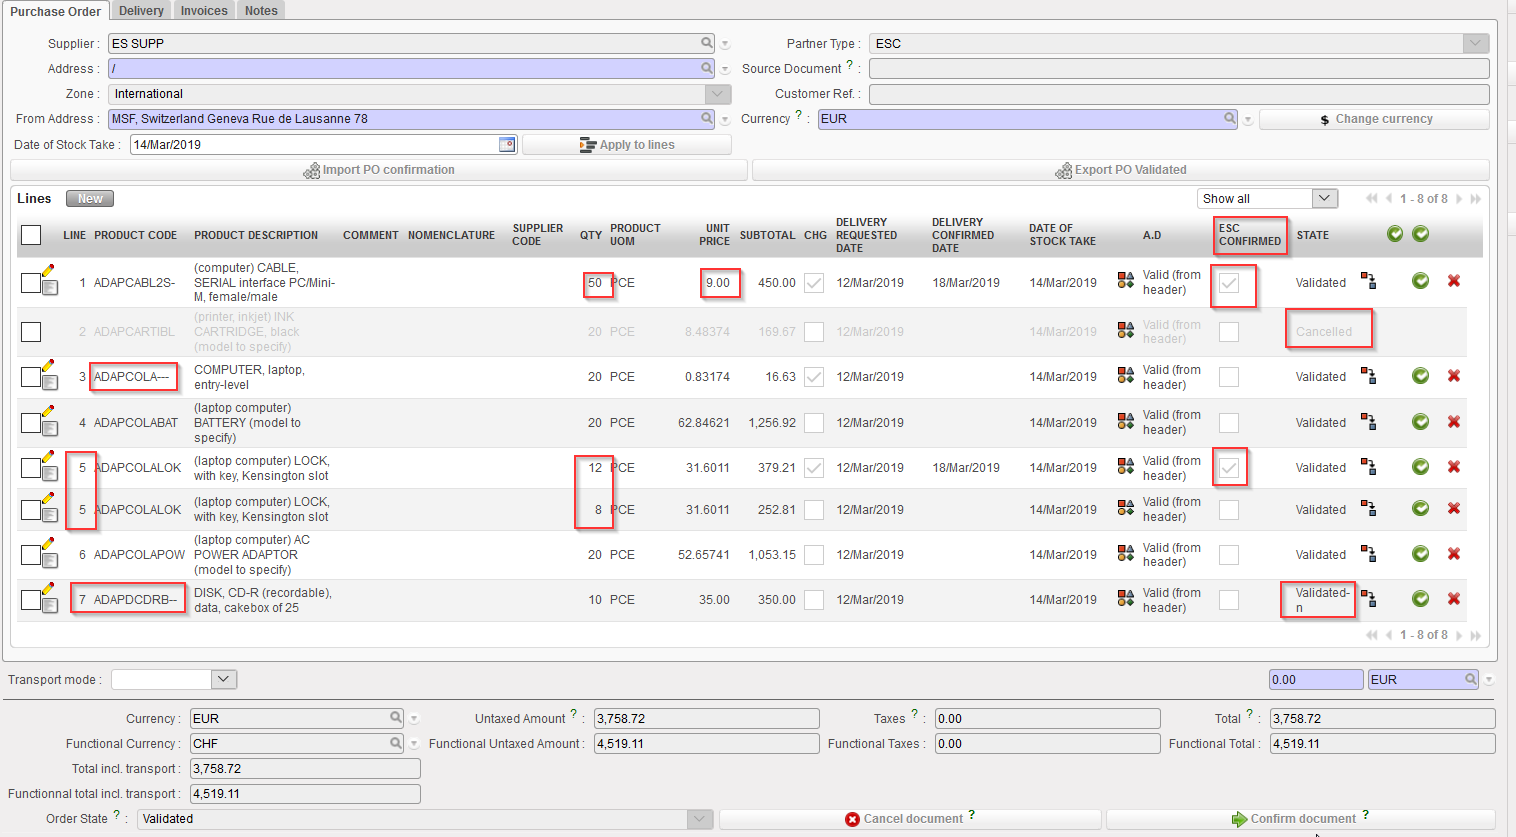 |
| PO after VI import |
History of VI files imported on a PO can be seen on the tab “Notes” of the PO, under “imported filenames“.
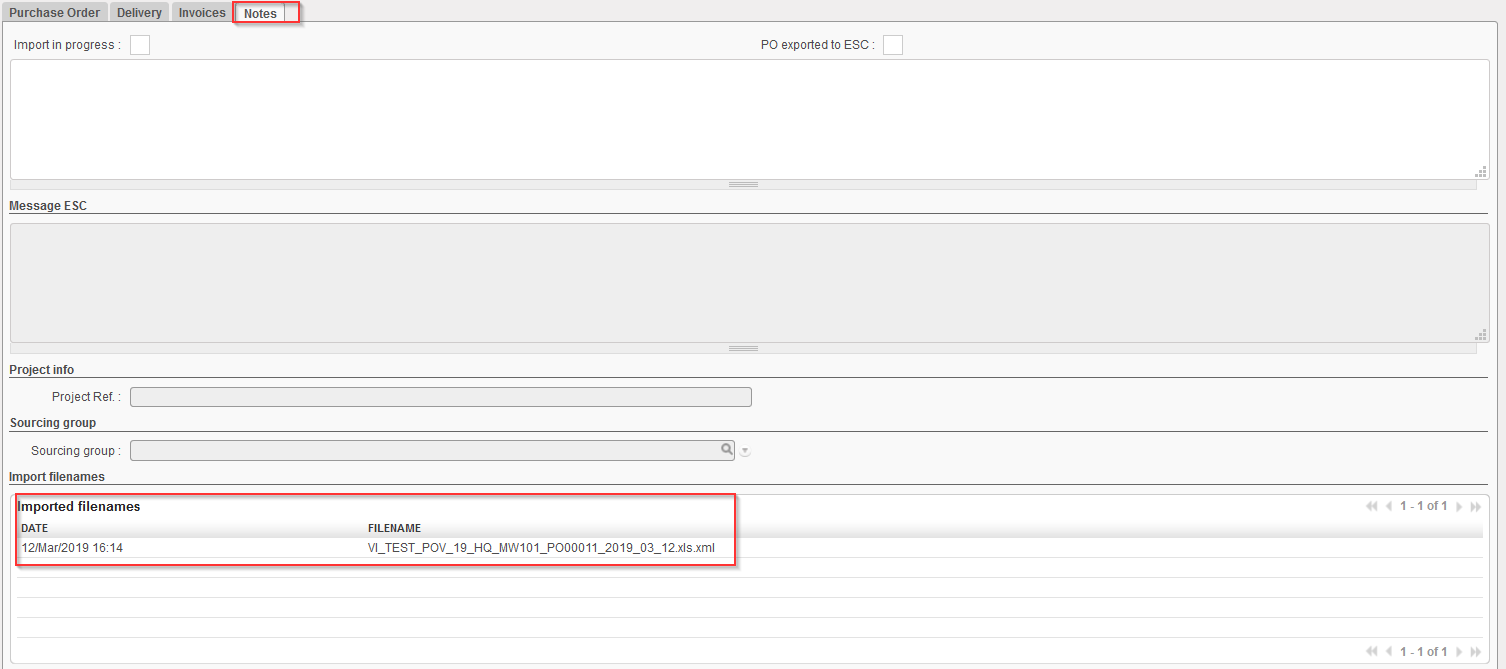 |
| History of imported VI file on a PO |
Note that the actual confirmation of the PO or PO-line(s) should be done manually. However, for OCs where automated VI has been developed, confirmation can be done automatically after import confirmation.
Keep in mind that when a line has been ignored, it means that the ESC hasn’t confirmed it yet. Therefore, it is wise to ask the ESC whether some more updates are expected before confirming manually the PO at header level. Another option is to confirm the PO at line level, for the lines which have actually been confirmed by the ESC. You will be able to identify them thanks to the “ESC Confirmed” checkbox and you can use the drop down filter on the top right of the lines, to display the ESC Confirmed, ESC Unconfirmed and default show All lines.
A deleted line from the import file will cancel any line with the same line number; meaning that if the line has been split before, the whole product line will be cancelled.
When import file adds new lines or splits or updates existing lines, system crosschecks any existing line number and also any external ref. on the line and against lines already existing in the UF PO, . This also means that split lines which keep the same line number can have different External References applied to assist specific split to be identified and if necessary further updated.
From this point you have the option to confirm the Purchase Order at header level or at line level. Remember that the PO-lines you wish to confirm should always have a delivery confirmed date and the “ESC Confirmed” checkbox ticked.