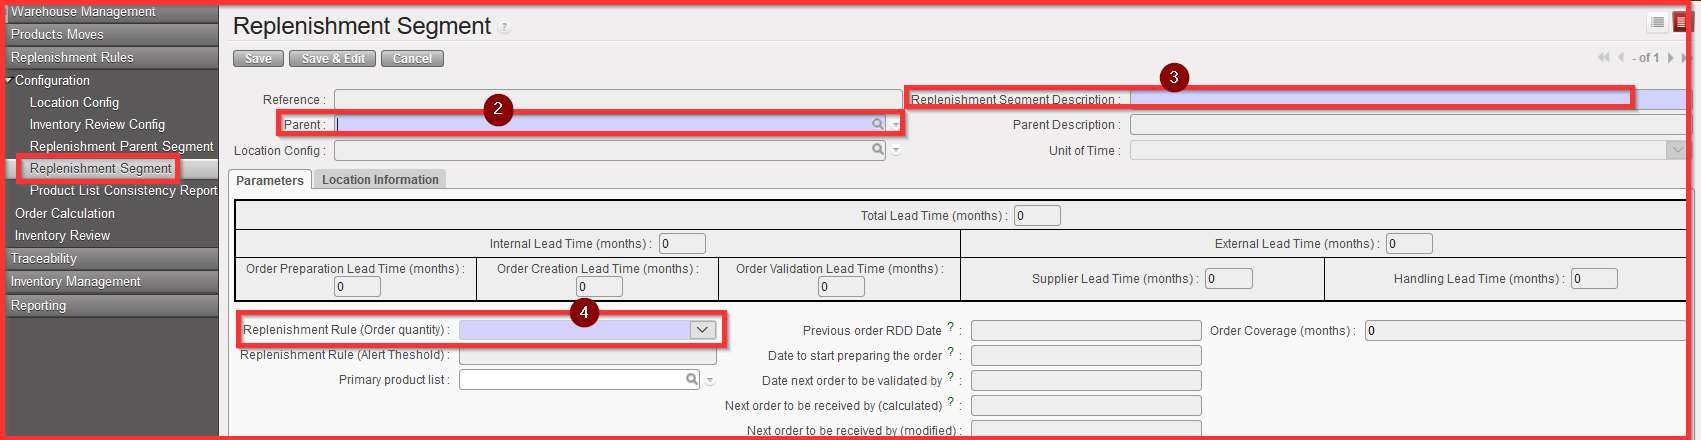
Supply User Manual ENG -> 5. Warehouse -> 5.12 LU-SU4205 Replenishment Rules -> J. HOW TO GENERATE AN ORDER CALCULATION
J. HOW TO GENERATE AN ORDER CALCULATION
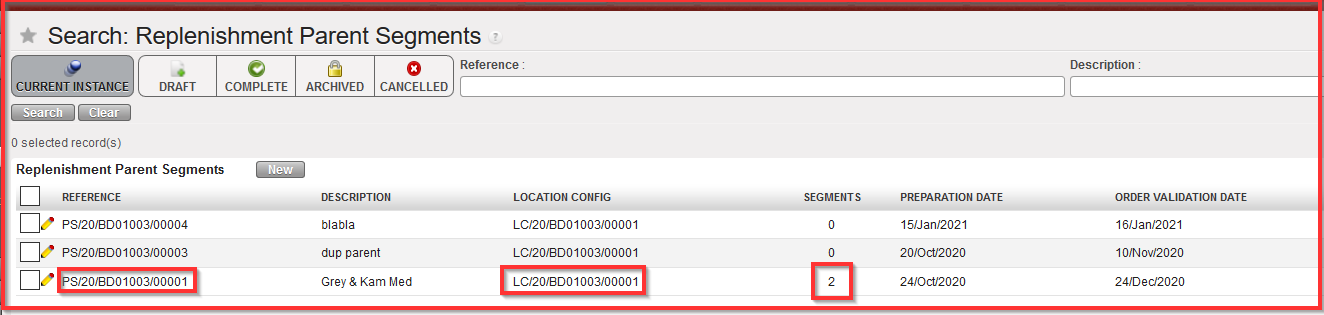
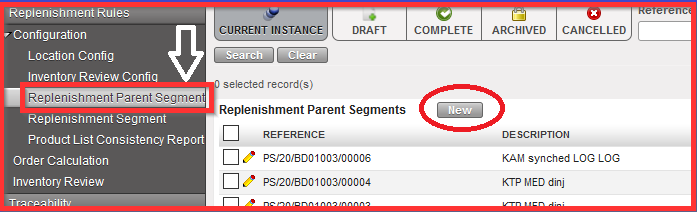
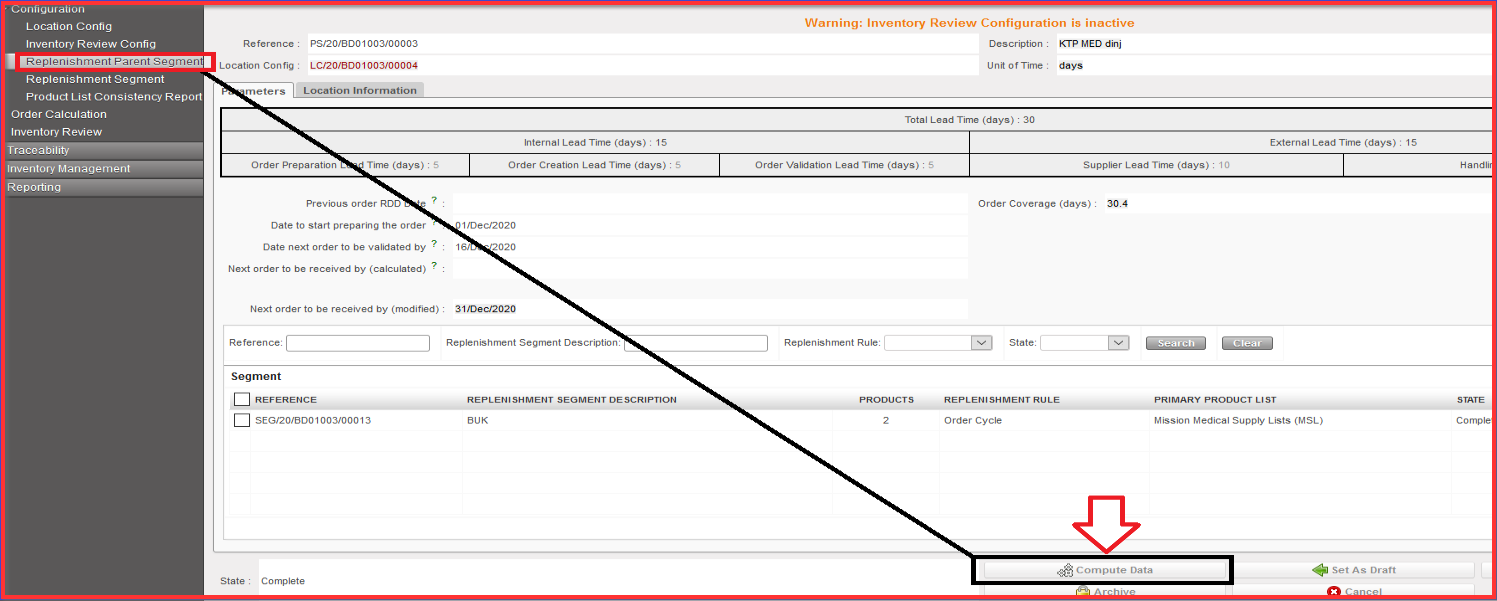
Order Calculation enables to export “IR” and “PO” based on configured “RR” steps before. In order to generate Order Calc go back to “Replenishment Parent Segment” and select Replenishment Parent Segments REFERENCE which exists there and which you need to process.
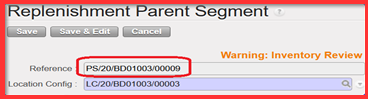
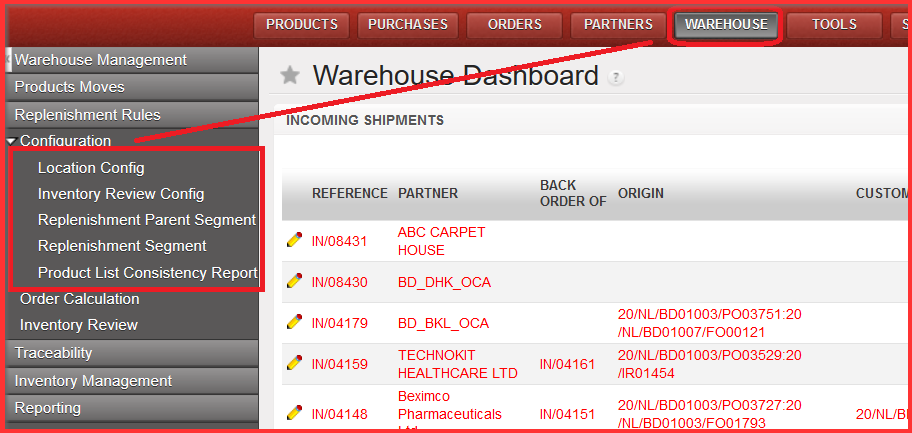
Go to: Warehouse / Replenishment Rules / Configuration / Replenishment Parent Segment

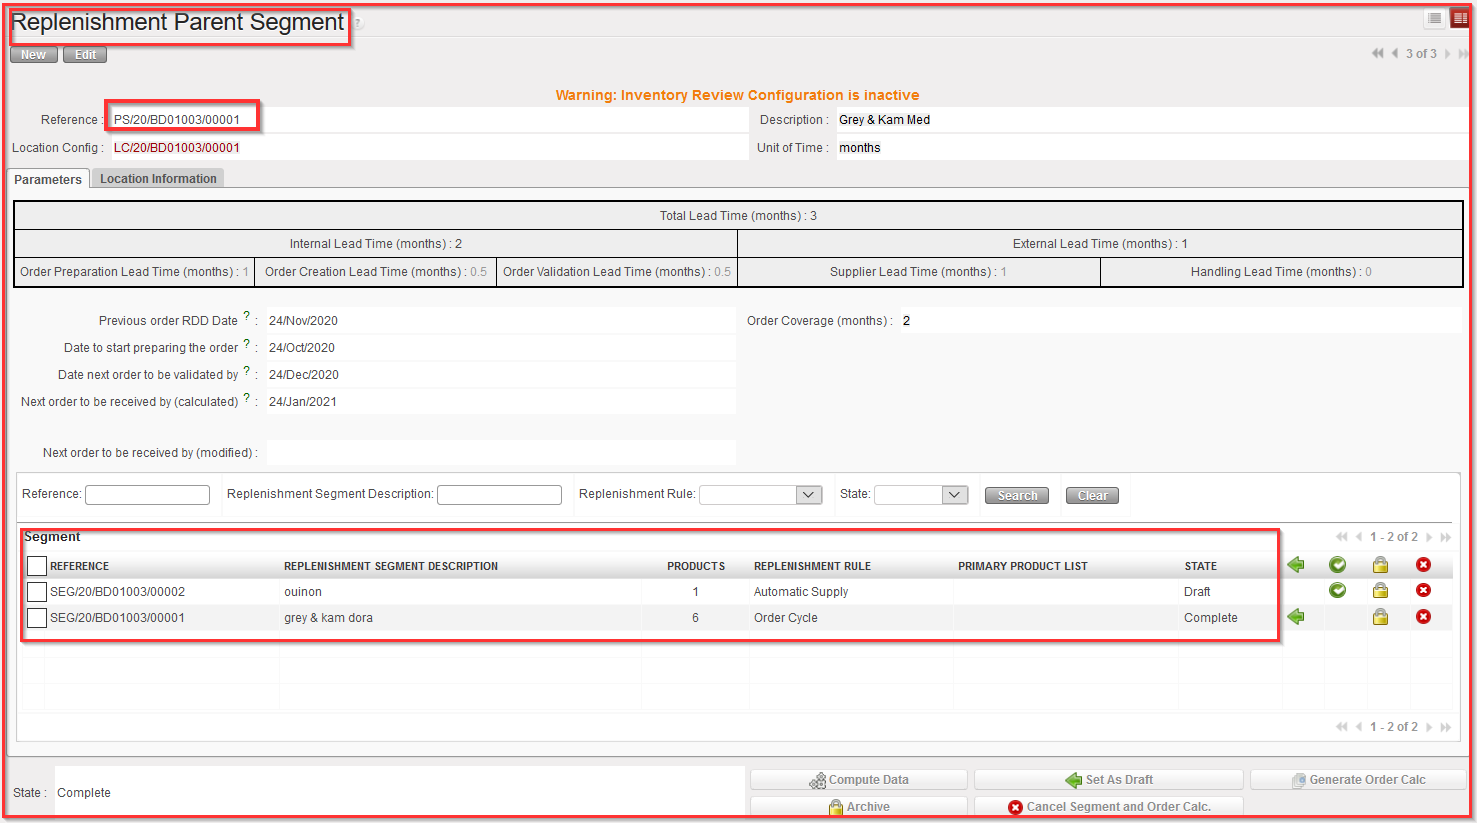
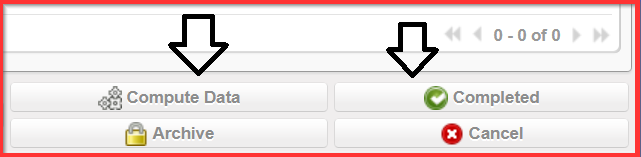
- Click on “Compute Data” button.
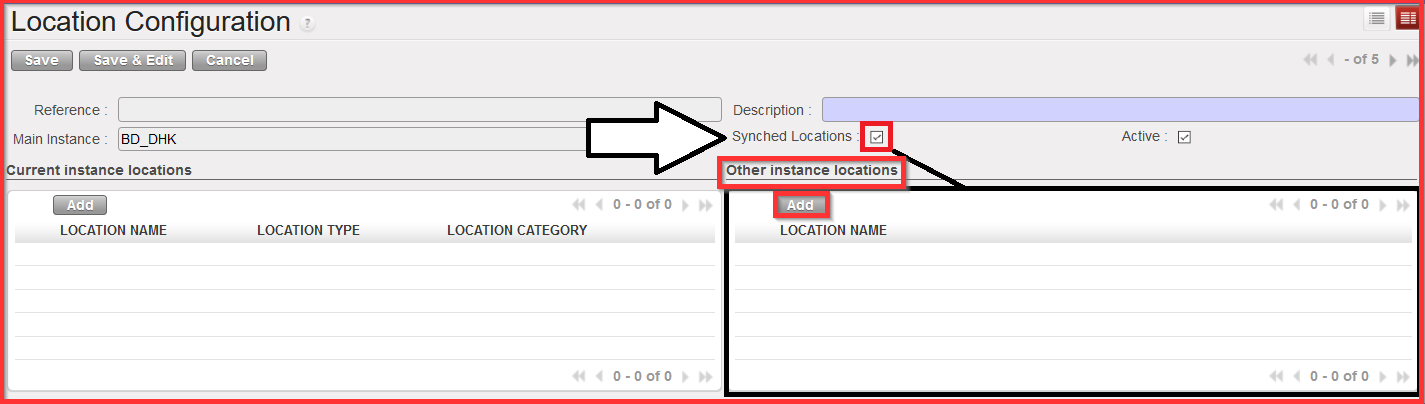
2. Synchronize the instances.
In case you cannot wait until the next automated synchronization, proceed to a manual synchronization (see UM Chapter 2 Configuration> LUSU1103 Synchronization> C.How to Synchronize manually).
Please note that manual synchronization is subject to specific User right; liaise with your IT officer if needed.
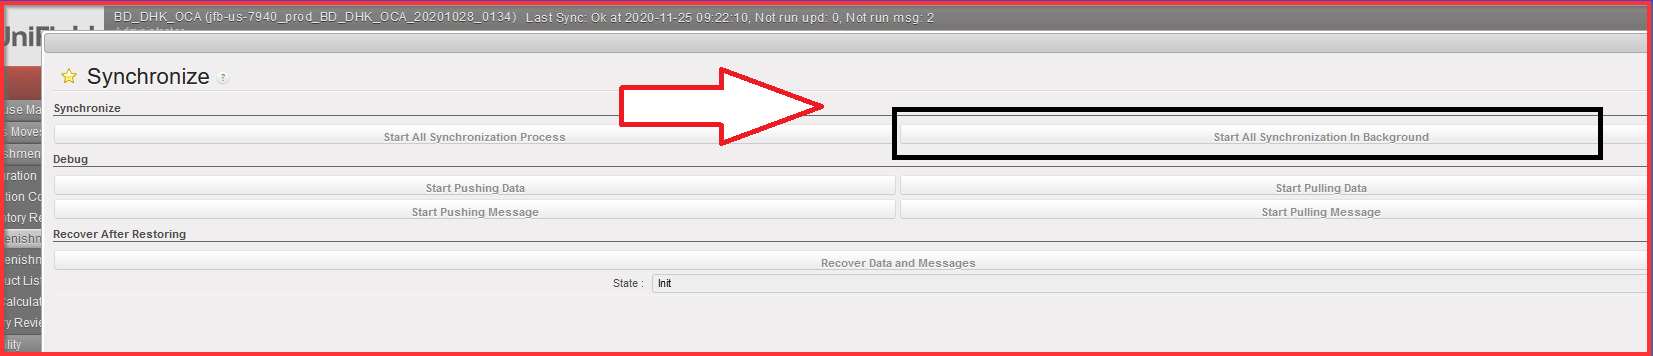
Once synched, go back to Replenishment Parent Segment screen.
3. Click on “Generate Order Calc” button.
When button is clicked it will generate and Order calculation for all lines included in all “Complete” state (child segments) belonging to the Parent Segment. When Button is clicked there is a message indicating that Order Calc has been generated for XX YY and ZZ (child) Segments.
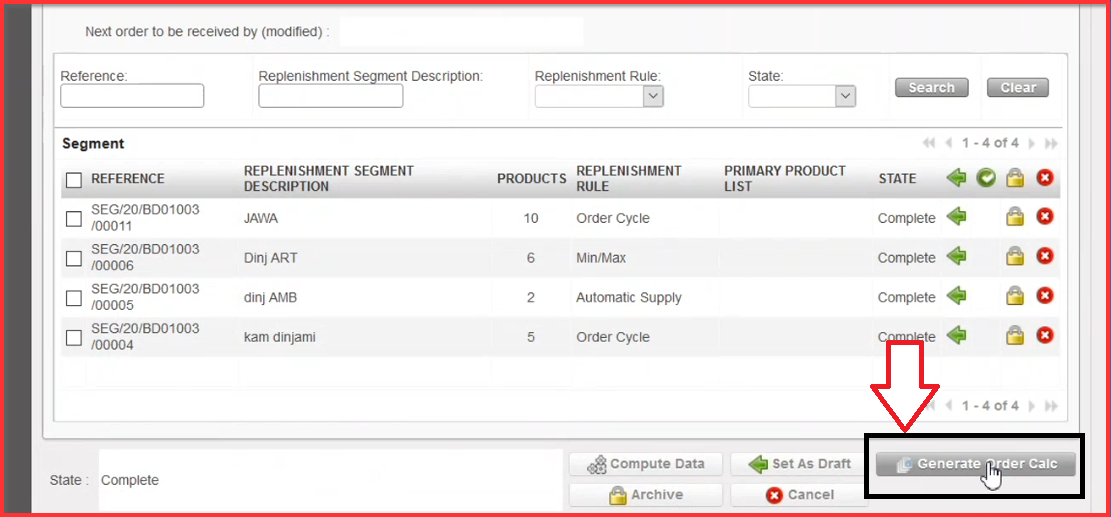
The export from the Order Calc will also contain all lines from segments belonging to the Parent Segment. Once attached to a parent segment a child segment cannot switch its parent. If a Child segment is Archived, it is not considered Active.
After the clicking on “Generate Order Calc” button you get the notification message on the top of the “Replenishment Parent Segment” screen informing about generated Order Calc. It automatically generates for all Replenishment Segment References (all lines).
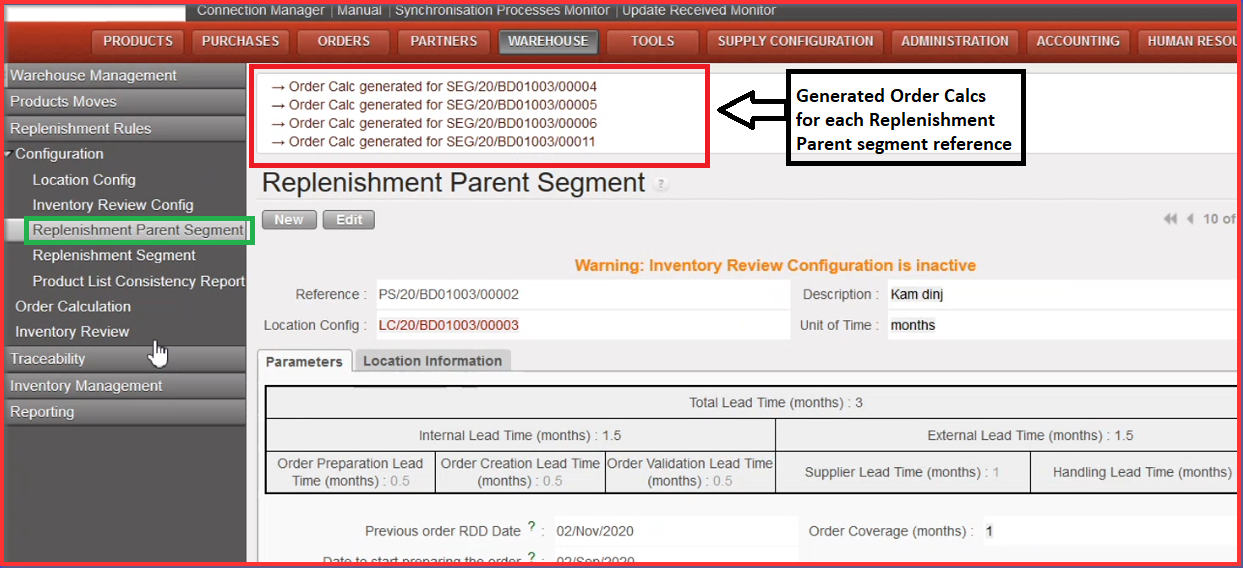
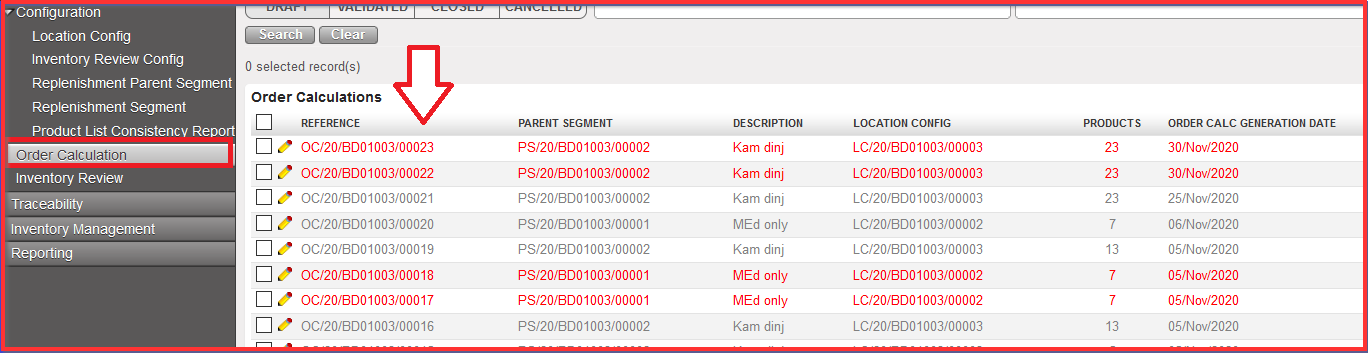
4. Click on “Order Calculation” submenu option. There are created generated Order Calcs on the top of the screen in “draft” status.
5. Click on the “OC” reference which you need to process
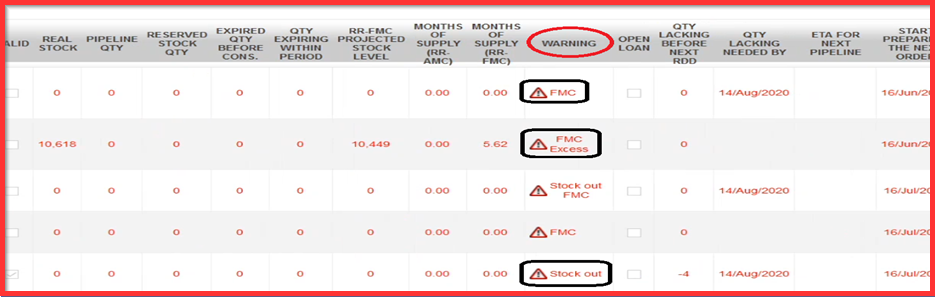
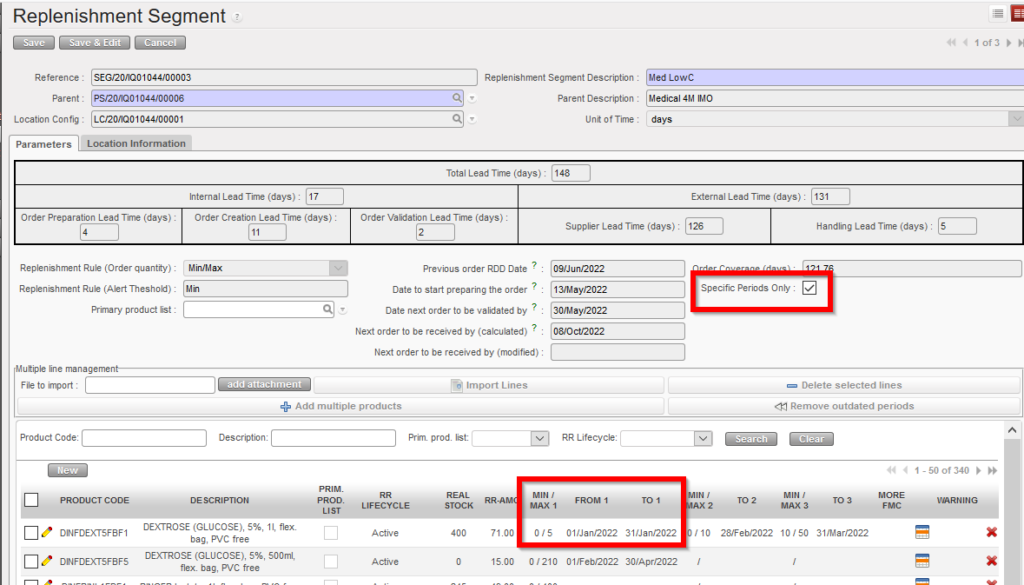
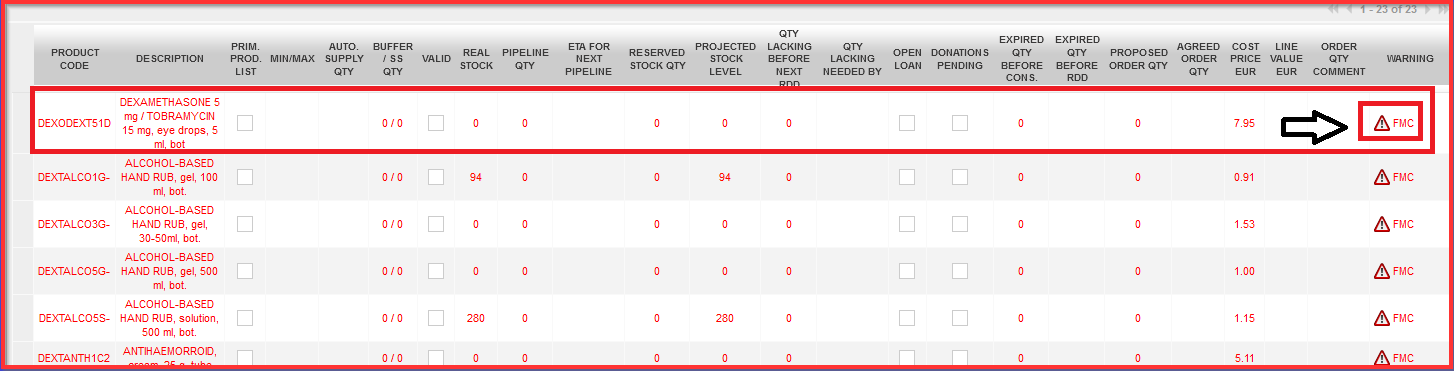
There are multiple product lines visible. If there is invalid “FMC” the product code line is in “red” and there is an exclamation mark depicted in “Warning” column. Invalid FMC goes with wrong data when FMC is not calculated correctly which is a huge blocker in terms of calculating and processing IR to PO. Order Calcs must be processed only with correct FMC.
6. Update the Order Calc (if necessary)
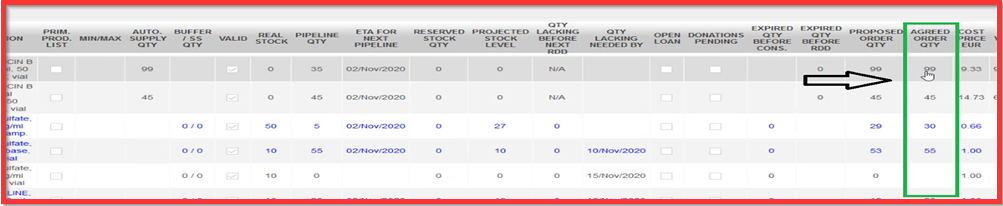
a) Fix FMC correctly by correcting input values in “Agreed Order Qty” column. Column cells for “Agreed Order Qty” must contain at least “zero” value. Blank cells are not allowed.
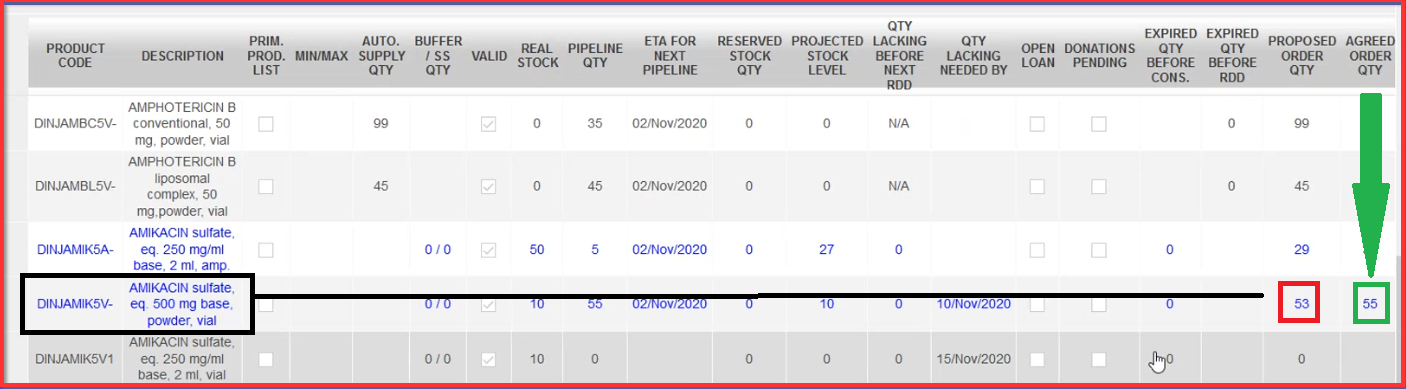
b) Click on “Round Qty to SoQ” which will round up the quantities in the “Agreed Order Qty” according to any SoQ value found in the Product PMD in main instance.

This “Agreed Order Qty” column is a main pillar for further validation process. The validation process needs to be done at this point which means that cost price is taken from the product PMD (data sheet) e.g. average Cost Price is not computed based on the supplier selection at this stage. Proposed Order Qty. can be changed due to the type of packaging. This is a manual action only. If Product PMD has SoQ of “1” then no rounding to be done. If proposed Qty is “0” then no rounding to be done. “Proposed Qty” value is not impacted by this button and should stay as per original value.
Where this button has been used and the qty has been changed (rounded up), the line should appear in a different color (blue) onscreen and in export report. The Cost price (X) is still based on this “Agreed order Qty” and so will take any rounded up qty into account. Below picture shows the quantity of products in “Proposed Order Qty” column which is rounded up for the quantity set out in “Agreed Order Qty” column.
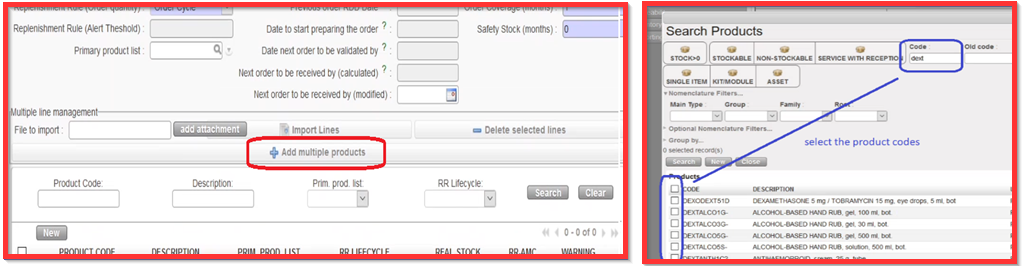
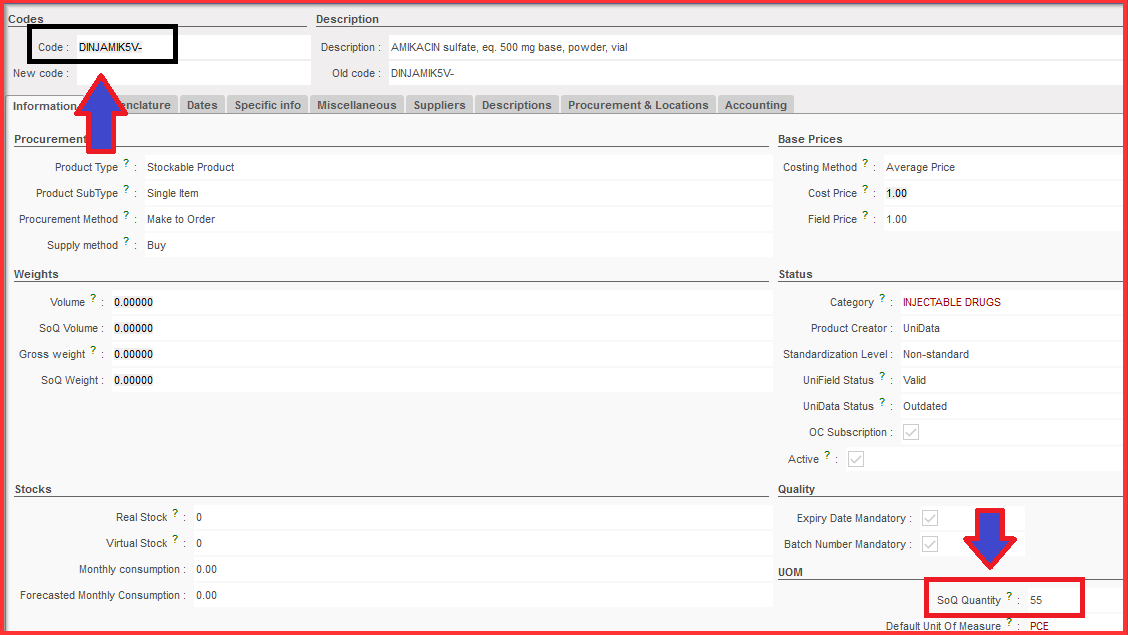
You can go to Products > Products “Search: Products” section and check “SoQ Quantity” for the specific product code in related product data sheet under UOM (Unit of measurement) section.
7. Back to the Order Calc screen, when values are fixed for each product line, click on button “Validate”.

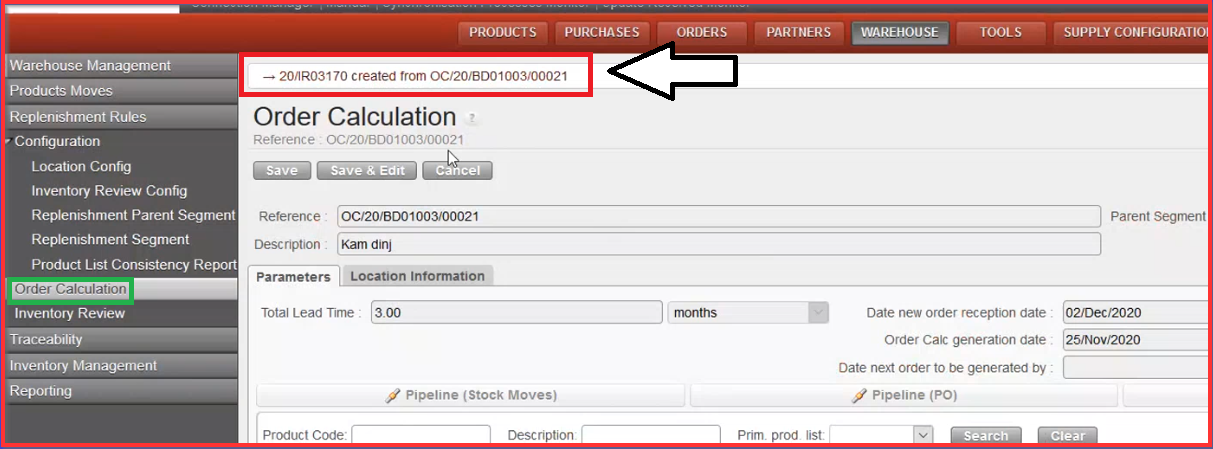
8. Click on button “Generate Requisition & Close”.

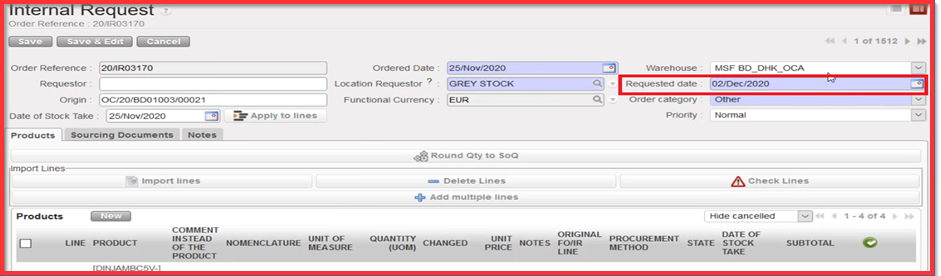
When you click on “Generate Requisition & Close”, the Order Calc is Closed. There is a new message on the top of the screen informing us about newly created IR (e.g. 20/IR xxx) reference from specific Order Calc reference (e.g. OC/20/BDO xxxxx) as depicted below on print screen example.
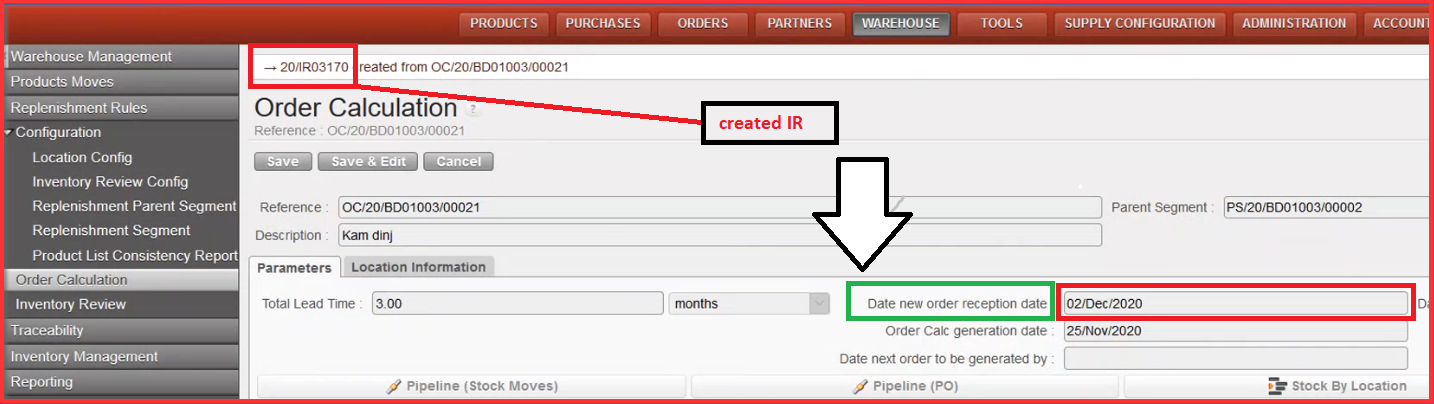
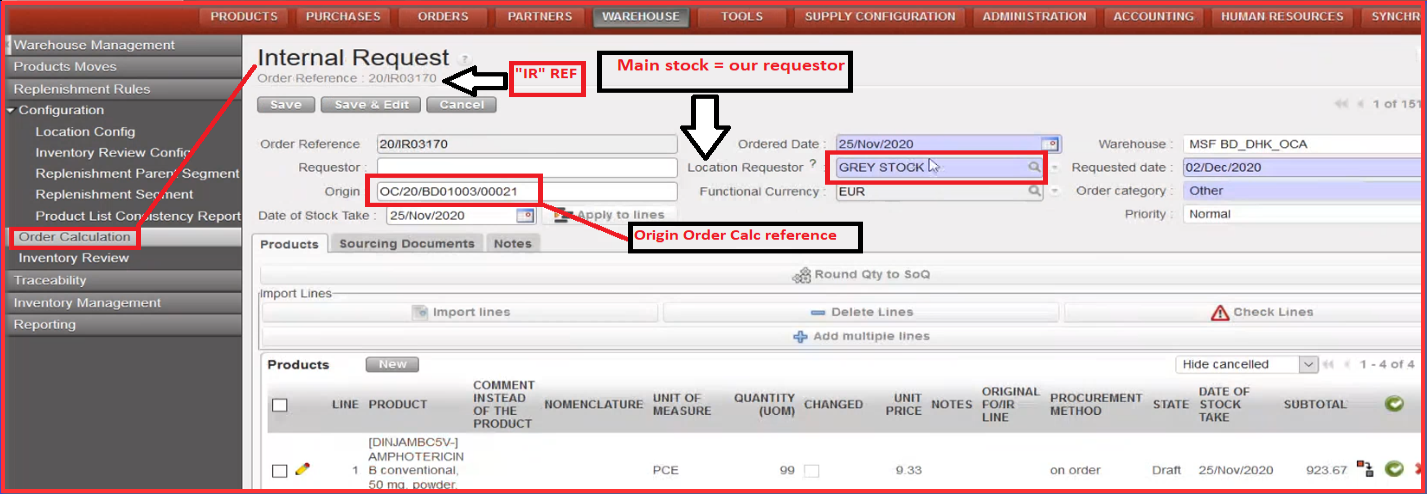
9. Click on created IR reference on the top of the screen to be redirected to the “Internal Request” screen
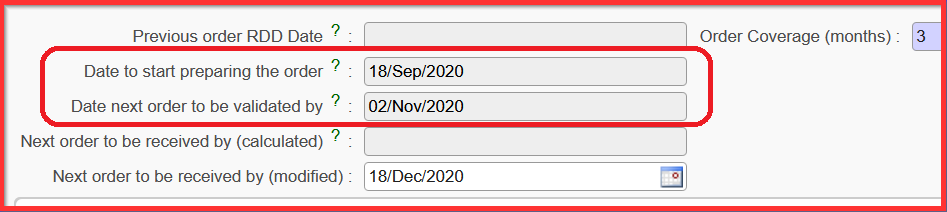
The “Replenishment Parent Segment” and “Replenishment Segment” are updated based on created “IR”, next order is due by e.g. “Date new order reception date” section depicted below.
See below the description of the sections in opened new Internal Request window.
10. Click on “Validate document” on the IR screen.
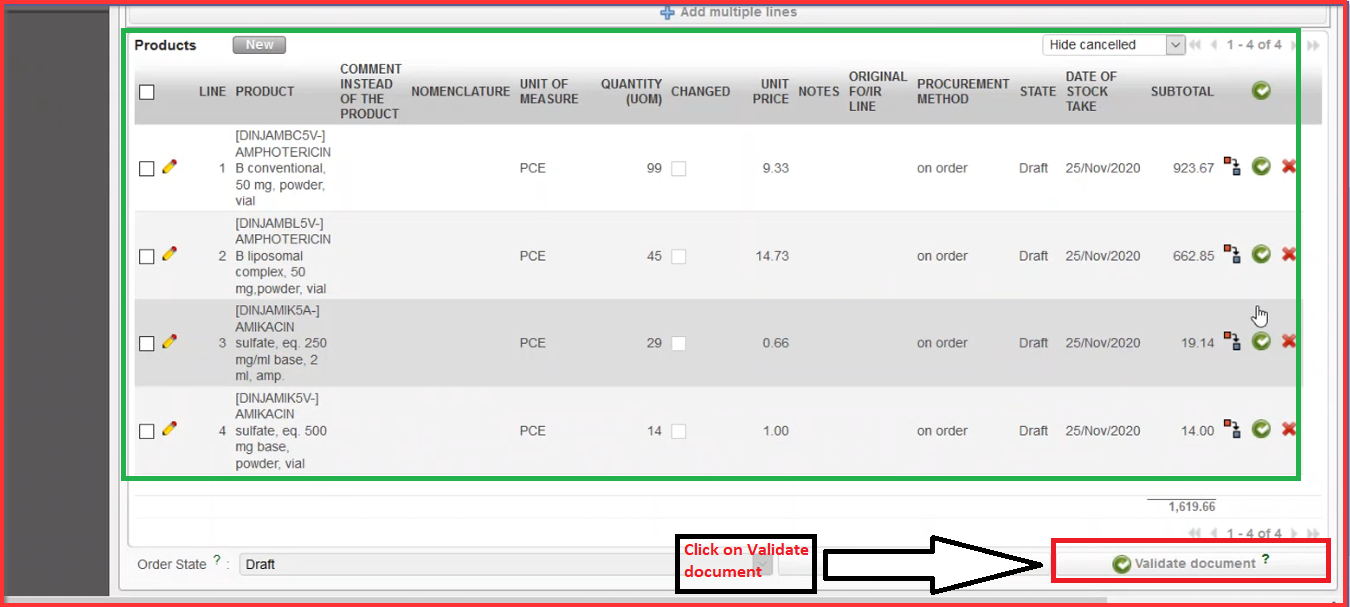
After the validation process, there is still option to change “Requested date”. This date is used in PO phase in order to determine “RDD” date. There is no update backwards but only onwards feasible. When you get to PO stage as soon as you have validated lines, there will be considered as pipeline.