If you look at the INT screens, you will find various types of references (document numbers):
INT/XXXXX. This type of reference is generated
a) for movement from the “Input” location to the final destination of the goods. These INT will be automatically/manually processed if the “Direct to Requesting Location” checkbox is ticked/not ticked.
b) for Internal Move created from scratch
2. INT/KITXXXXX. This type of reference is used in case of kit substitution or de-kitting (see the section on kits for details)
3. SYS-INT/XXXXX. This type of reference is used for these very special Internal Moves which have been introduced in the previous section
Explanations in this section are quite technical. Skip them if you do not want to enter into this. The section on virtual stock in LU-SU4302 may help to understand them as these SYS-INTs are used to impact the virtual stock levels. More specifically they are used in order to insure that Replenishment Rules can work. See specific section on RR as well.
In any case, bear in mind that you should not touch these Internal Moves. SYS-INTs should always be created, confirmed updated and cancelled by the system, never touched by a user.
These special Internal Moves are created by the system when a PO (or PO-line) with “Input” as planned destination location is confirmed. This confirmation triggers the creation of an Incoming Shipment with “Input” as destination location.
This means that SYS-INT are created in 2 cases:
When a PO (or PO-line) created from scratch is confirmed.
When a PO (or PO-line) created following the sourcing of an IR with a stock or an ICU as Location Requestor is confirmed.
The lines of the created IN (which is in state “Available” with all its lines “Available”) have “Input” as destination location. This means that the virtual stock level of the “Input” location will be directly impacted by this IN.
However, the virtual stock level of the final destination location (stock or ICU) is not impacted by the IN.
The SYS-INT (created in the state “Confirmed” with its lines “Not available”) is actually simulating a movement between the “Input” location and the final destination location. It decreases the virtual stock level of the “Input” location (which is increased by the IN) and increases the virtual stock level of the final destination location.
With this feature, users are able to have a better view on where the virtual stock levels will be. They can see “further” than the “Input” location.
The processing of the IN will update (in case of partial reception) or cancel the SYS-INT according to the situations. In addition, this will also create the Internal Move as usual, to move goods (manually or automatically) from the “Input” location to the final destination location.
E. INTERNAL MOVES WITH “Input” AS SOURCE LOCATION.
If you source an IR whose Location Requestor is an ICU on order (PO), an INT will be automatically created after the reception of the PO (the processing of the IN). It will have “Input” as source location and the ICU as destination location.
If the “Direct to Requesting Location” checkbox is ticked when the IN is processed, the INT will be processed automatically, and goods will reach directly the ICU. This will be transparent for the user. However, an INT will still exist but will directly appear in the state “Closed“.
If the “Direct to Requesting Location” checkbox is not ticked, goods will be received in “Input”, the same INT will be created but you will need to process it manually. This INT will directly have the state “Available” with all its lines “Available“.
The same principle will apply with POs created from scratch or when the Location Requestor of the IR will be a stock (e.g. “LOG” or “MED”).
Example of INT created automatically by the system
An Internal Move can be exported to PDF or Excel. This may be useful if you want to communicate about a planned transfer or to get a needed validation (signature).
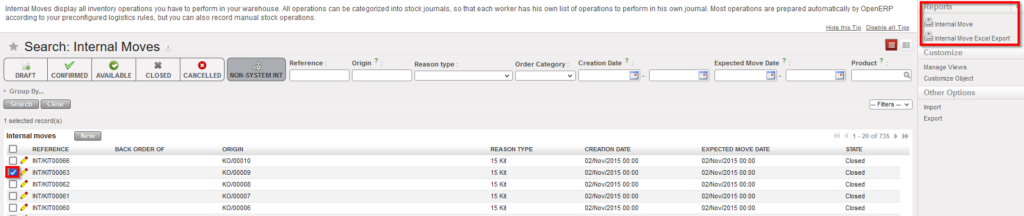
Go to:Warehouse / Warehouse Management / Internal Moves
Using a checkbox, select the Internal Move you wish to export.
In the action menu, select the option “Internal Move” to export the INT to PDF or the option “Internal Move Excel Export” to export the INT to Excel.
Exporting an Internal Move to PDF or Excel
Internal Move in PDF format
Internal Move in Excel format
Note that these export options are also available in the action menu from within the INT.
If you tick several check-boxes in the “Search: Internal Moves” screen, you may export several INTs in one step. In PDF, you will get one page per INT. In Excel, you will get one sheet per INT.
An Internal Move can be created manually to transfer products from one location to another. You will have to specify source and destination locations. Note that all locations cannot be used as sourced or destination on an INT as this document should only be used to transfer goods internally within the warehouse (e.g. you will not be able to put an ECU as destination location on an INT).
Go to: Warehouse / Warehouse Management / Internal Moves
Click on the “New” button to create a new Internal Move.
Creating a new Internal Move
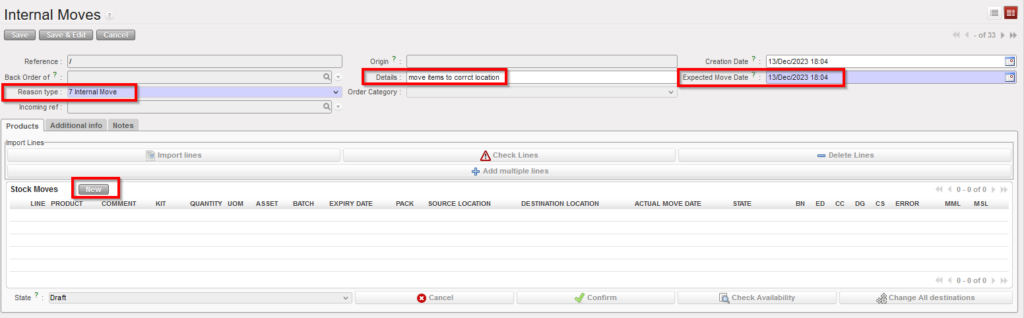
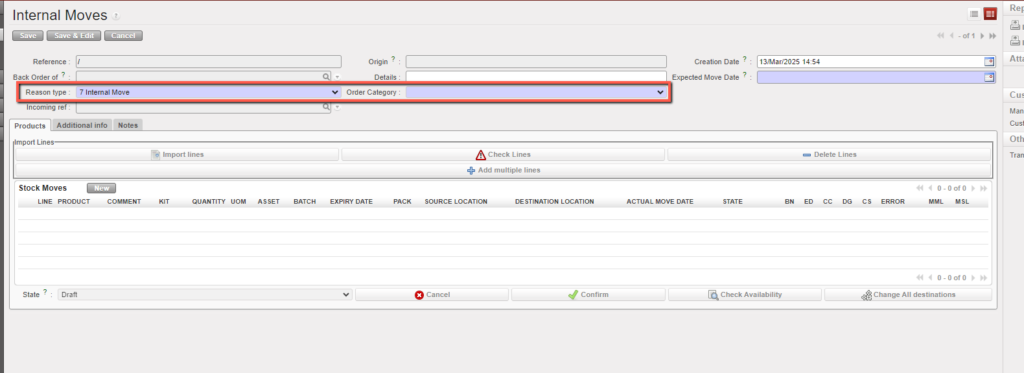
2. Enter the appropriate reason for the movement in the “Reason type” field and the “Expected Move Date“. In addition, you may add information in the “Details” field, on the “Additional info” tab or on the “Notes” tab.
Completing the Internal Move header
“Reason type” drop list includes “Internal Return” this is for products which have been returned from another internal location and this will be used in RR-AMC calculations in the same way as INs with RT “Return from Unit”.
Select Order Category .The default value is empty, and the user can select one of the following options: Logistic, Medical, Service, Transport, or Other.
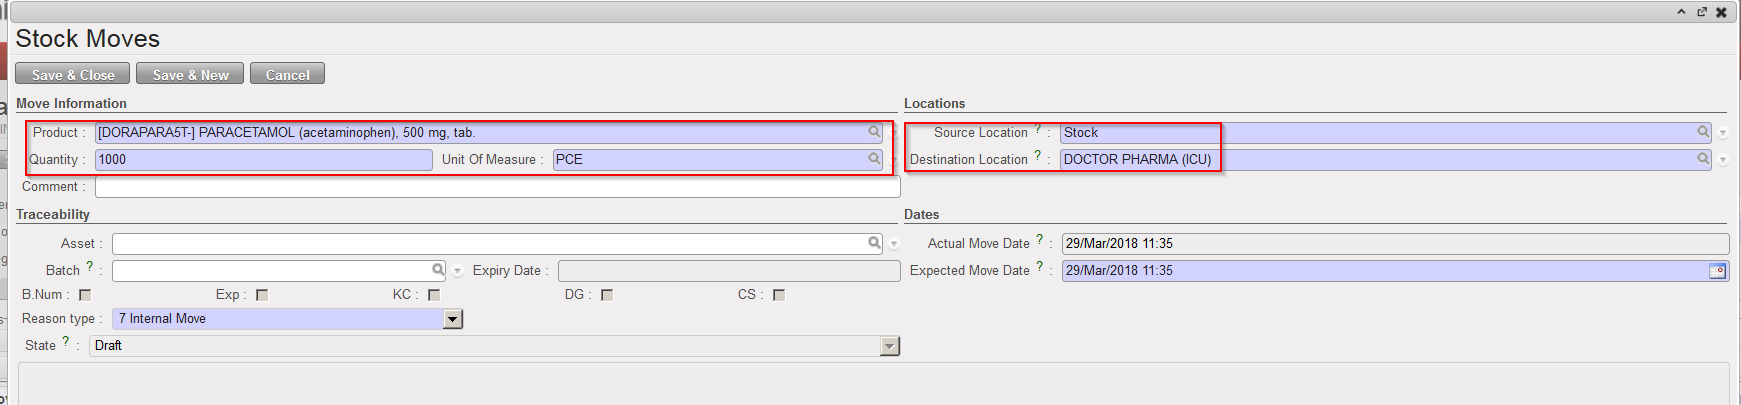
3. Click on the “New” button at the top of the “Stock Moves” table to insert a product line on the INT. Note that product lines may also be inserted via the “Add multiple lines” button or the “Import lines” button.
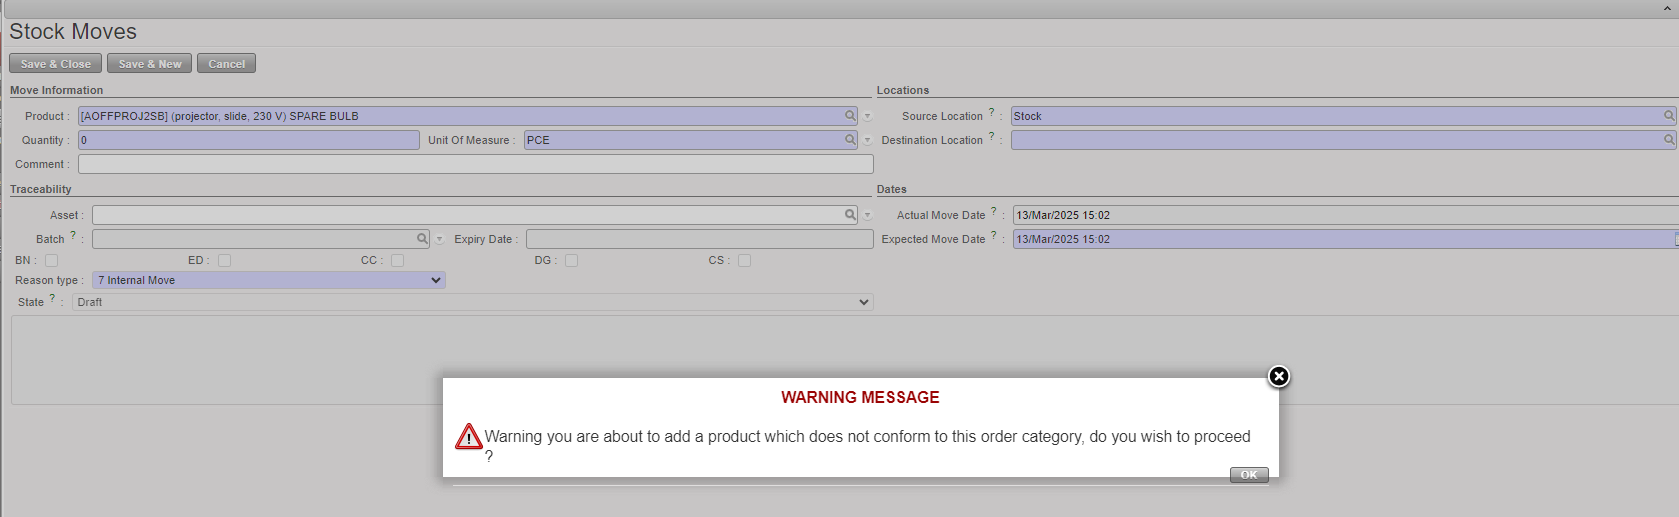
4. Enter a product code, a quantity and a unit of measure if needed. Note that if the product entered is managed by BN/ED, the system will warn you about this.
Inserting a line on the Internal Move
If a product does not correspond to the selected category, the user will receive a non-blocking warning message.
5. Select the “Source Location” (from where the product has to be taken) as follows:
“Input” to transfer a received product (this stock move should be automatically created)
“Stock” to transfer the product out of the stock
“MED” / “LOG” or another stock location to transfer the product out of this specific location
An Intermediate Stock to transfer the product out of this specific location
An Internal Consumption Unit to transfer the product out of this ICU
“Cross docking” to transfer the product out of the “Cross docking” location. This can be used to transfer a product to a client other than the one who ordered it (e.g. product initially purchased for a project but finally delivered to an Internal Consumption Unit)
6. Select the “Destination Location” (where the product has to be delivered) as follows:
“Stock” to transfer the product to the stock – it will be transferred to the “MED” / “LOG” location according to the product main type
An Intermediate Stock to deliver the goods to an intermediate stock location
An Internal Consumption Unit to deliver the product to an ICU
“Cross docking” if you need to transfer received products (from the “Input” location) to the “Cross docking” location to reimburse an exchange
Please note that “Input” location can never be used as a “Destination location” for INT from scratch.
7. If the product is managed by BN/ED, you may already select the batch master data on this screen.
8. Click on the “Save & Close” button to save your line and return to the main INT screen. Another option is to click on the “Save & New” button to save your line and add another one or on the “Cancel” button to discard your changes.
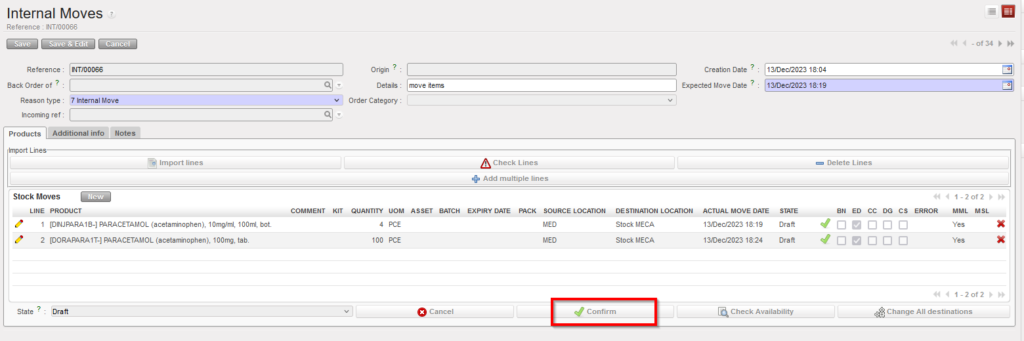
9. Once all lines have been inserted, click on the “Confirm” button located at the bottom of the main INT screen.
Confirming the Internal Move
10. The INT switches from “Draft” to ”Not Available”. Click on the “Check Availability” button located at the bottom of the main INT screen.
Checking the availability of the products on the Internal Move
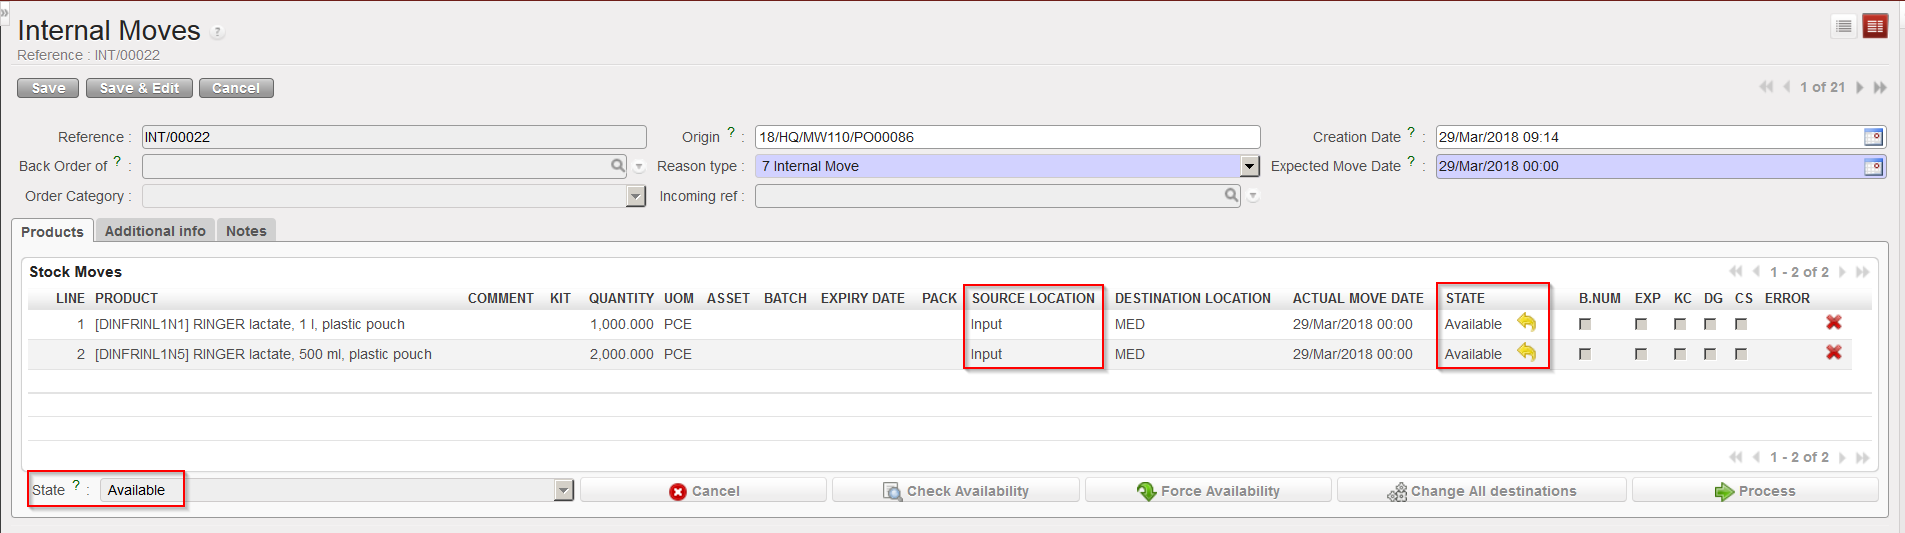
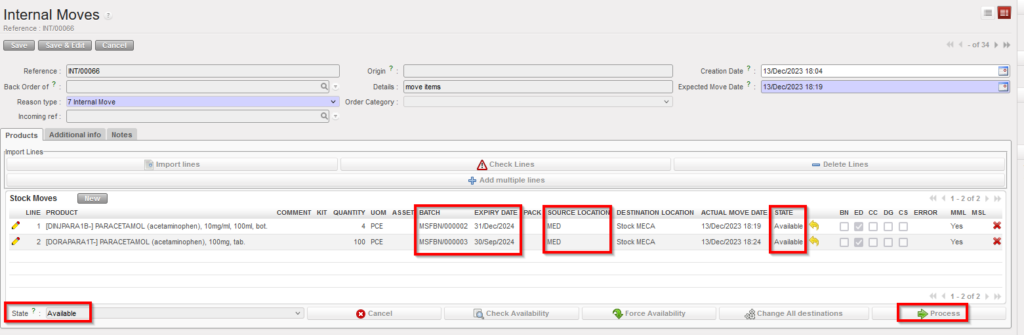
11. The availability check has been done. Batches have been selected if needed. The INT switches from ”Not Available” to “Available“. Click on the “Process” button located at the bottom of the main INT screen.
Internal Move ready to be processed
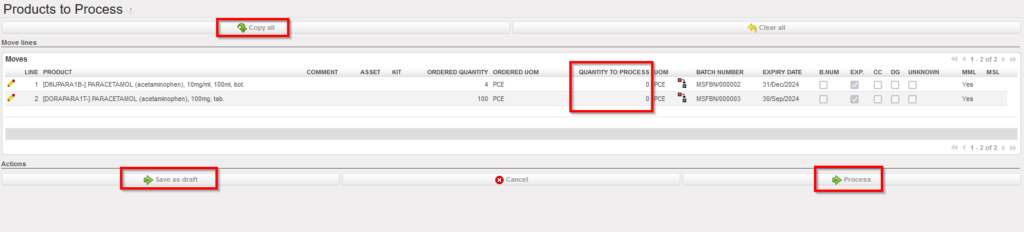
12. On the “Products to Process” screen, click on the “Copy all” button and on the “Process” button.
Processing the Internal Move
Please note that all the encoded information can be saved in case you need to process the INT at a later stage using the “Save as draft” button.
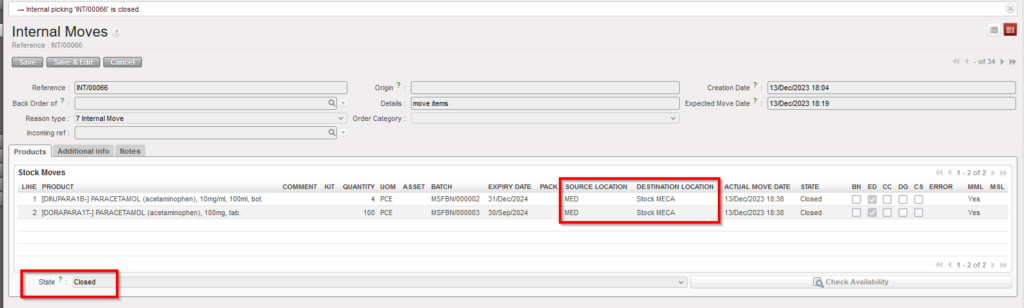
13. The INT is now “Closed” all products/batches have been transferred from source to destination location(s).
Internal Move in state “Closed”
Note that INT can be confirmed at line level. However, you should not do this as it will block the process.
Some product lines could be in the state “Not Available” following the availability check. These product lines won’t be transferred to the “Products to Process” screen when you will process the INT.
An INT can be partially processed. In this case, processed product lines will be registered on a new “Closed” INT while product lines left behind (back-order) will stay on the initial INT, ready to be processed. That’s what will happen if some lines of an INT are “Available” while others are “Not Available“.
An INT takes the state “Available” if at least one of its lines is in the state “Available“.
If a product line is “Not Available“, its availability may be forced (and this action can be done at line or header level). However, if you force the availability of a product which is managed by BN/ED, you could be blocked at the next step. If the product is not managed by BN/ED, you will be able to proceed but could create negative stocks. In any case, forcing the availability should only be done with great care.
The button “Change All destinations” which is located at the bottom of the main INT screen (if the INT is “Draft“, ”Not Available” or “Available“) allows changing all the destination locations in one step.
If you want to update an INT-line on a ”Not Available” or “Available” INT, you may only do this if the line has the state “Not Available“. Therefore, if the line is “Available” but you still want to change it, click on the yellow arrow to cancel the availability of the line and update the line as needed. After this you may recheck its availability.
B. HOW PRODUCTS MOVE THROUGH THE UNIFIELD LOCATIONS
For processing day to day transactions, it may not be necessary to know the technical aspects of Internal Moves, but the following table may be useful to understand how each transaction in UniField will move products from one location to another. In the pick/pack/ship full shipment process, products will usually initially be in a stock (e.g. “LOG” or “MED”)or in cross docking.
The picking process will transfer them from this location to the “Packing” location. The packing process will transfer them from the “Packing” location to the “Dispatch” location“. Finally, the shipping process will transfer them from the “Dispatch” location to the “Distribution” location and from the “Distribution” location to a customer (partner) location.
Source location
Destination location
Remark
Picking
Stock or Cross docking
Packing
When sub PICK is “Closed”
Packing
Packing
Dispatch
When PPL is “Closed”
Shipment
Dispatch
Distribution
When shipment is “Shipped”
Shipment
Distribution
MSF Customer/Other Customer
When shipment is “Closed”
Stock levels of each product in each location can be analyzed thanks to the “Stock by Location” functionality.
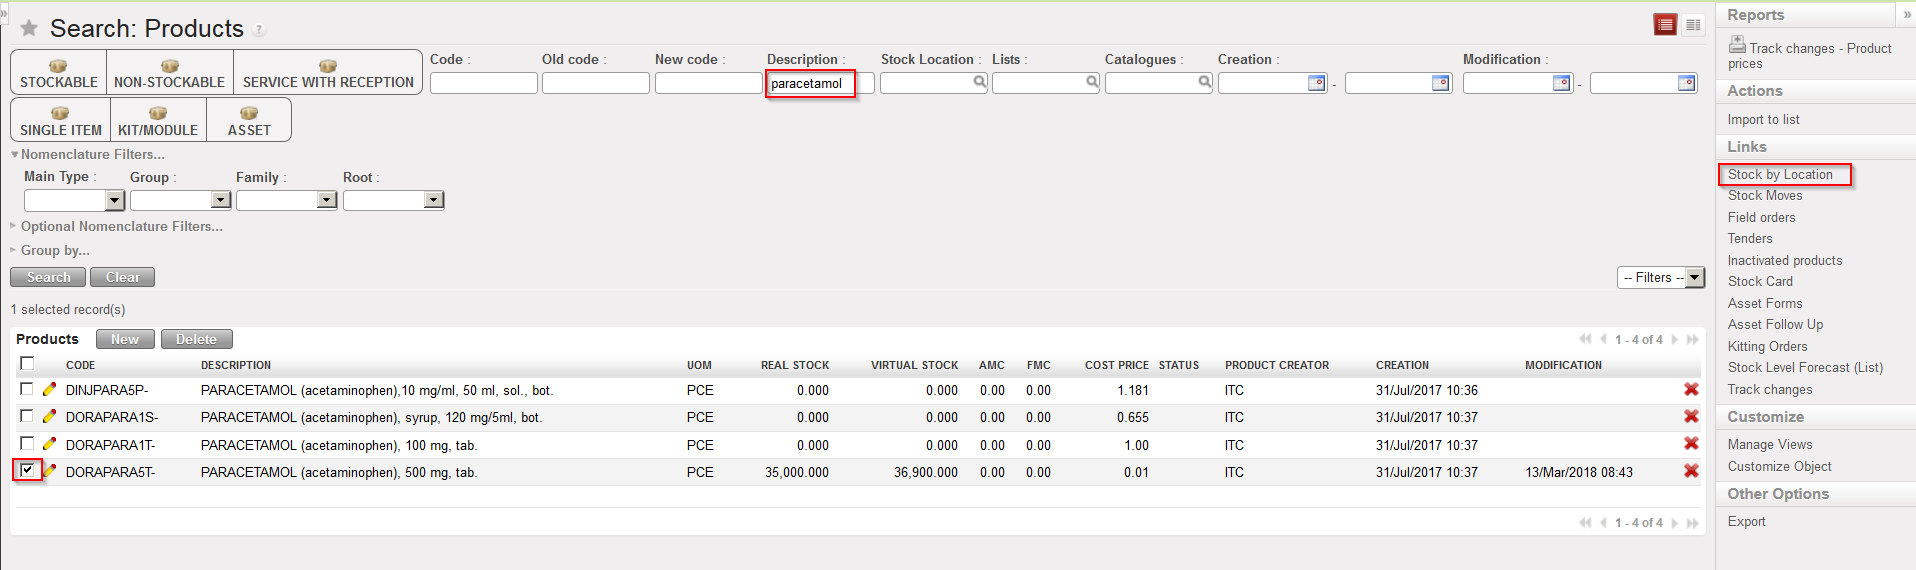
Go to:Products / Products / Products
Using the filters and a checkbox, select the product for which you want to see the stock levels.
In the action menu, select the option “Stock by Location”.
Opening the “Stock by Location” screen for a specific product
3. The “Stock by Location” screen appears. The “Instance Full View” is shown. Note that you may see here real and virtual stock levels. Click on the “Expand all” button to see all locations from the “Instance Full View”.
“Stock by Location”, Instance Full View collapsed
4. The “Instance Full View” is expanded. All locations belonging to this view appear and real and virtual stock levels in all these locations are showed.
“Stock by Location”, Instance Full View expanded
During the pick/pack/ship full shipment process, if you check this “Stock by Location” screen step after step, you can see your products moving through these locations as stock levels are changing at each step.
Note that on top of the “Instance Full View“, you may choose to show the “Partners Location” view which will show locations related to supplier and customers.
Another option is to select the “Virtual Locations” view which will show locations related to inventories, services, non-stockable products, …
Internal Moves (INT) are used to transfer products from one location to another within the warehouse.
As we already saw in the previous sections, they are used to move the received products from the “Input” location to the final destination location after having processed an Incoming Shipment. They need to be processed manually if the “Direct to Requesting Location” checkbox is not ticked on the IN, they are processed automatically if the checkbox is ticked.
Internal Moves can be created automatically by the system in some cases. They may also be created manually.
Most Internal Moves will require written approval (in accordance with the OC’s procedures) from the stock owner before to actually move the goods.
As already mentioned, many transactions in UniField (IN, PICK, PACK, SHIP, OUT, INT) are actually moving goods from one location to another.
If you decide to ship a freight to a customer using a simple out process, a documentation may also be generated. However, you will not have all the details which are available with the full process.
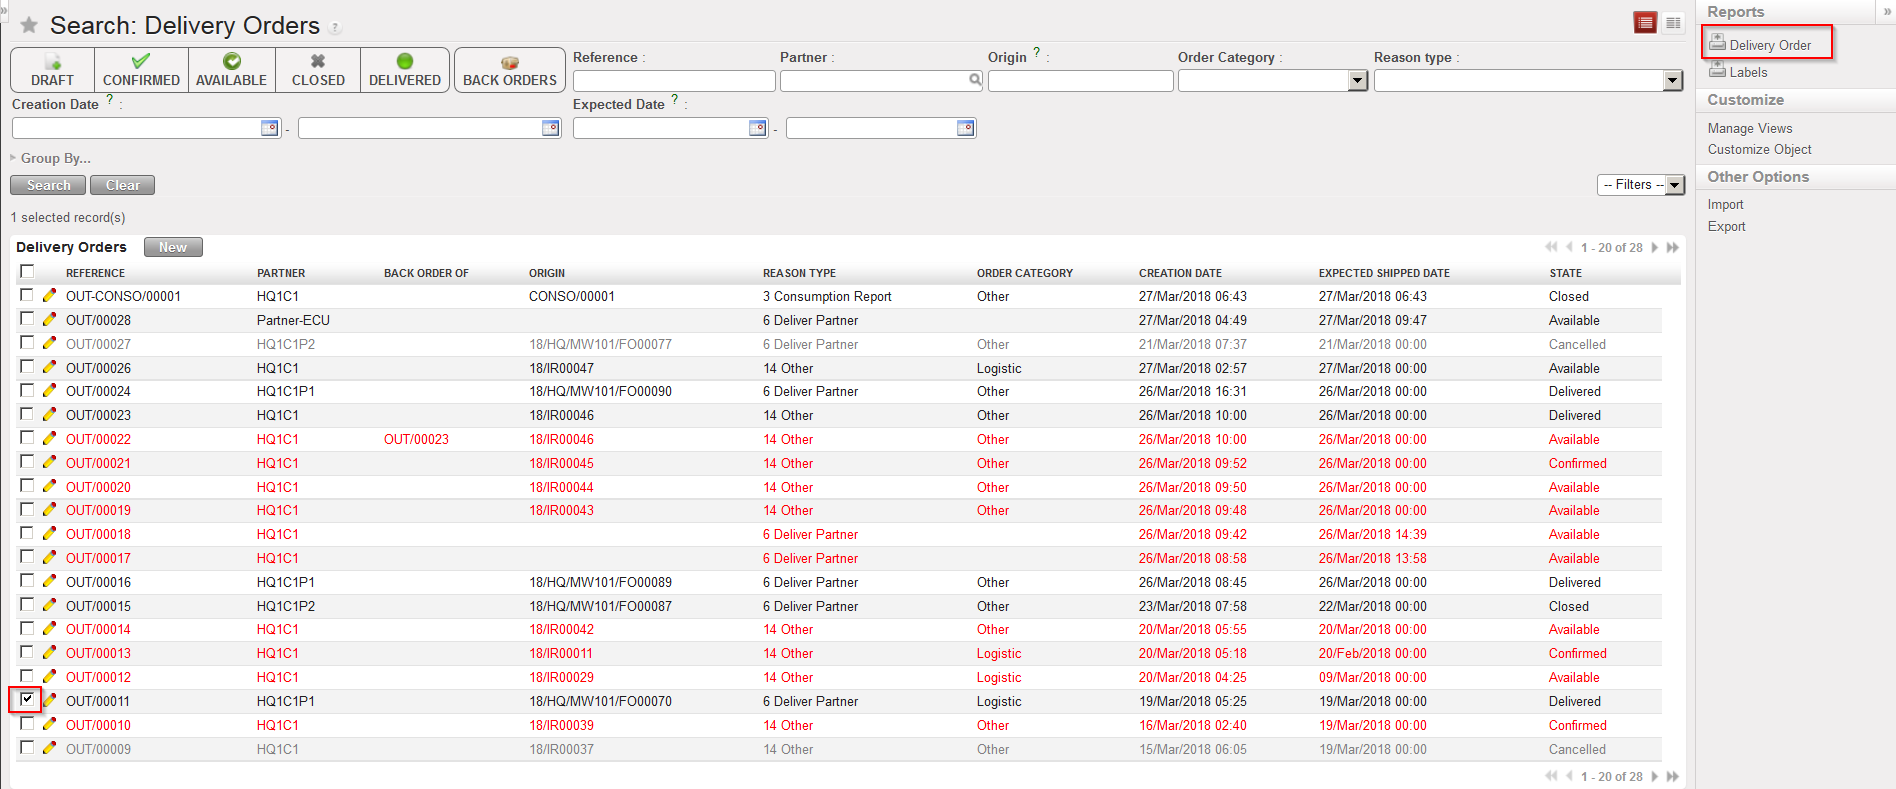
Go to:Warehouse / Warehouse Management / Deliveries / Delivery Orders
Using the check boxes, select the Delivery Order you wish to print.
In the action menu, select the option “Delivery Order”.
Exporting a Delivery Order to PDF
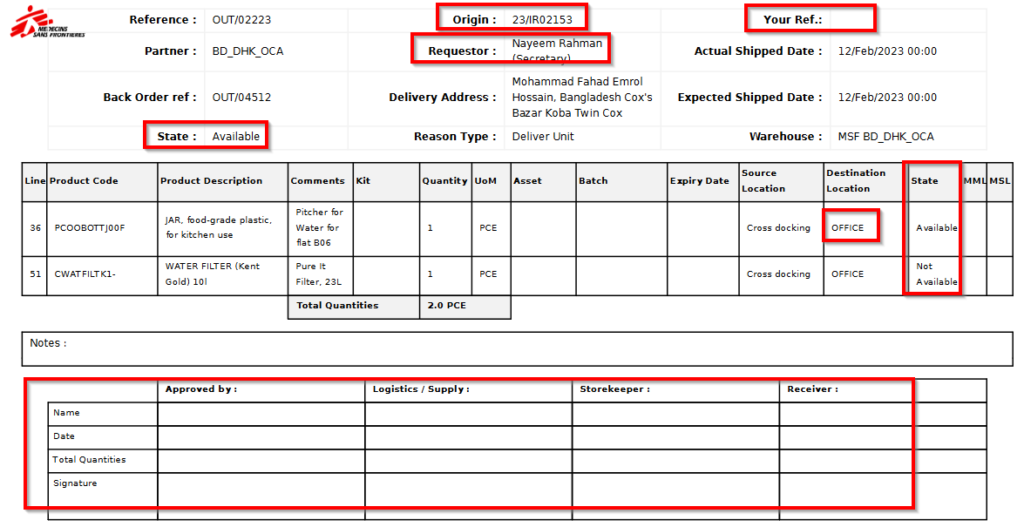
Delivery Order in PDF
This documentation can also be used for internal deliveries (to ECU) and signature boxes may be useful to authorize shipment and acknowledge receptions.
Information such as “Origin”, “Destination location”, “Requestor” ( same field coming from IR; “Contact name” if from FO) and “Your Ref” (PO from other instance) can be automatically populated from preceding documents (IR, FO…).
We use cookies to ensure that we give you the best experience on our website. If you continue to use this site we will assume that you are happy with it.


 to cancel the availability of the line and update the line as needed. After this you may recheck its availability.