Supply User Manual ENG -> 5. Warehouse -> 5.11 LU-SU4204: Kits Management -> D. HOW TO CREATE A KITTING ORDER (Kitting process)
D. HOW TO CREATE A KITTING ORDER (Kitting process)
Rather than buying a complete kit directly from a supplier, you can also create a kit using components available in stock. The kitting process can be seen as a kind of “manufacturing order” or more precisely an “assembly order“.
Note that before kitting can be carried out, all the kit components / products should be available in your warehouse and a Theoretical Kit Composition List should exist for the kit to be produced.
Go to: Products/ Kit Management / Kitting Order
- Click on the “New” button to create a new kitting order.
- On the “Kitting Order” screen
a) As “Product“, enter the code of the kit to be produced (for which at least 1 “Active” and “Completed” TKCL version must exist).
b) Enter the “Qty” of kits you wish to be produced (entering a qty > 1 will avoid repeating the same process over and over if you are producing several kits).
c) The “Reference” and “Creation Date” are auto-populated. Leave them as they are.
d) Use the “Version” field to select the appropriate TKCL version (which must be “Active” and “Completed”).
|
|
|
Kitting Order |

3. On the “Components” tab, select as “Default Source Location” the location from where the components will be taken.
4. On the “Kits” tab, select as “Destination Location” the location were the produced kit(s) will be stored.
|
|
|
Kitting Order |

5. On the “Notes” tab, you may enter any additional information related to the kit(s) production.
6. Click on the “Display Items from Version” button ![]() .
.
|
|
|
Kitting Order |
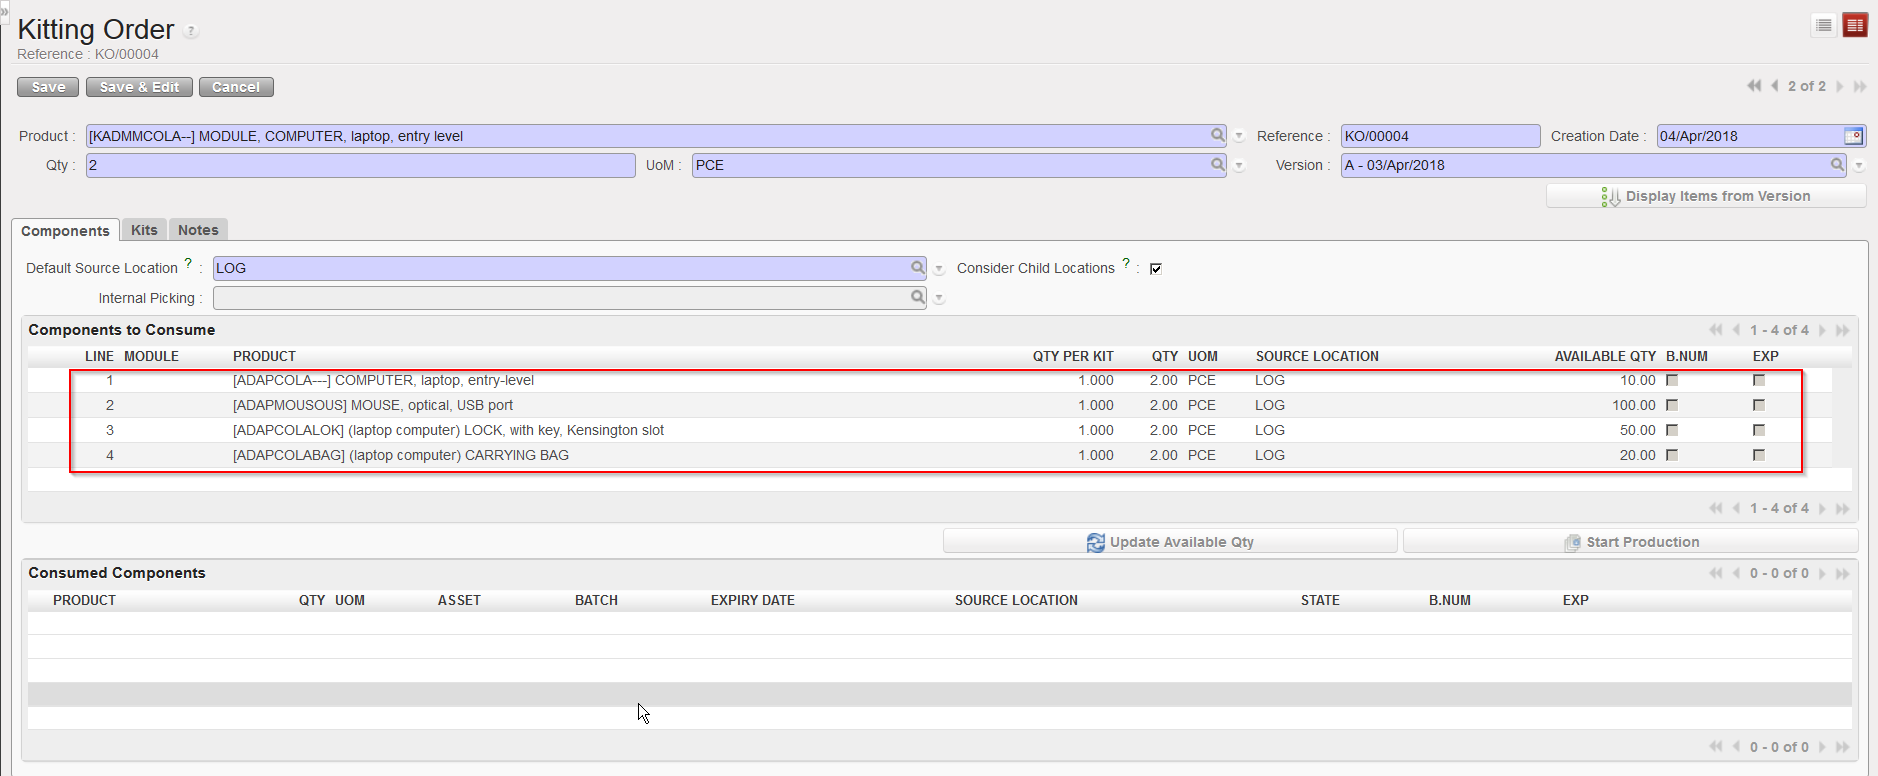
The “Components to consume” section of the “Components” tab is filled with the components of the selected TKCL version (including quantities). The “available qty” column indicates quantities available in the source location for the components.
7. Click on the “Save” button to save your kitting order.
8. When you are ready to launch the kit(s) production, click on the “Update Available Qty” button to check that the requested quantities are available in stock (as things may have changed between the creation of the kitting order and the actual production of the kit(s)).
9. Click on the “Start Production” button.
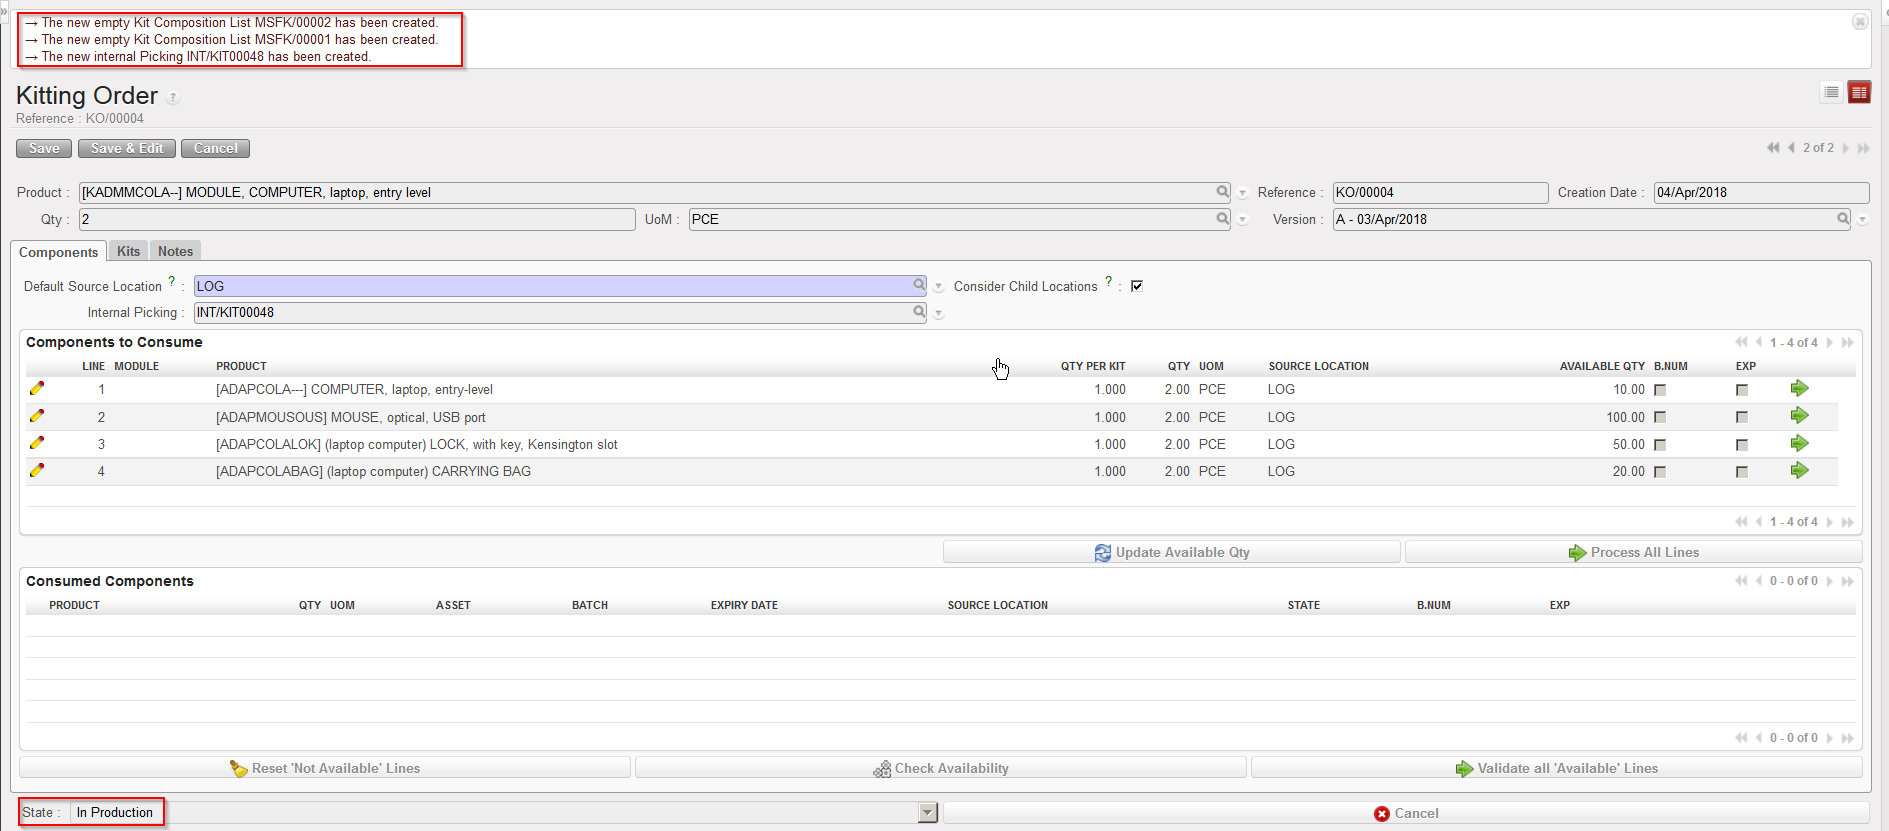
The system informs you on the creation of KCL(s) (2 in this case) and an Internal Move KIT/INT. The state of the kitting order switches from “Draft” to “In Production“
10. To process the production of your kit(s), Click on the “Process All lines” button.
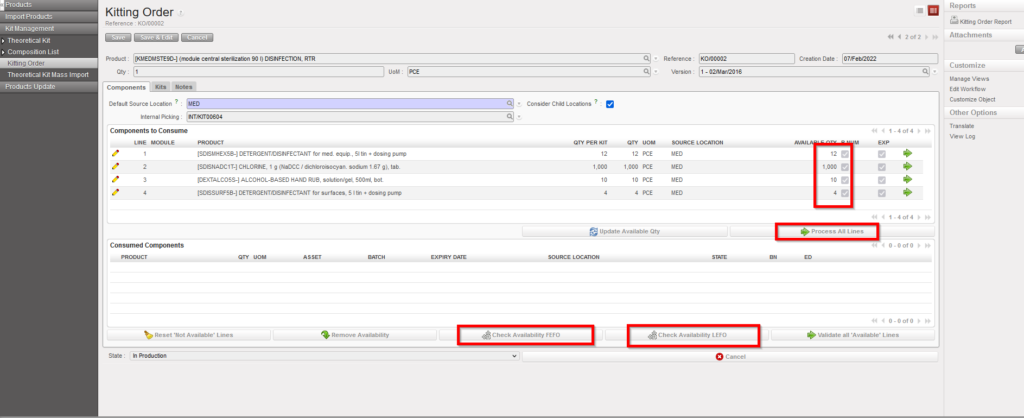
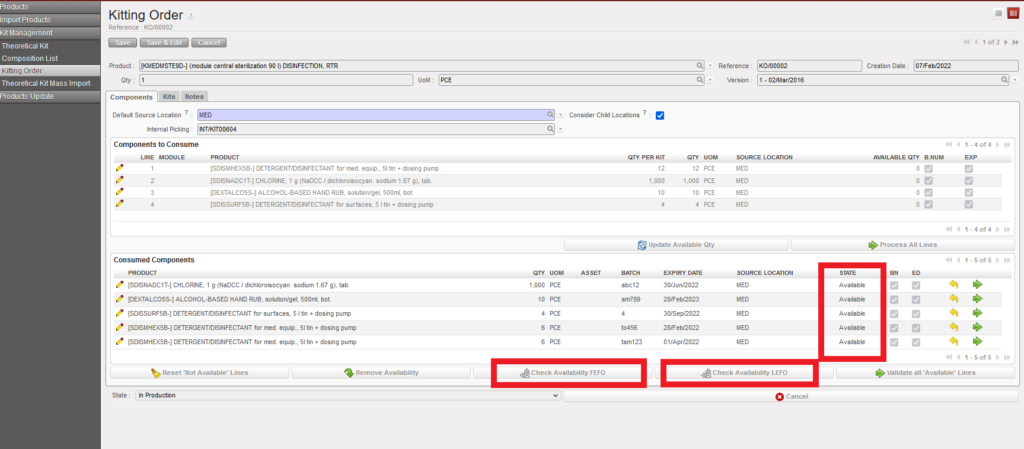
11. It’s possible to choose between the check for the availability according to FEFO or LEFO for Kit production as below snapshot, if you chose LEFO, the availability of products/batches with longest expiry dates will be shown, and if you check FEFO, (First Expired First Out) which is the default rule for all other stock movements, then the products/batches which will expire the soonest will be selected and displayed
11. To process the production of your kit(s), Click on the “Process All lines” button.
|
|
|
Kitting Order |
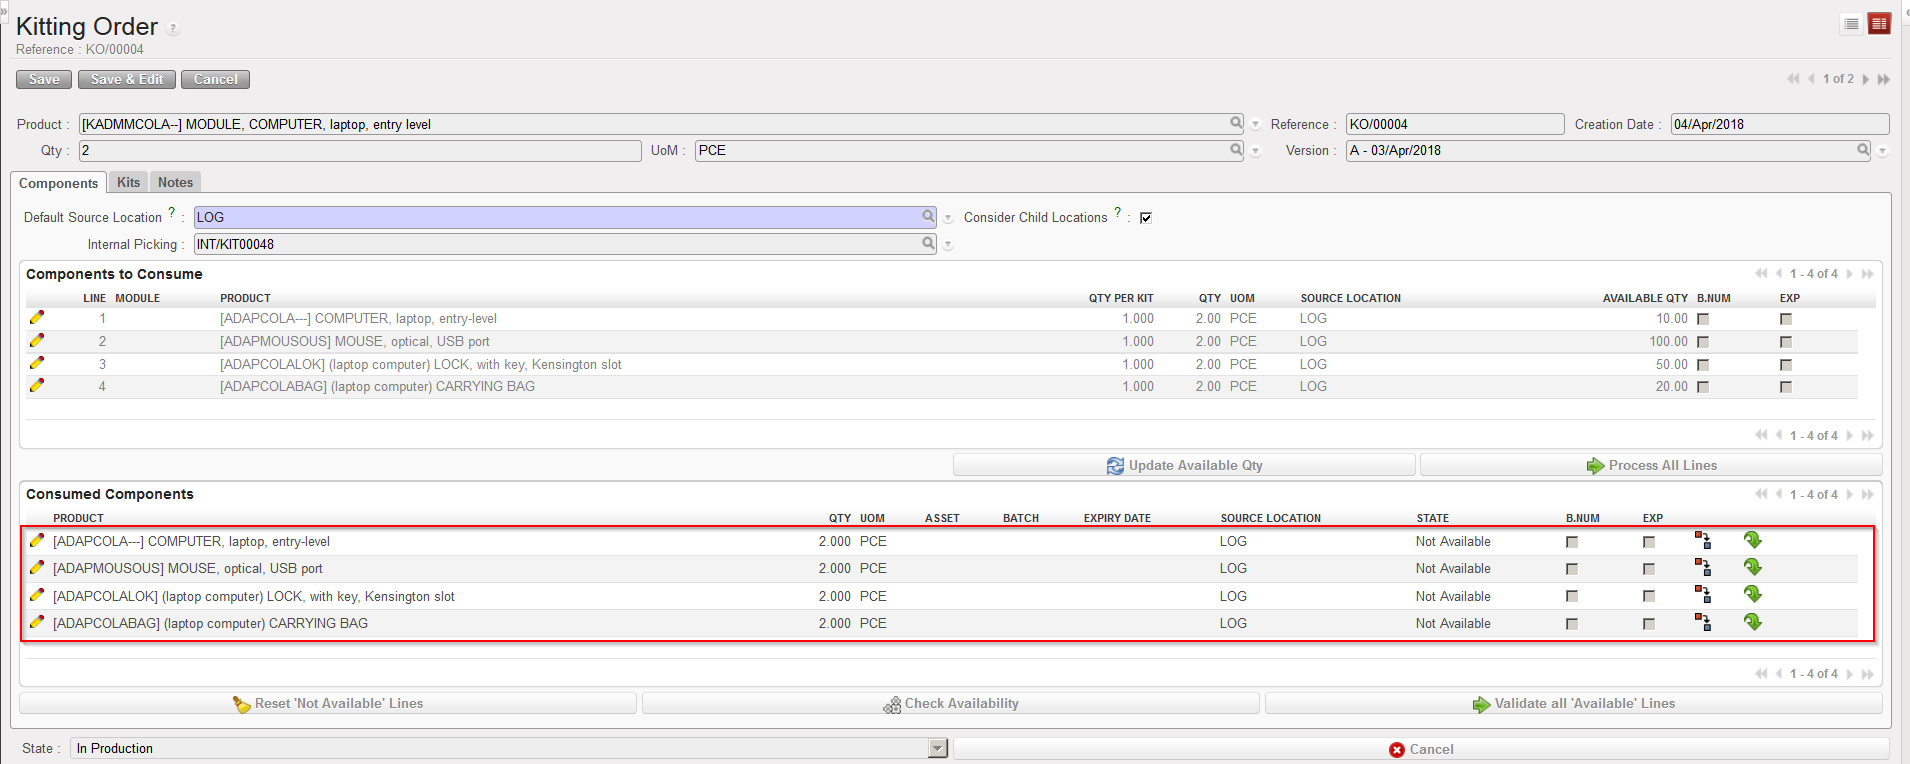
Components now appear in the “Consumed Components” section.
12. Click on the “Check Availability” button, to check that all components are available.
 |
|
Kitting Order |
If all components are available, their state switches to “Available“.
13. Click on the “Validate all ‘Available’ Lines” button to validate the consumption of these components/quantities by the production of the kit(s).
|
|
|
Kitting Order |
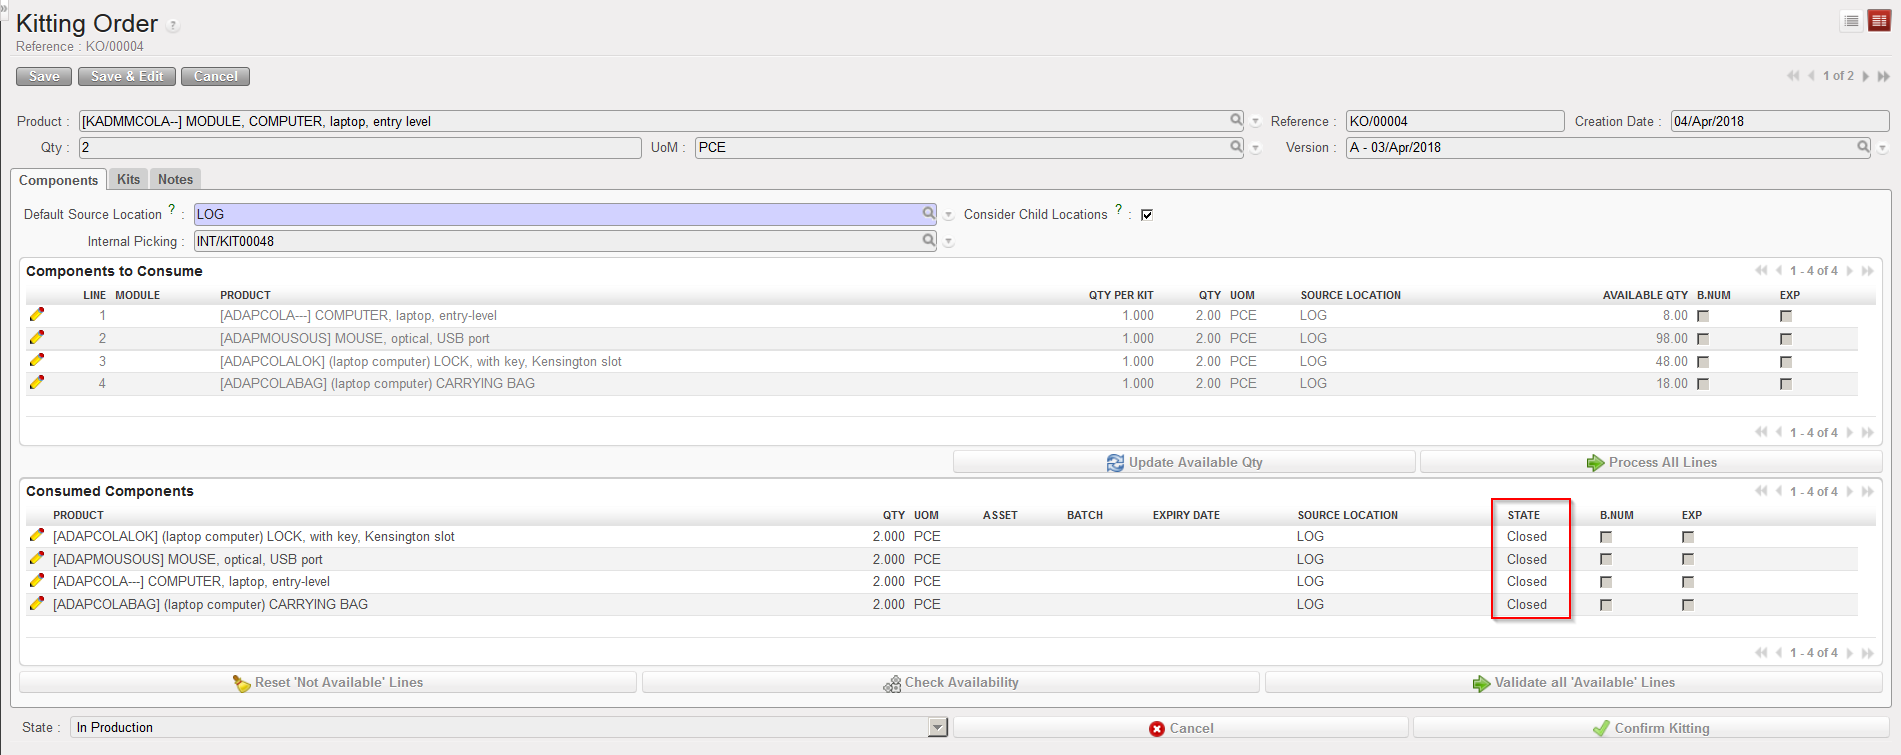
The state of the components switches to “Closed“.
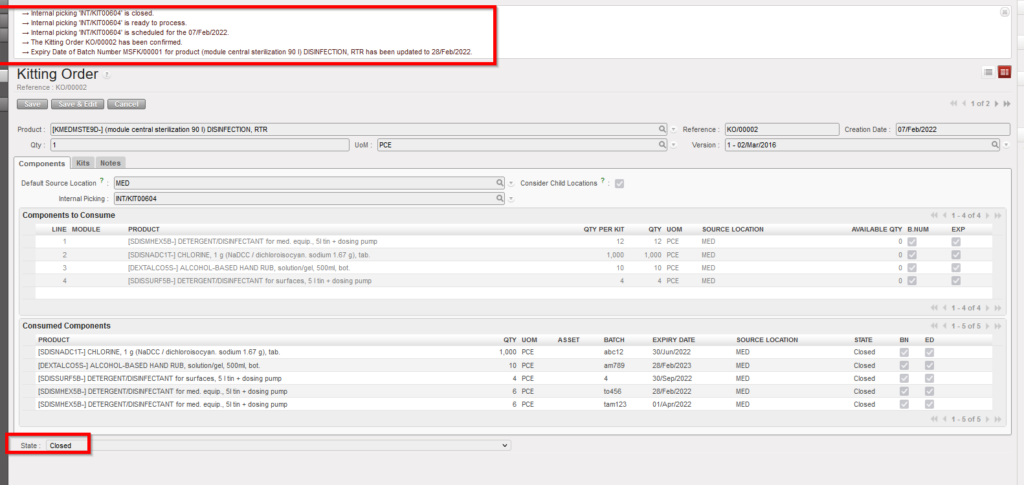
14. To confirm the kitting, click on the “Confirm Kitting” button.
 |
|
Kitting Order |
The state of the kitting order switches to “Closed“. The kit is now present in the destination location and the components have been consumed (i.e. they are no longer present in the source location).
In case a physical output document is need, please note that a Kitting Order PDF can be generated from the right side action menu.

The Internal Move INT/KIT which had been created before is processed and closed.
|
|
|
Internal Move created by a Kitting Order |
|
|
|
Kit Composition List created by a Kitting Order |

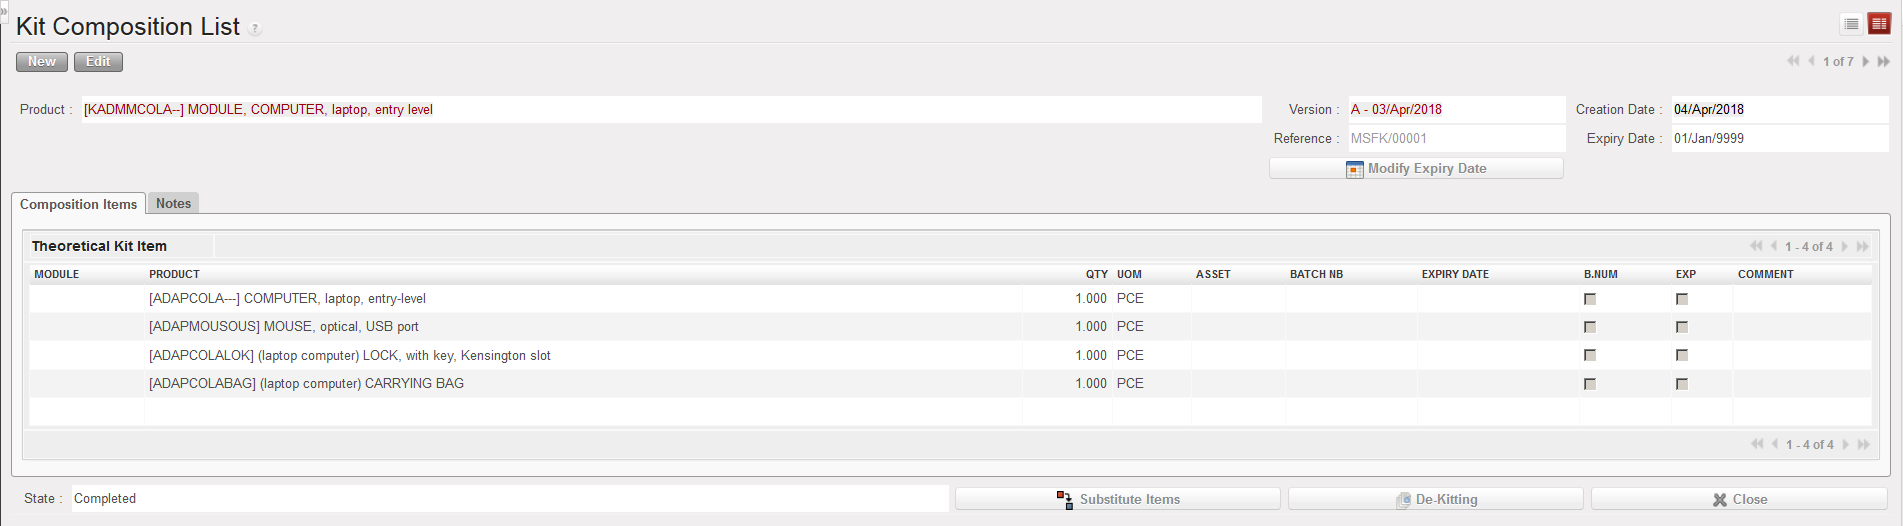
Note that the “Warehouse” business application doesn’t provide any information on kits content. To have the details on the kits content and to manage the content of a kit, go to the dedicated sub-menu called “Kit Management” under the business application “Products“.
Kits content are managed via Kit Composition Lists (KCL). Kit Composition List is a transaction that displays the actual content of a kit present in stock. When the KCL is created after receiving a kit from a supplier or from a kitting order, it reflects the content of the received or produced kit in the warehouse.
If a module (that you may also see as a “bundle of products” from a kit) appears in the warehouse inventory, it will be seen just as a product, which means that it is an independent module (i.e. not part of a kit), considered purely as a single product and not as a kit’s content. When a module is inside a kit, it doesn’t appear in the warehouse inventory.
To display the content of a kit, just open the Kit Composition List of that kit. If the Kit Composition List was not created when the kit was received/added to stock inventory, then it will not be possible to see its content in UniField.
As you have probably noticed, the virtual location “Kitting” is used in kits management. This location enables following the double-entry system briefly explained in the introduction of this chapter as kit managements will trigger movements and that all movements need source and destination locations.
