Supply User Manual ENG -> 5. Warehouse -> 5.9 LU-SU4202: Claims-> D. HOW TO CREATE A SUPPLIER CLAIM FROM SCRATCH
D. HOW TO CREATE A SUPPLIER CLAIM FROM SCRATCH
If goods are noticed non-conformed after their reception in stock (or in cross docking), a claim should be created from scratch.
Go to: Purchases / Claim / Claim
- Click on the “New” button.
 |
| Creating a claim from scratch |
2. Check the “Reference“, “Type” and “Creation Date” fields and update them if needed. The “Type” should be set to “Supplier” if you are raising a claim to a supplier regarding goods non-conformity. “Transport” will be used for services transport suppliers. “Customer” will be used to register a claim raised to you by one of your customers.
3. Select a “Category” related to the non-conformed goods.
4. In the “Reception/Shipment reference” field, select the Incoming Shipment (PICK and OUT will be used for customer claims) reference related to the non-conformed goods. The “Partner” and “Order reference” fields are populated.
5. In the “Order line number” field, enter the order line number related to the damaged goods if you know it.
6. In the “Description” field, explain why you are creating this claim.
 |
| Creating a claim from scratch |
7. On the “Events” tab, click on the “Add an Event” button.
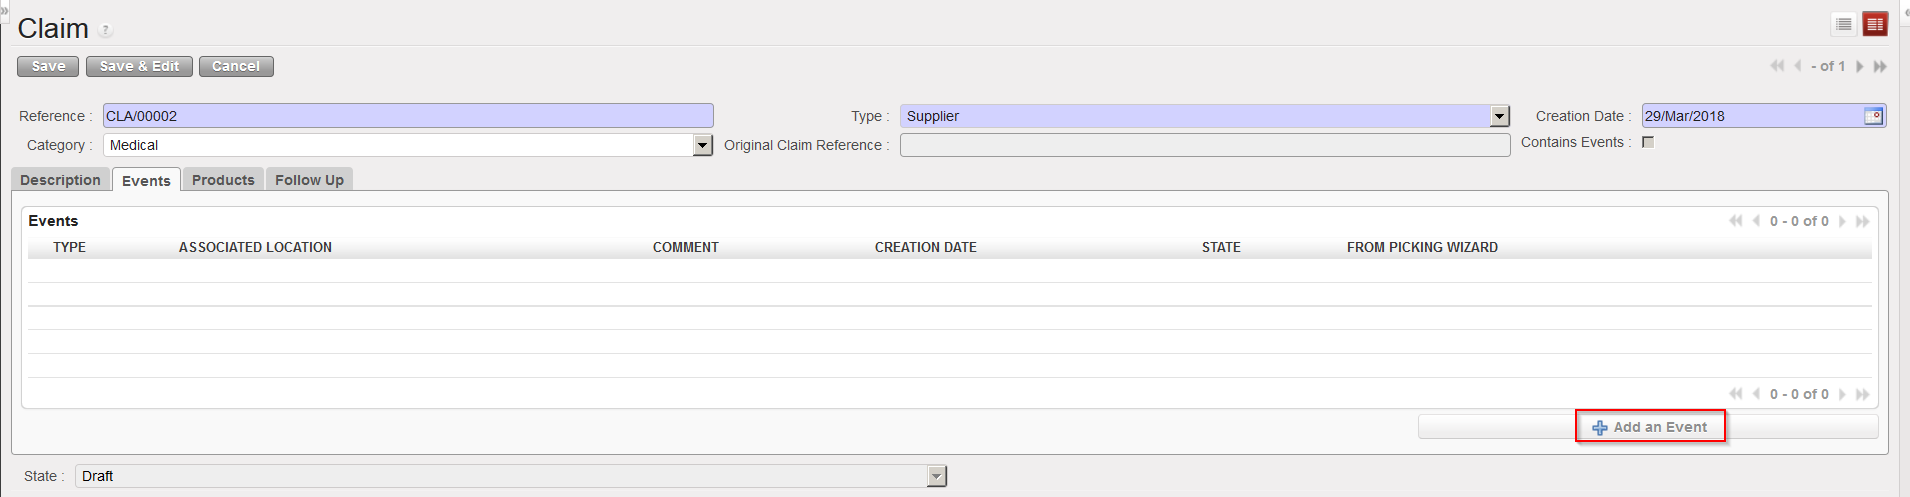 |
| Adding an event to a claim |
8. Complete the “Add an Event” screen. For the Event type, choose from the options:
- “Accept“, if you have decided to accept the goods.
- “Scrap“, if you have decided to destroy the goods.
- “Return“, if you are returning the goods to the supplier.
- “Return (surplus)“, if you are returning goods because you realized that the supplier delivered an excessive quantity.
 |
| Adding an event to a claim |
9. Tick the checkbox “Replacement expected” if you wish the goods to be replaced.
10. Click on the “OK” button.
11. On the “Products” tab, update the “Default Source Location” if needed. This is the location where the products for which you are raising a claim are currently stored.
12. On the “Products” tab, add products by:
- Clicking on the “Load products from IN/OUT” button to automatically load all products from your reception on the claim.
- Clicking on the “New” button to add the products manually. Note that you will only be able to add products which were are on the IN.
 |
| Adding products on a claim |
13. Check/update/enter the quantities and any other relevant information such as Asset reference, BN/ED, unit price,…
14. Ensure that the “SRC LOCATION” indicates where these products currently are.
15. Click on the “Check Integrity” button to check that these products are available in the source location.
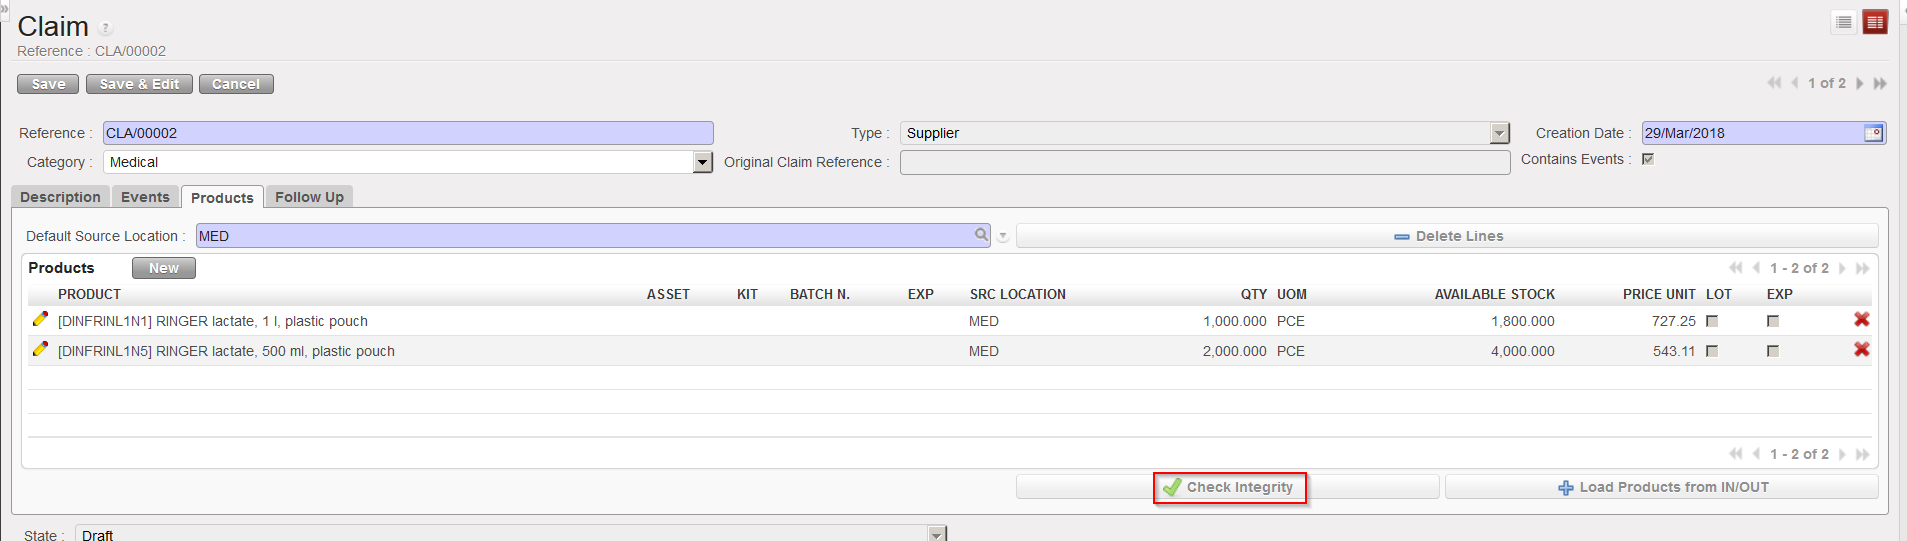 |
| Checking the integrity of the entered products |
- In the case where the products batches/Expiry Dates don’t exist/not in stock therefor they cant be returned with this claim, Warning message will be displayed: (Prod/BN/ED not available in the IN/OUT).
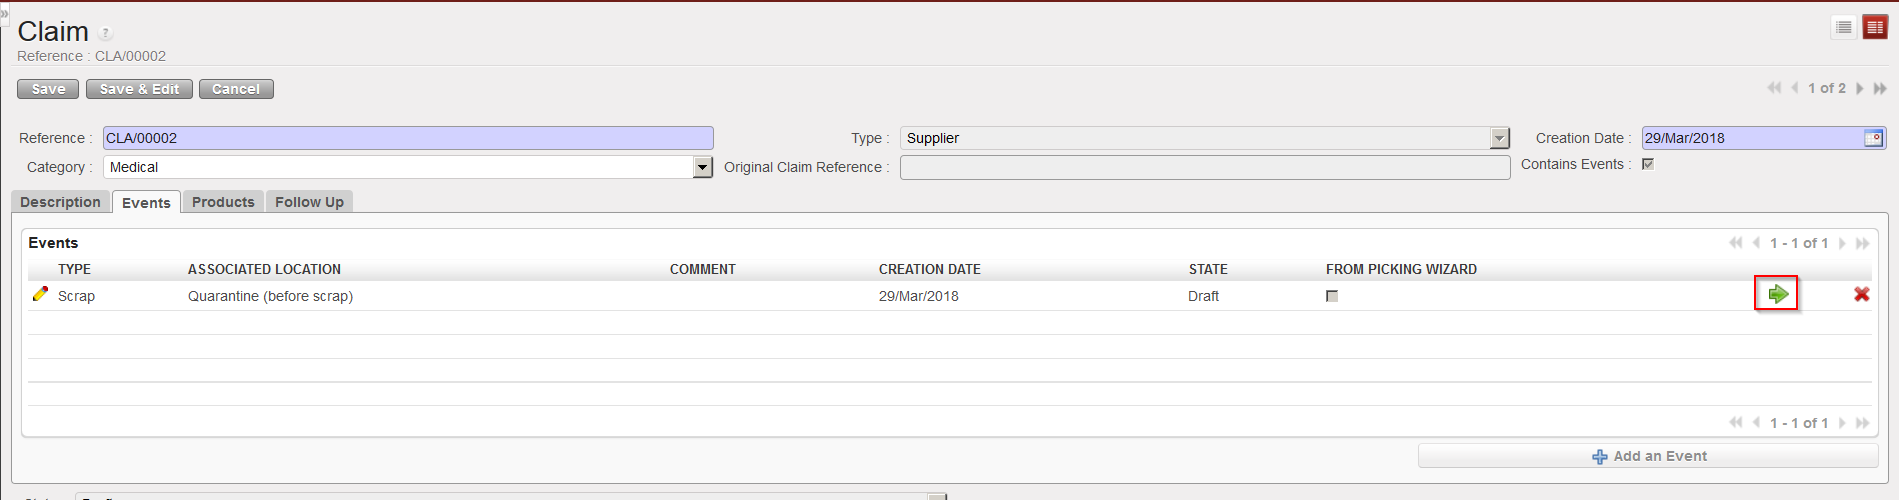
16. Select the “Events” tab.
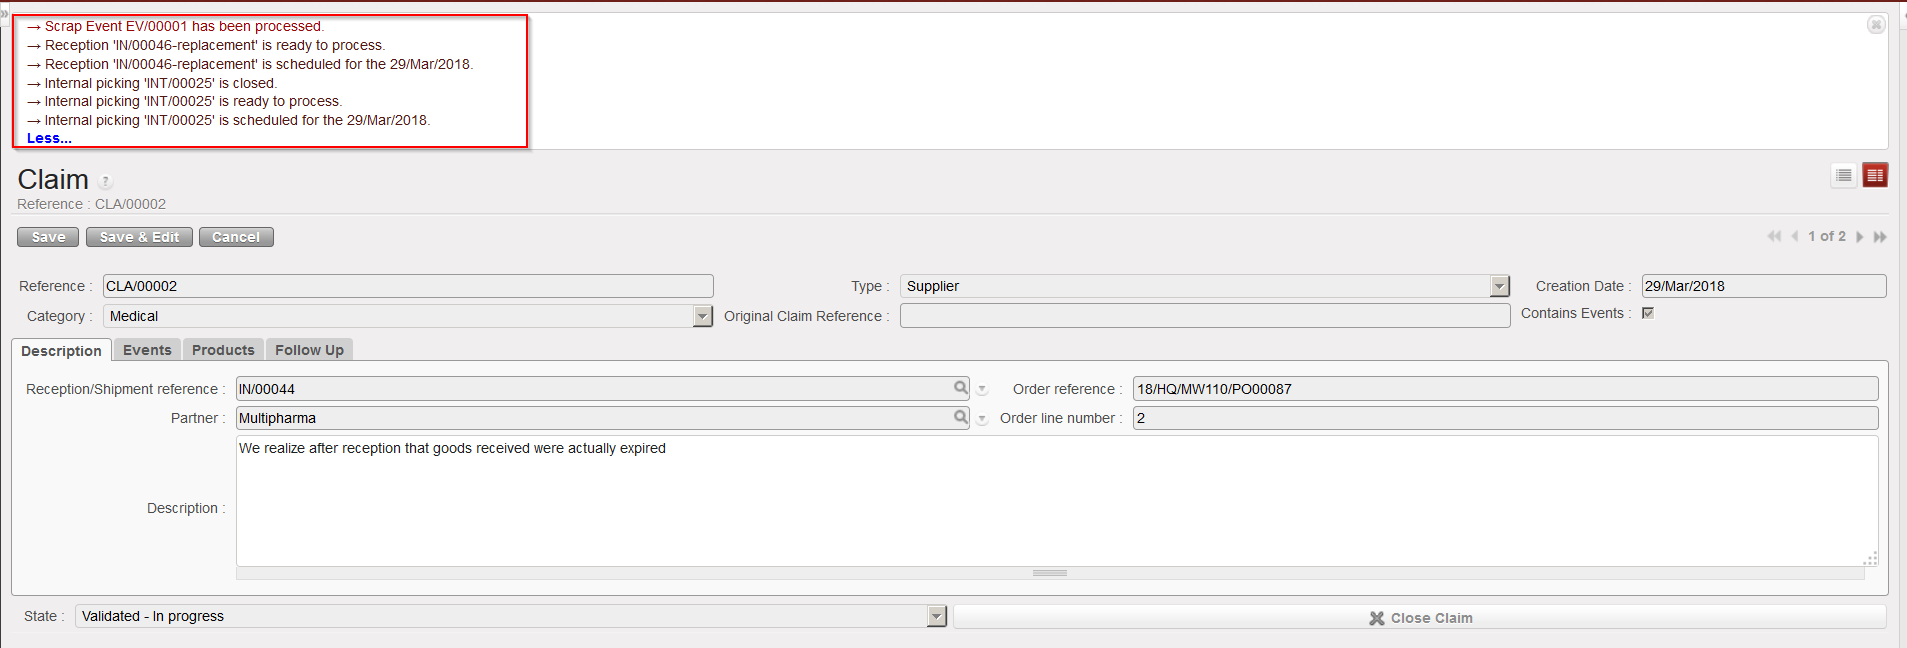
17. Click on the green arrow to process the claim event. A message will appear confirming (according to the event selected) that an internal picking (INT) has been created, processed and closed (if you selected “Scrap” as event type), that a reception IN-replacement is ready to process (if the replacement expected checkbox was ticked) and that the event has been processed.
 |
| Processing the claim event |
 |
| Claim event processed |
With the above selected options (claim type = Scrap and replacement of goods requested), the system:
- Creates and process an Internal Move (INT) to move the goods from their source location to the “Expired/ Damaged /For Scrap” location.
- Creates an Incoming Shipment (IN-replacement) for the replacement of the goods.
- Updates the partner master data sheet of the supplier (“Claims” tab) to show that a claim was raised to this supplier.
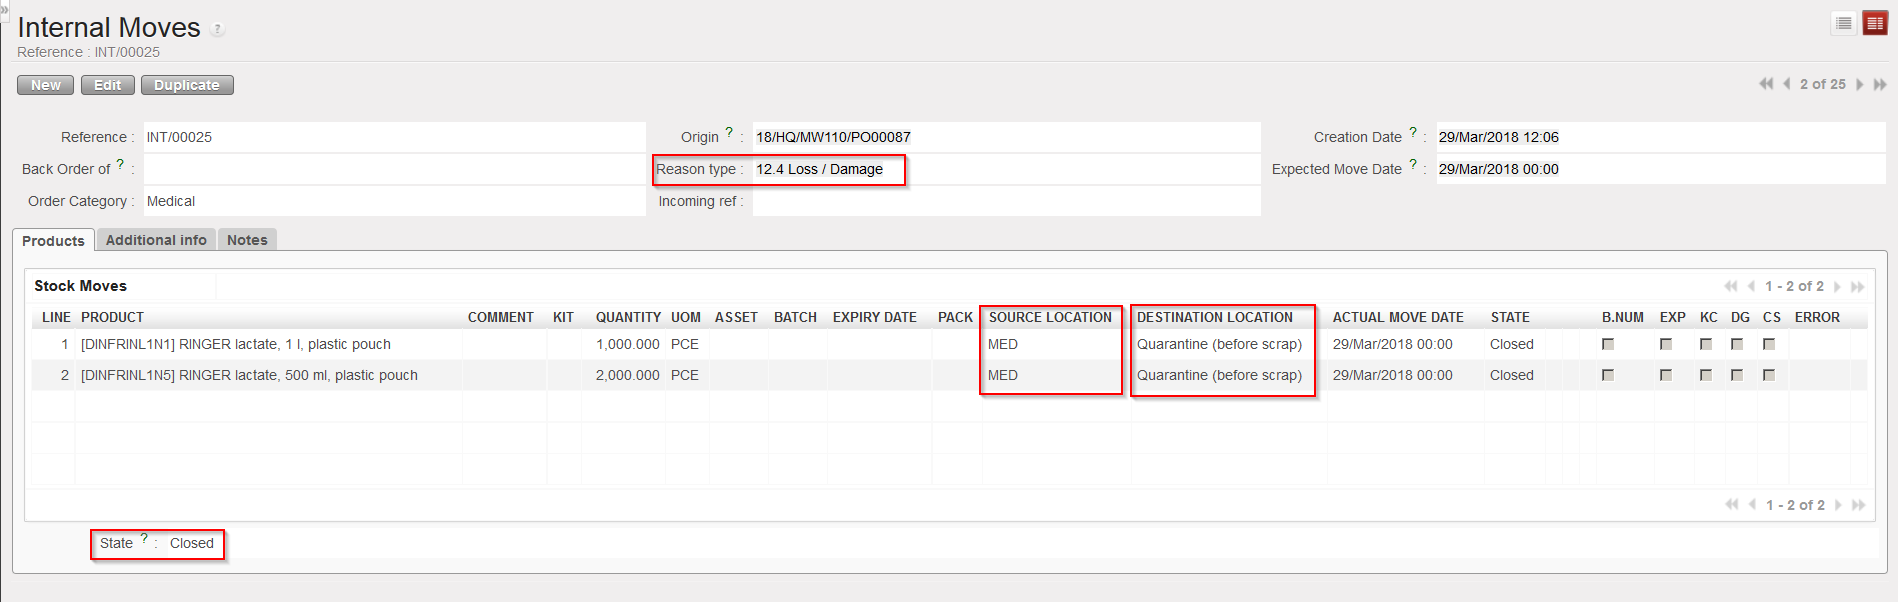 |
| INT created by the claim |
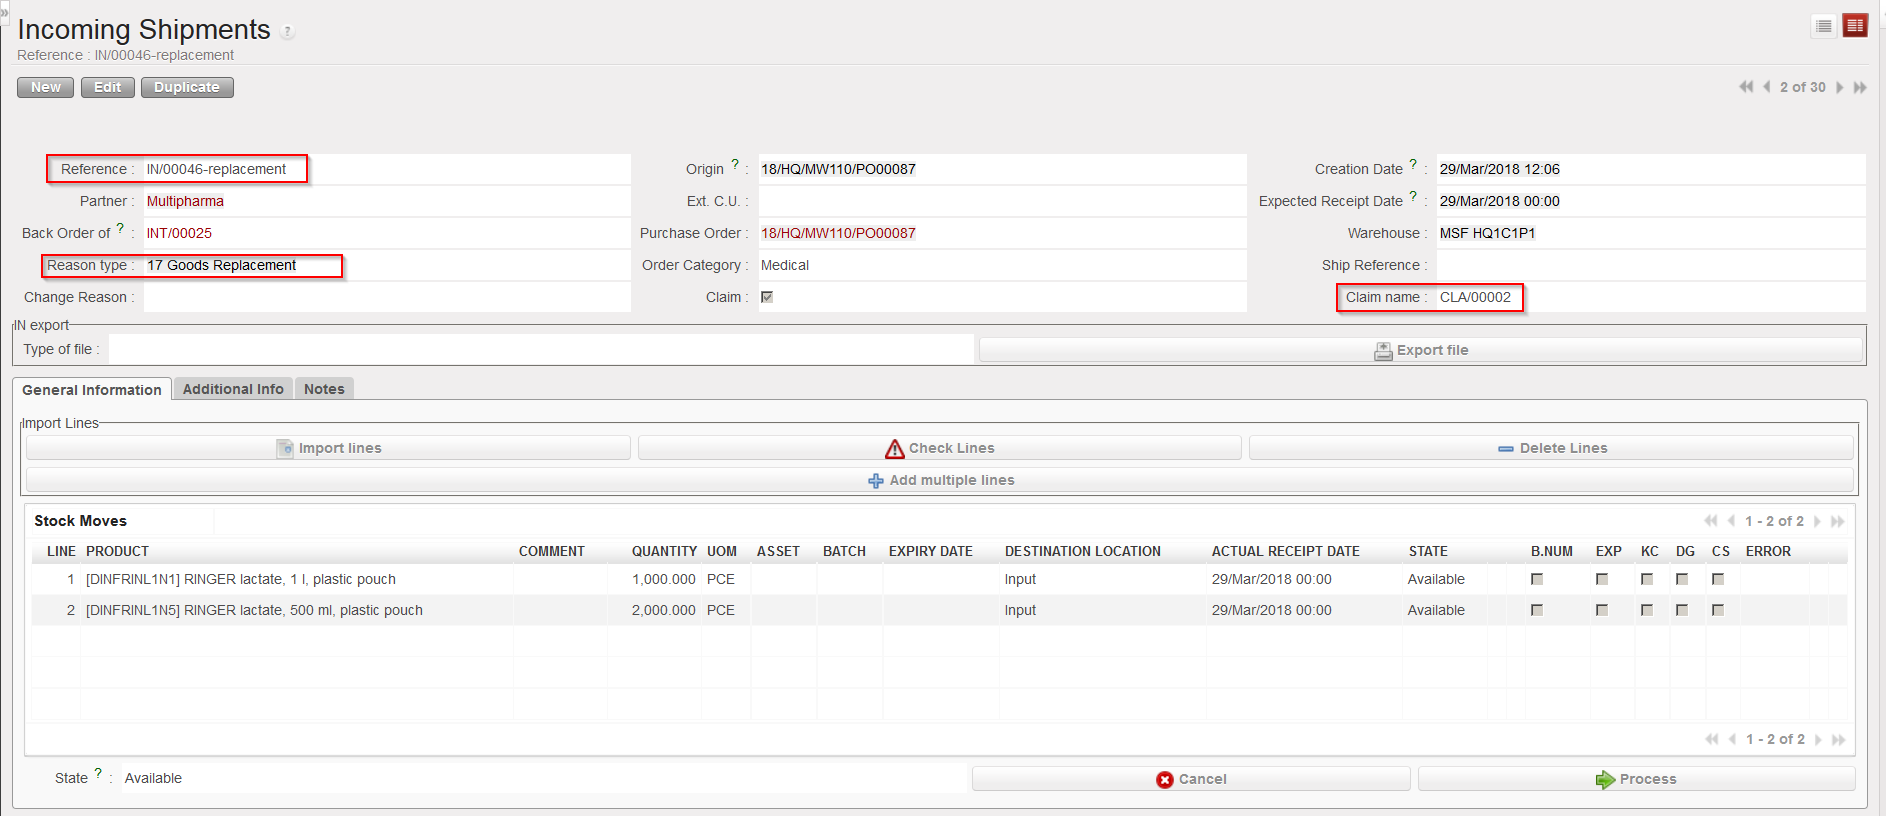 |
| IN-replacement created by claim |
 |
| Supplier master data sheet updated by claim |
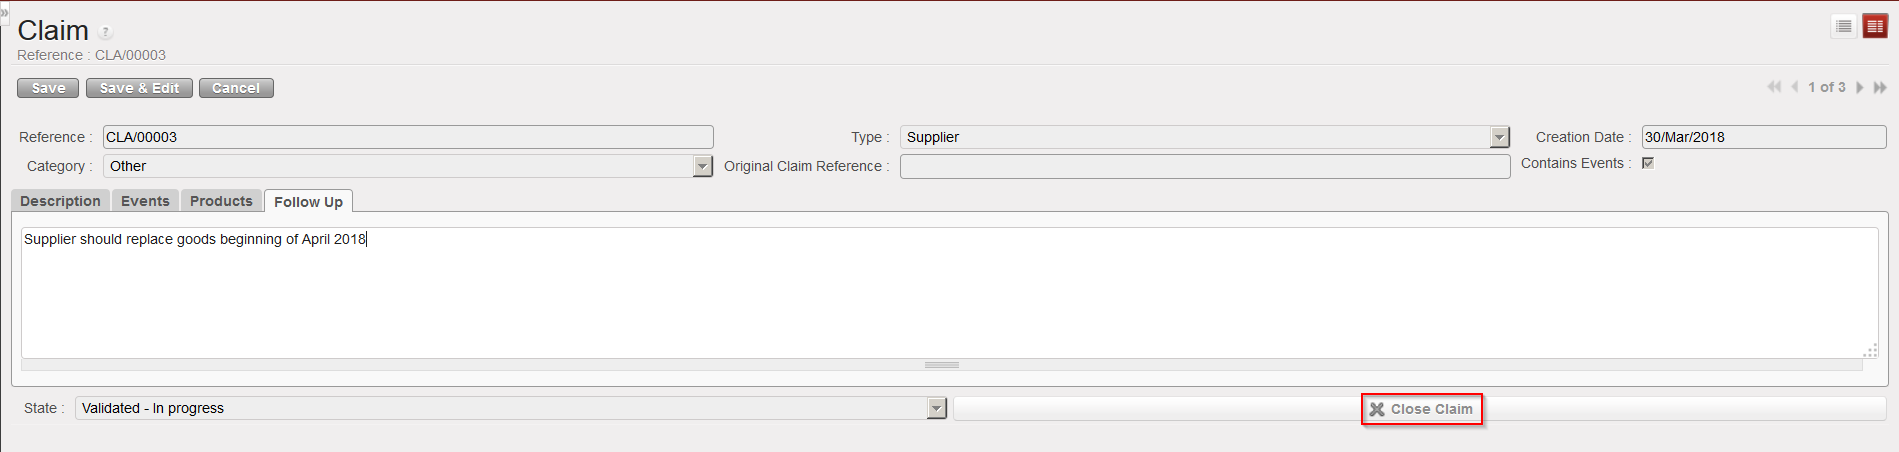
18. Click on the follow up tab. You may add here any additional information related to claim follow-up.
19. When the claim has been closed (e.g. goods have been replaced and all is clear on the invoicing side) you can close the claim by clicking on the “Close Claim” button.
 |
| Closing a claim |
