Supply User Manual ENG -> 5. Warehouse -> 5.5 LU-SU4104: Shipment -> E. HOW TO VALIDATE A SHIPMENT
E. HOW TO VALIDATE A SHIPMENT
A (sub) Shipment has to be validated once it has been dispatched. The state of the (sub) Shipment will then switch to “Dispatched“. This means there will be no more option to return the parcels back to the (main) Shipment or to stock (as explained in the 2 previous sections).
Validating a shipment will also consume the products, transferring them from the “Distribution” location to the “MSF Customer” location if the customer is another instance or to the “Other Customer” location if the customer is an external partner. Note that these 2 destination locations are “Partners” locations.
Therefore, it is important to validate the Shipment only when you are sure that the goods were all sent.
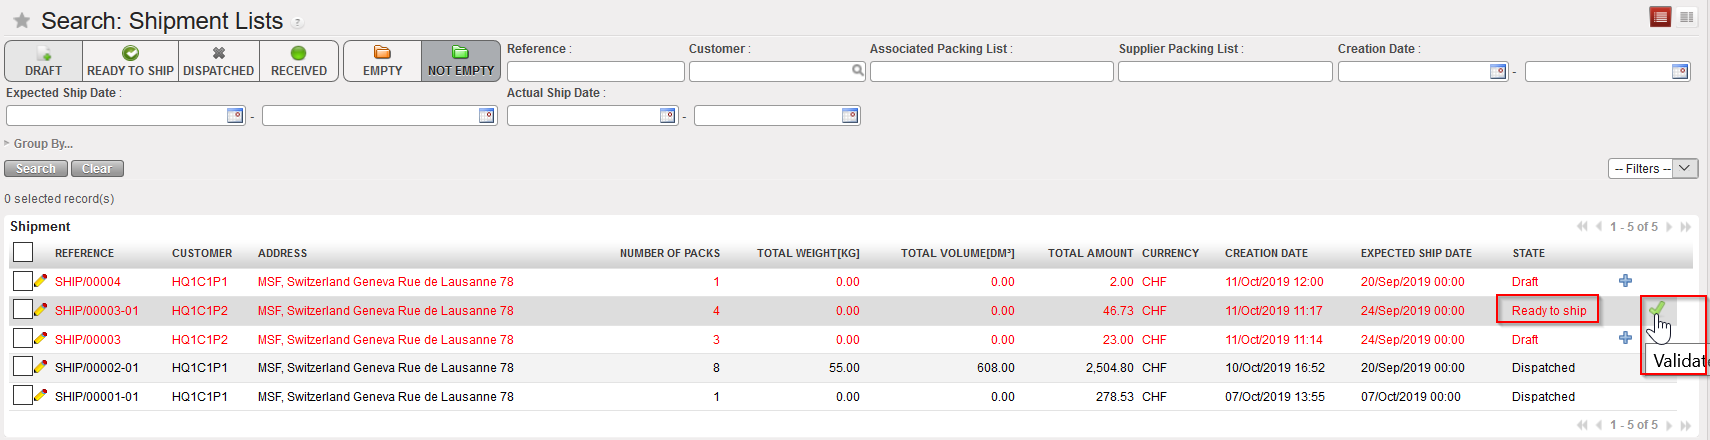
Go to: Warehouse / Warehouse Management / Deliveries / Shipment
- Locate the Shipment you wish to validate (its state should be “Ready to ship“).
- Click on the green icon
 (which when you hover over it says “Validate”) on the right side of the screen on the appropriate line. Another option is to click on the “Validate” button from within the Shipment (nb: this process has been detailed above at the end of section B).
|
|
|
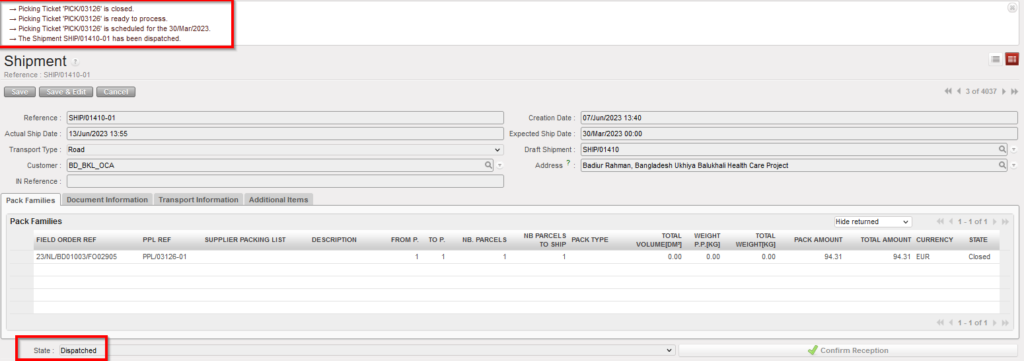
Validating a Shipment |
|
|
|
Validated Shipment |
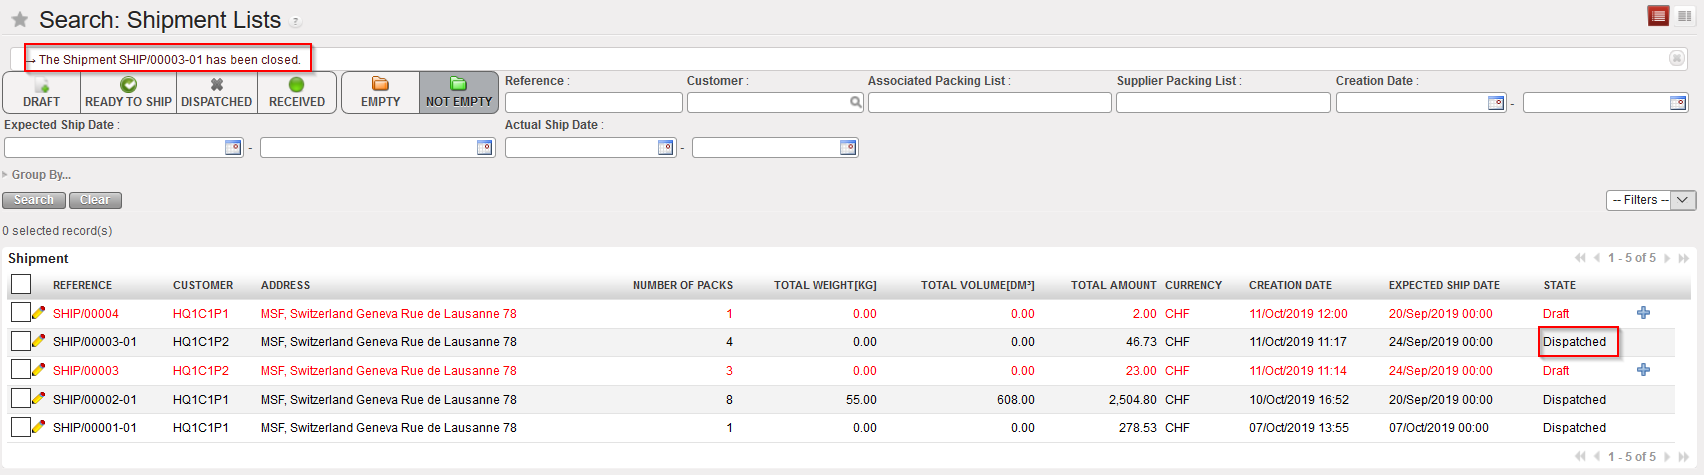
Shipment is validated (it switches to the state “Dispatched“) and the corresponding Picking Tickets are closed if relevant.
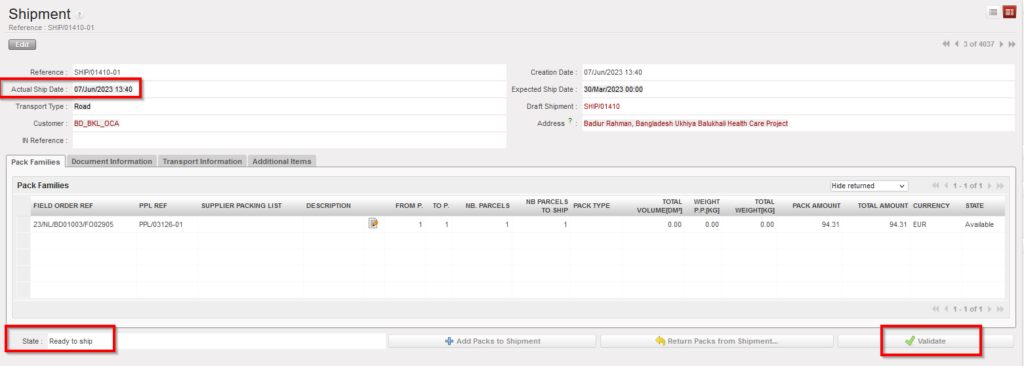
You can also validate the shipment while it is open:
Go to: Warehouse / Warehouse Management / Deliveries / Shipment
- Open the Shipment on which you want to validate, (its state should be “Ready to ship“).
- Click on the “ Validate” button, pop-up screen will be displayed, asking to confirm the “Actual Ship Date”, you can change the date or leave it as it is and validate the shipment.

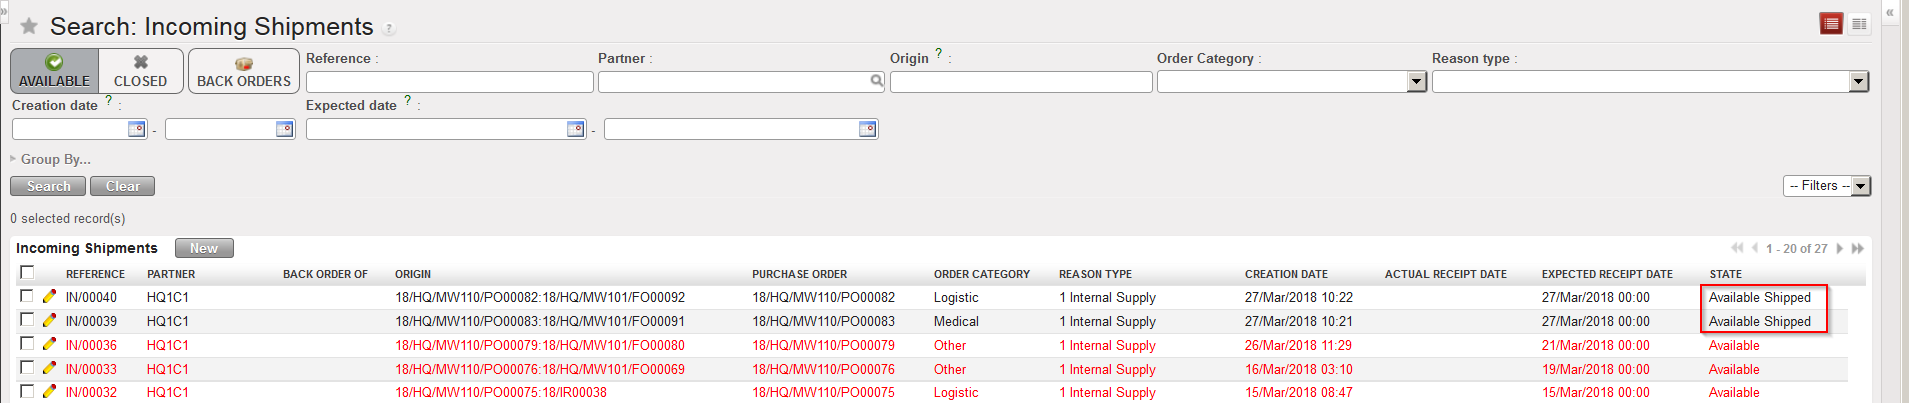
It is important to note that if a synchronization is done after validation of a Shipment, the related Incoming Shipment(s) at the requesting instance (often project) will switch from the state “Available” to the state “Available Shipped” and all the information will be carried on (products, quantities, expiry dates, batch numbers, packing information, volume, weight, form P , to P……).
|
|
|
Incoming Shipments in state “Available Shipped” |
Incoming Shipments sent from other instances should not be processed if they are in the state “Available” but only if they are in the state “Available Shipped” (i.e. when the supplier instance has validated the shipment).
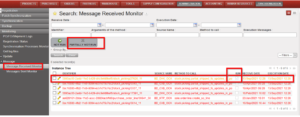
- If, on the requesting instance, you try to process an Incoming Shipment sent from another instance which is still in the state “Available“, you will get the below message.
|
|
|
Message if IN sent from other instance is processed in the state “Available“ |

The message can be bypassed and the Incoming Shipment processed anyway (i.e. you may force the reception). However this is absolutely not advised. If you do so you will create not run messages on the requesting instance as the synchronization will not be able to update the IN anymore (as it will be “Closed“) when the Shipment will be validated (meaning actually be shipped) by the supplier instance.
- If, on the requesting instance, if user try to change the flow manually (e.g. cancelled), without waiting for the synch to update the IN, and then the Coordo has sent the line, another type of Not Run synch message will be created. It is called a “Partially Not Run” meaning the message itself was run for the document (so the IN has been updated with all lines where possible), but the flagging of Synch message as “Partially Not Run” indicates there were problematic lines in the document which could not be updated.
This type of Not Run is automatically displayed in the Message Received Monitor in the same way as standard Not run messages, but its line is displayed in Orange rather than Red, and there is a specific filter button for this type in the header.
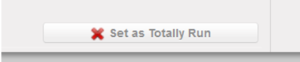
This type of Synch message has a button “Set as Totally Run” to allow user to set to fully Run in order to remove from this filter on the dashboard: