Supply User Manual ENG -> 5. Warehouse -> 5.2 LU-SU4101: Incoming Shipments -> O. HOW TO RECEIVE AN ASSET
O. HOW TO RECEIVE AN ASSET
A product may be defined as an asset on its PMD sheet.
|
|
|
PMD sheet – asset sub-type |
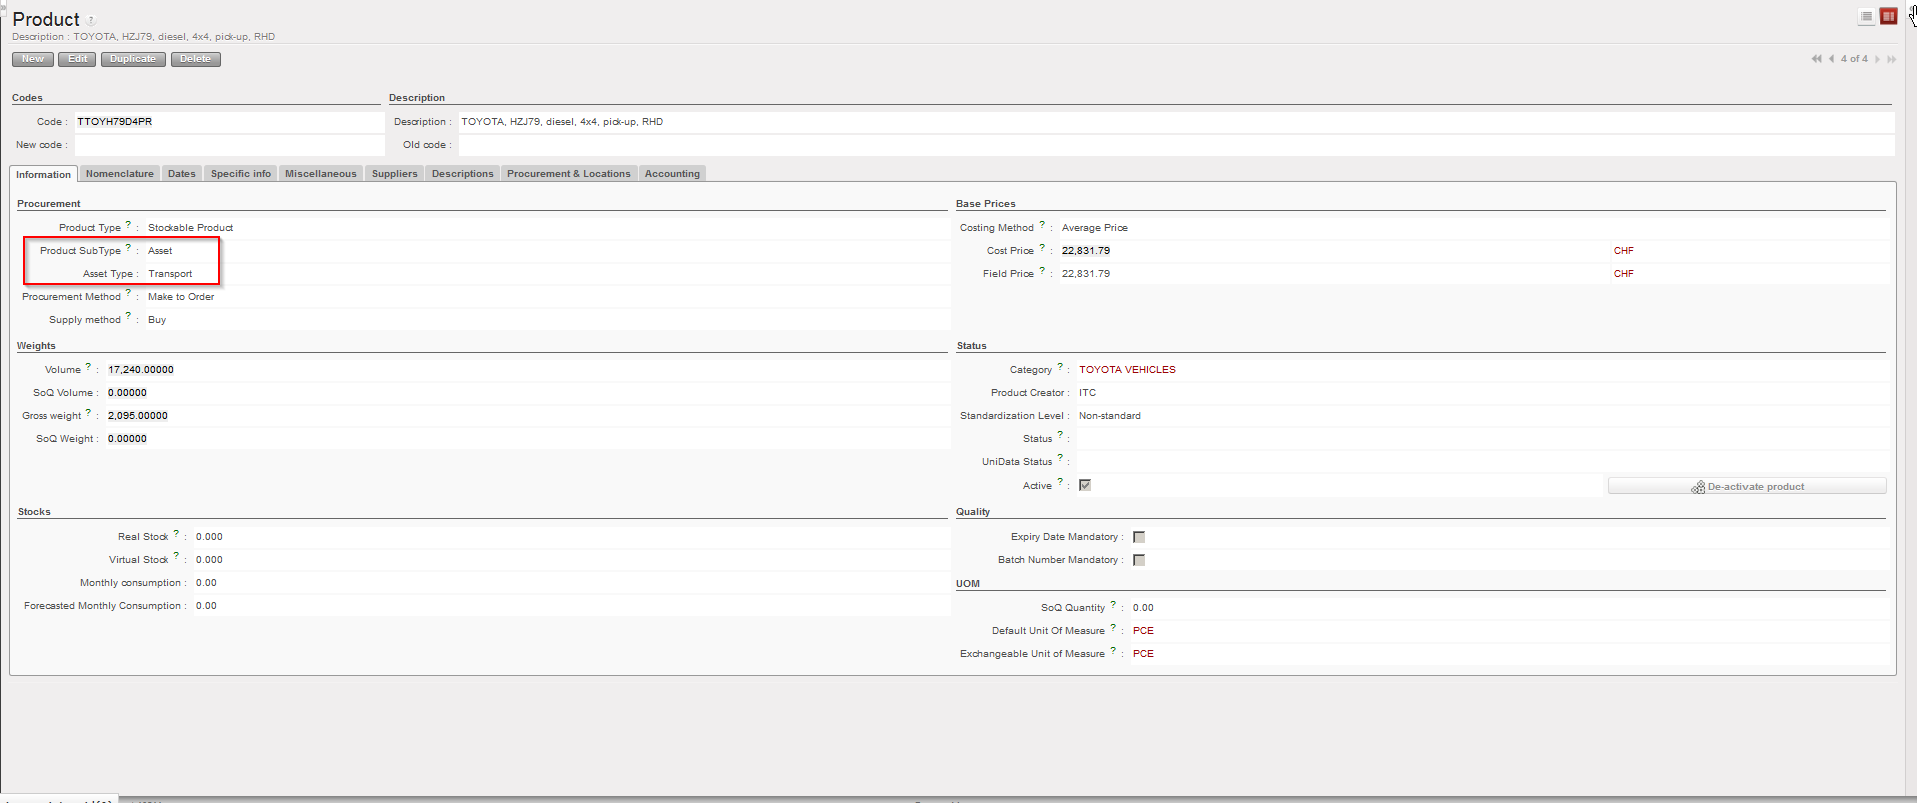
The decision on which product is defined as an asset should be taken by the OC. Refer to your OC to know which products are followed as assets in your section. For UniData products, the settings should be defined at HQ level and be valid for all instances related to this HQ. For local products, the settings should be defined at coordination level and be valid for all (project) instances related to this coordination.
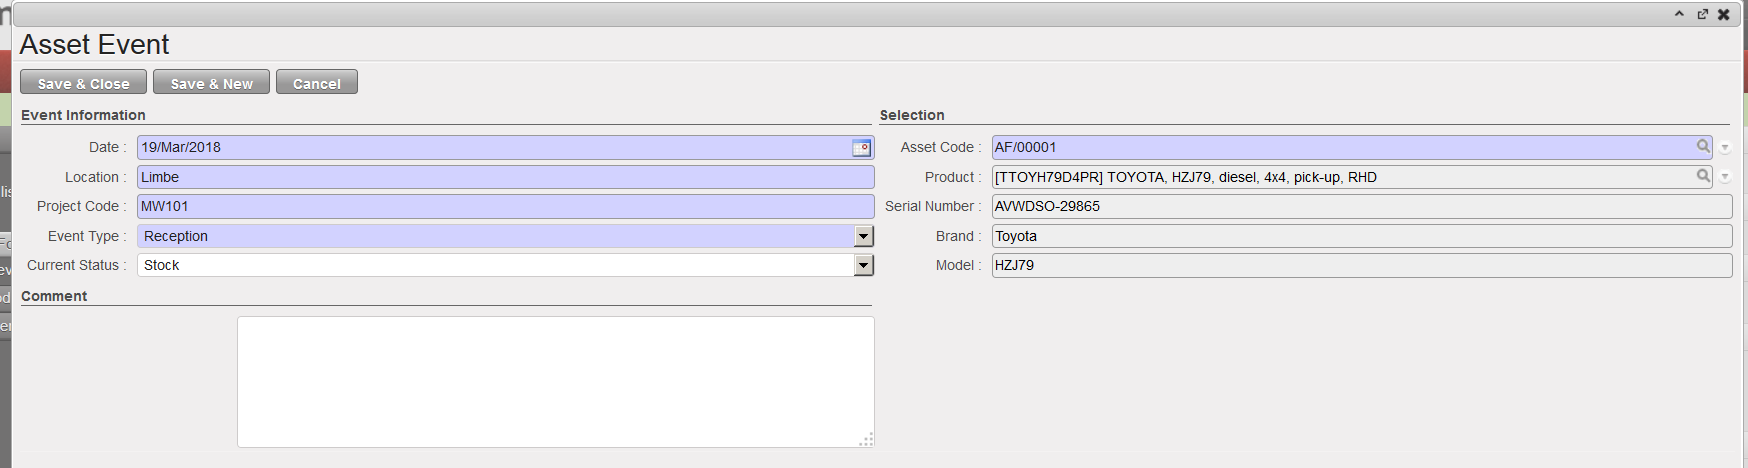
Assets need to be traced throughout their life cycle; therefore, an asset form has to be created for each received asset and including all necessary information such as brand, model serial number, price, PO, guarantee period,…
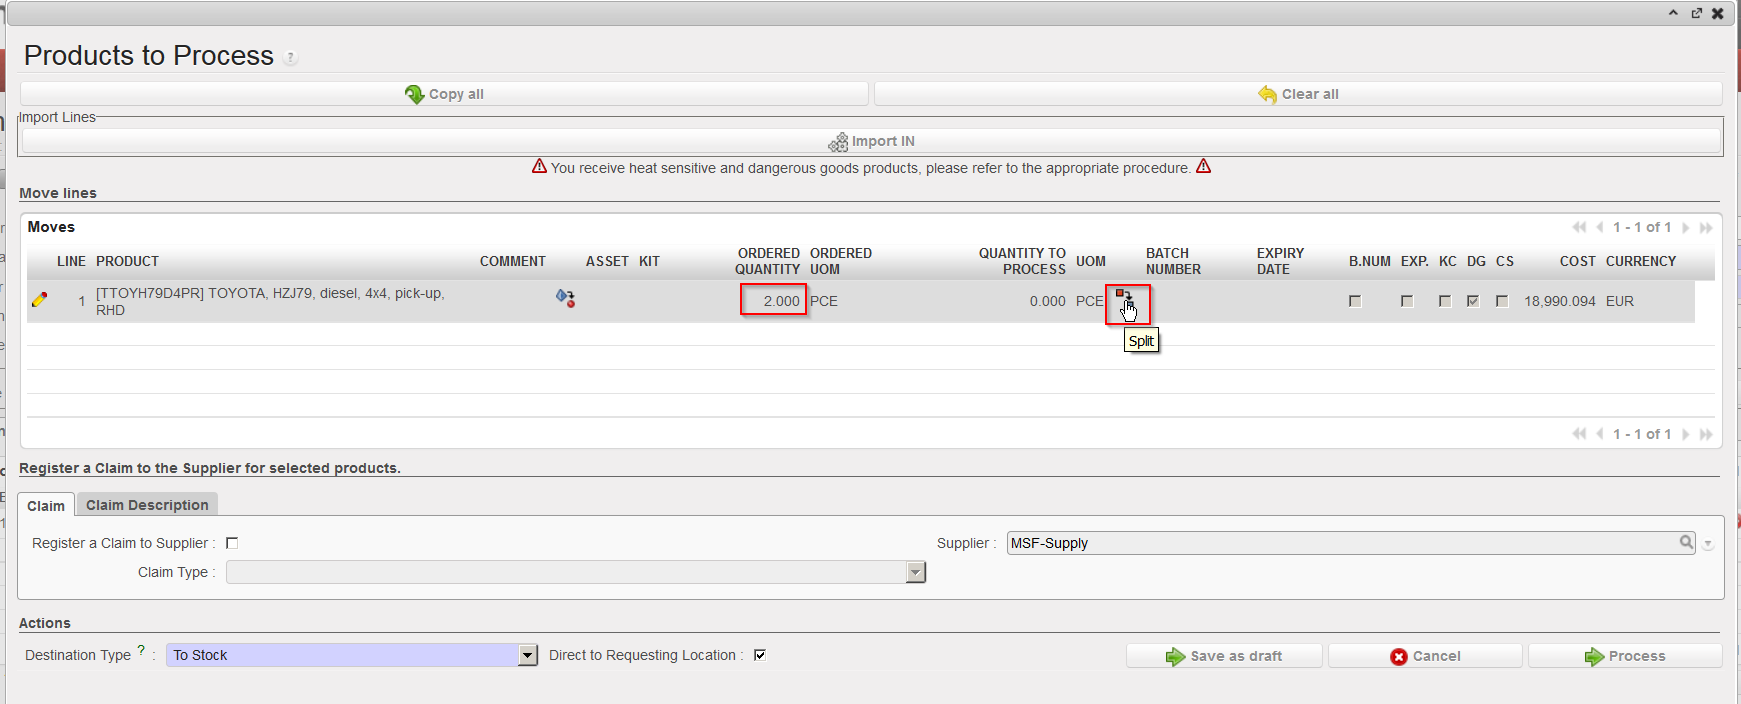
The system will create one asset form per asset line of the Incoming Shipment. Therefore if several assets are received together (e.g. 2 land-cruisers) on a same line, the user will have to split the line into as many lines as there are assets so that you have only one asset per line (i.e. quantity should be 1 on each asset line) as each will have different data to encode on their asset form.
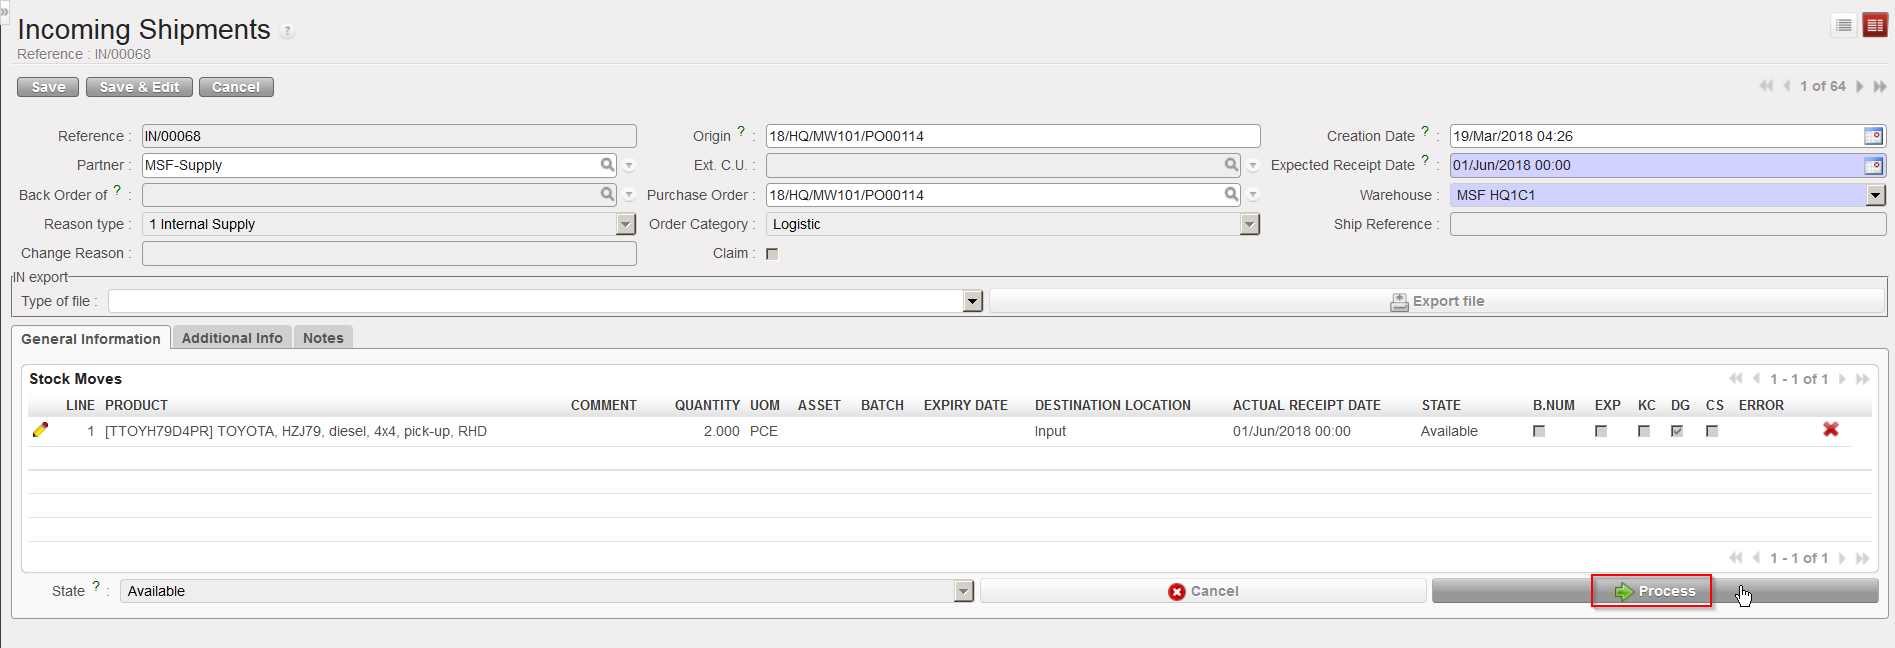
Go to: Warehouse / Warehouse Management / Incoming Shipments
- Open the Incoming Shipment you wish to receive.
- Click on the “Process” button.
|
|
|
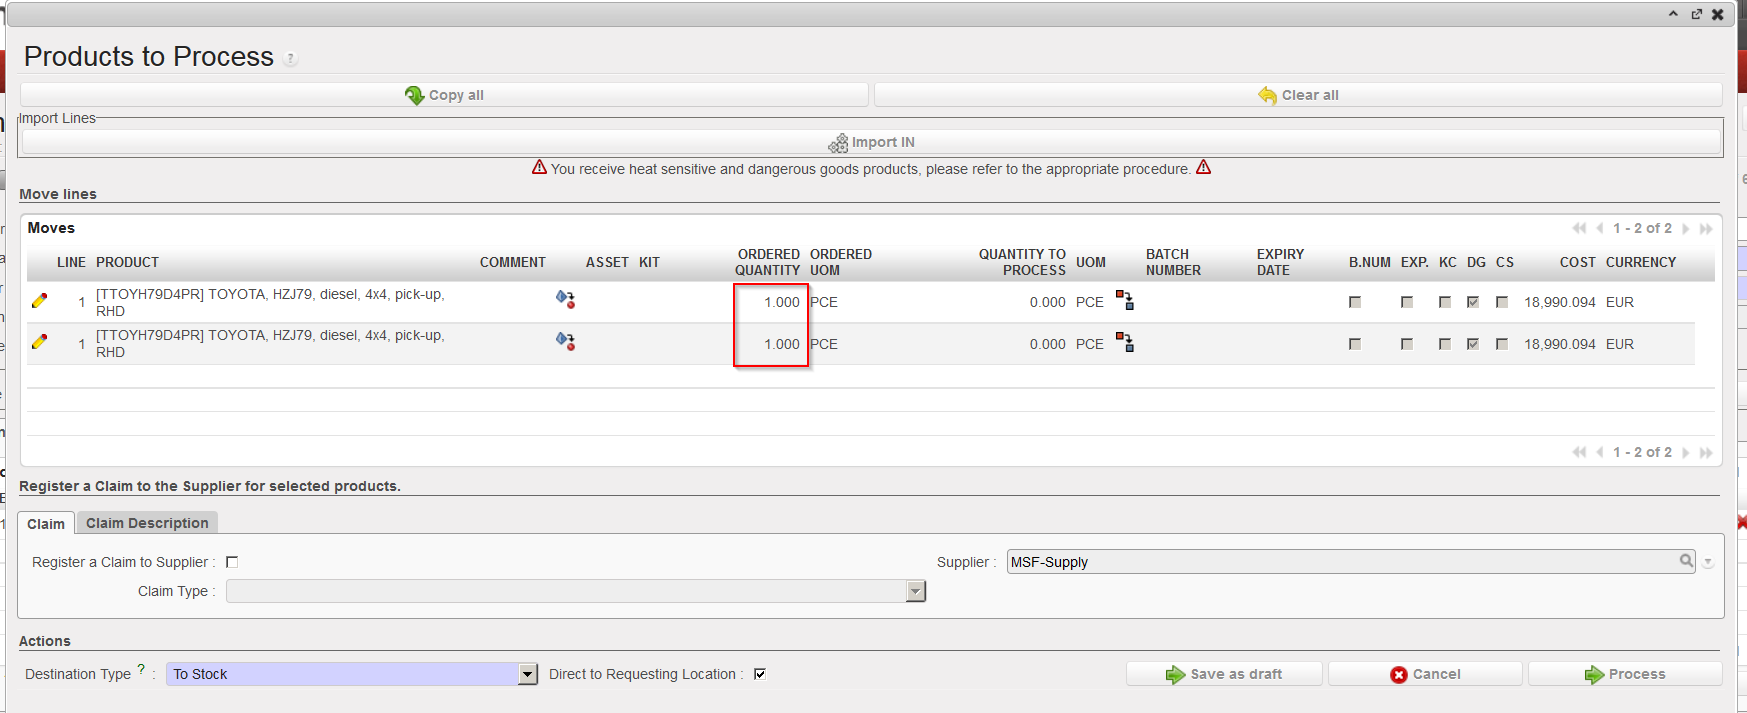
Processing and Incoming Shipment with assets |
3. Split the line ![]() (if necessary) to have one single asset per line. Note that you may have to repeat this operation several times. The objective is to have the quantity 1 on each asset lines of the IN to process.
(if necessary) to have one single asset per line. Note that you may have to repeat this operation several times. The objective is to have the quantity 1 on each asset lines of the IN to process.
|
|
|
Splitting a line to have 1 asset per line (step1) |
|
|
|
Splitting a line to have 1 asset per line (step2) |
|
|
|
Split line including assets |

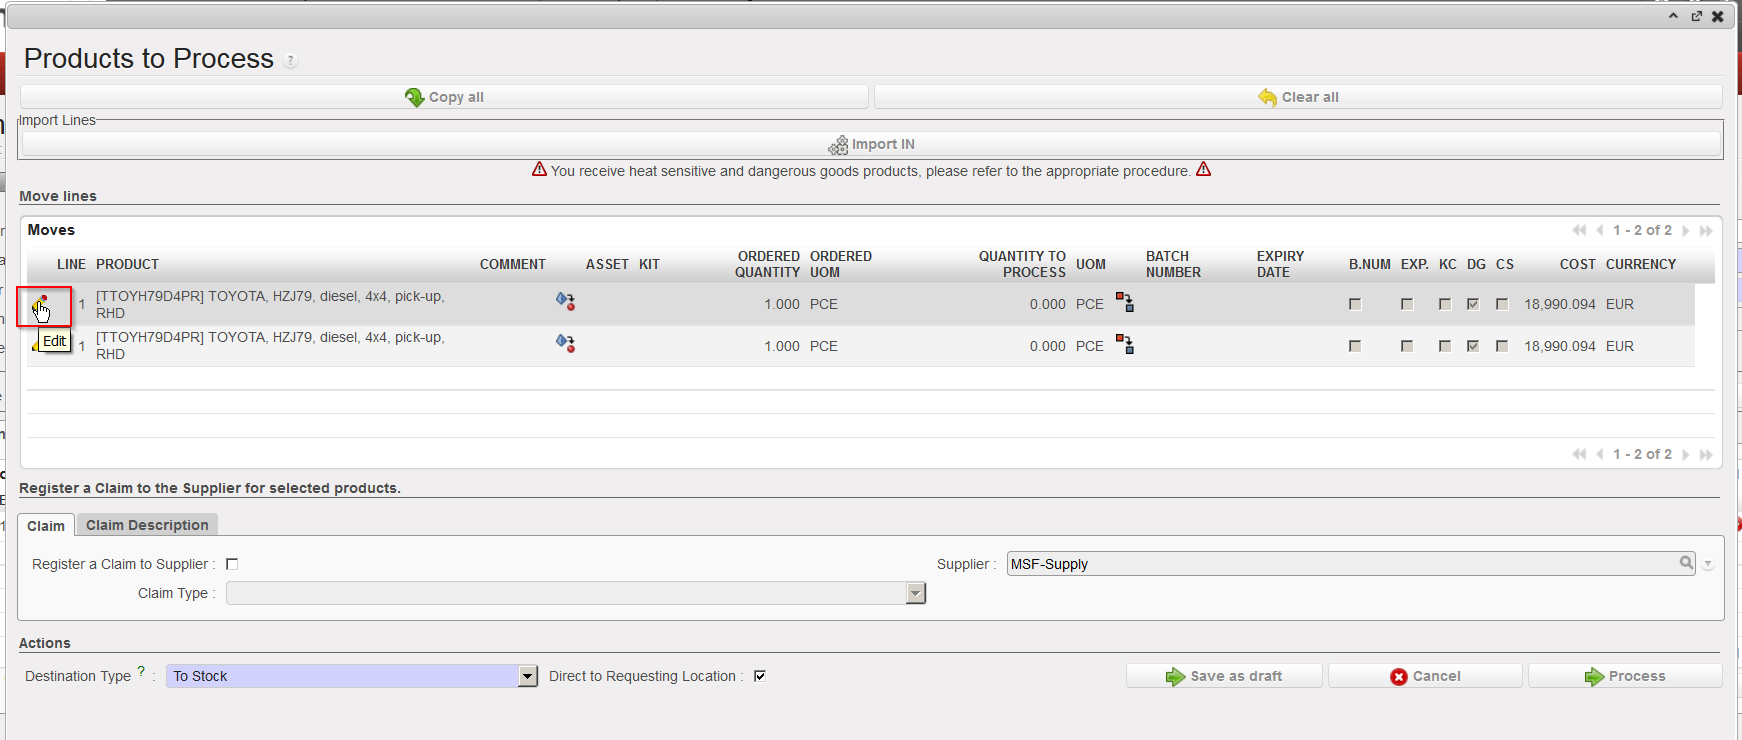
4. Click on the pencil ![]() located on the left of the asset you wish to receive
located on the left of the asset you wish to receive
|
|
|
Editing one line on the Incoming Shipment |
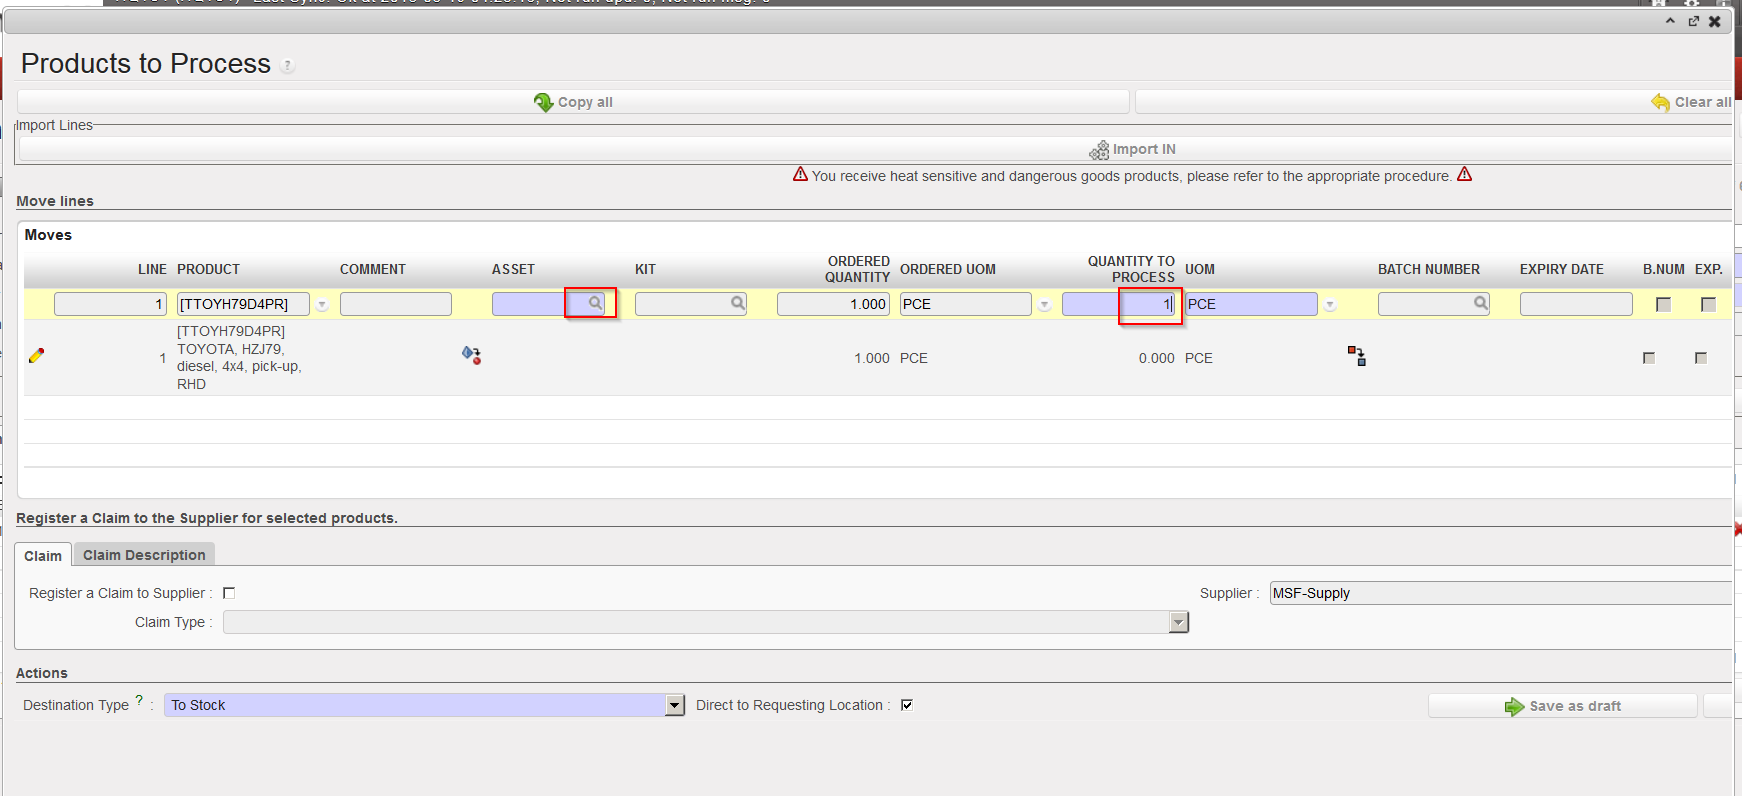
5. Enter the received quantity (should always be 1) and click on the magnifying glass located on the right of the “Asset” field.
|
|
|
Entering received quantity (1) and opening the asset search screen |
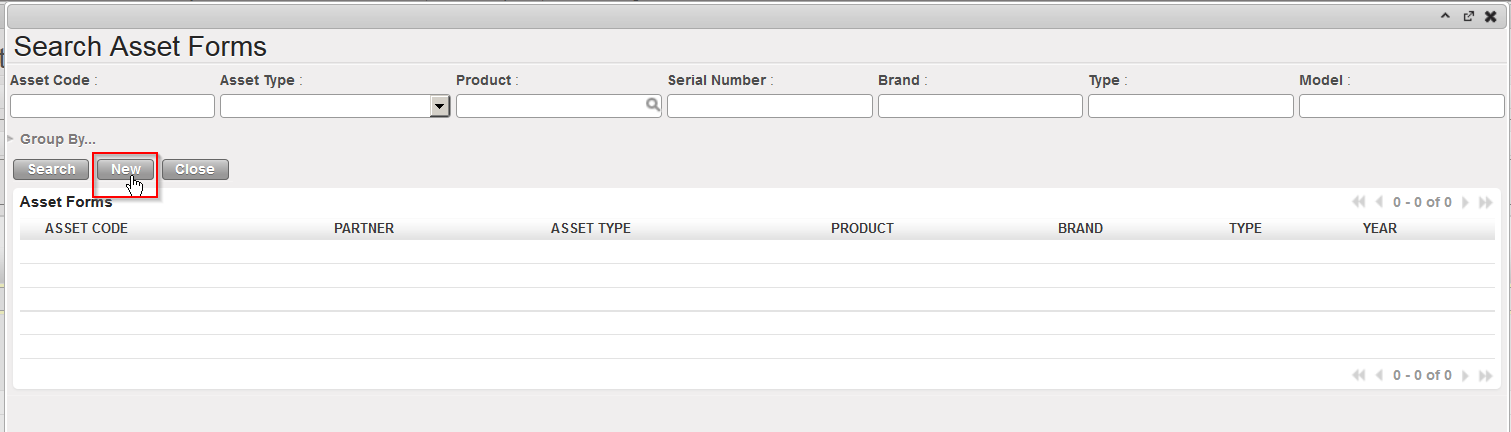
6. The “Search Asset Forms” screen is opened. If the asset form already exists, you may select it here, but most of the times you will need to create a new one. Click on the “New” button” to do so.
|
|
|
Creating a new Asset Form (step 1) |
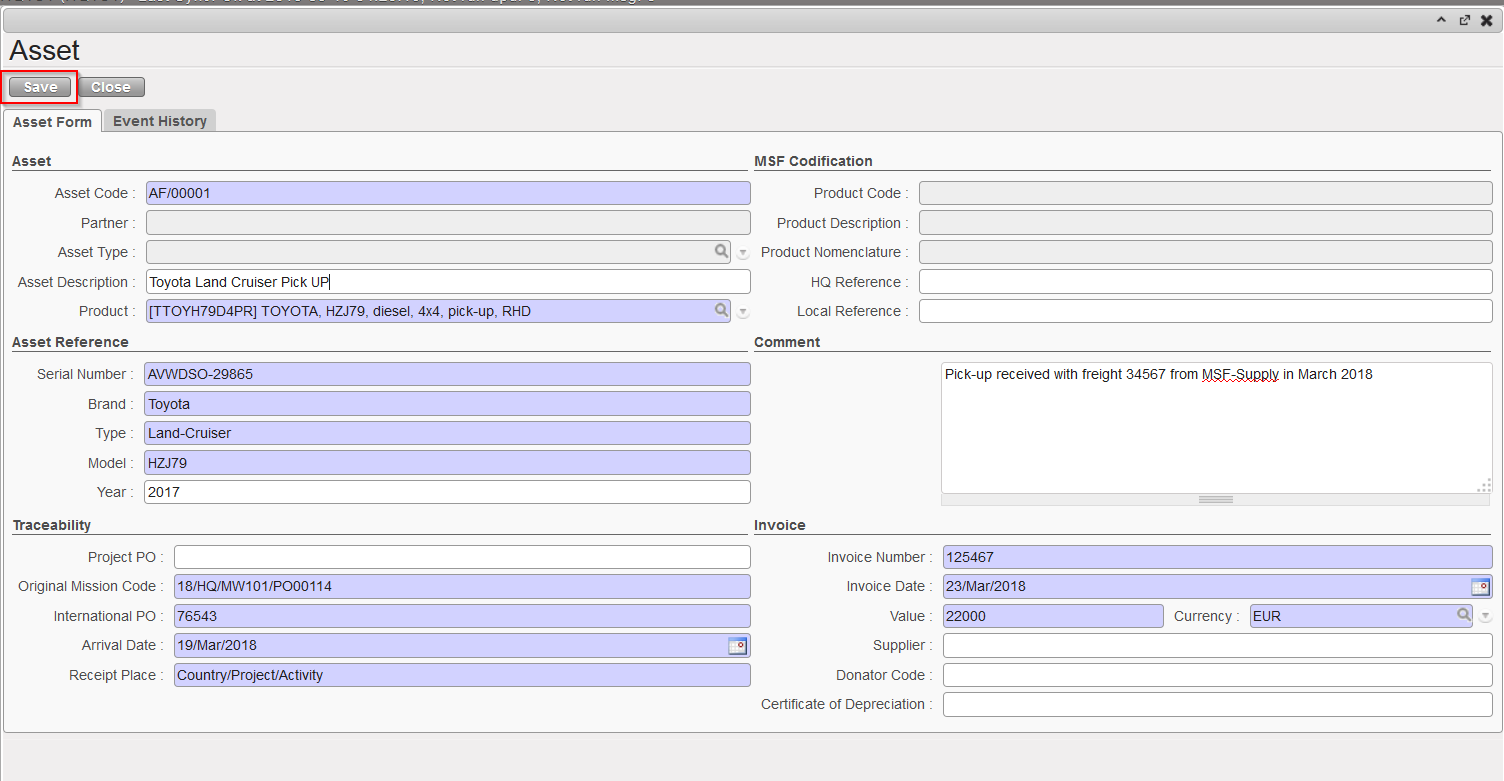
7. Complete the Asset Form (blue fields are mandatory) and click on the “Save” button.
|
|
|
Creating a new Asset Form (step 2) |
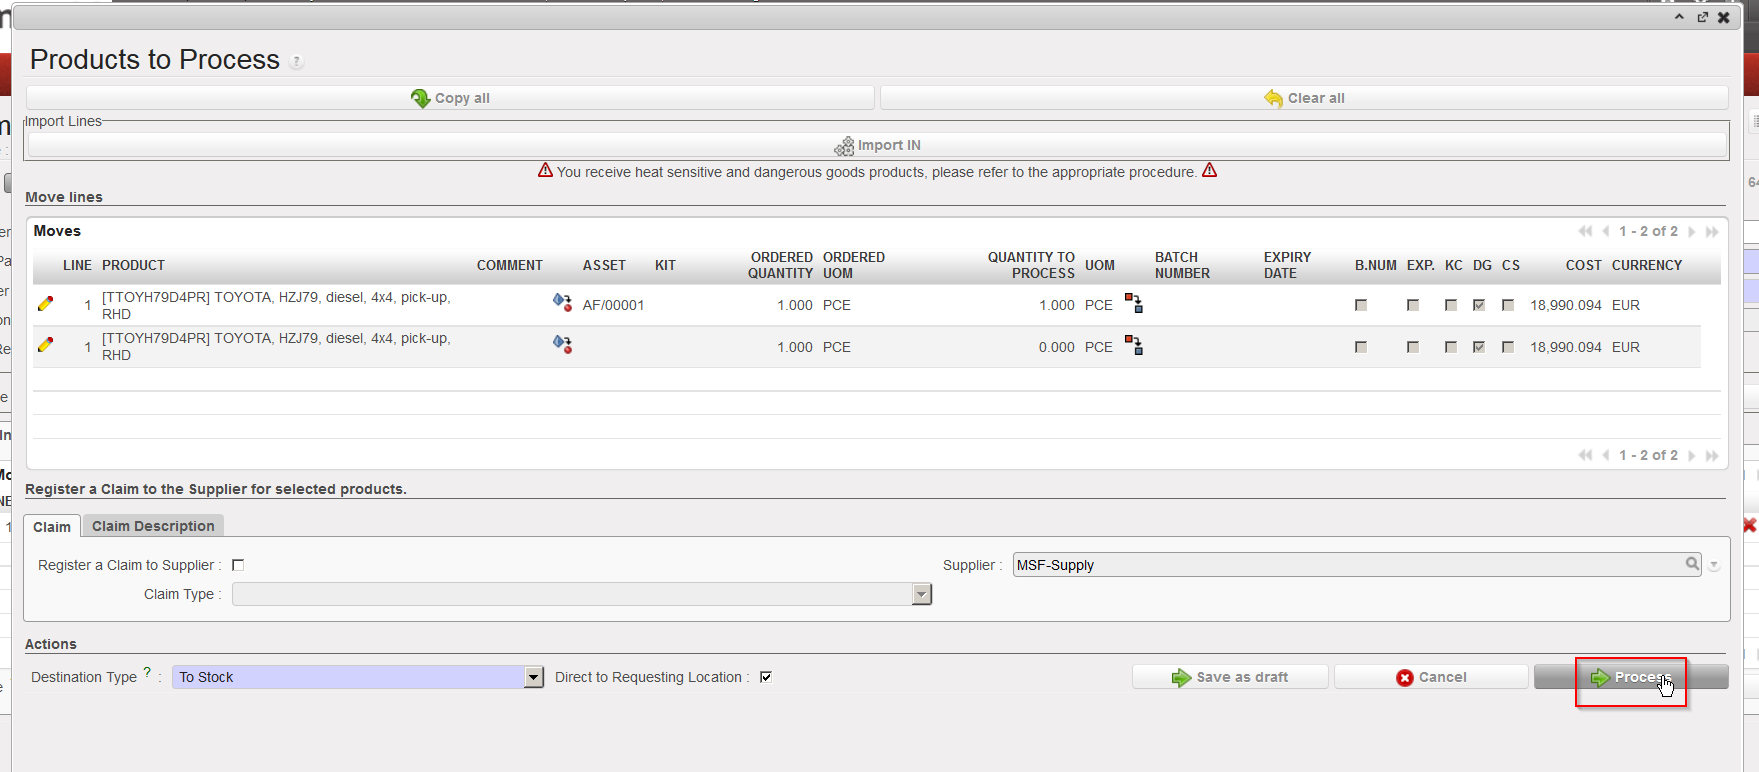
8. On the “Products to Process” screen, save the line by clicking on the floppy disk icon ![]() located on the right of the line (sometimes hidden).
located on the right of the line (sometimes hidden).
9. Repeat the steps 4 to 8 for all the assets that you wish to receive.
10. Click on the “Process” button.
|
|
|
|
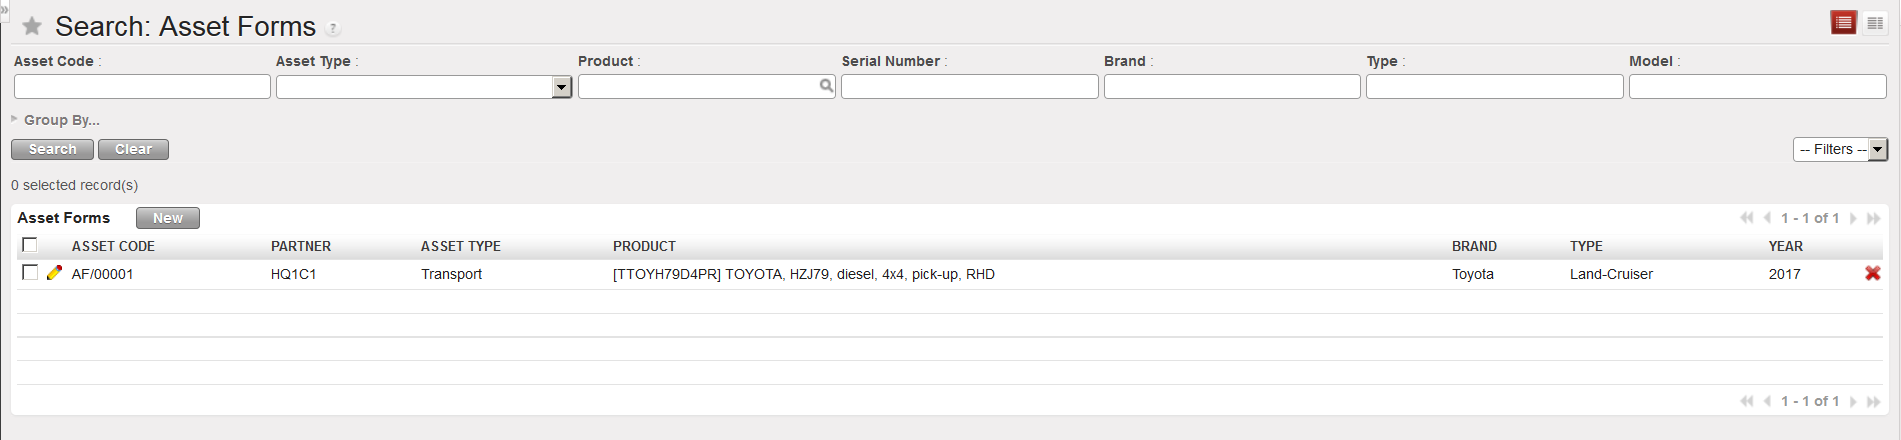
The asset(s) has/have now been received and is/are now in the specified location (LOG in this example).
The asset master data (Asset Form) can be seen through Products / Products / Assets / Asset Forms.
|
|
|
Asset master data |
Note that you also have the possibility to register events & follow-ups on asset forms.
|
|
|
Asset Events & Follow-ups |