Procedure To Migrate a UniField Instance
Requirements:
- Latest AIO (All in One)
- Latest database dump
- Pgadmin3 or 4 Installer
- Notepad++
- SSH Key (Find it in C:/Program Files (x86)/msf/ of the old server)
Please note:
The AIO installation requires administrative rights as it is going to install:
- OpenERP Server
- OpenERP Web
- The database PostgreSQL and all the dependencies, such as Windows C++ 2005 Redistributable.
Other Important Considerations:
- Once UniField is installed, the web port (default: 8061, but possibly 80 or 443) needs to be open on the firewall to accept inbound connections.
- Some outgoing ports (port 8069 or 22) must be opened on the firewall to be able to synchronize and push backups via rsync; refer to user manual this section
- It is not necessary to migrate the WAL or Postgresql folders from the old server to the new one because:
i) You will be required to generate fresh base backup after migration to ensure continuous backup config is working in the newly migrated server.
ii) For PostgreSQL folder, AIO installation will take care of that.
Migrating the Instance
Step1: Perform a sync on the soon to be old server just before the migration.
Step2: After sync is complete, disable synchronization by:
- Disconnecting the instance in the connection manager and remove auto connect config from the openerp-server file. Change sync user to False and sync password line to False as below:
sync_user_login = False
sync_user_password = False
Step 3: Extract the latest dump by manually clicking backup as below.
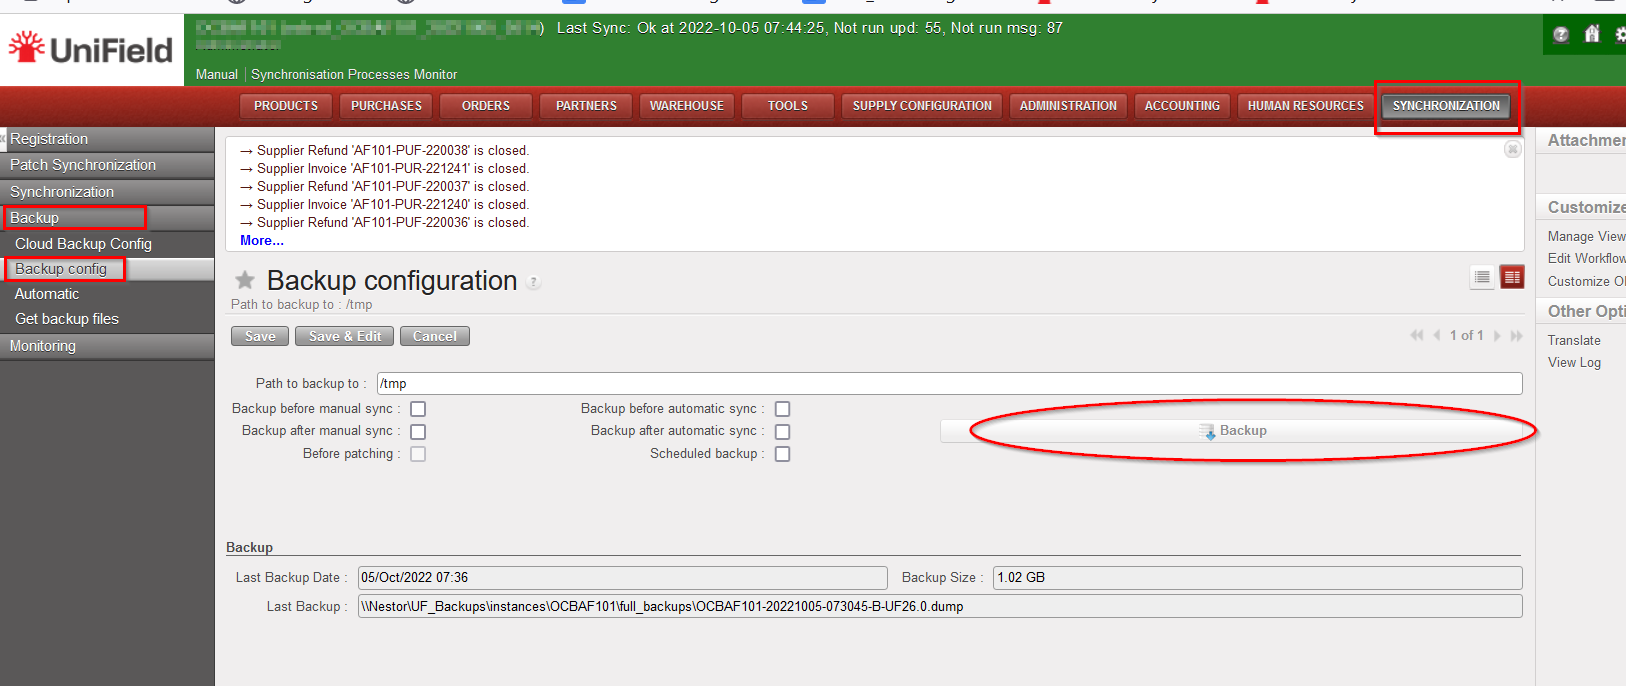
The dump will be downloaded to the backups folder defined in the “path to backup to:”
Step 4:
Transfer the dump and SSH_CONF folder to the new server. Place the SSH_CONF file in C:/Program Files (x86)/msf/
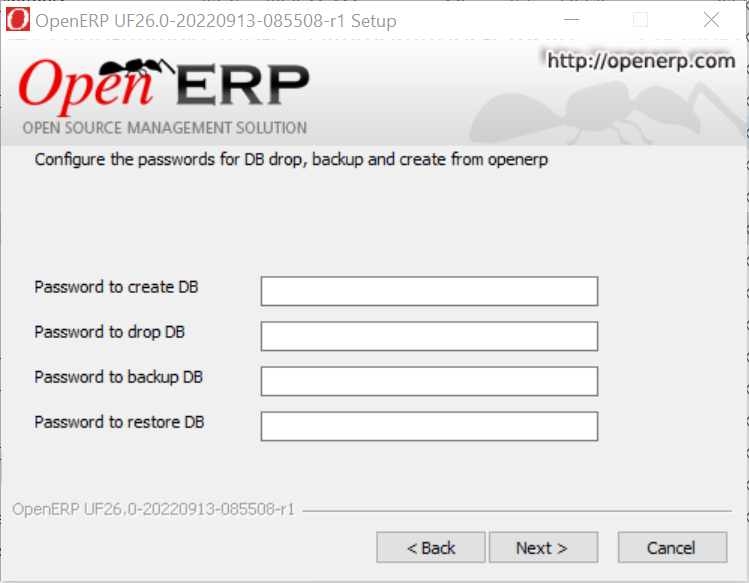
Step 5:
Install pgadmin, notepad++ and run the latest AIO set up. During the AIO installation, do not forget to update the following passwords from the defaults, they differ per OC
After AIO installation is complete, UF application will open on your chosen default browser.
Step 6: Restore the dump.

Step 7: Hardware id update
Login to the restored dump, extract the new hardware id and last update sequence. To do this, go to Synchronization menu ->Maintenance -> Click entity Id as below.
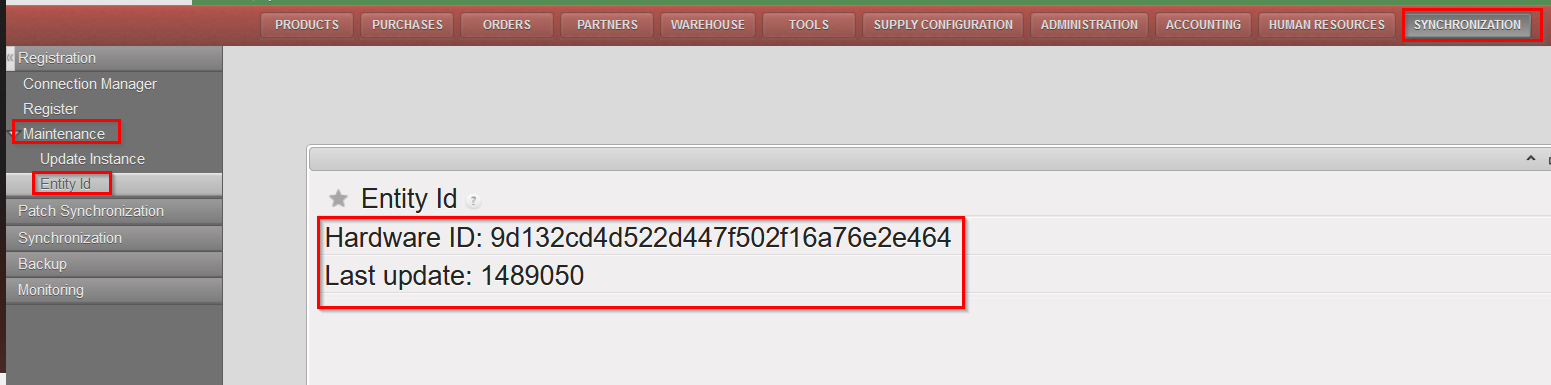
Create a jira ticket to request the hardware id update for the newly migrated instance. Do not forget to copy-paste the hardware id and last update in the description when creating the ticket.
Last checks and conclusions:
- After hardware id update, sync the instance to make sure the update was done correctly.
- Update the continuous backup on the newly migrated server by editing the pg_hba and postgres.conf files and generating a fresh base backup. Please refer to how to do continuous backup config in the IT user manual here.
