Supply User Manual ENG -> 5. Warehouse -> 5.2 LU-SU4101: Incoming Shipments -> T. HOW TO MOVE RECEIVED PRODUCTS FROM THE INPUT LOCATION TO A STOCK (DESTINATION LOCATION)
T. HOW TO MOVE RECEIVED PRODUCTS FROM THE INPUT LOCATION TO A STOCK (DESTINATION LOCATION)
As explained earlier in this LU, goods may be received in a one-step process. In this case they will directly go the requesting location. But goods may also be received in a two-steps process. In this case, they will stop in the “Input” location where a quality check will be performed before to move them to the requesting location with an Internal Move. Note that in both case an INT is actually used but in the first case, this INT is processed automatically by the system.
When receiving products which were ordered for the receiving instance or internally, the system always tries to receive them with the one-step process by default. All Incoming Shipments move the goods to the “Input” location. But an Internal Move is directly automatically created and processed to transfer the products from this temporary “Input” location to the final destination of the goods.
However, you may decide to receive the products in the “Input” location and stop the process at this stage in order to be able to correctly check quality of the goods received. For this, you simply need to uncheck the checkbox “Direct to Requesting Location“. Goods will be received in “Input“. An Internal Move will automatically be created by the system to prepare the move from this “Input” location to the final destination of the goods but will not be processed automatically. This will be done manually by the user once the quality check has been performed.
This two-steps process may also be useful if you want to change the planned destination of the goods as illustrated below.
Go to: Warehouse / Warehouse Management / Incoming Shipments
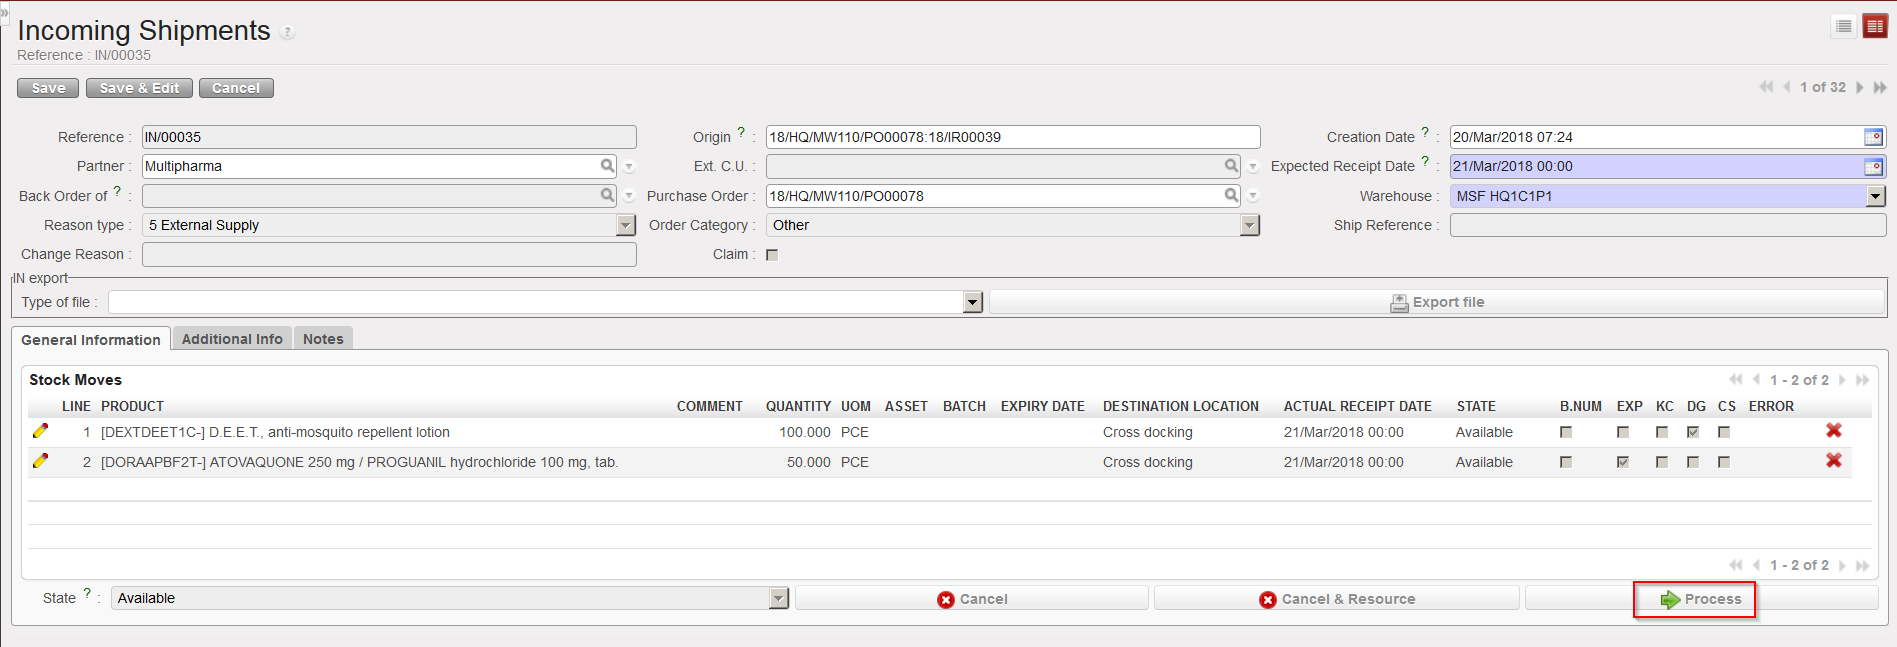
- Open the Incoming Shipment you wish to receive. In the below example, the IN is related to a PO which was created by the OST following sourcing of an IR with Location Requestor = ECU. As a consequence, an OUT has been created to prepare the delivery of the goods to the ECU. The Destination location at line level will be pulled from the destination in the IR or FO (Input, Crossdocking, Service, Non stockable)
- Click on the “Process” button to initiate the reception process.
|
|
|
Processing an Incoming Shipment |
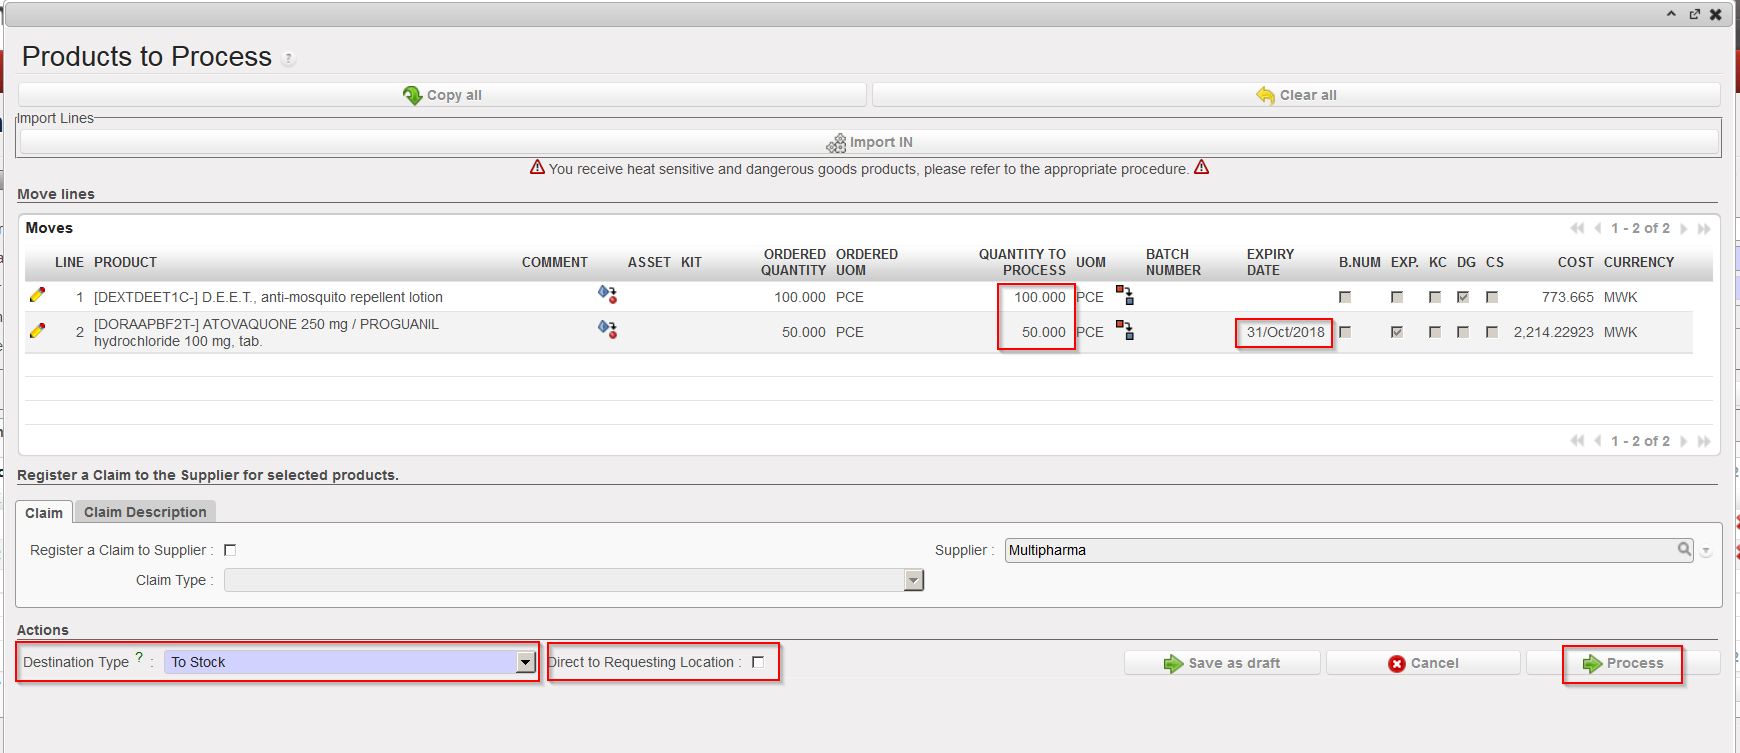
3. On the “Products to Process” screen, complete the received lines, change the “Destination Type” from “To Cross Docking” to “To Stock” (you will get a warning message, click “OK“) and untick the “Direct to Requesting Location” checkbox.
4. Click on the “Process” button.
|
|
|
Completing the received lines and changing destination type on IN |
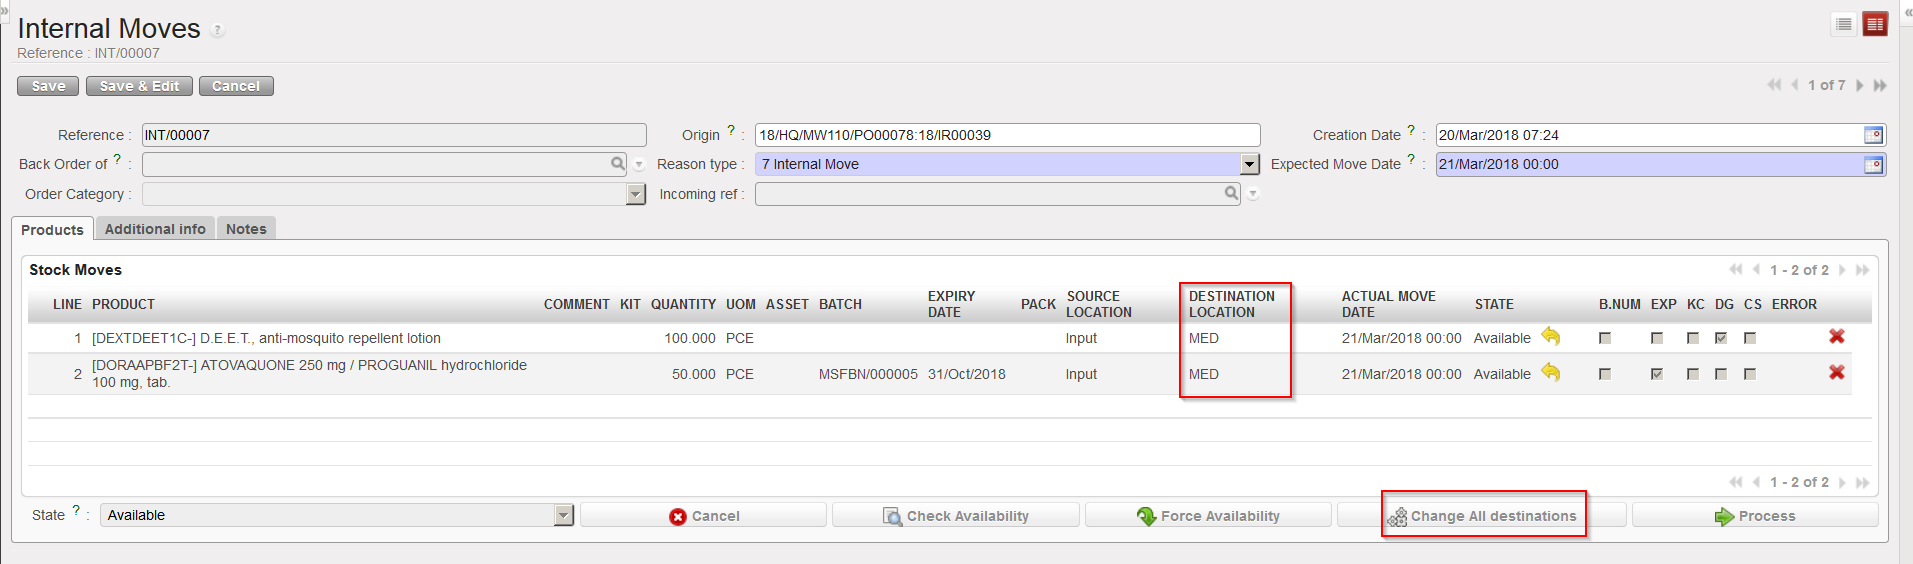
The goods have now been received in the “Input” location and the Internal Move is ready to be processed.
5. Open the Internal Move. Note that the destination location of the goods is “MED“.
6. Click on the “Change All destinations” button
|
|
|
Changing the destination location on an Internal Move (step1) |
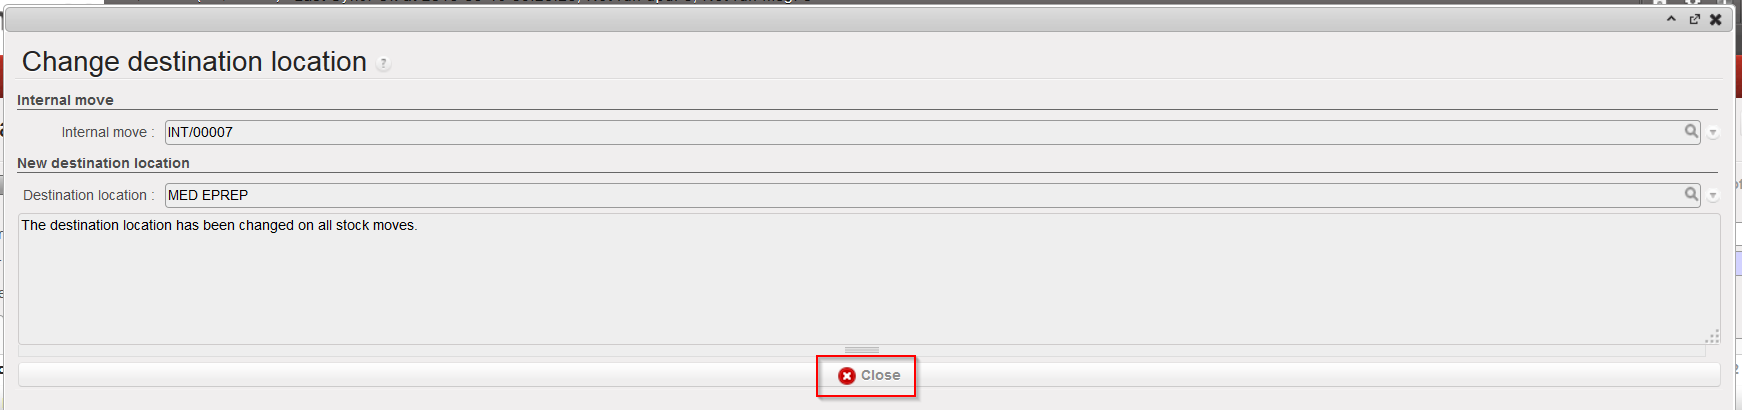
7. In the “Change destination location” window, enter the location to which you want to direct the goods in the “Destination location” field and click on the “Change location” button. A window informs you on the change done, click on the “Close” button.
|
|
|
Changing the destination location on an Internal Move (step2) |
|
|
|
Destination location changed on INT |

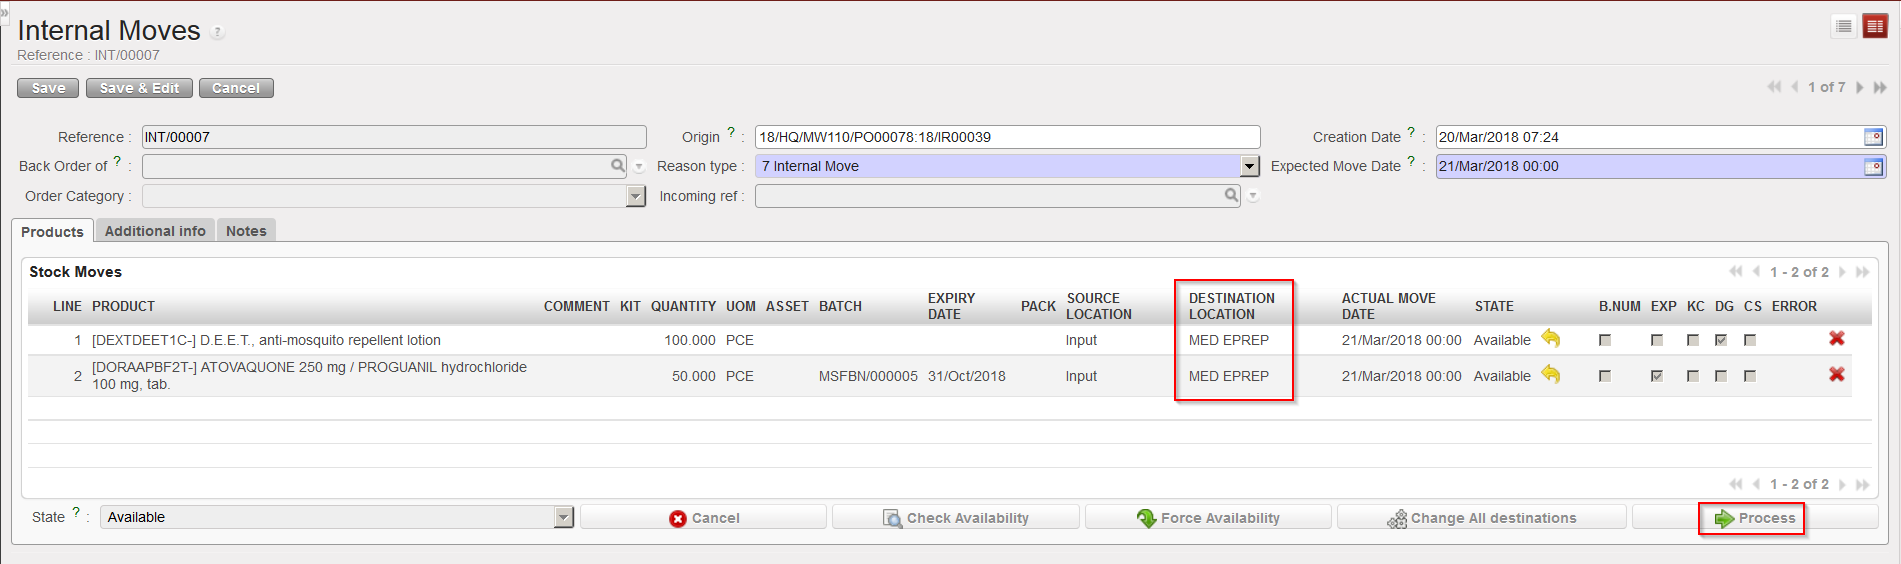
8. The destination location on the INT is now “MED EPREP“. You may process the Internal Move as usual via a click on the “Process” button.
|
|
|
Processing the INT with the new destination location |
9. The last step is to cancel the OUT as it has now been replaced with the INT.
|
|
|
Cancelling the OUT |

