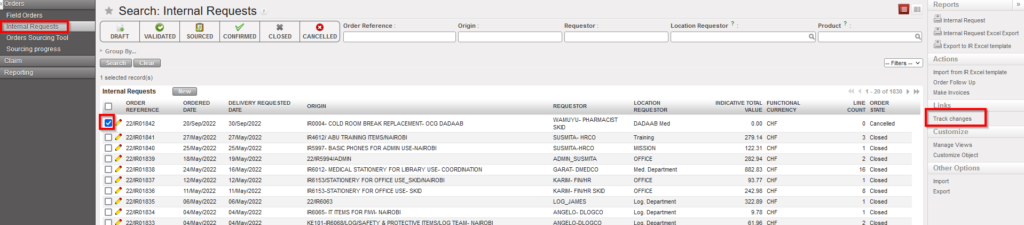
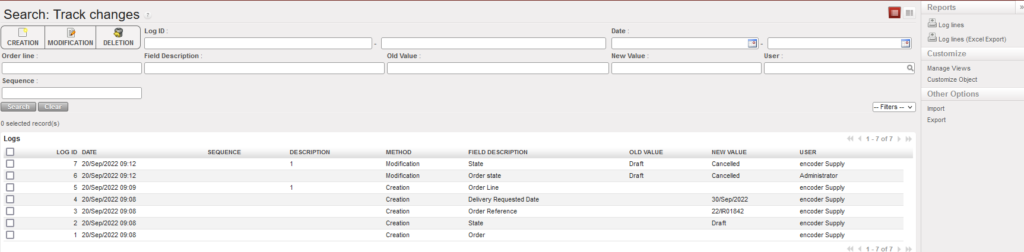
For an easy follow up of the history of changes of supply/finance objects, users can use the Track changes on the right action menu to display information about changes for many objects in supply/finance:
Example of one of the objects – Track changesInformation displayed in Track changes report
This option is available for below supply/finance objects:
The system is able to automatically import supply data from predefined locations, and update the corresponding records in UniField. This was designed to automate the data transfer between the ESC and UniField: existing Purchase Orders (state: Validated) and Incoming Shipments will be updated if data is valid.
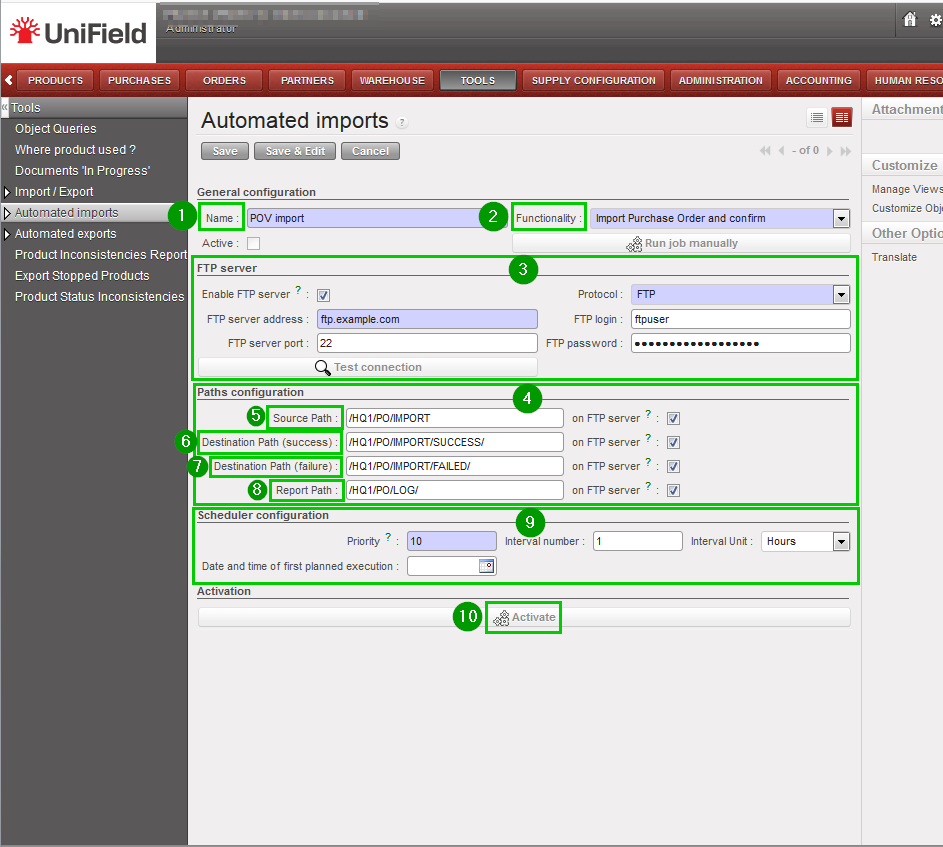
Configuration: Log in your instance and click on menu TOOLS 1,Automated Imports 2 Click on New3 to create a new scheduled import
Fill the following fields Name 1: provide a name to the import job Functionality 2: choose one. All import features are listed here, but so far Vertical Integration is supposed to rely on Import Purchase Order and Confirm or on Import Incoming Shipment only. If you want to retrieve the files from an FTP server, check the box and type your FTP host and credentials on the FTP server section 3 Set the paths under the Paths configuration section 4:
Source path 5: where to look for files to import
Destination path (success) 6: where to store the file if import succeeds
Destination path (failure) 7: where to store the file if import fails
Report path 8: where to write log files
Paths can be located on an FTP server or locally on the UF server Configure the scheduler 9 (refer to 11.5 Scheduled actions configuration) Click on Activate 10
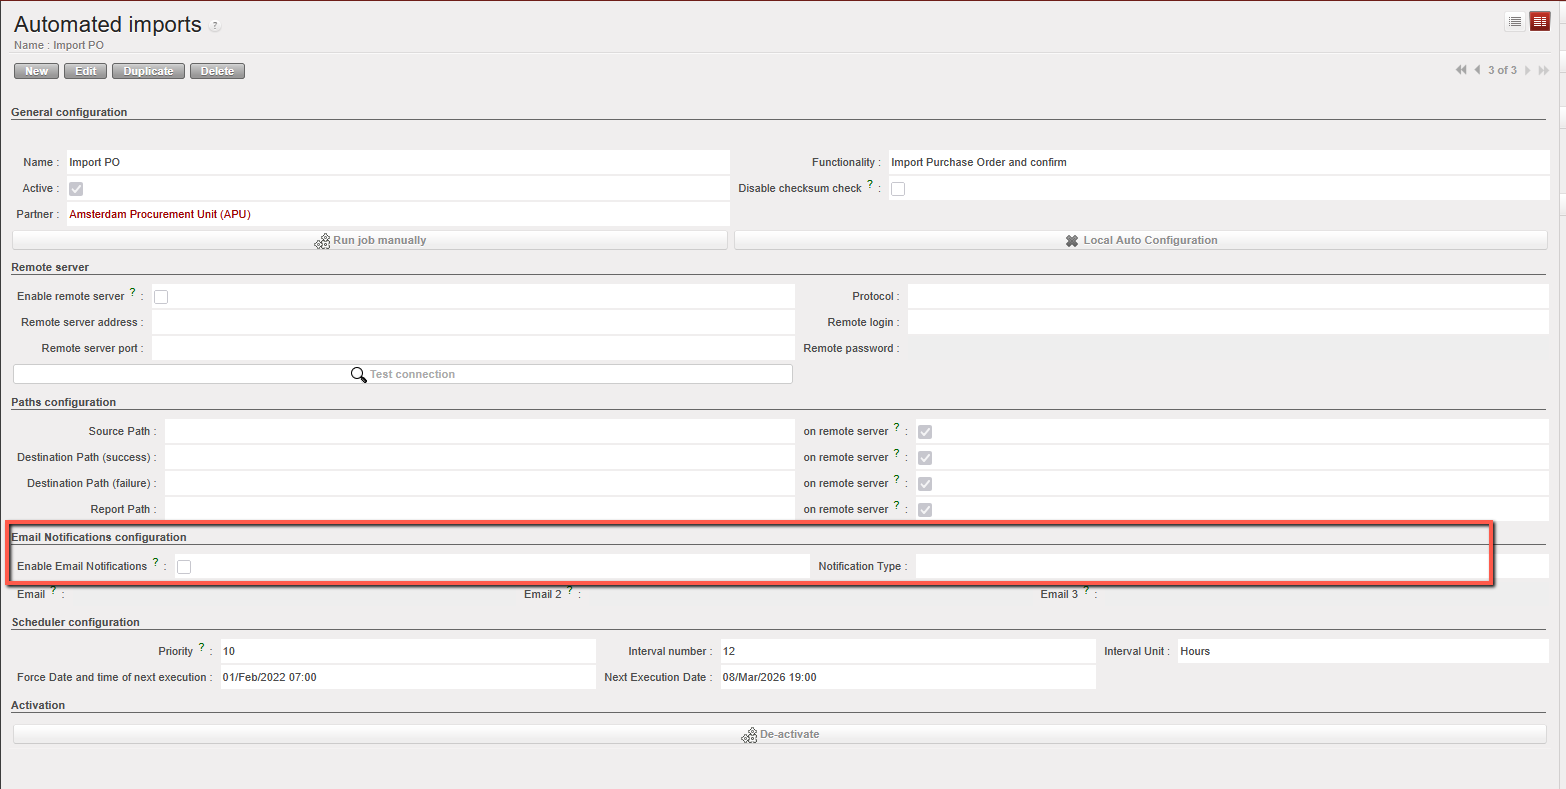
N.B. Up to three email addresses can be configured to receive notifications when Auto-VI PO updates are partial or fail, based on the job report.
FTP servers are not provided by UniField and must be hosted either by the OC or its ESC. The same paths can be used for both POV and IN import jobs: the system relies on filenames to recognize what file it is processing. Expected patterns are:
POV
– POV_XXXX_YYYY_MM_DD.xml – POV_XXXX_YYYY_MM_DD.xls where: XXXX is the UF PO Reference (parts separated by “_” e.g. 17_NL_SL001_PO00251) YYYY_MM_DD is the year, mointh and day (e.g 2018_10_05) E.g of POV: POV_17_NL_SL001_PO00251_2018_05_15.xml
IN
– SHPM_XXXX_ZZZZ_YYYY_MM_DD.xml – SHPM_XXXX_ZZZZ_YYYY_MM_DD.xls where: XXXX is the UF PO Reference (parts separated by “_” e.g. 17_NL_SL001_PO00251) ZZZZ is the serial number YYYY_MM_DD is the year, mointh and day (e.g 2018_10_05) E.g of POV: POV_17_NL_SL001_PO00251__0528_2018_05_15.xml Please note that a file that has already been processed will not be processed again, unless its checksum is different. So it is not possible to import the exact same data twice.
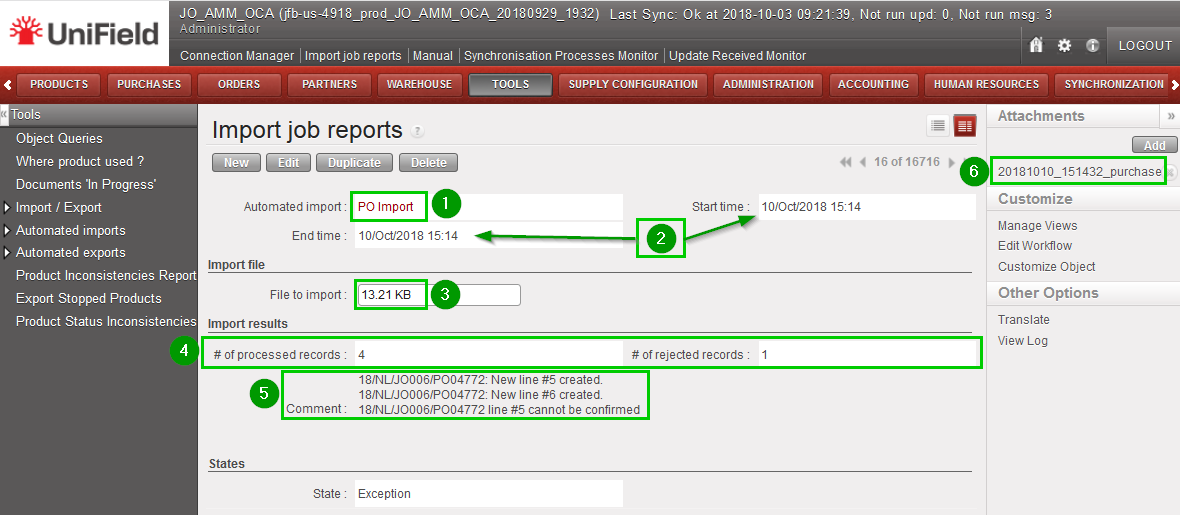
Monitoring: You can see the history of imports by clicking on menu TOOLS 1, Automated imports 2, Import job reports 3 You’ll get a list of all past executions. You can filter the list by status, import function, date and time or Import File name. Click on any line 4 to get more information
The form view gives you more details about a specific execution of the import:
Import function 1
Start and End date and time
Import file Name
File size 3
Number of processed/rejected records 4
Errors and exceptions 5 (if any)
You can download the result file 6 in the top right corner
*** Automated imports/Automated export
Import job reports / Export job reports, the job reports can be searched by using the existing filters (Automated import or export functionality, start time, End time and Name of imported or exported file).
We use cookies to ensure that we give you the best experience on our website. If you continue to use this site we will assume that you are happy with it.