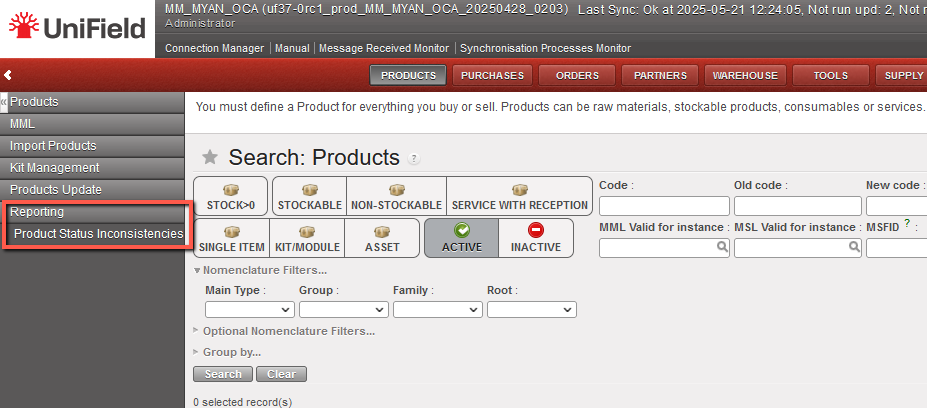
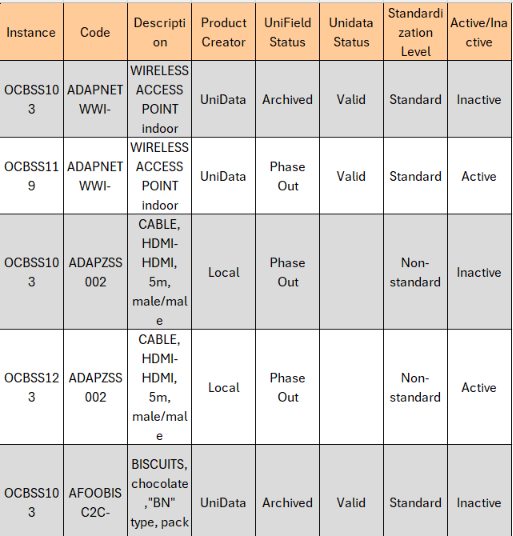
This report is generated in excel at Coordination level and shows every product which has the Status discrepancy between Coordination and Projects, the header information of the product is displayed (code, description, product creator, Standardization Level, UniData status). OC guidelines should be consulted before taking any further action.
Go to: Products>Reporting> Product Status Inconsistencies
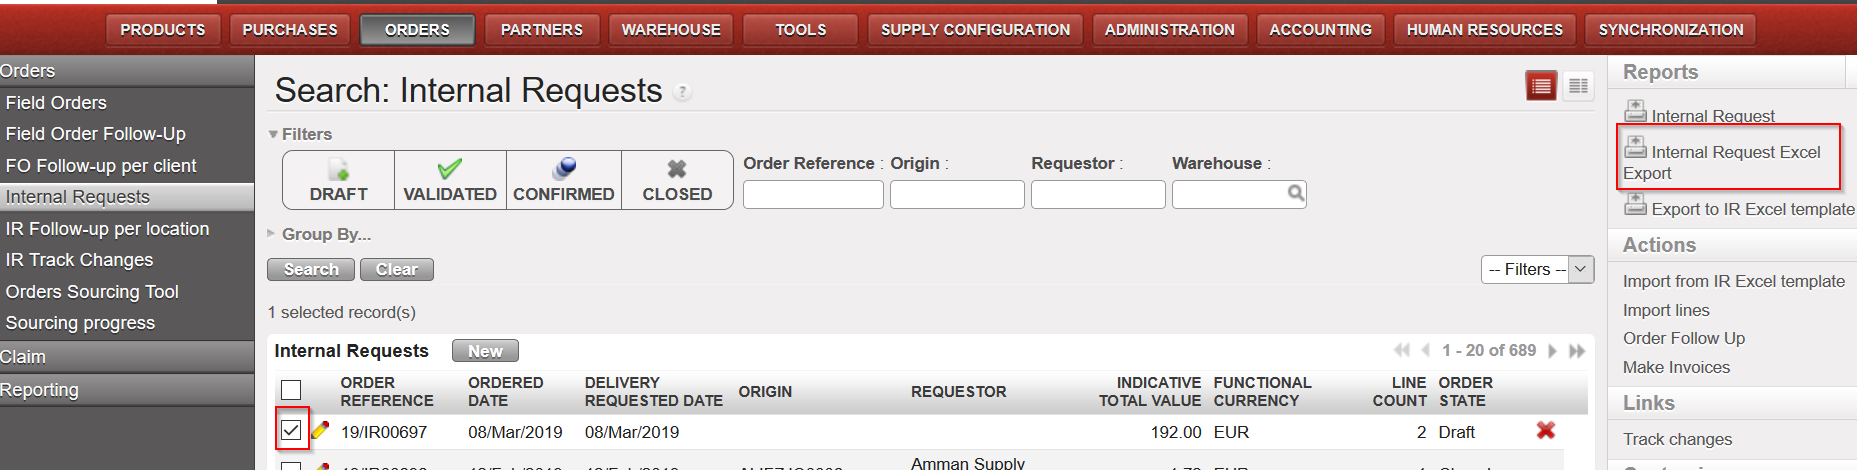
As for the import, the system offers several options to export the lines from an Internal Request to an Excel file. Depending on whether you need to export only product lines or product lines AND header information you will need to choose the correct link in the right action menu.
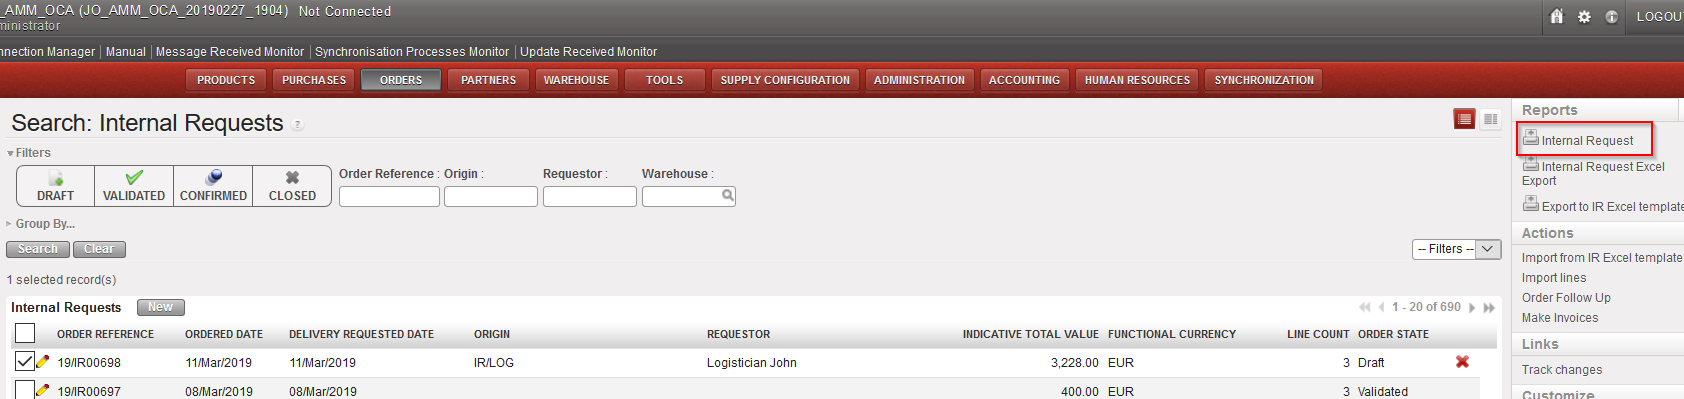
Go to: Order / Order / Internal Requests
Click on the check box on the left side of the line corresponding to the Internal Request to be exported.
The Action menu on the right-hand side is displayed.
Click on the
3.1 “Internal Request Excel Export” link to export product lines only
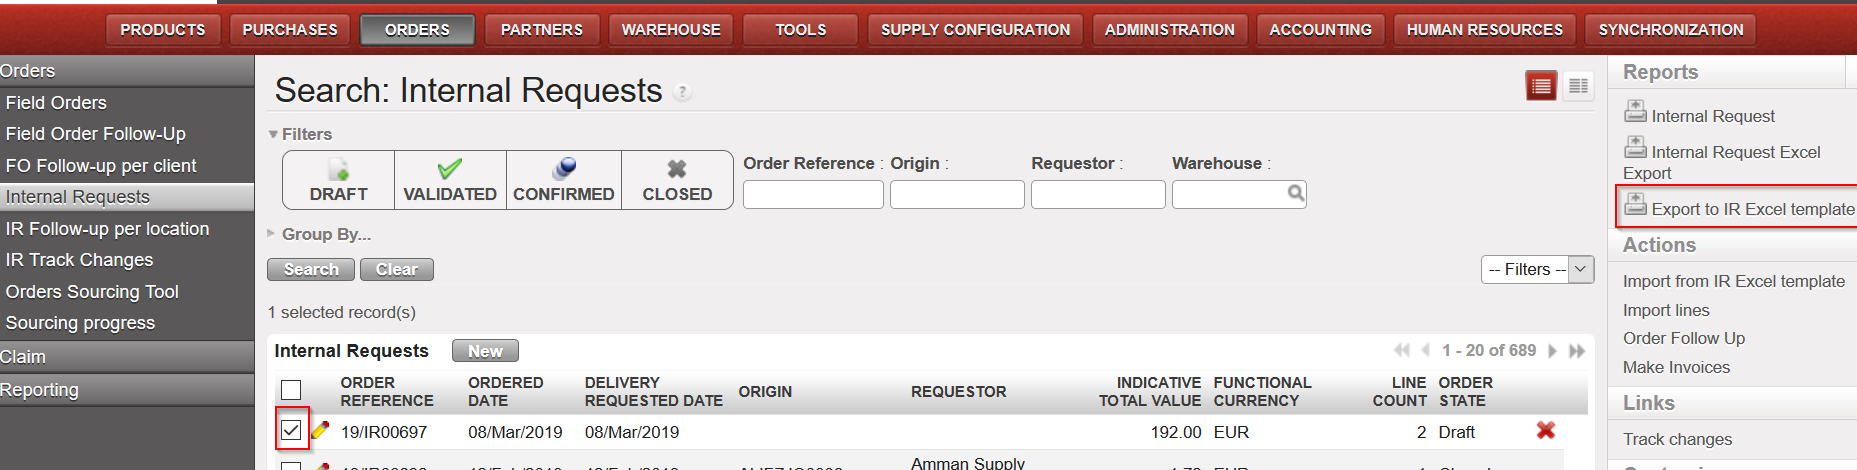
3.2 “Export to IR Excel template” link to export product lines AND header information
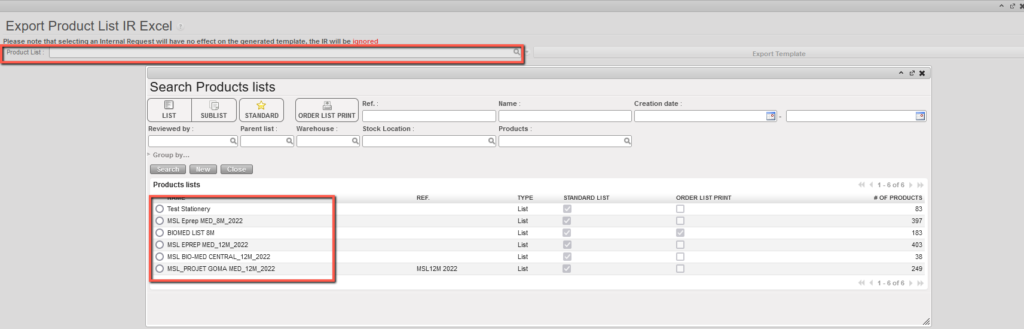
3.3 “Export Product List IR Excel” can be accessed in the IR List view Action menu (without any IR being selected). In the intermediate pop-up, the user can select an existing Product list.
4. The IR will be exported to Excel.
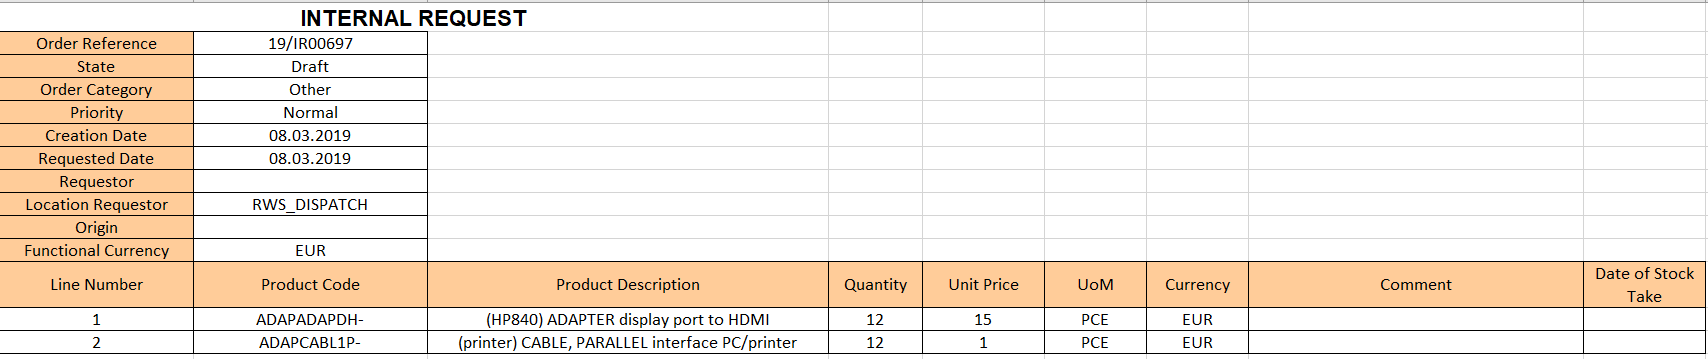
3.1 Exporting an IR to Excel
All the information of the IR you chose will be exported to Excel with the following format:
3.1 IR Excel export
3.2 Exporting to IR Excel template
3.2 Export to IR Excel template
Do not mix-up these 2 export options with the “Export” option available at the bottom of the action menu which will export all the headers of the IRs appearing on the screen (without the details of the product lines).
3.3 Export Product List IR Excel template ( select Product list to export)3.3 “Export Product List IR Excel”
From the same screen, you can produce (and print) a PDF report for validation purpose using the option “Internal Request” also located in the action menu (under “Reports“). Note that these exports can also be done from within the IR.
Exporting an IR to PDF from the “Search: Internal Requests” screen
Exporting an IR to PDF from within the IR
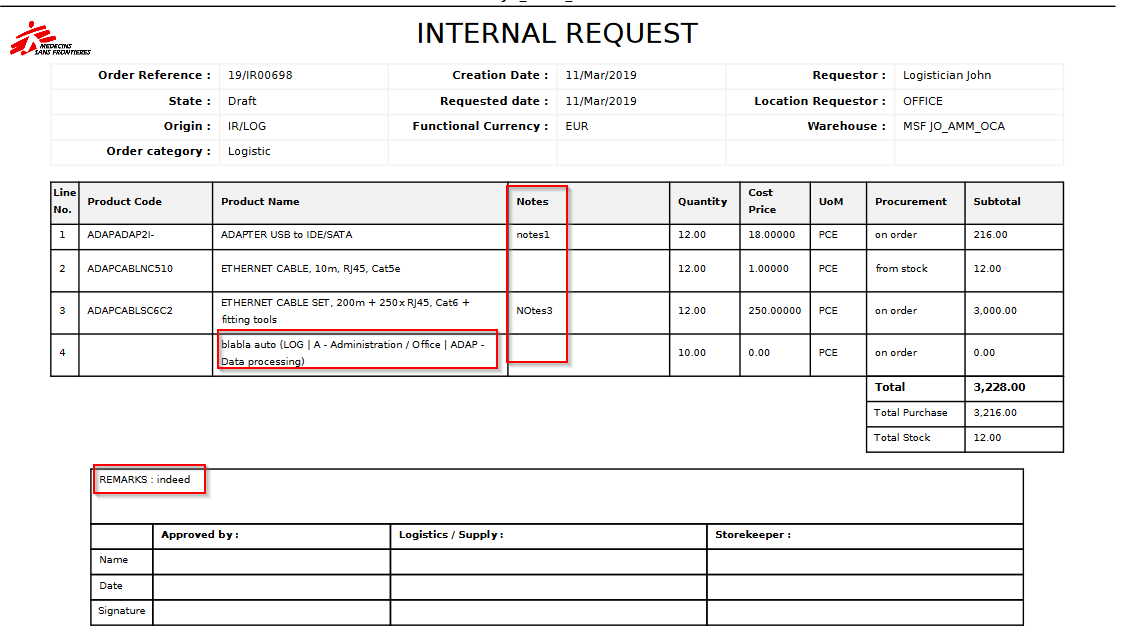
Internal Request in PDF format
Note 1: It is possible to select several IRs at the same time on the “Search: Internal Requests” screen (using several check boxes) and export them in one click to Excel or PDF. In Excel, you will get one IR per sheet. In PDF, all the selected IRs will be exported on one PDF file.
Note 2: The export to Excel and PDF can also be done from within the IR as the “Internal Request Excel Export“, “Export IR Excel template” and the “Internal Request” options are also available in the action menu (under “Reports“).
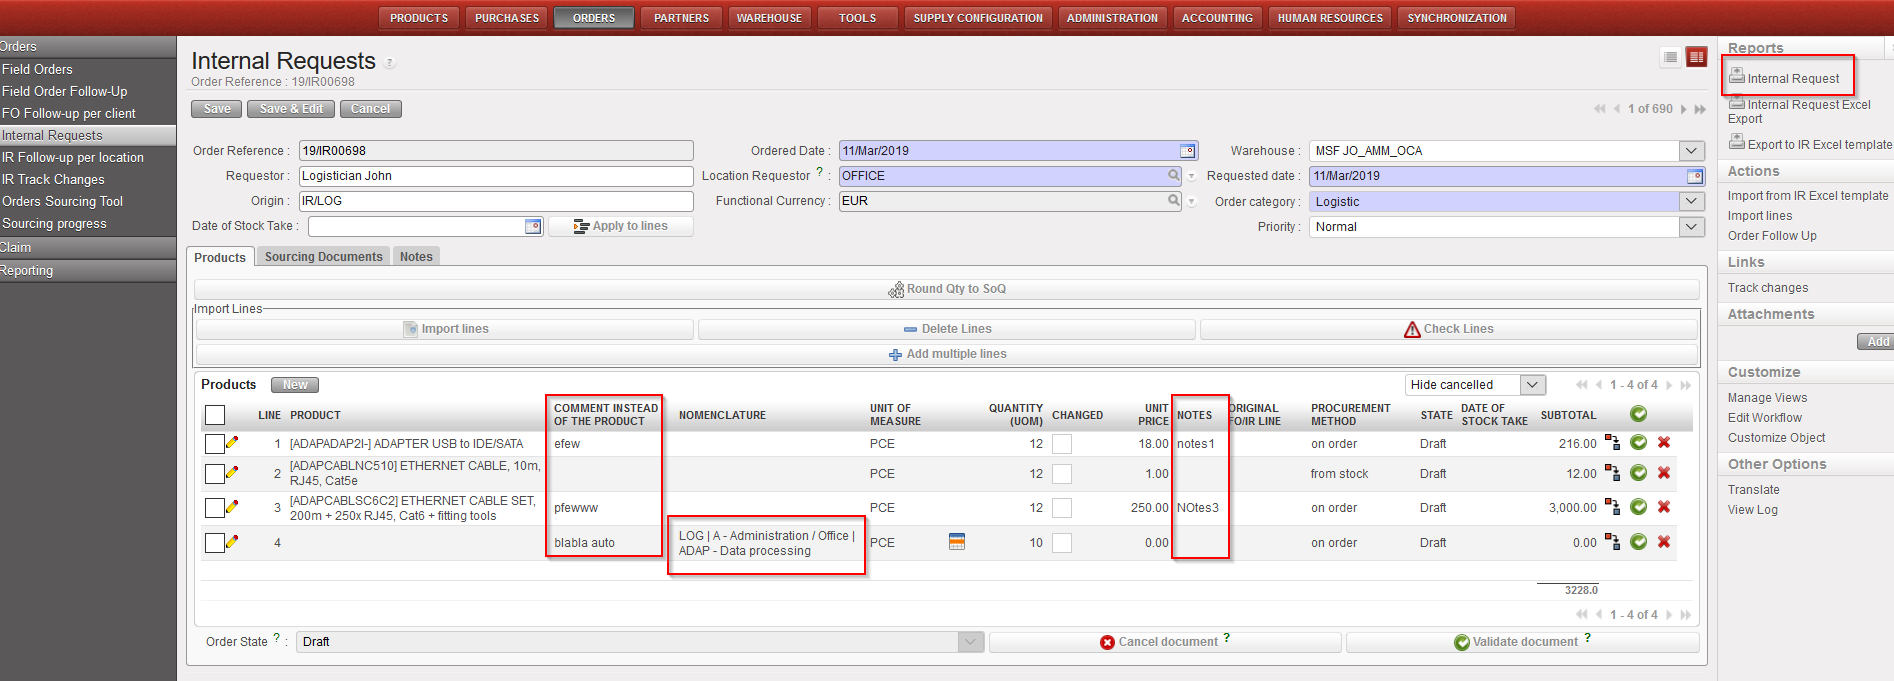
Note 3: On the Excel, the comment included in the “Comment instead of the product” column of the IR will appear in the column “Comment“. Note that the notes included in the “Notes” column of the IR are not exported to excel.
Note 4: On the PDF, at header level, the notes inserted on the “Notes” tab of the IR will appear (at the bottom of the PDF, behind “REMARKS“). At line level, the notes included on each line of the IR will appear (in the column “Notes” of the PDF) but the “comment instead of the product” information won’t appear except for lines with “product by nomenclature“.
Note 5: On the PDF, “Cancelled” lines will not be displayed
B. How to create a supplier product catalogue price list
In order to create a Supplier Catalogue Price List for a supplier, the user should follow the relevant MSF procedures outlined for gathering this sort of information, commonly known as market analysis (which may involve a Tendering process) before entering this data into the system. To make this inputting process as efficient as possible, it is possible to both enter this information directly into the Supplier/Product record as well as to import the data into the system via an excel file.
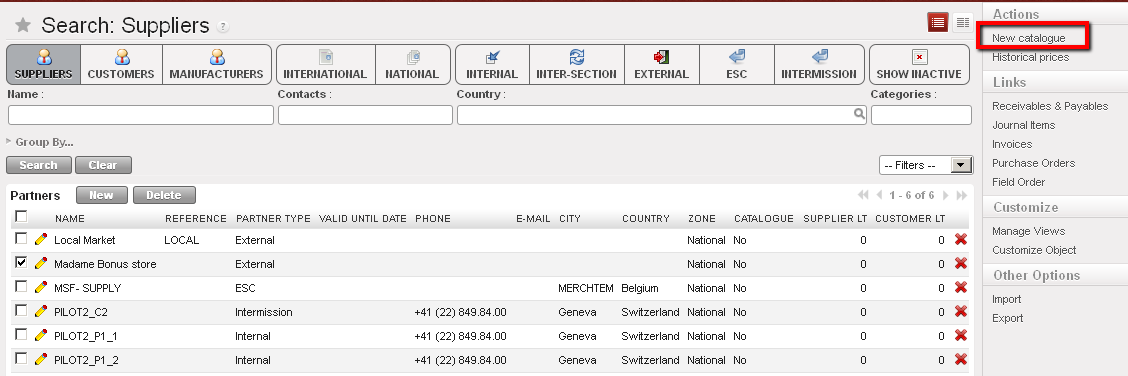
To enter the Supplier Catalogue Price List directly into the system, Go to:Partners/Suppliers
Enter the relevant search values in the header fields to find the Supplier you want
Tick the checkbox next to the supplier in the list view
In the Actions Menu on the right-hand side, click on New Catalogue. A screen displaying New
Catalogue will appear.
Product catalogue – 1
Enter the Name (how you want to call this Supplier’s catalogue)
The “From” field will automatically display today’s date but can be edited
Enter the “To” date using the calendar button. This should reflect the last day on which the information you are entering is valid (e.g. if the price is fixed how long it is fixed at this price according to the supplier’s bid). This field is not mandatory.
The currency will pull through from the currency entered for this supplier
Each new catalogue must have a ranking. A default “3rd choice” ranking is automatically assigned for catalogues created via synch or auto VI importbut can be changed.
The Partner field will display the name of the Supplier that for which you are adding the catalogue price.
The Active box will reflect the state from the Supplier record (i.e. this should have been ticked if we are considering using them and have asked for product pricing etc)
In the Import Line section, the Add Attachment button will allow us to browse and select the excel file that we want to import, and next to this is the “Import file” button which will import the data from the excel file.
To Add products individually to the catalogue, in the Products tab, click on the New button
Click on the magnifying glass icon to bring up the search products window and enter the relevant values to find the product(s).
Select all relevant products, and check that the default UoM is correct (or changing it if need be)
Enter the minimum quantity which the supplier had based their price on. If there is none then 1 can be entered. If you try to save a line with 0 as a minimum quantity, the system will display an error message
Enter the Unit Price (which should be related to currency selected)
Enter any SoQ Rounding figure (e.g. if Pens are the product, the UoM and price may be per pen (i.e. pce), but the supplier sells the pens in packets of 50, in which can the rounding would be 50.)
Enter the minimum order quantity – depending on the supplier, the lowest quantity of the goods they would accept to supply per order
Enter any other comment
Click on the floppy disk icon to save the line and either repeat the steps to add another product or click on the Save button to save the catalogue list.
When catalogue is complete and all lines are saved, user can confirm catalogue by clicking on the Confirm button. This means all data it contains will be used by system for relevant transactions.
Product catalogues – 2
N.B: It is possible to have 2 active catalogues for the same supplier in the same instance as long as the products are different in each catalogue. If one supplier has more than one catalogue for the same product, user will receive a warning message.
Please note that it is possible to create a Catalogue of the Coordination instance at coordination instance. This function has been added to enable the related projects, to which this catalogue is synchronized down, to have a Coordination Supplier Catalogue. This will help to get more accurate estimation prices for intra-mission orders.
We use cookies to ensure that we give you the best experience on our website. If you continue to use this site we will assume that you are happy with it.