H. How to receive products different from the ones ordered
It happens that suppliers are unable to deliver exactly the products that have been ordered (and confirmed) and instead deliver alternative or similar products (ideally after agreement from the client). As the corresponding PO (or PO-line) has been confirmed, it is no longer possible to amend it to change the products concerned. Therefore, this change will have to be done during the reception process on the Incoming Shipment.
Go to: Warehouse / Warehouse Management / Incoming Shipments
Click on the Incoming Shipment you wish to receive.
Click on the “Process” button.
Check that the products and quantities match with the delivery received from the supplier.
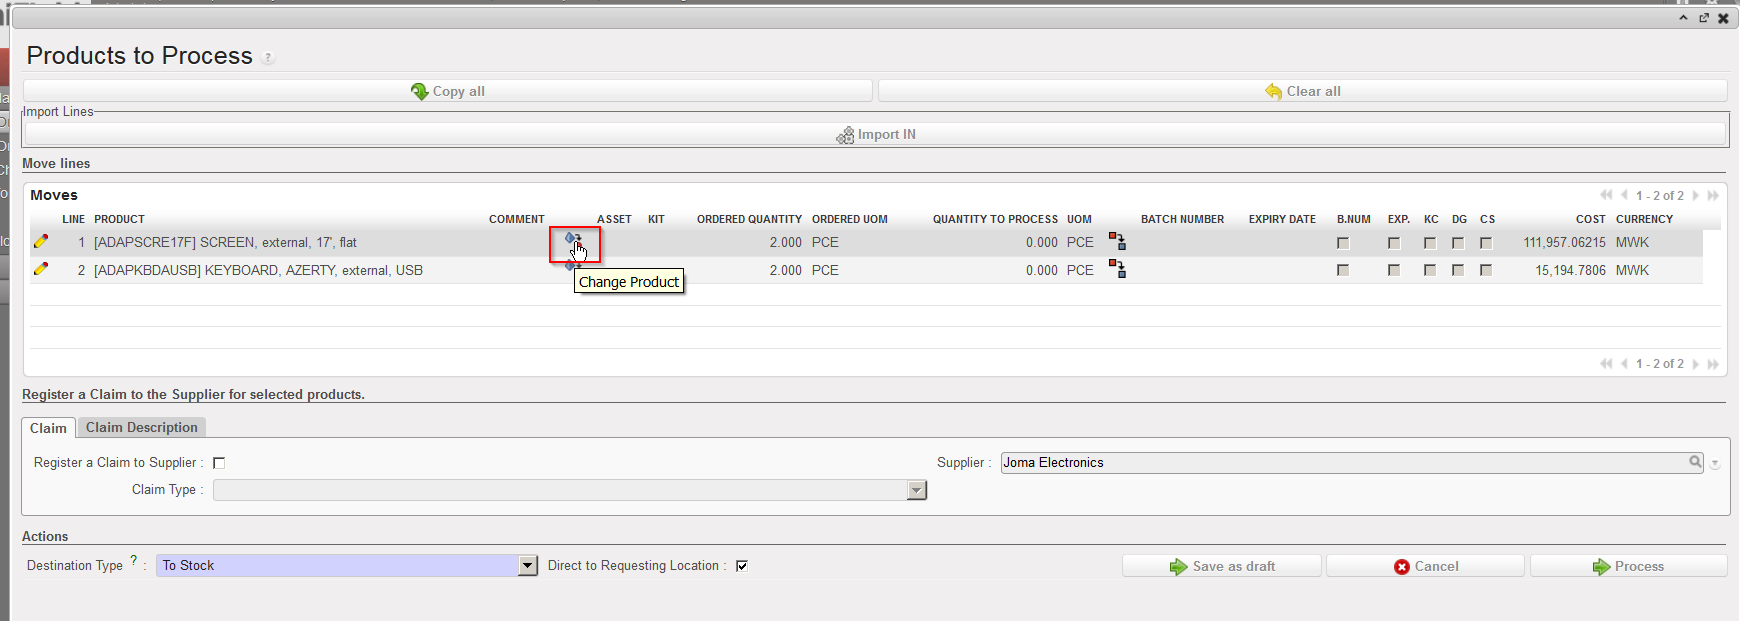
If one product does not match with a received product, click on the “Change Product” icon .
Enter the product actually received in the “New Product” field (in the “Change Product of Memory Move” window).
Enter the reason for the change in the “Change Reason” field (this is a free text).
Click on the “OK” button.
“Change Product” icon on the “Products to Process” screen
Changing a product on the “Change Product of Memory Move” window
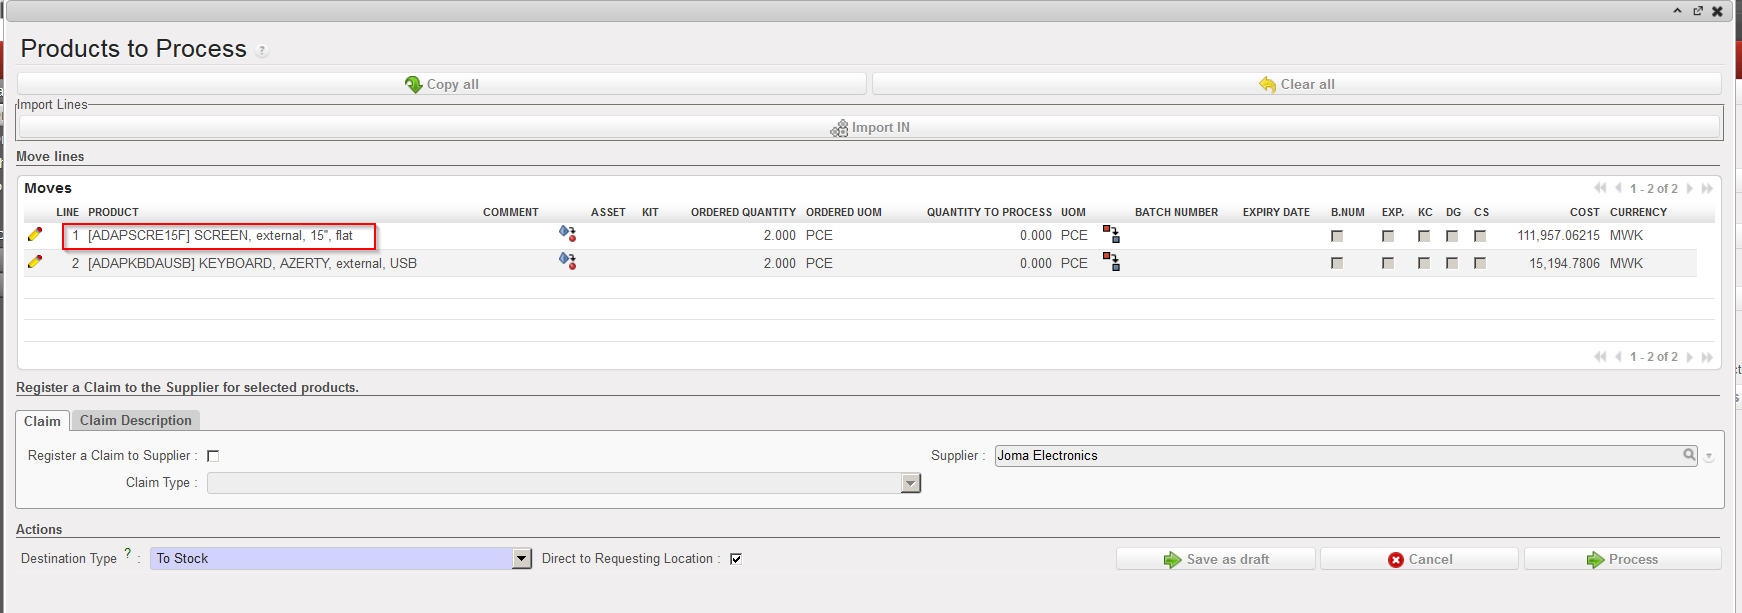
8. The system sends you back to the “Products to Process” screen where the product has been changed accordingly.
“Products to Process” screen after product change
From this stage, you may process the reception normally. Note that several products can be changed if needed.
Note that the corresponding PO won’t be updated and will keep the product which was initially confirmed. By consequence, at the end of the process, you will have a mismatch between the “Closed” PO and the “Closed” IN.
If an Incoming Shipment is created from scratch, rather than entering all the lines of the IN manually, you may also choose to import those from an Excel file. Note that this file should have the XML Spreadsheet 2003 format and be organized as below.
Excel format to import on Incoming Shipment
Go to:Warehouse / Warehouse Management / Incoming Shipments
Click on the “New” button.
Enter the header information on the IN.
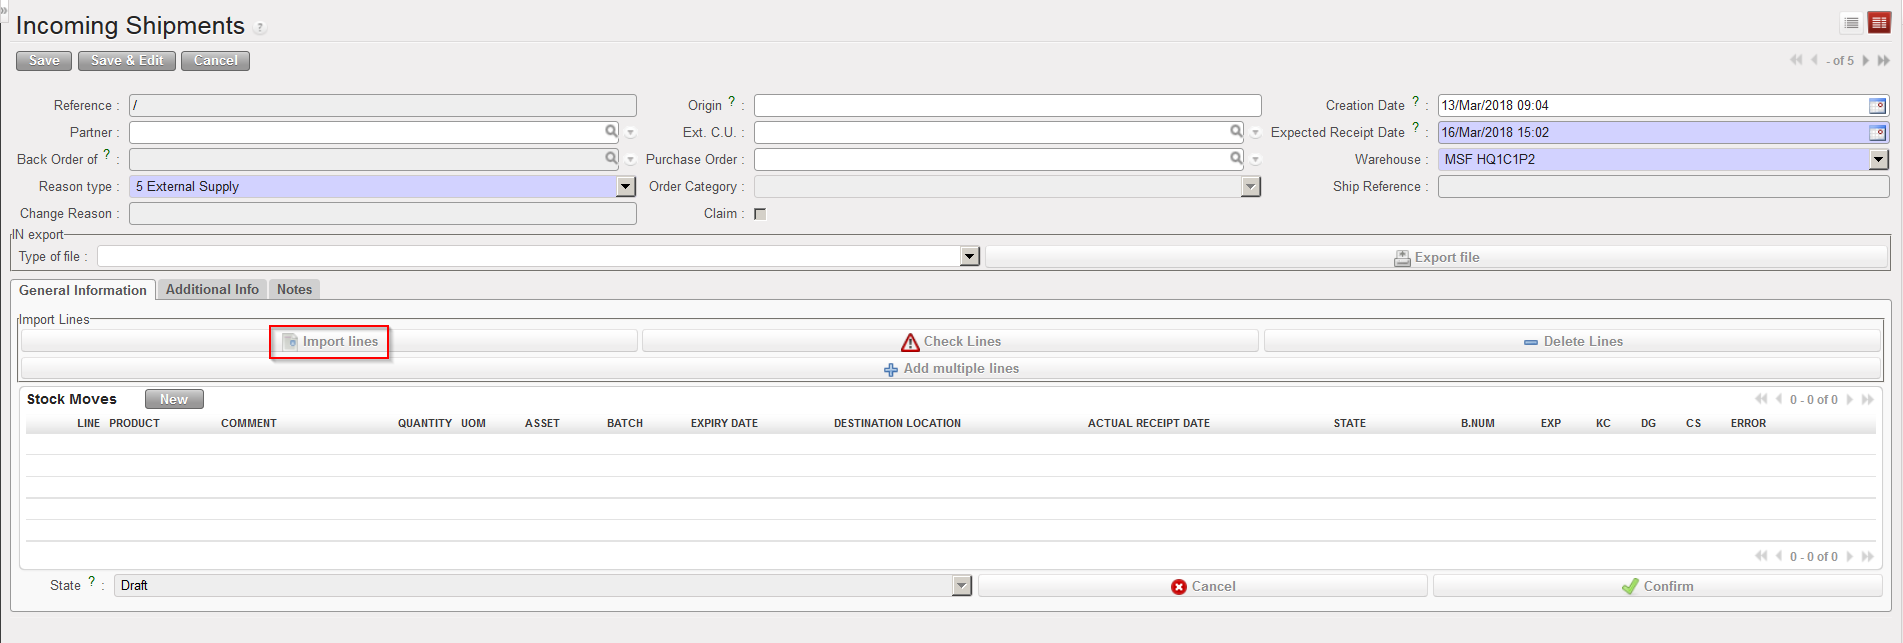
Click on the “Import lines” button.
Importing an Excel file on an Incoming Shipment
4. Click on the “add attachment” button.
5. Click on “Browse” and select on your computer the file you wish to import on the Incoming Shipment. Note that from this screen (Import of lines) if you click on the “Saveas” button, you will be able to generate a template of file which can be imported on INs.
6. Click “Open“.
7. Click on the “Importfile” button.
8. Click on the “Update” button until the “% completed” bar reaches 100%.
9. Check the result of the importation under “Information“.
10. Click on the “Close window” button.
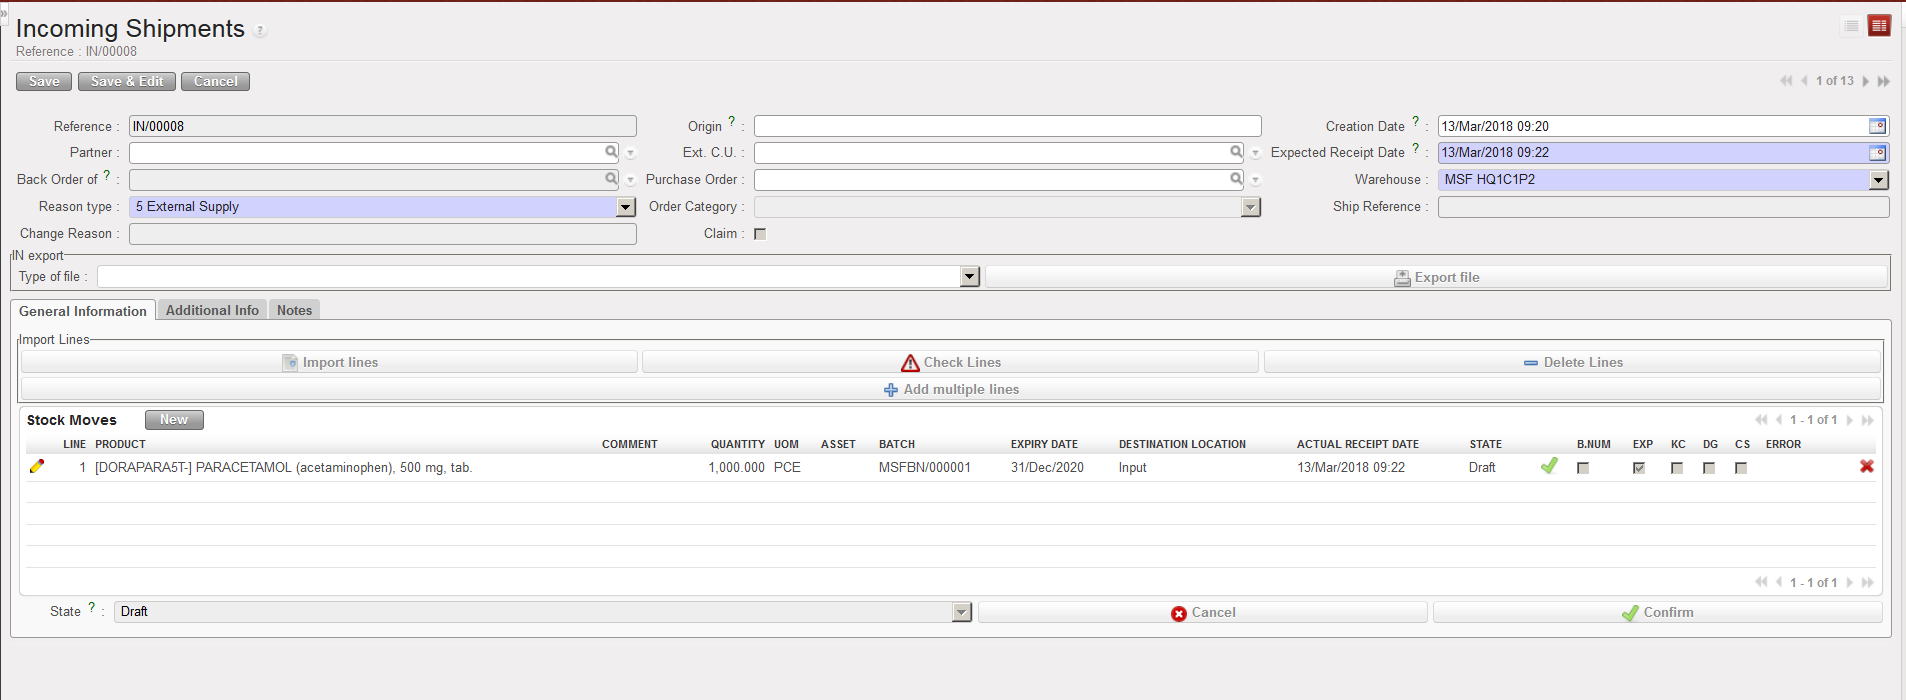
11. The system displays the main IN screen with the imported lines.
Excel file imported on an Incoming Shipment
Note that the imported file may include BN and ED of products (according to the settings of the products defined on the PMD sheet). If this is done, batch numbers will be created on the instance and be visible through Warehouse / Traceability / Batch numbers. As we will see later in this LU, batch numbers are actually master data as they can be reused on other transactions.
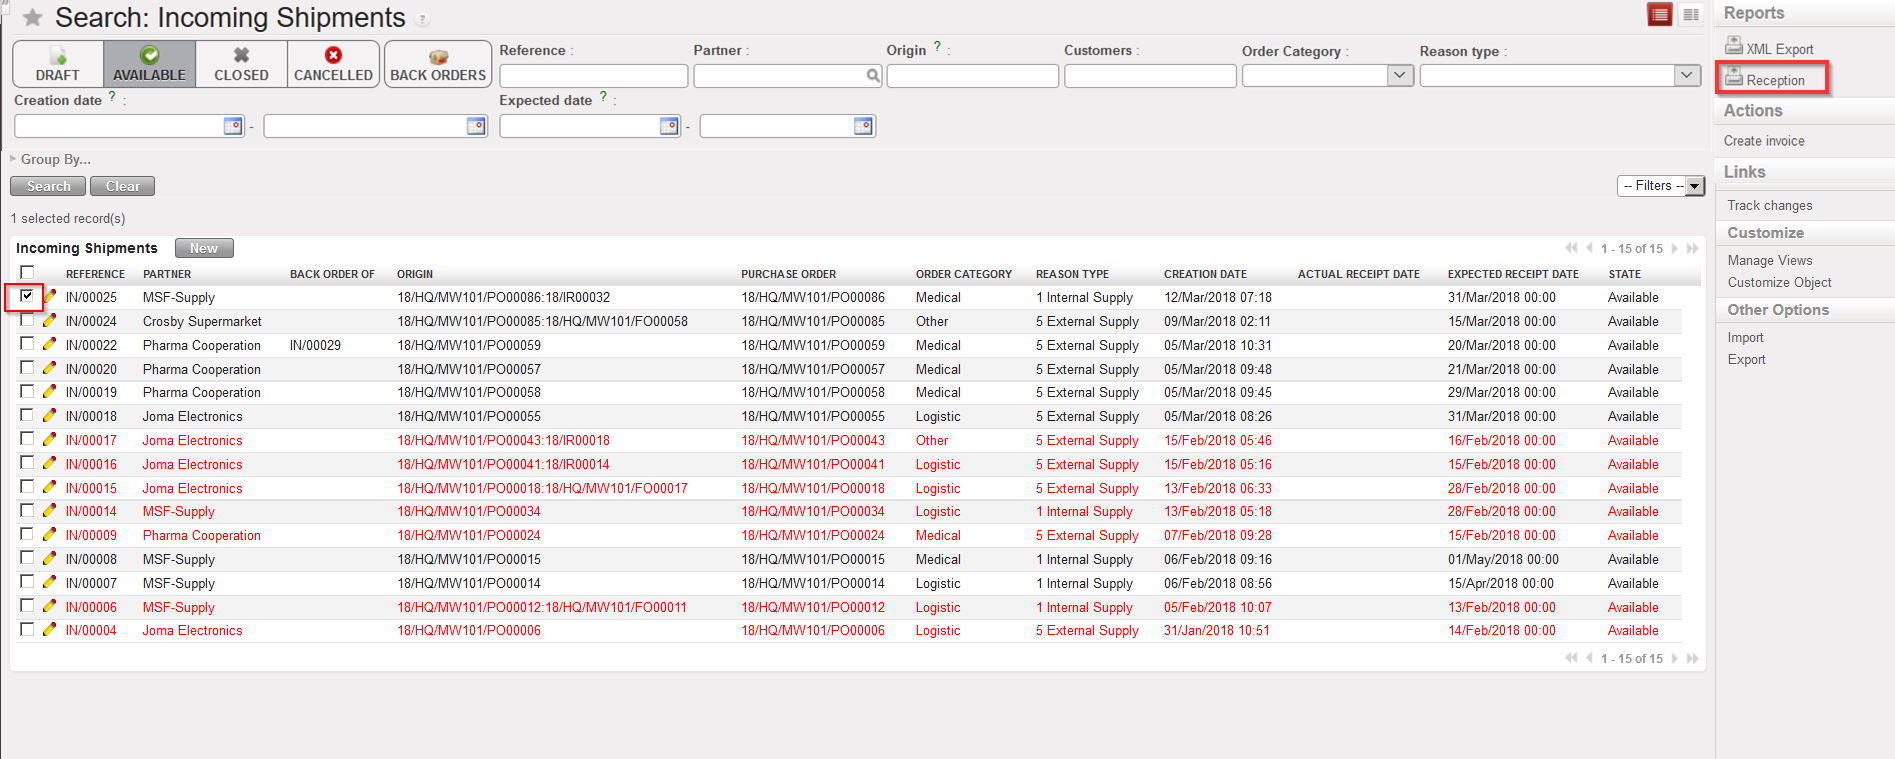
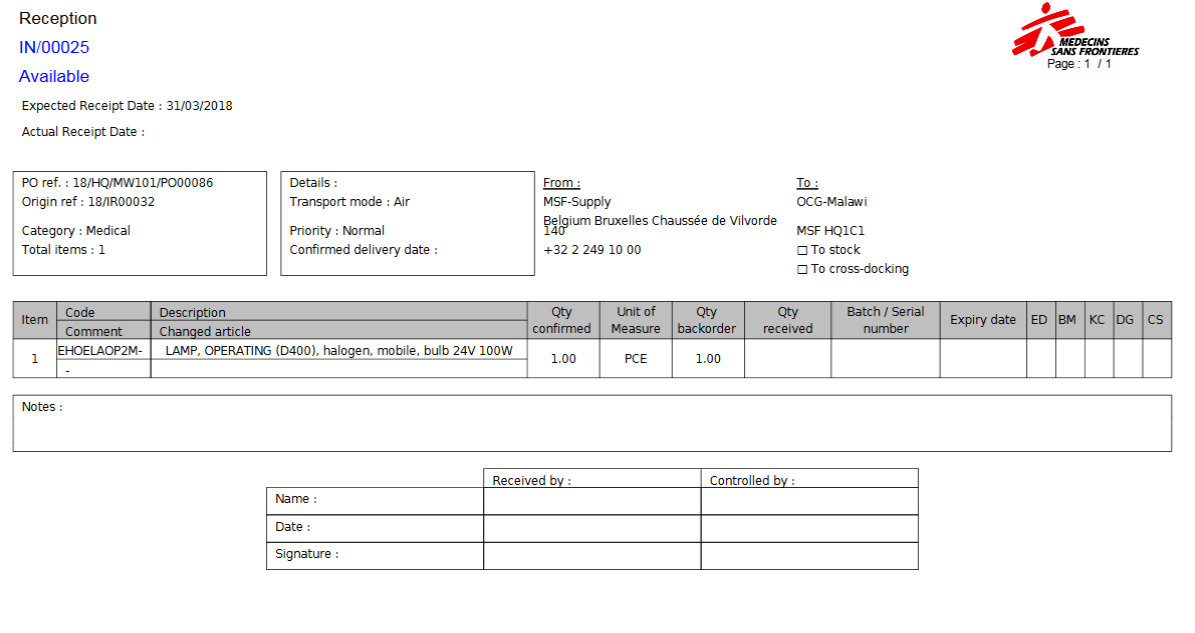
An Incoming Shipment can be exported to PDF (and printed) by selecting the option “Reception” in the action menu (under “Reports”).
It can also be exported to Excel (XML Spreadsheet 2003 format) by selecting the option “XMLExport” in the action menu (under “Reports”) although this will only be possible for “Closed” Incoming Shipments.
Exporting an Incoming Shipment to PDF
Incoming Shipment exported to PDF
Note: On the PDF, “Cancelled” lines will not be displayed.
Incoming Shipments (INs) refer to all deliveries that you expect from a partner which can be internal (coordination or a project), external (a supplier), ESC (an MSF European Supply Centre), inter-mission (a coordination instance from your section) or inter-section (a coordination instance from another section). An Incoming Shipment is usually created automatically (in state “Available”) following the confirmation of a Purchase Order (or a PO-line in case of partial PO confirmation) in order to prepare the reception, even if goods could only be delivered by the supplier in some weeks/months. The initial Incoming Shipment document will have the same information (products, quantities, supplier, expected receipt date,…) as the corresponding confirmed PO (or PO-line).
Note that an Incoming Shipment can also be created manually (from scratch) but this is not the normal process and it will only be done in exceptional circumstances.
Products received through Incoming Shipments are often received in the “Input” location (which is a location where quality analysis of received products should be performed) and then transferred to another location (where the products are actually expected). By default, the system will do this automatically in a “one step” process, unless the user activates the “two steps” reception process by anticking the “Direct to Requesting Location” checkbox (and in this case, the user will have to process the second step manually through the processing of an Internal Move (INT) from the “Input” location to the final destination location).
Another option is to receive the products in the “Cross docking” location and transfer them to another destination (internal partner or external consumption unit) via another movement.
An Incoming Shipment is actually a movement from a source location to a destination location. Source location will usually be “Other Supplier” or “MSF Supplier” while the destination location will be “Input” or “Cross docking“.
An Incoming Shipment is very often associated to an Internal Move (INT created automatically and processed either manually either automatically) which is actually another type of movement. The source location of this movement will be “Input” while its destination location will be the final destination of the goods (stock, ICU,…).
An Incoming Shipment can also be associated to a Delivery Order (OUT created automatically but always processed manually) which is another type of movement. The source location will be “Cross docking” while the destination location will be the final destination of the goods (ECU, “MSF Customer”, “Other Customer”).
Finally, an Incoming Shipment can be associated to a Picking Ticket (PICK created automatically and processed manually) which is another type of movement. The source location will be “Cross docking” while the destination location will be the “Packing” location, used to prepare parcels to be shipped to other instances.
This chapter covers all the necessary functionalities related to warehousing. It is divided in three parts: deliveries (inbound and outbound), stock management and reporting.
The deliveries part deals with the reception (IN) and the delivery (OUT) of products in UniField. This includes receiving partial deliveries, receiving alternative goods, processing goods with expiry dates and batch numbers, picking products, packing products, processing outgoing shipments, … The system offers a wide range of functionalities to process these types of warehouse related operations.
The stock management part explains all the necessary functionalities needed to manage a warehouse with UniField. This includes moving goods from a location to another, addressing a claim to a supplier, recording the consumption of products, managing kits, creating inventories, …
The reporting part focuses on reports which are available in UniField to allow traceability, consumption analysis and stock analysis.
Receptions and deliveries are actually movements from one location to another. As we will see, many transactions used in warehouse management trigger the creation of a movement. A movement always has a source location and a destination location.
Stock management in UniField can be compared to a double-entry system in accounting. The stock levels (or stock quantities) do not appear and vanish magically within the warehouse, they are just moved from one location to another and, just like accounting, the double-entry system offers a big advantage for tracing missing stock or inaccurate counts, as you can trace a product’s movements and search for source and destination locations.
In UniField, the inventory management of stocks is based on a hierarchical locations structure, from warehouse to intermediate stocks and consumption units (depending on the warehouse set up). UniField has the capacity to manage batch numbers and expiry dates so as to ensure compliance with the traceability requirements.
The warehouse is designed to reflect physical and non-physical locations from which you can deliver products to the customers and into which you can receive products from suppliers. Furthermore, as stock locations are hierarchically organized, you can carry out analysis at various levels of detail.
UniField also introduces the concepts of “virtual stock” (which can be understood as “future stock”) and “available stock” (which can be understood as “non-reserved” stock). These concepts are very useful to have an overview of products availability analysis and projection in the supply chain.
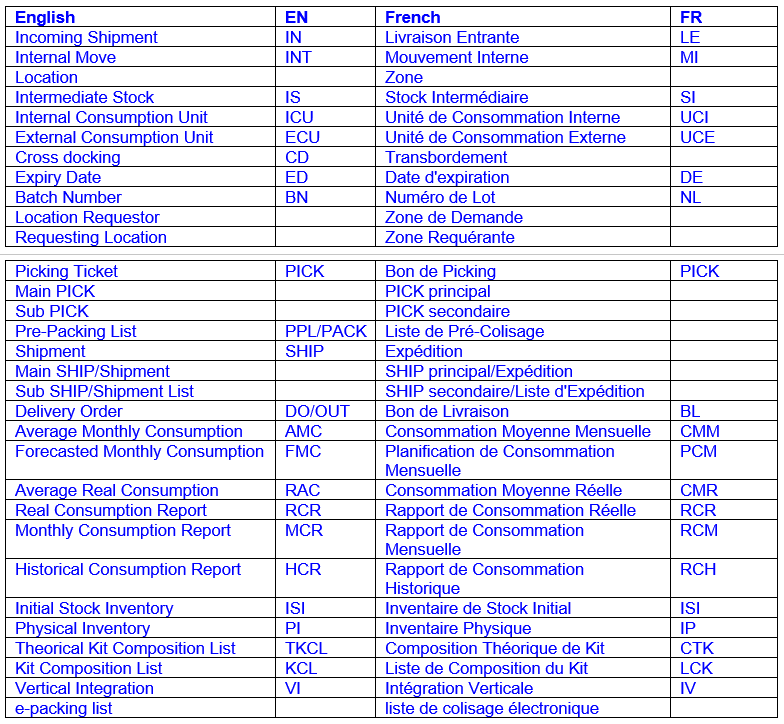
Throughout this chapter, you will find many acronyms. They are mostly used to shorten English words but can be used in the English manual or the French manual (i.e. you may find the acronym PPL in the French version of the manual). In the below table, you find the main acronyms used in this chapter with their meaning.
French acronyms, such as the names of the documents in French in a less extend, are barely used. English acronyms and documents names are usually preferred. In the software, references of documents are often built with the English acronyms of the documents (e.g. 18/HQ/MW101/PO00045, PPL/00033-01, OUT/00028,…), independently of the language in which the software is used.
The language in which UniField is developed is English. The software is then translated in French. That’s the reason why, even if you are connected in French, you could still find some English terminology (on screens, in messages…) while working on UniField. The translation of the software in French is a work in process and some improvements are still needed on this side.
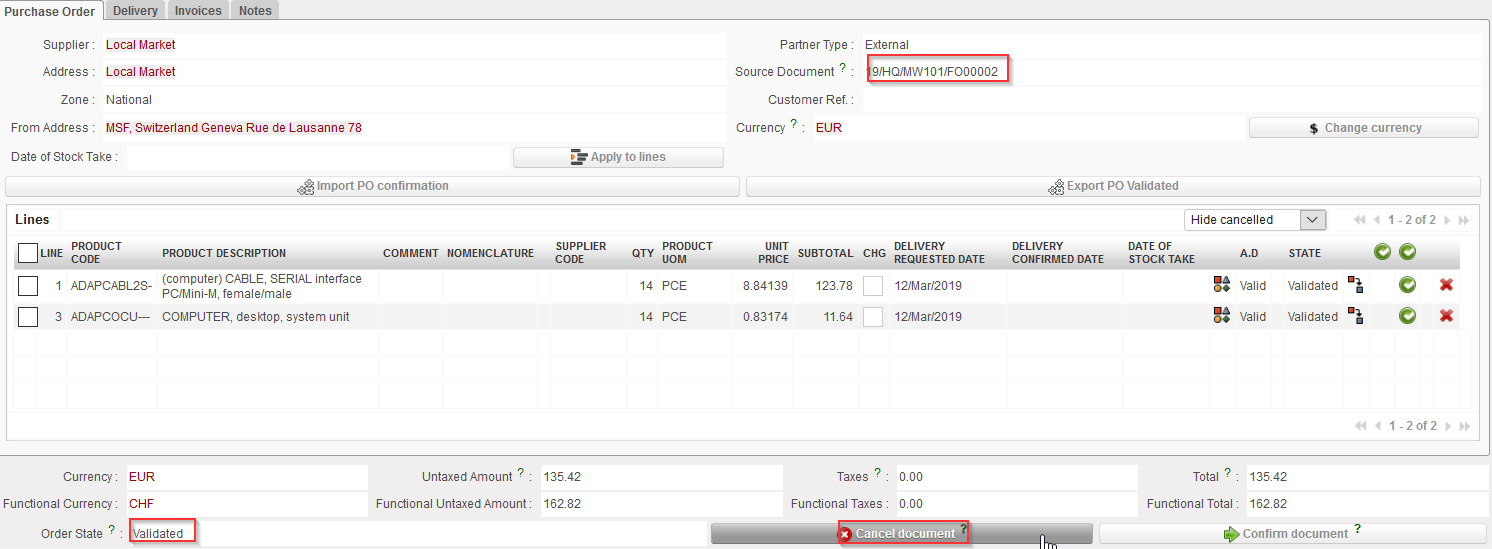
The below steps show how to cancel & resource a validated Purchase Order which has been generated by the OST following the sourcing of an FO on order.
Go to:Purchases / Purchase Management / Purchase Orders
Click on the line of the Purchase Order on which you need to cancel & resource.
Click on the “Cancel document” button at the bottom of the PO screen.
Cancelling an entire PO
3. Select “Cancel & Resource” on the pop-up window.
Cancelling & Resourcing an entire PO
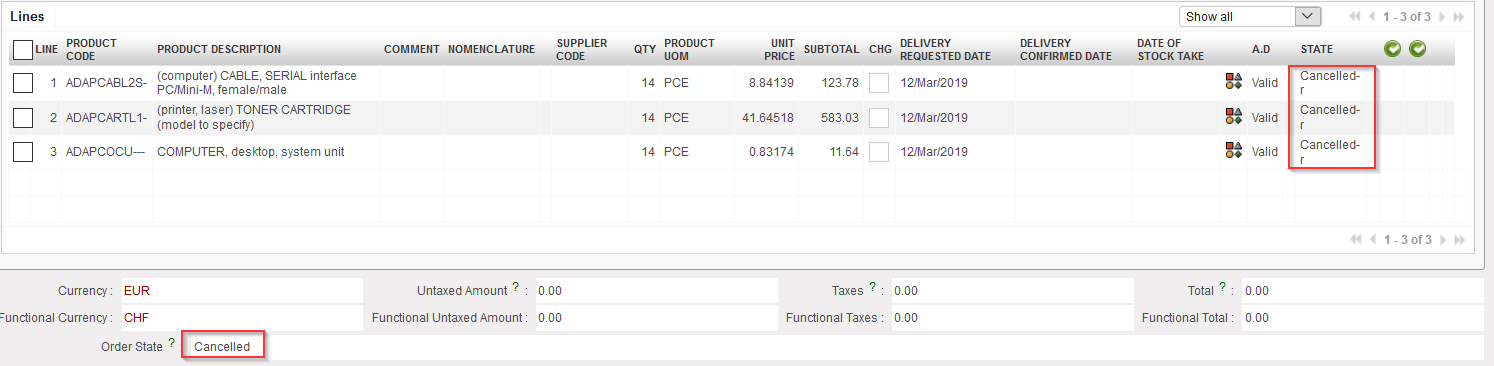
4. The PO switches to state “Cancelled” while the PO-lines switch to state “Cancelled-r” (use the filter at the top of the “Lines” table to see them).
Cancelled & Resourced PO
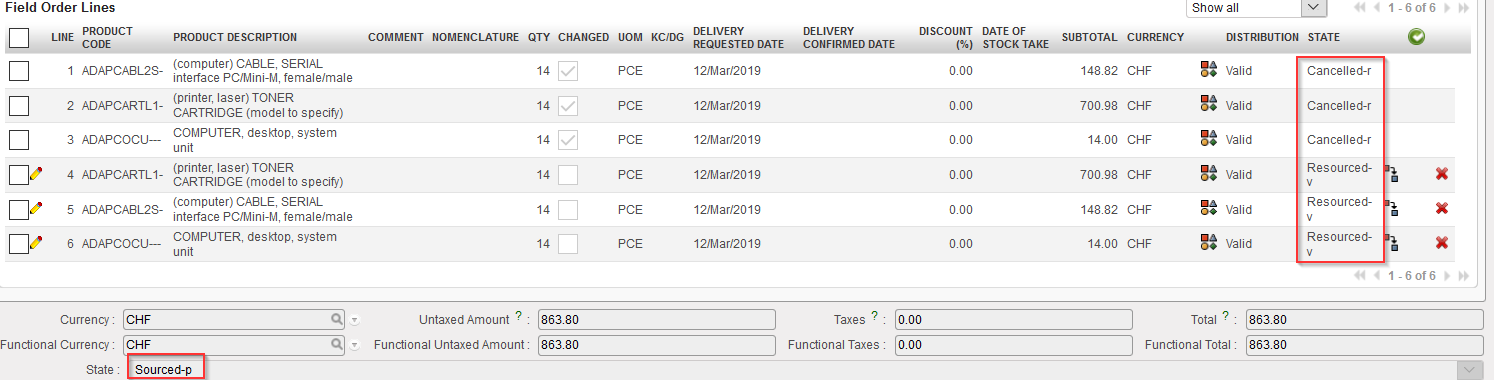
5. On the FO which was sourced on order, the original lines switch to state “Cancelled-r” and new lines (copy of the original ones) are added in state “Resourced-v“. These lines can be resourced in the OST. Note that the FO is in state “Sourced-p“.
FO after cancel & resource
We use cookies to ensure that we give you the best experience on our website. If you continue to use this site we will assume that you are happy with it.

 .
.