Finance User Manual ENG -> 2. Finance Configurations -> 2.8 Suppliers and Customers -> LUFI-20801 Partner Creation
LUFI-20801 Partner Creation
LU Introduction
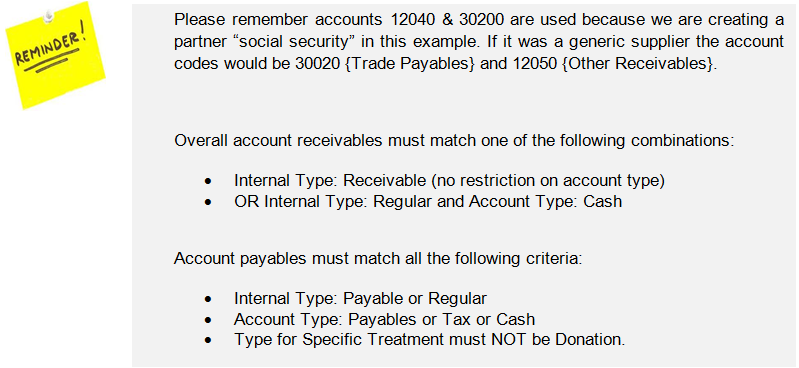
In the below example we will create a partner form type external to book the social security liabilities.
How to Create a Supplier
Go to: Accounting/Suppliers/Suppliers
A list of suppliers appears
- Click on {New} to create a new supplier form.
A supplier form appears (the supplier’s box is automatically checked)
2. Enter the supplier name in the {Name} field. In this case it will be {Social security}.
-
- If it concerns a business company, spell the name exactly as it is on the company’s invoice/letterhead.
3. Enter the reference in the {Reference} field, e.g {SSEC}.
-
- It could be the type of services provided if it is a business company.
4. Set {Partner type} field to {External} as we are creating a partner which is not linked to MSF
5. Set the {Language} of communication. All documents related to this partner will be printed in this language. If not, it will default to English
6. Set {Zone} field to {National}.
-
- {National} is used for all-in country partners. If {International} check with LogCo.
7. In the field {Order creation mode} {All requirements} is set by default.
8. The {Active} box is checked by default.
9. In the General tab, in the {contact name} section, enter the name of your contact in {Contact Name}.
-
- If it is a business company, spell exactly as it is on the company’s invoice/letterhead
10. Choose the right title using the combo box {Title}, enter manually a function.
11. Check the box active if you want to display the contact details in the partners Search view
12. In the {Postal address} section, fill in the different information fields.
-
- If it is a business company, spell exactly as it is on the company’s invoice.
13. In the {Communication} section, fill in the different information fields.
-
- If it is a business company, spell exactly as it appears on the company’s invoice.
14. In the tab {Field Orders & Purchases}, select the {Default Purchase Currency}. The {Default field order currency} should be identical. The selected currency will be the default currency you use to pay this supplier.
- The standard in the partner is that both Purchase Default Currency & Field Order Default Currency must be unique with the currency code, so once Purchase Default Currency has a value, the field automatically updates the Field Order Default Currency with the same currency code.
- It’s not possible to edit Field Order Default Currency otherwise a popup with a warning message will appear as below:
15. In the {Supplier lead time} keep {0} days.
16. In the Accounting tab, enter the Account Receivable 12040 {Social security receivable} and Account Payable 30200 {Social security).
17. You do not need to complete any other tabs/fields. Save the form.
The social security supplier form is created
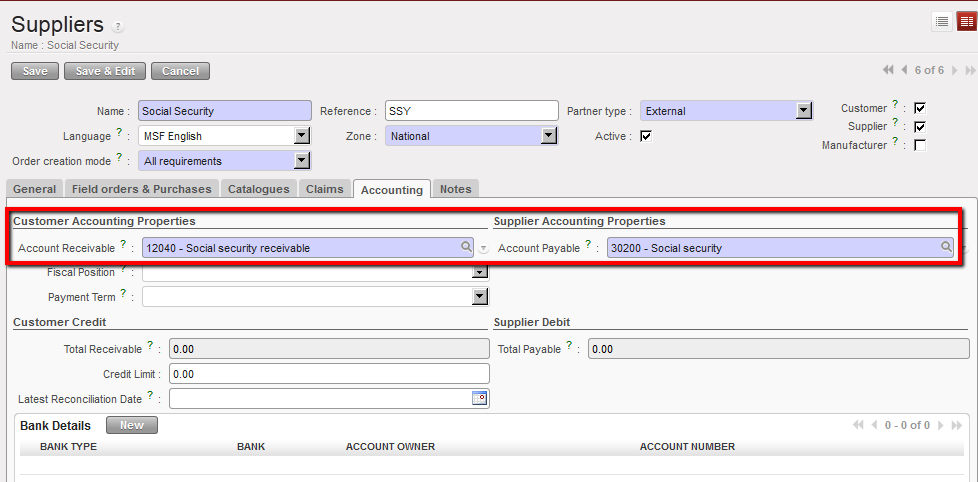
Social Security form and accounting tab
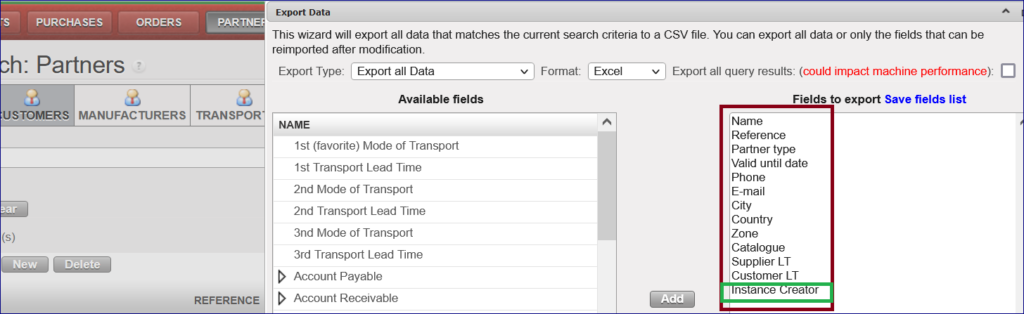
A faster way to create a partner form is to use the “Import” function at the top pane in the “Actions” menu. You will need a template of type csv to process the import. Remember that restrictions on account codes will apply too.
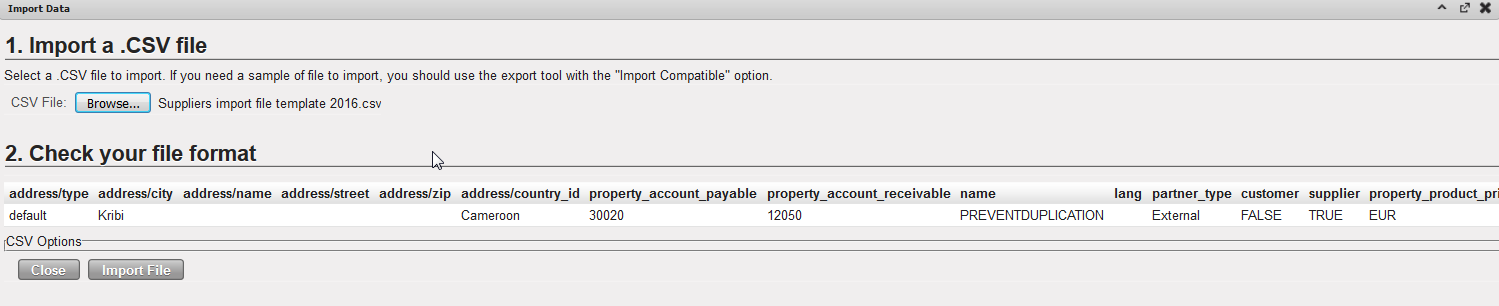 Supplier Import View
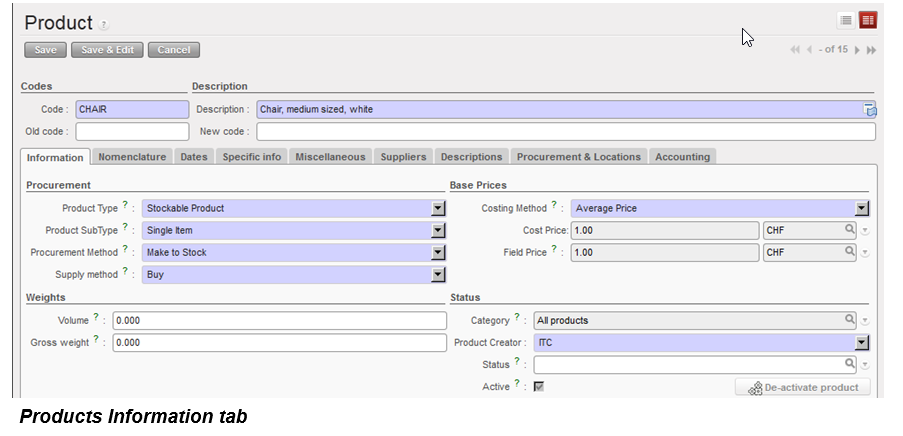
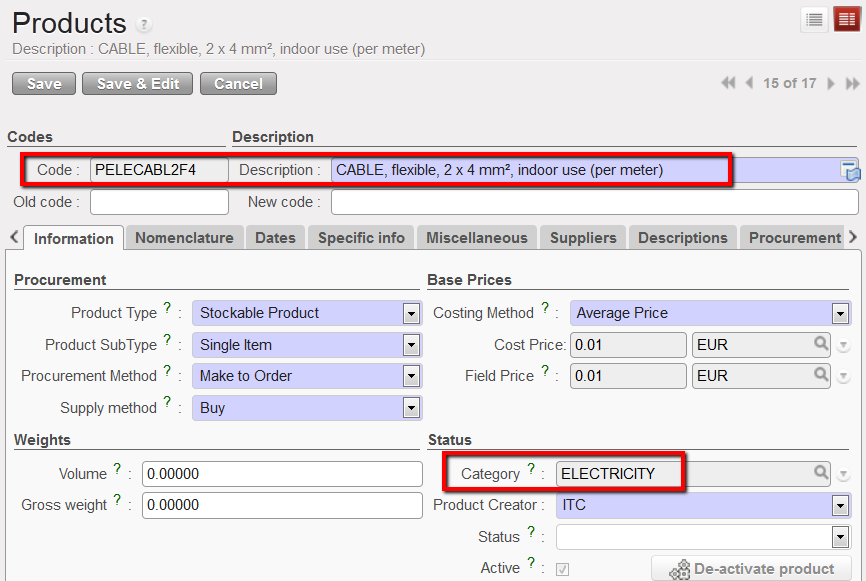 Product category displayed on the information tab of a product form view
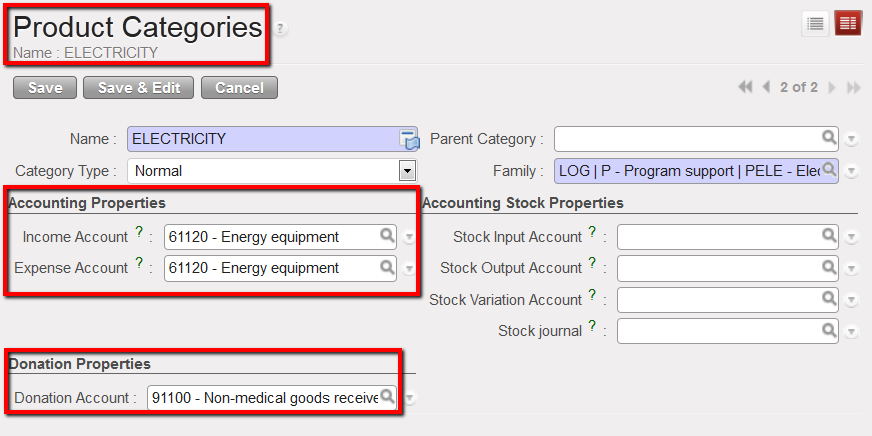


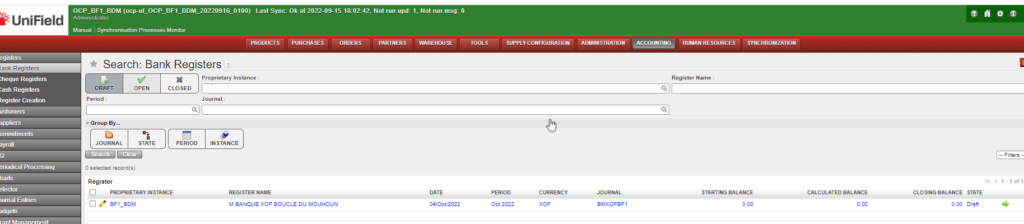
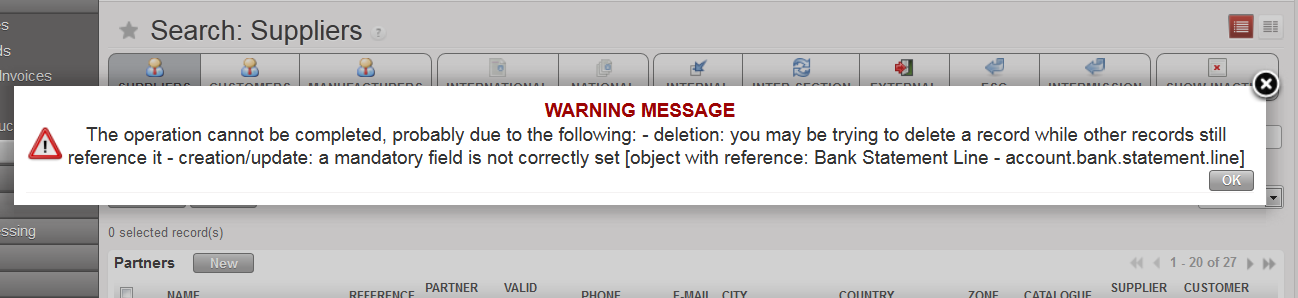 In this example, you cannot delete this partner because there is a transaction booked against it in a bank register.

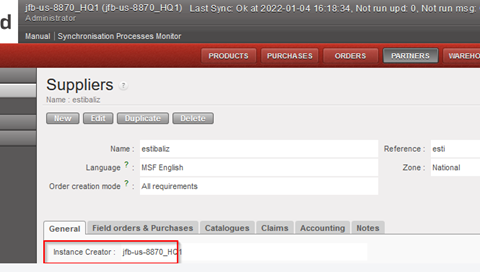
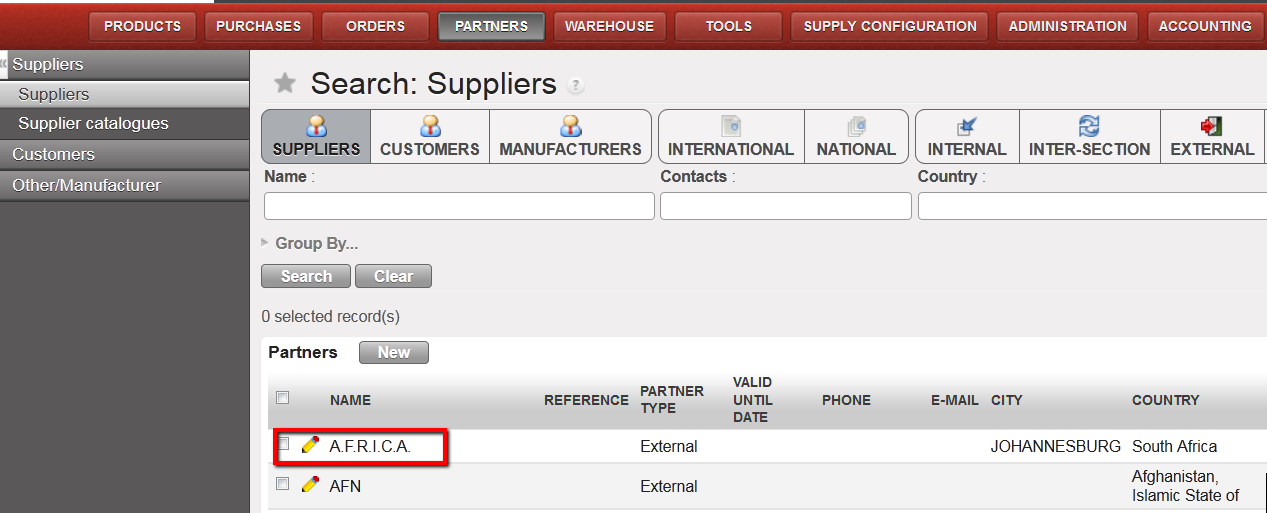 Supplier A.F.R.I.C.A. visible in the PARTNERS business application
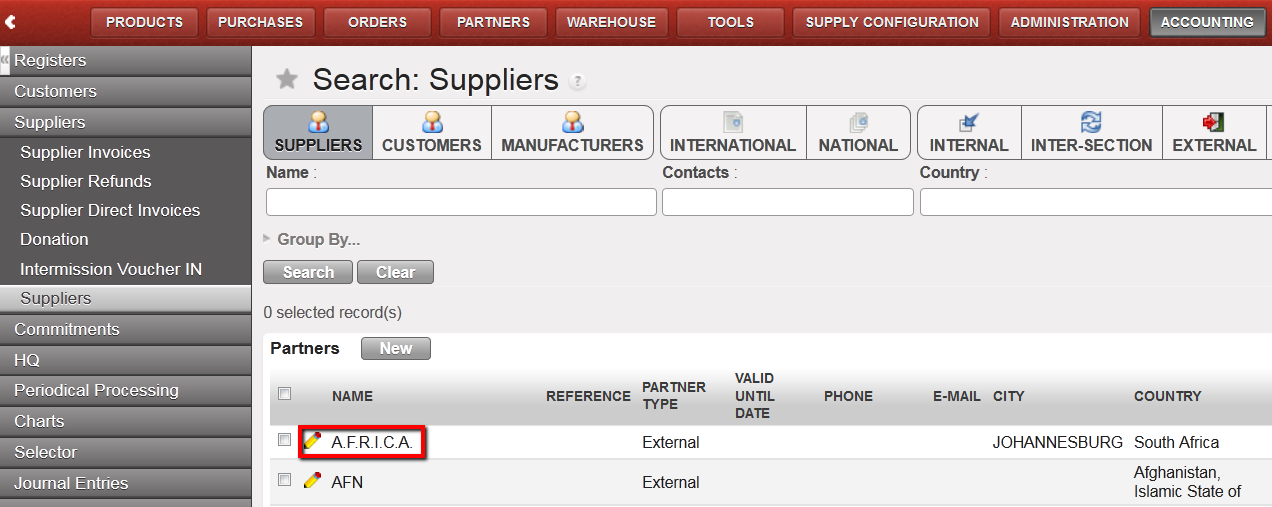 Supplier A.F.R.I.C.A. visible in the ACCOUNTING business application
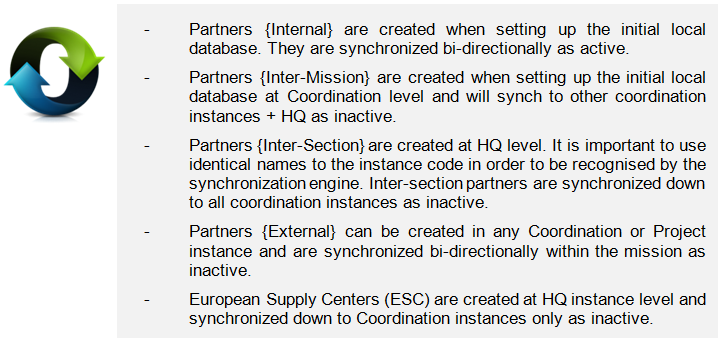
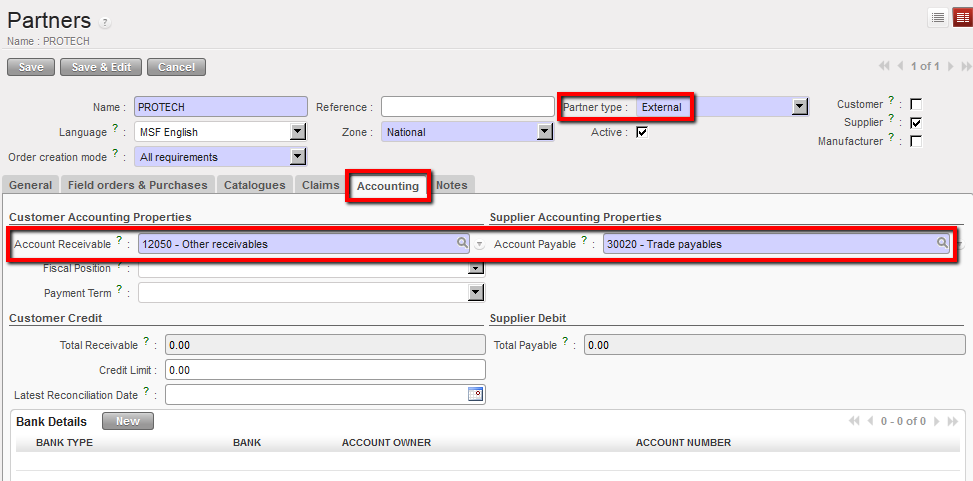 A supplier {External} of goods and services and associated accounting codes
 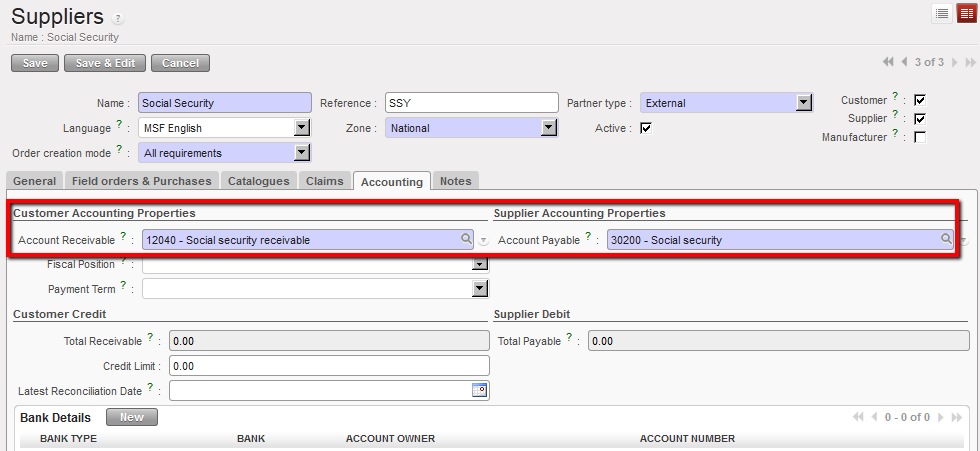 Social security partner (external supplier) and associated accounting codes
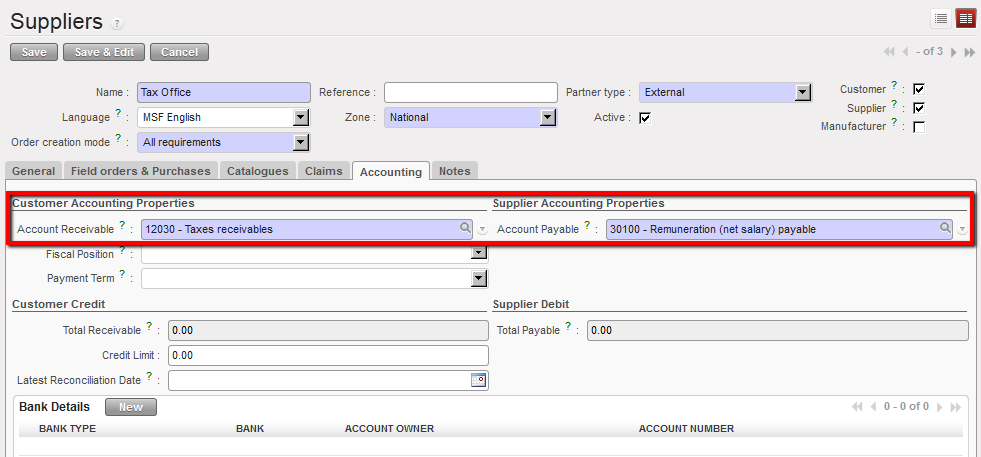 Tax office partner (external supplier) and associated accounting codes
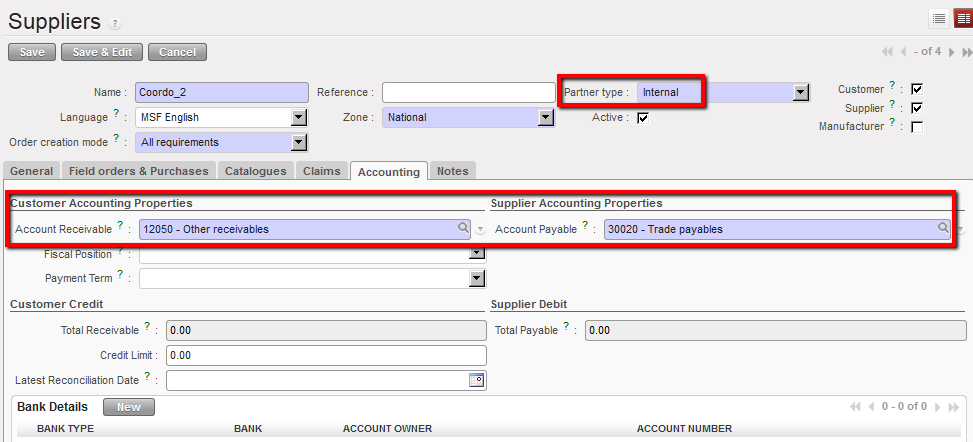 Coordo_2 is both a supplier and customer type of internal partner
 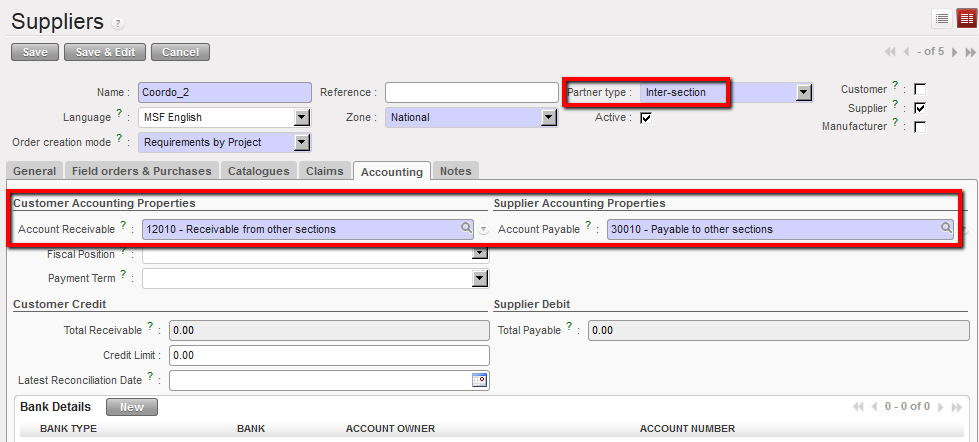 Coordination-002 is a supplier type of inter-section partner
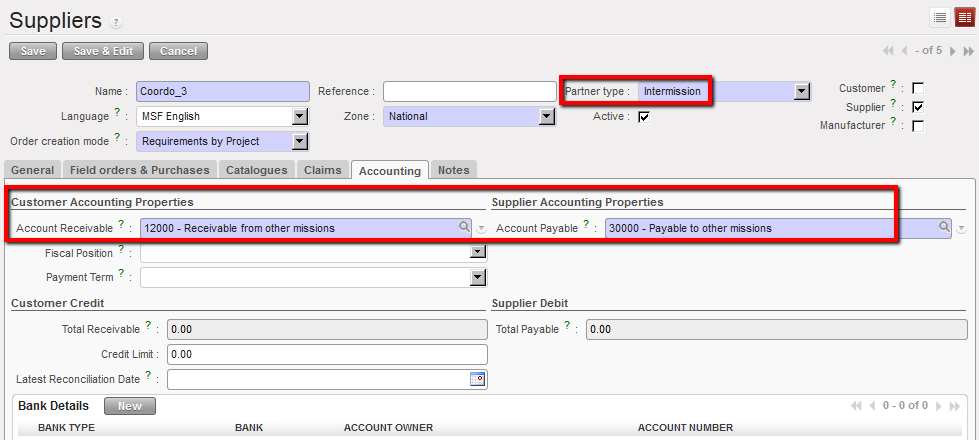


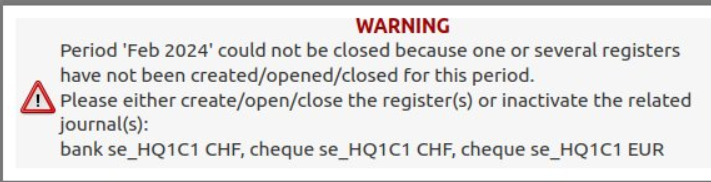


 . You want to create all cash, cheque and bank registers that have active cashboxes and bank accounts.