Supply User Manual ENG -> 5. Warehouse -> 5.9 LU-SU4202: Claims-> C. HOW TO CREATE A CLAIM FROM AN INTERNAL MOVE (after reception in the "Input" location).
C. HOW TO CREATE A CLAIM FROM AN INTERNAL MOVE (after reception in the “Input” location).
As the “Input” location is used to perform qualitative checks following suppliers deliveries, claims should actually be raised when products transit through this location. This will only happen if the “Direct to Requesting Location” checkbox is unticked during goods reception.
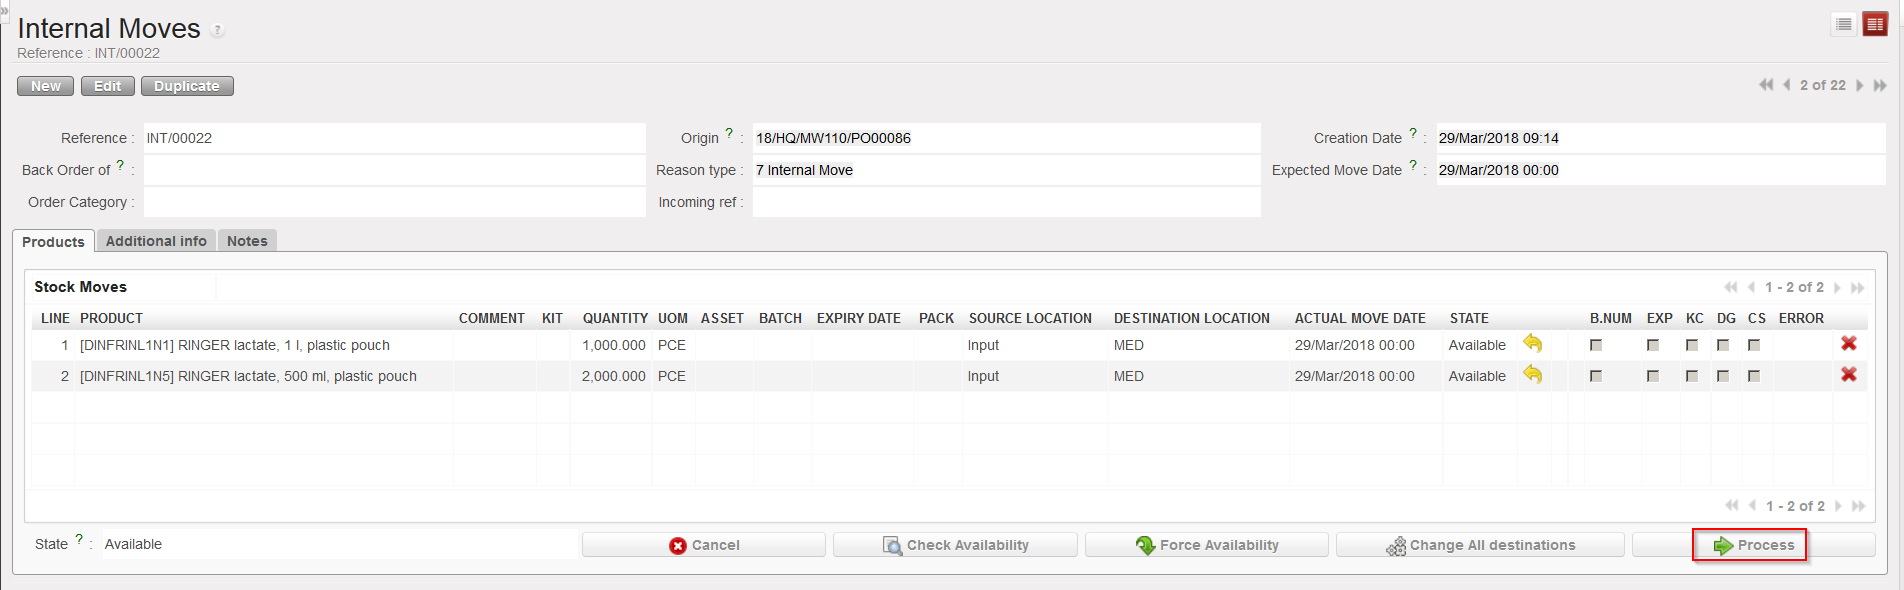
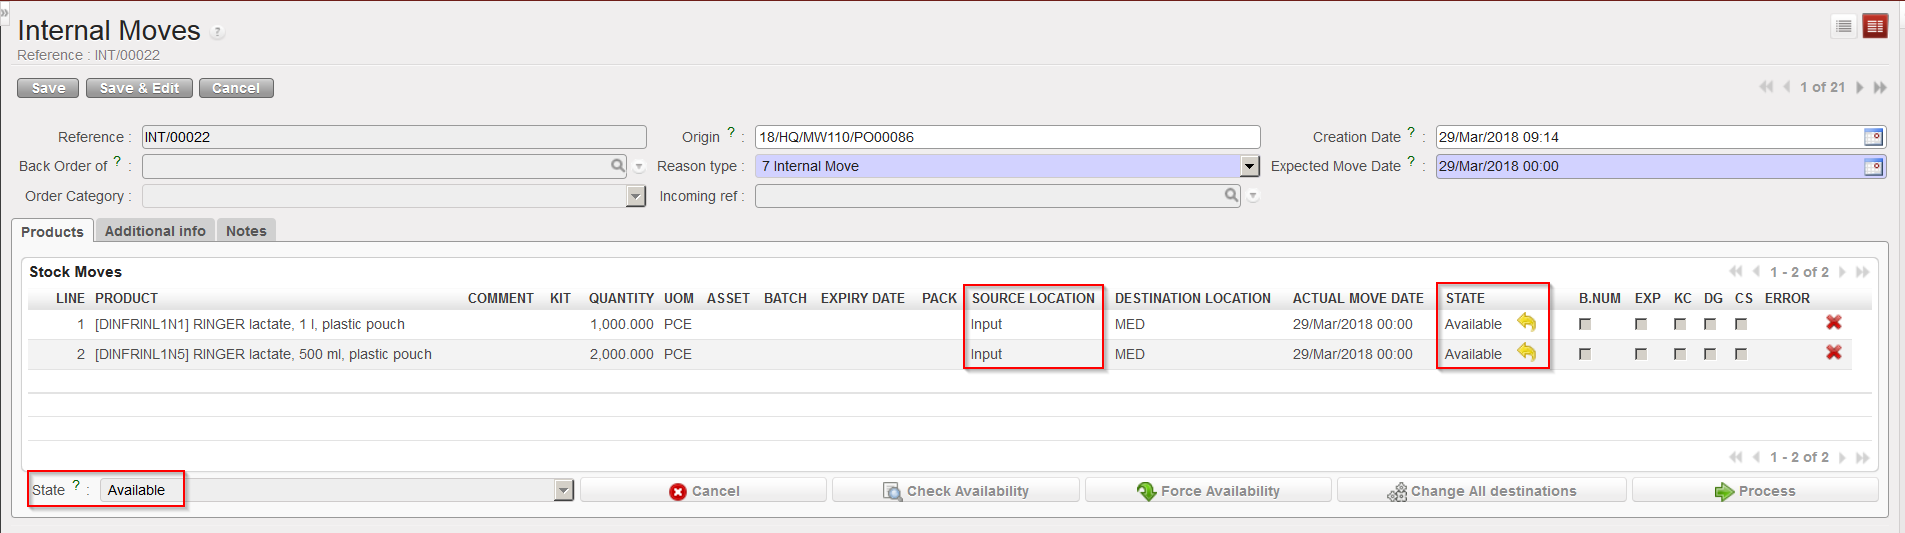
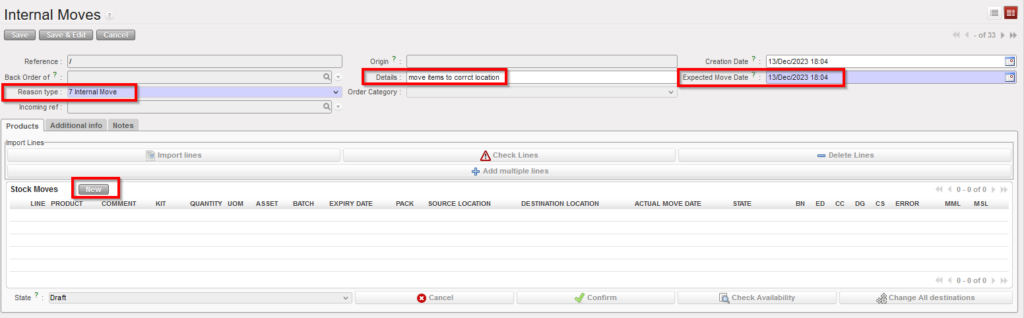
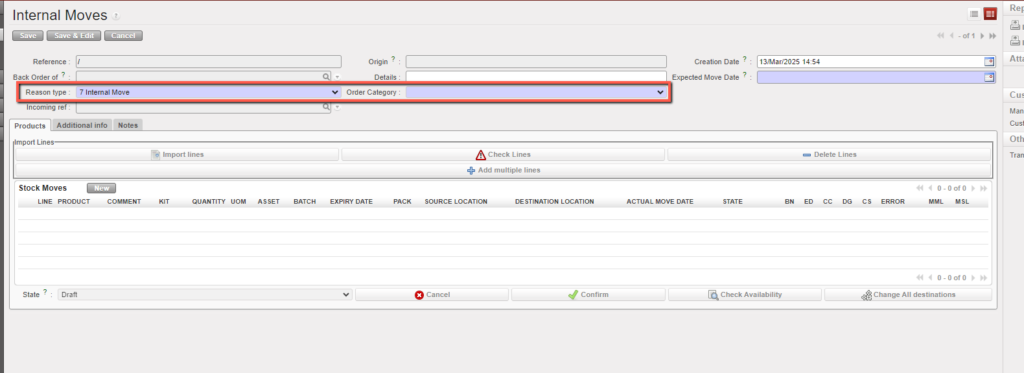
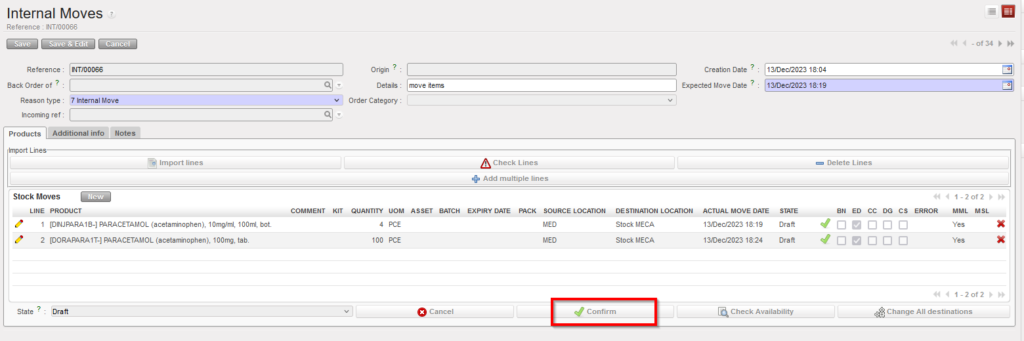
Go to: Warehouse / Warehouse Management / Internal Moves
- Locate and open the Internal Move which was created when you processed the Incoming Shipment (with the “Direct to Requesting Location” checkbox unticked).
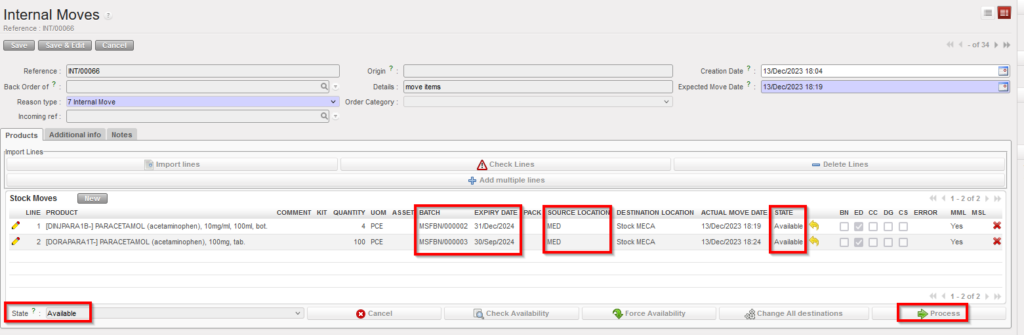
- Click on the “Process” button.
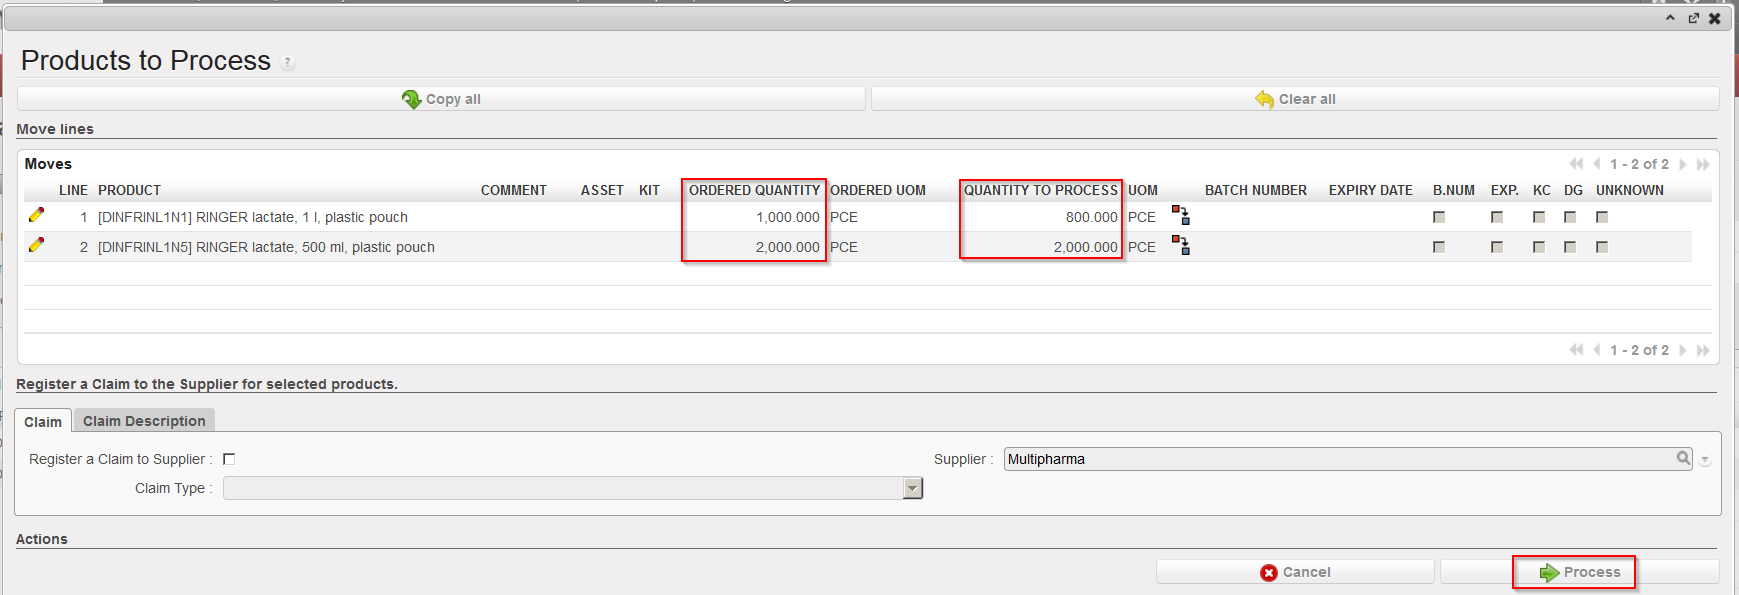
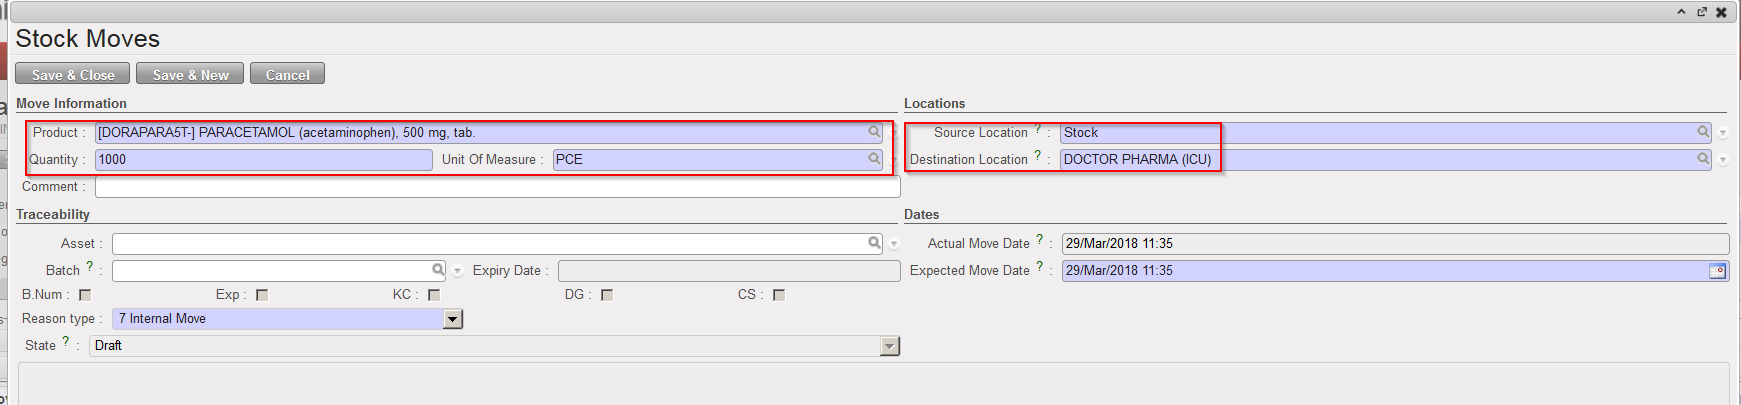
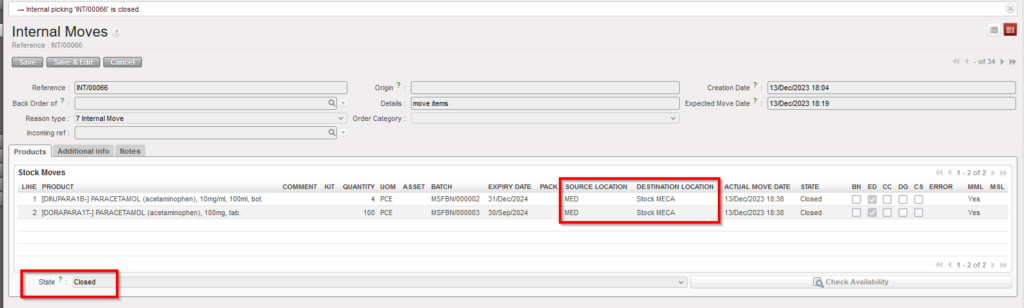
- Transfer the goods which are conformed to their final destination but not the ones which are not conformed. The system will create (and process and close) a new INT with the conformed products while the initial INT will stay open as a back-order with the non-conformed products.
|
|
|
Processing the Internal Move |
|
|
|
Transferring the conformed goods to their final destination |
|
|
|
Initial INT with non conformed goods in back-order |
|
|
|
New INT with conformed goods in state “Closed“ |
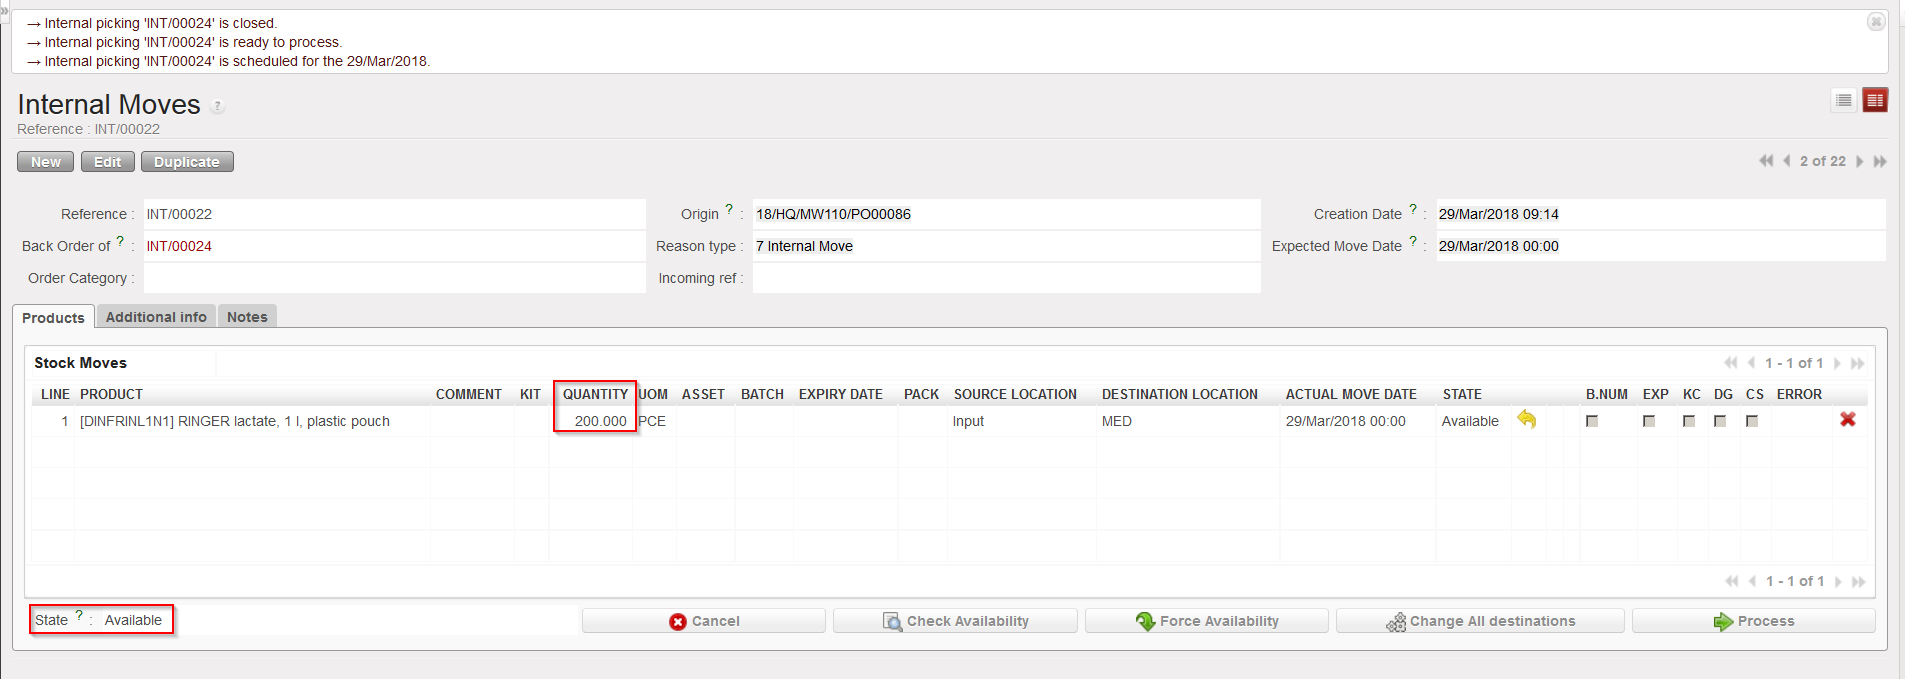

4. On the initial INT, click again on the “Process” button.
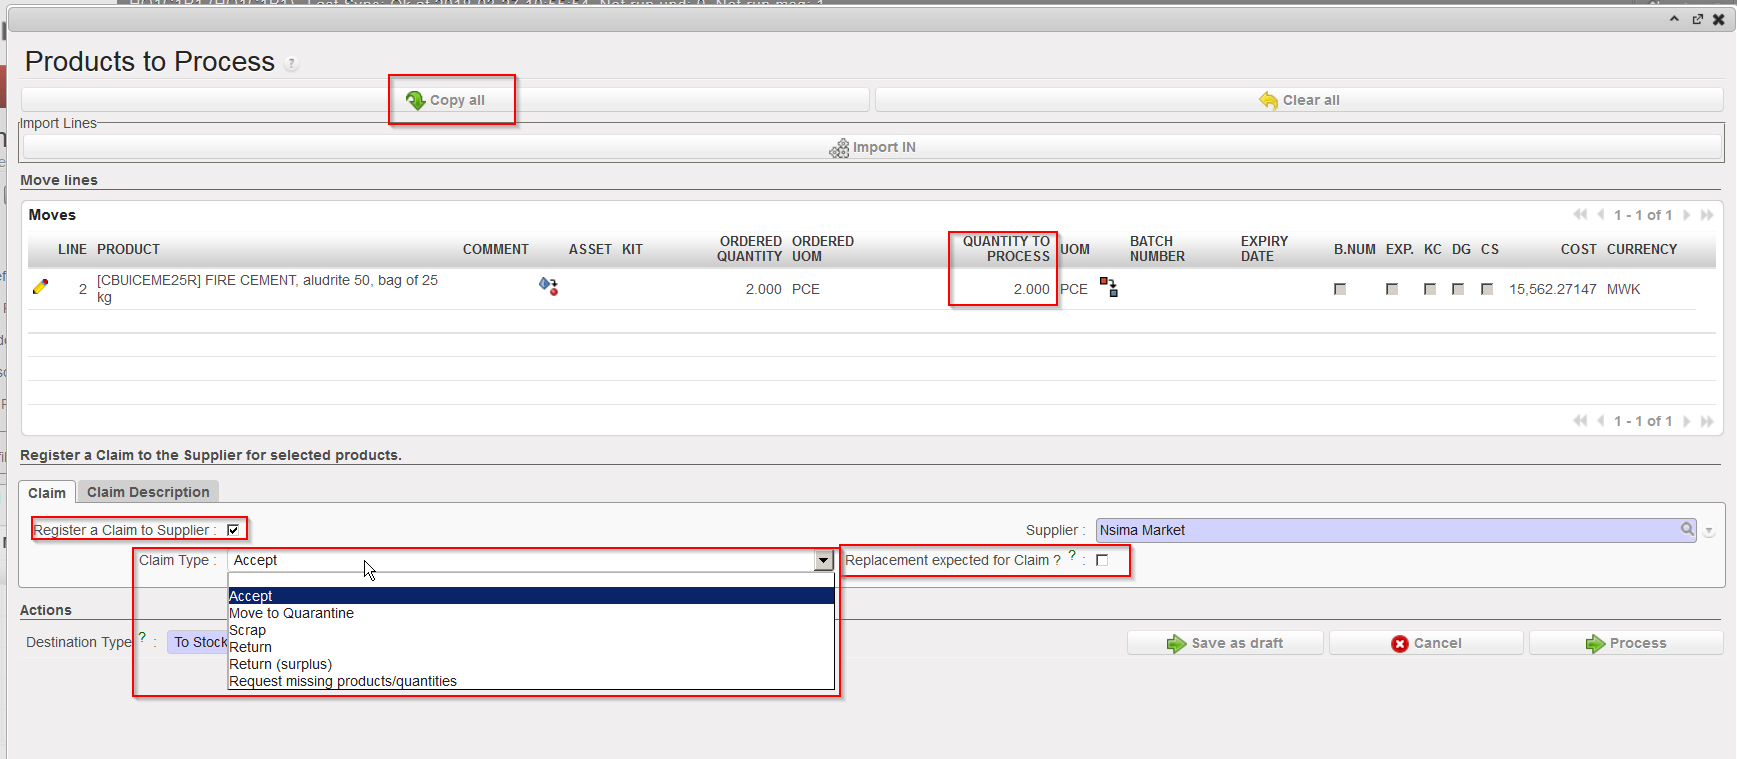
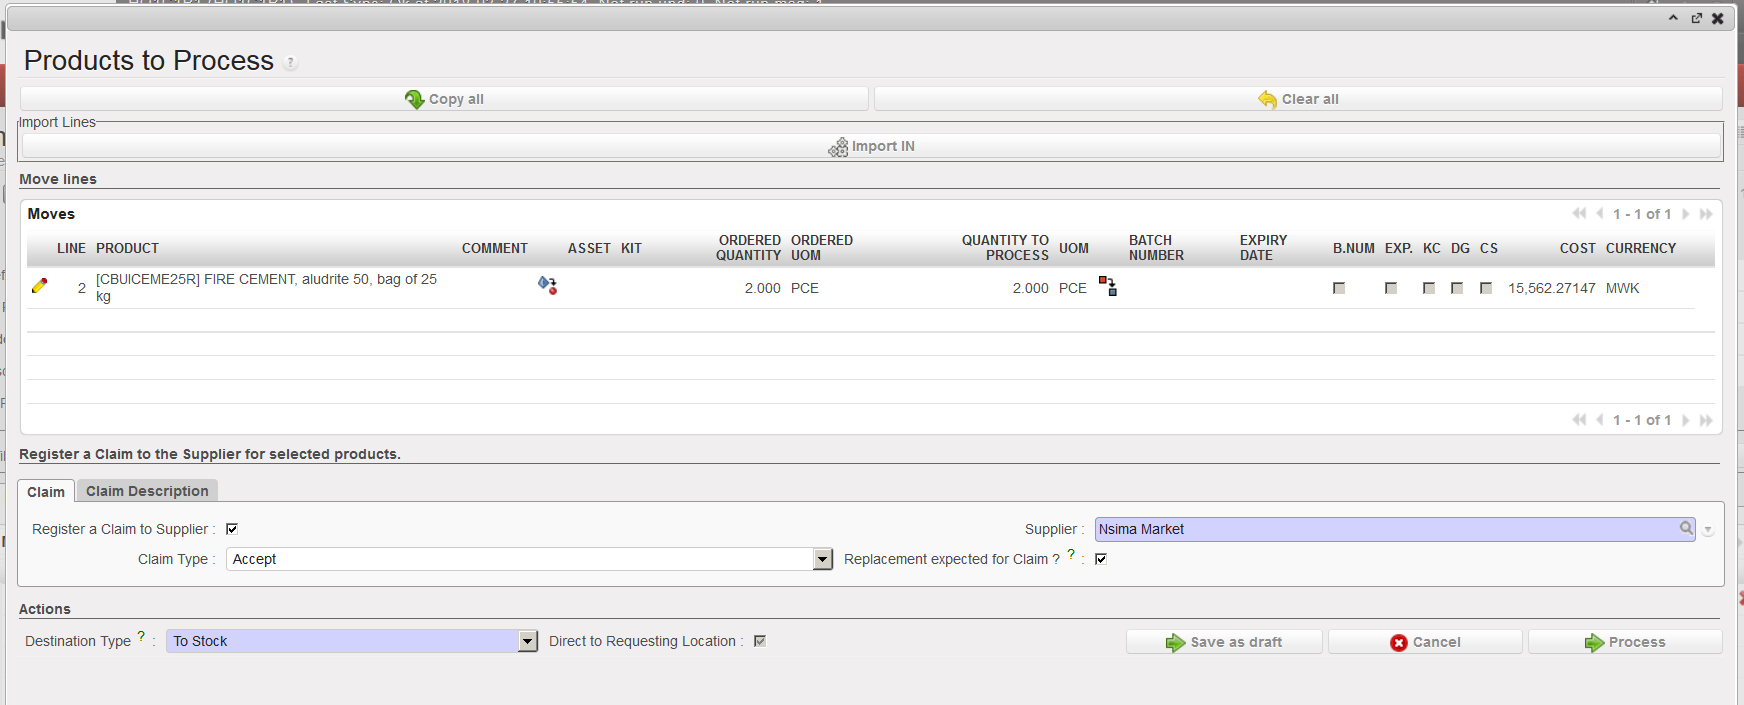
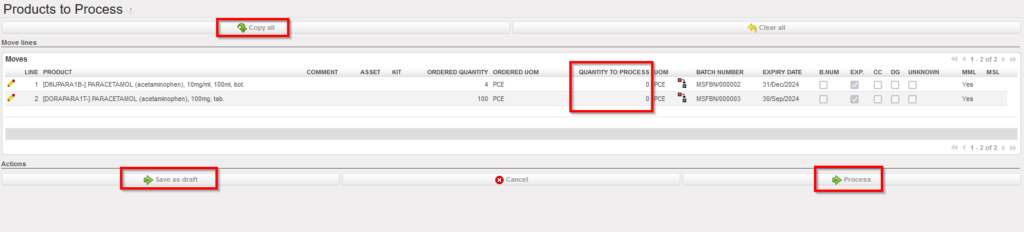
5. On the “Products to Process” screen, click on the “Copy all” button if all remaining product lines and quantities should be included in a claim. Otherwise, use the pencil icons and select products/quantities you want to make a claim for.
6. Tick the checkbox “Register a Claim to Supplier“.
|
|
|
Processing the non conformed goods |
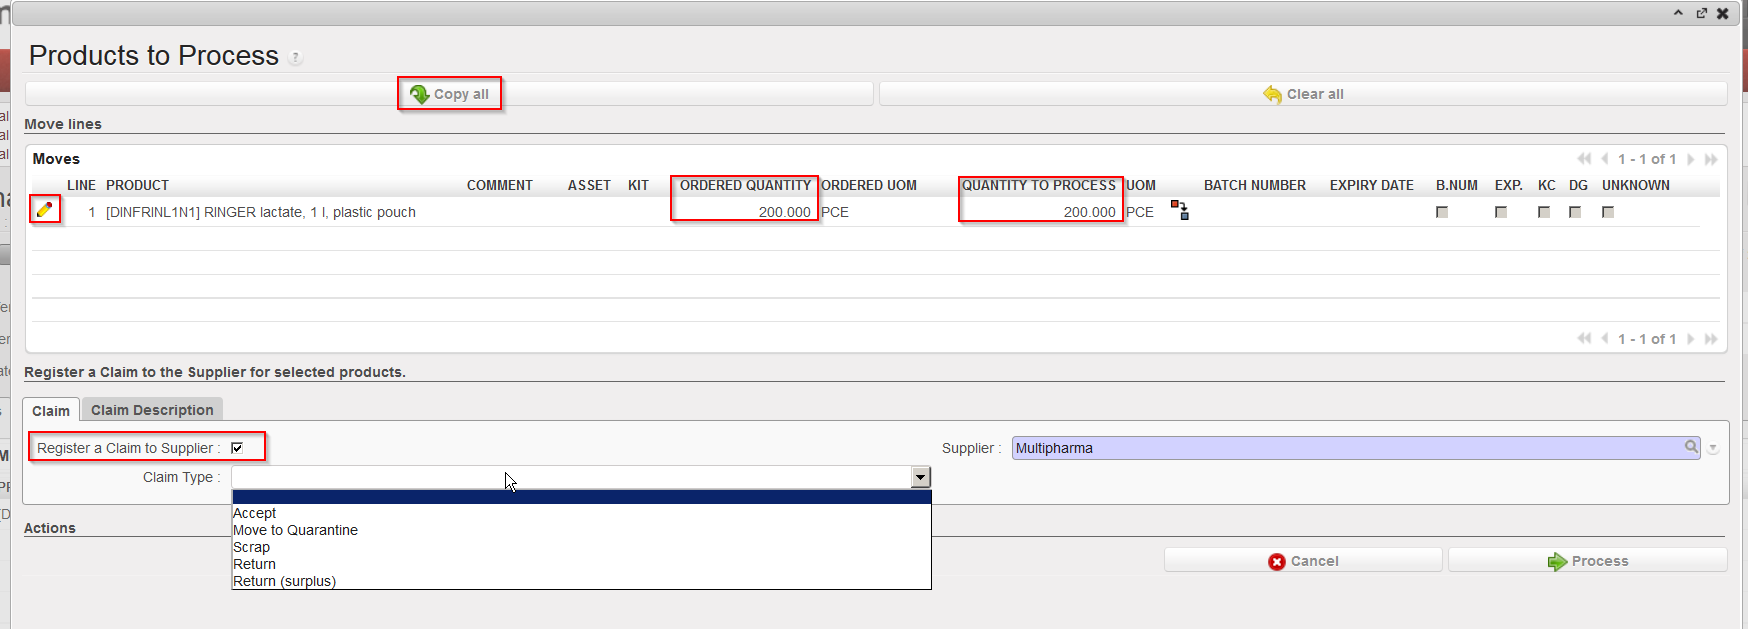
7. If empty, enter the supplier.
8. As Claim Type, select from the drop down list one of the following options:
-
- “Accept”, if you have decided to accept the goods.
- “Move to Quarantine”, if you are quarantining the goods.
- “Scrap”, if you have decided to destroy the goods.
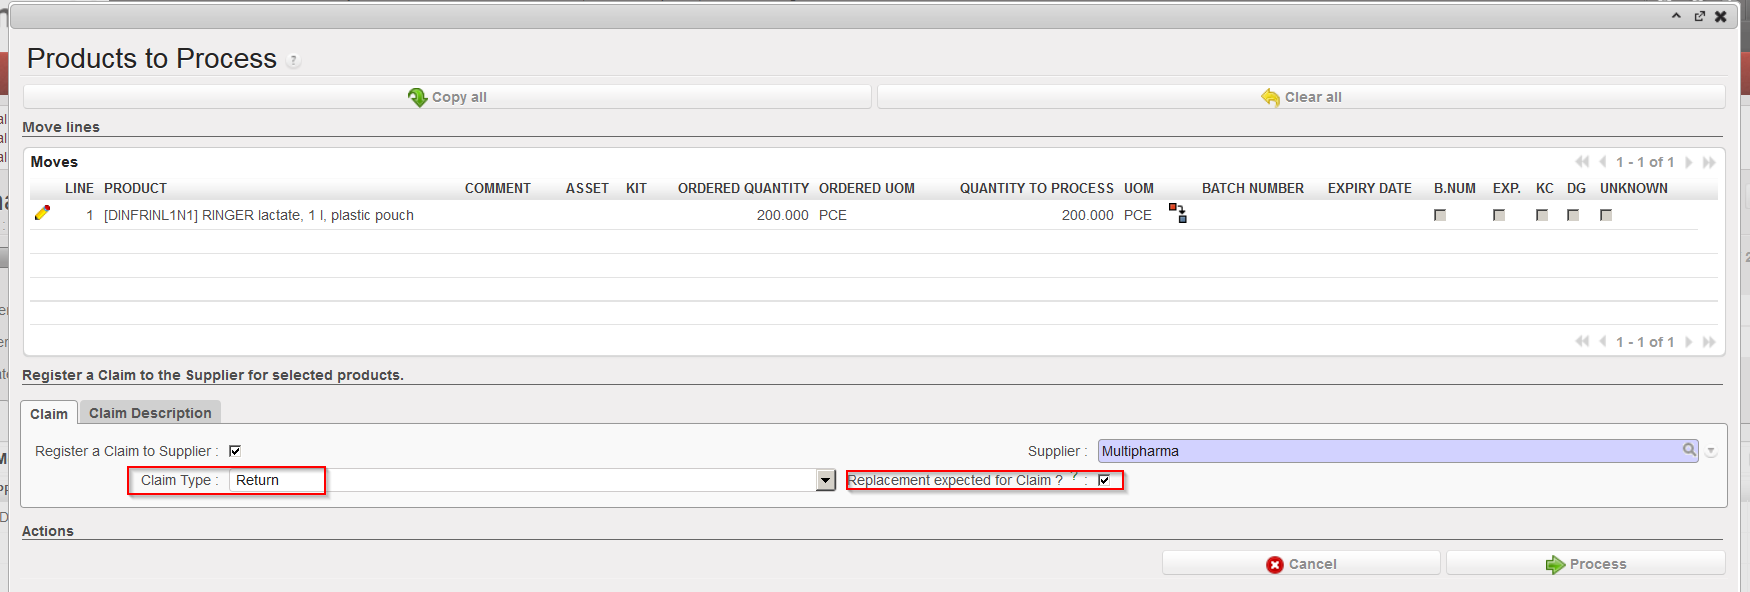
- “Return”, if you are returning the goods to the supplier
- “Return (surplus)” if you are returning goods because the supplier delivered an excessive quantity.
9. Tick the “Replacement expected for Claim” checkbox if you have already agreed with the supplier that the products will be replaced.
10. Use the “Claim Description” tab if you want to enter a description for the claim.
|
|
|
Requesting replacement for non conformed goods |
Note that if you want to create different claim types for a same INT (e.g. if you want to return some goods but scrap others) you will have to process the above transaction in several steps (i.e. repeat it).
11. Click on the “Process” button.
|
|
|
INT cancelled |
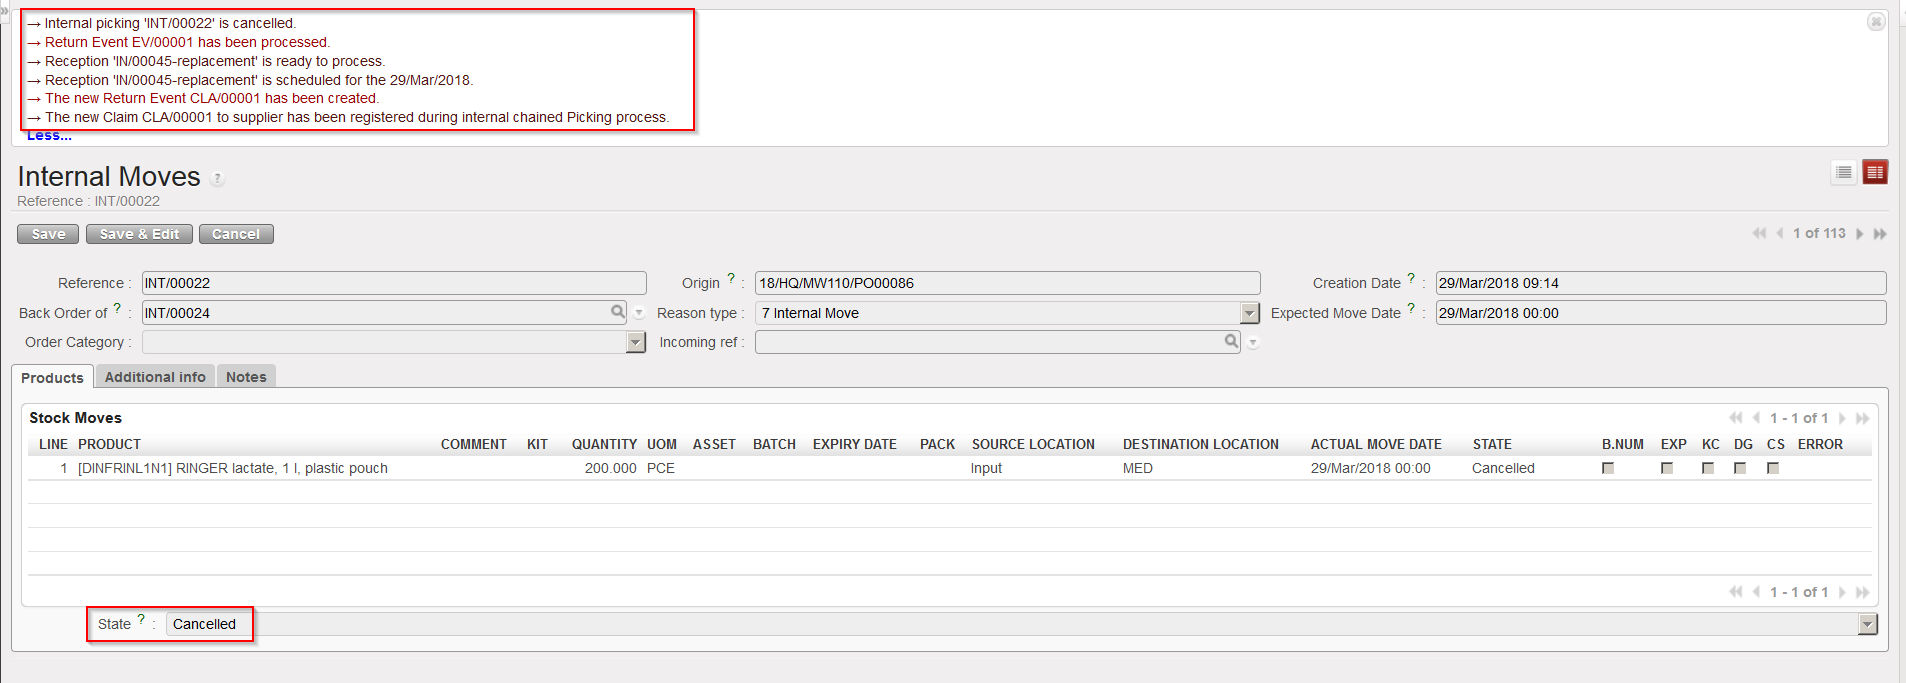
With the above selected options (claim type = Return and replacement of goods requested), the system:
- Cancels the INT.
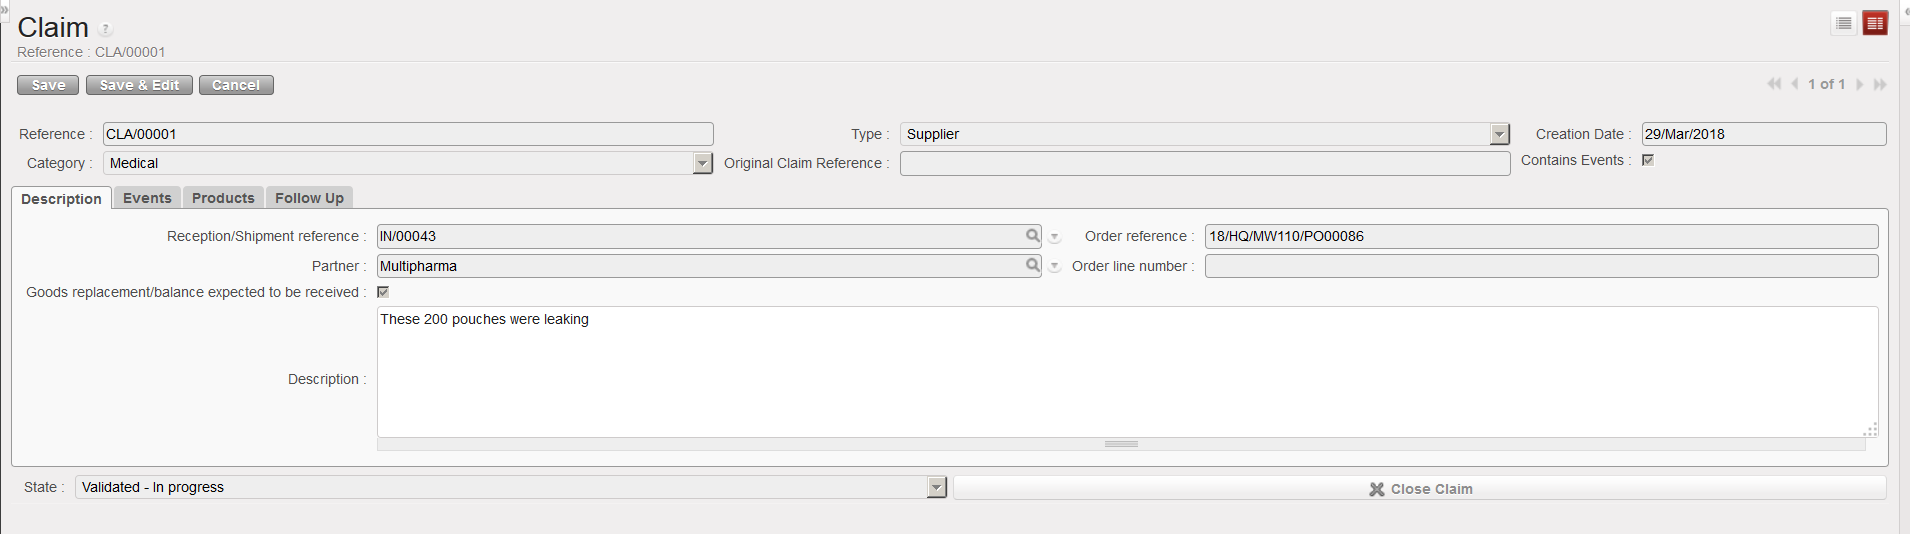
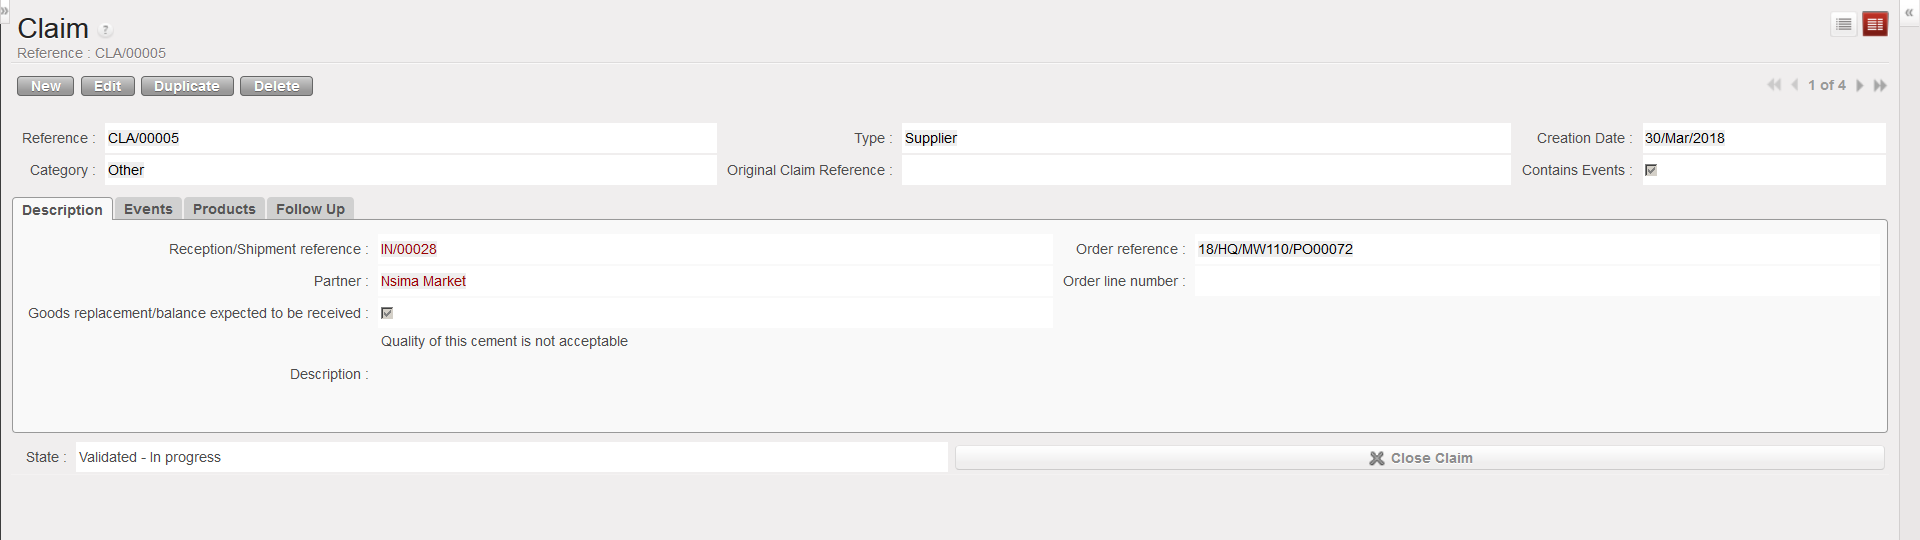
- Creates a supplier claim with an event and process this event.
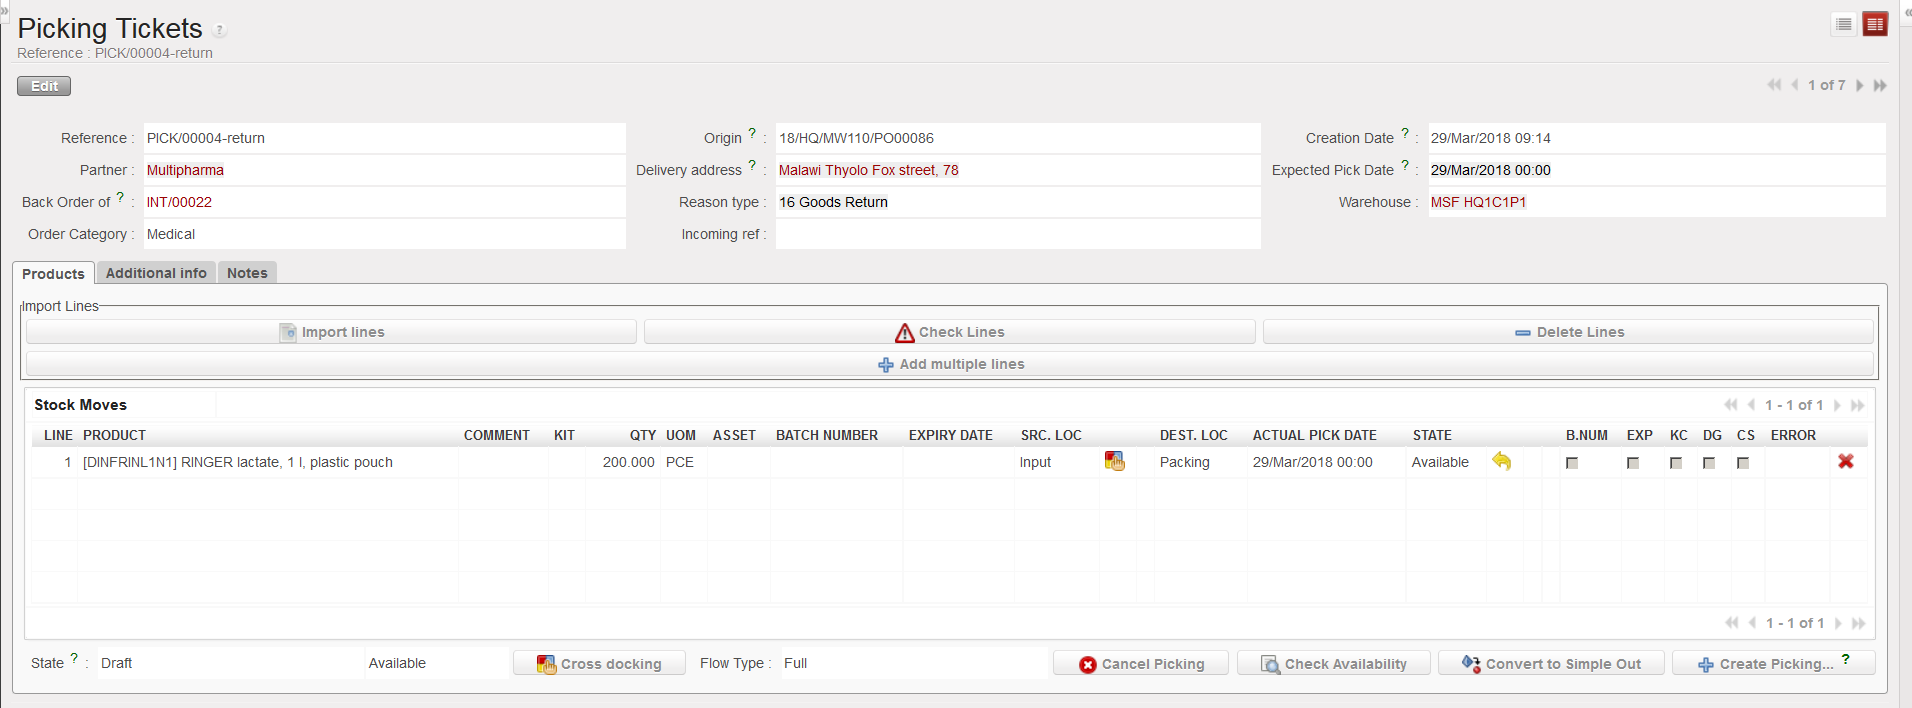
- Creates a Picking Ticket (PICK-return) to pick the goods from the “Input” location and return them to the supplier.
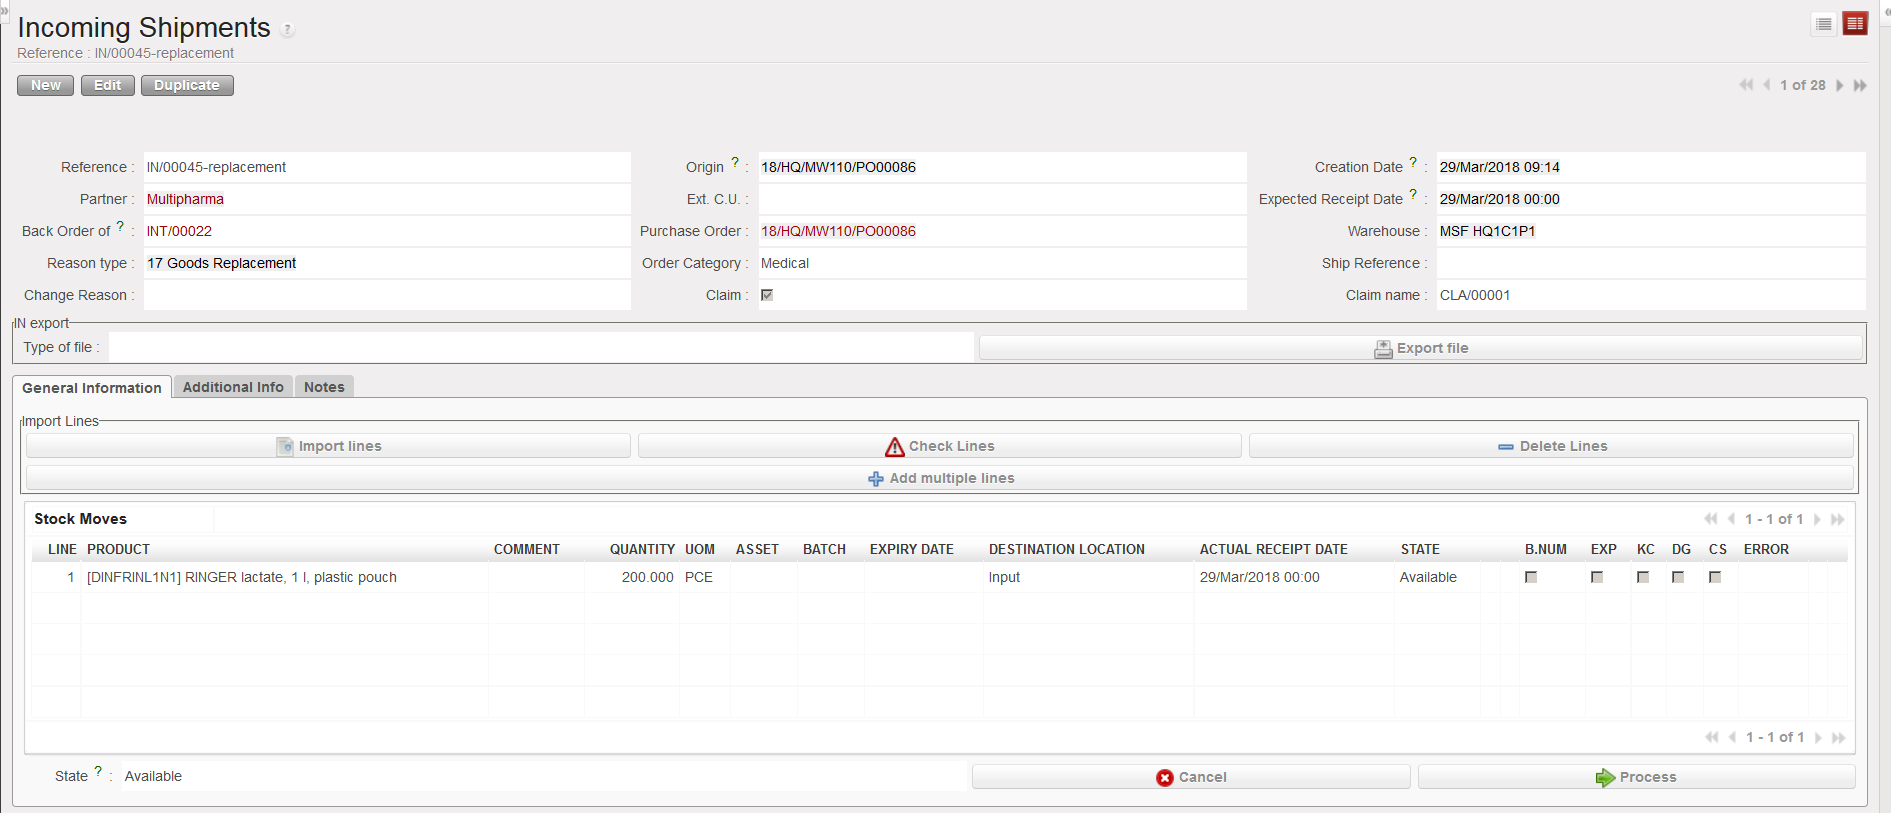
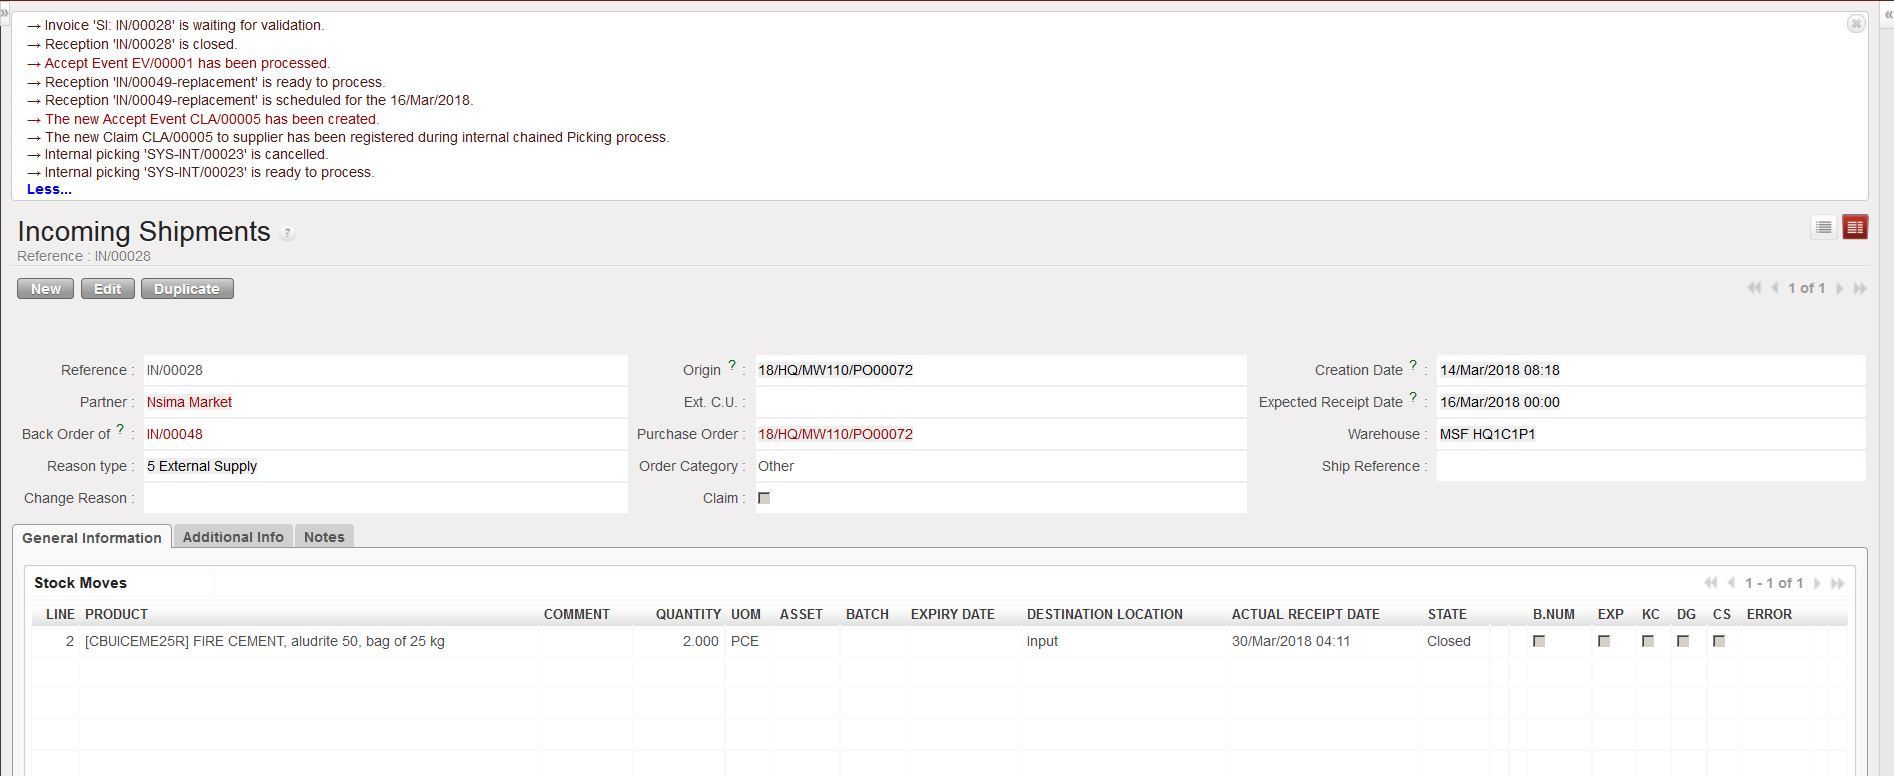
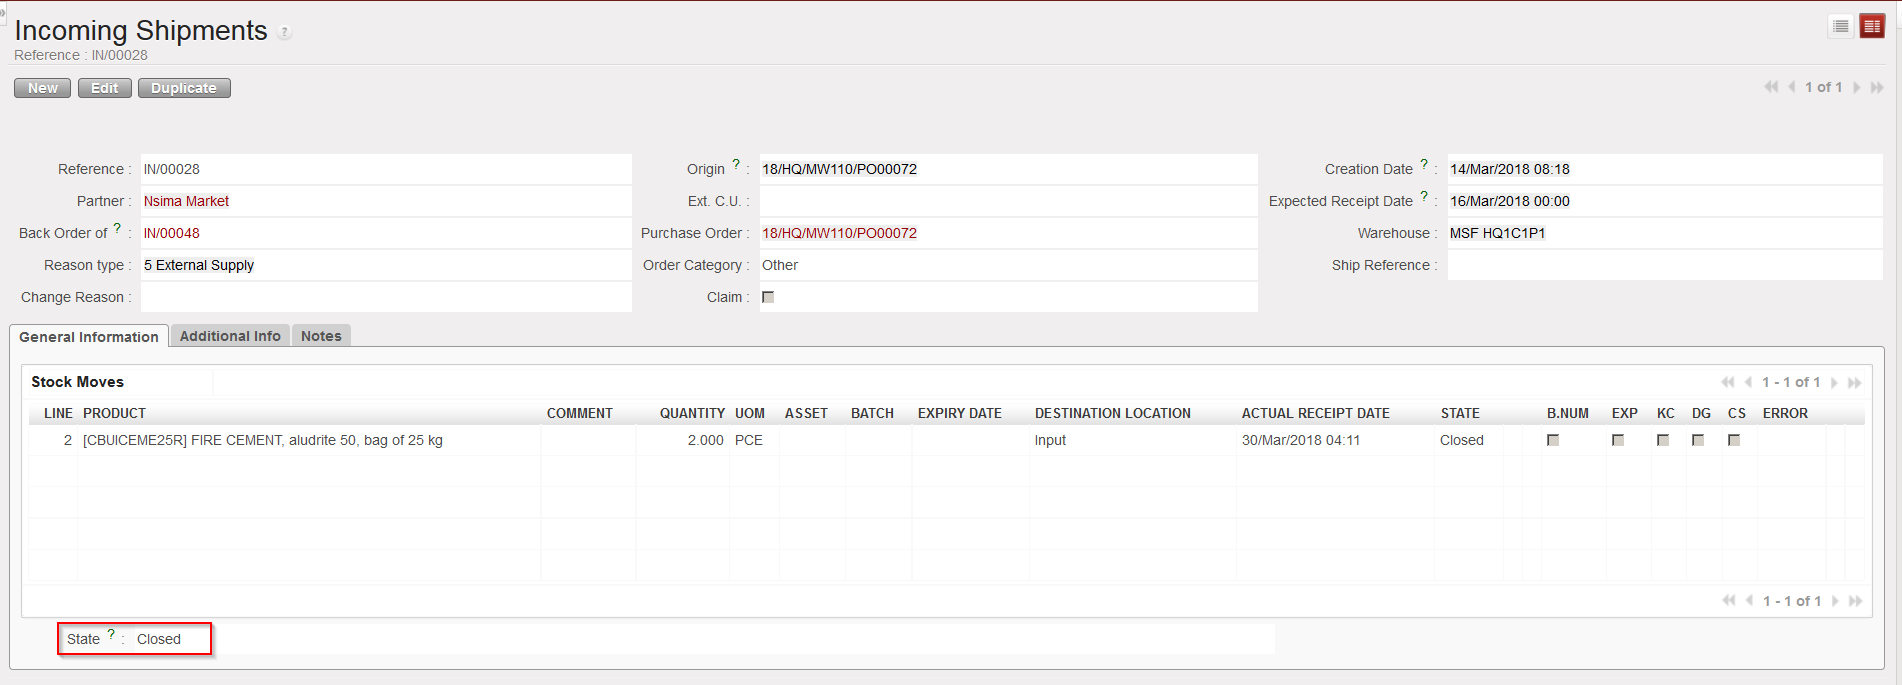
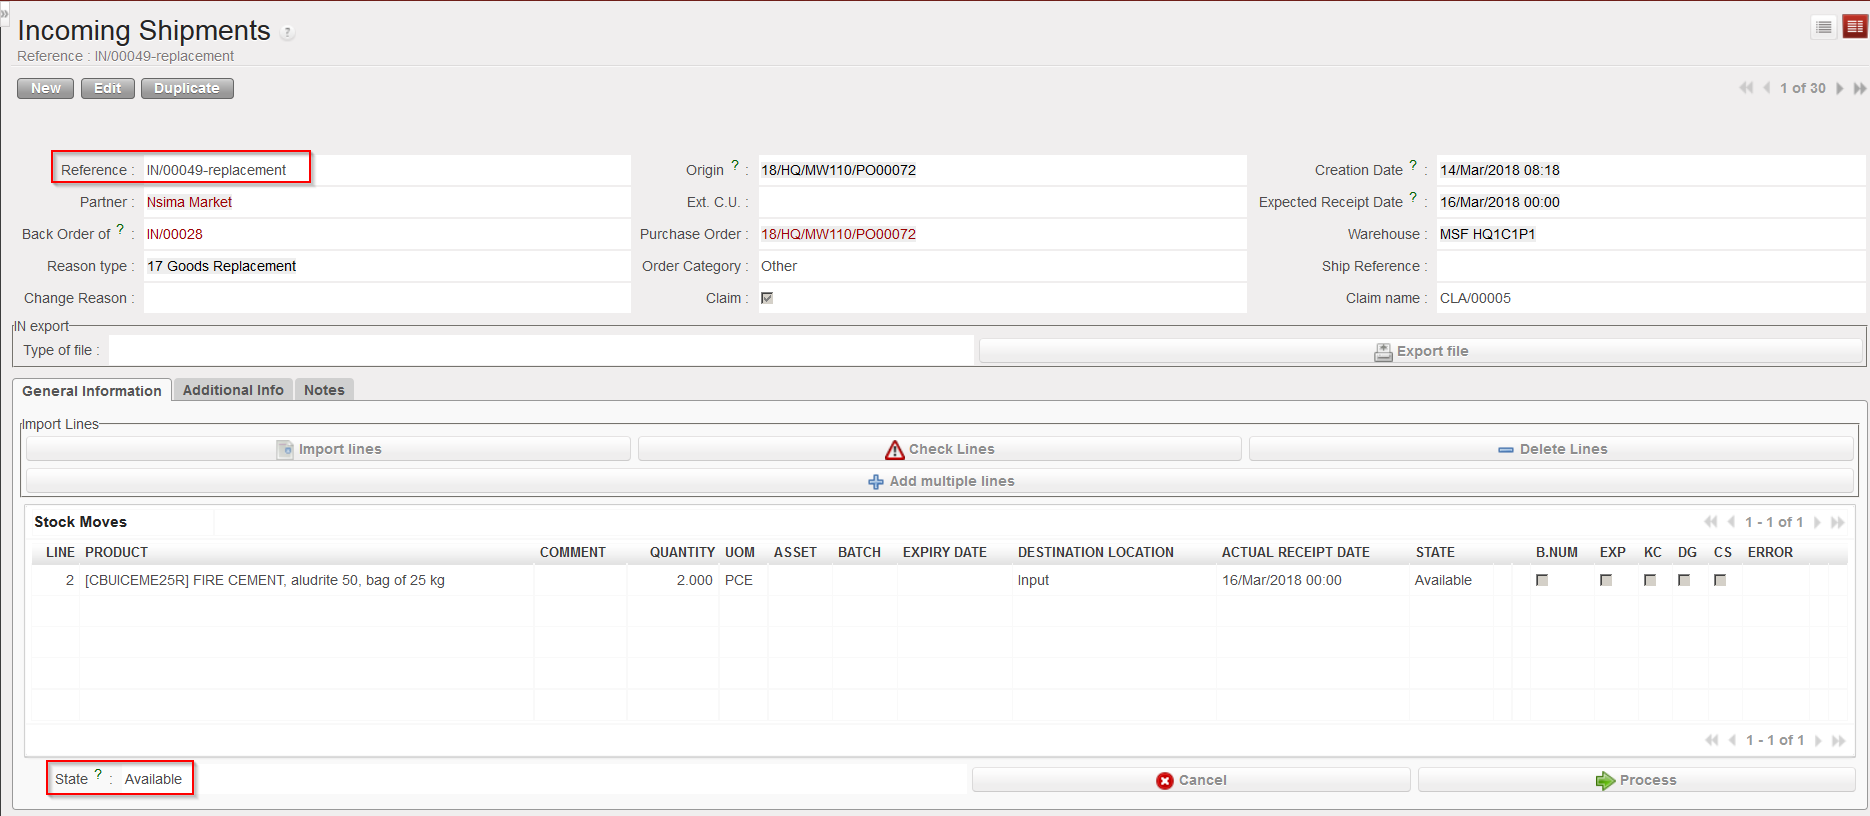
- Creates an Incoming Shipment (IN-replacement) for the replacement of the goods.
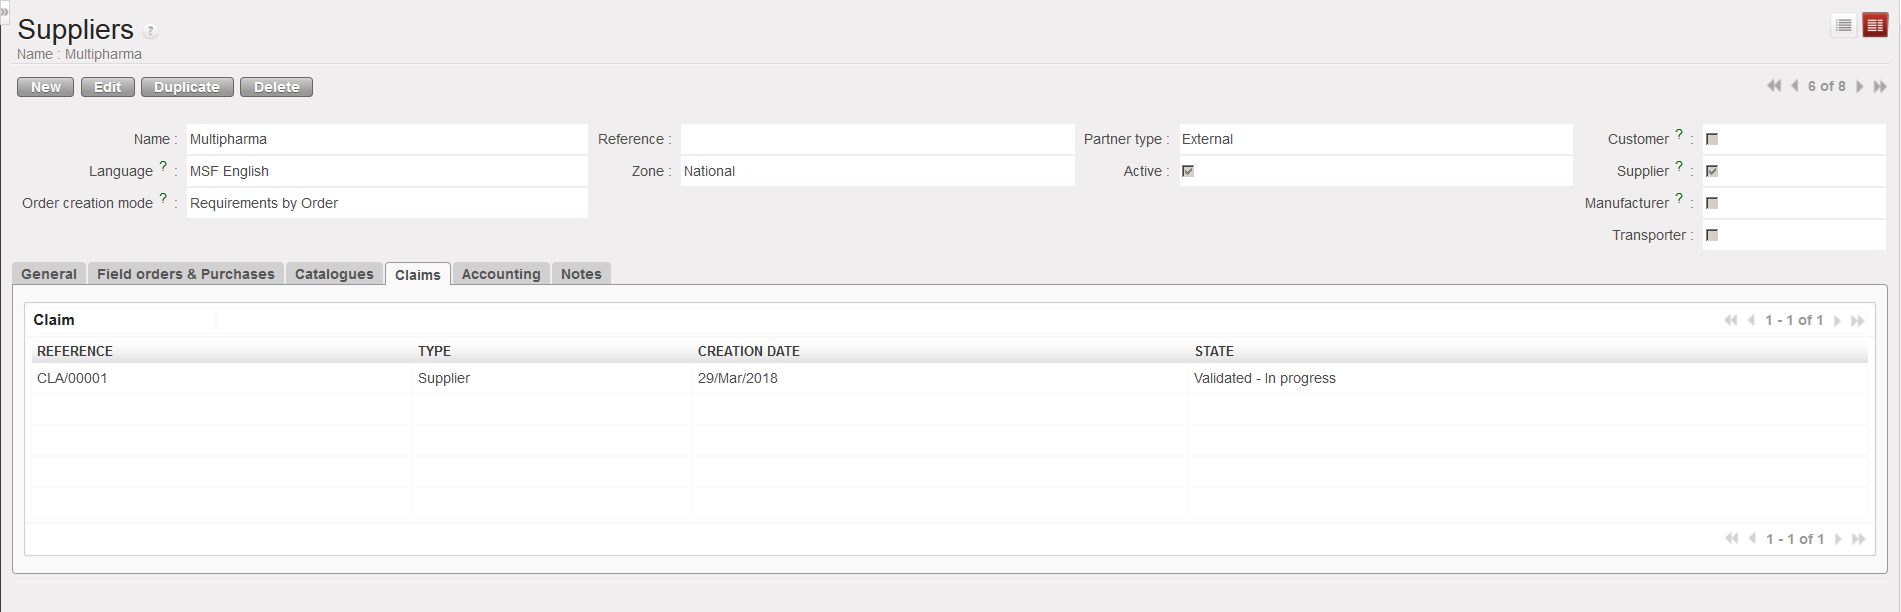
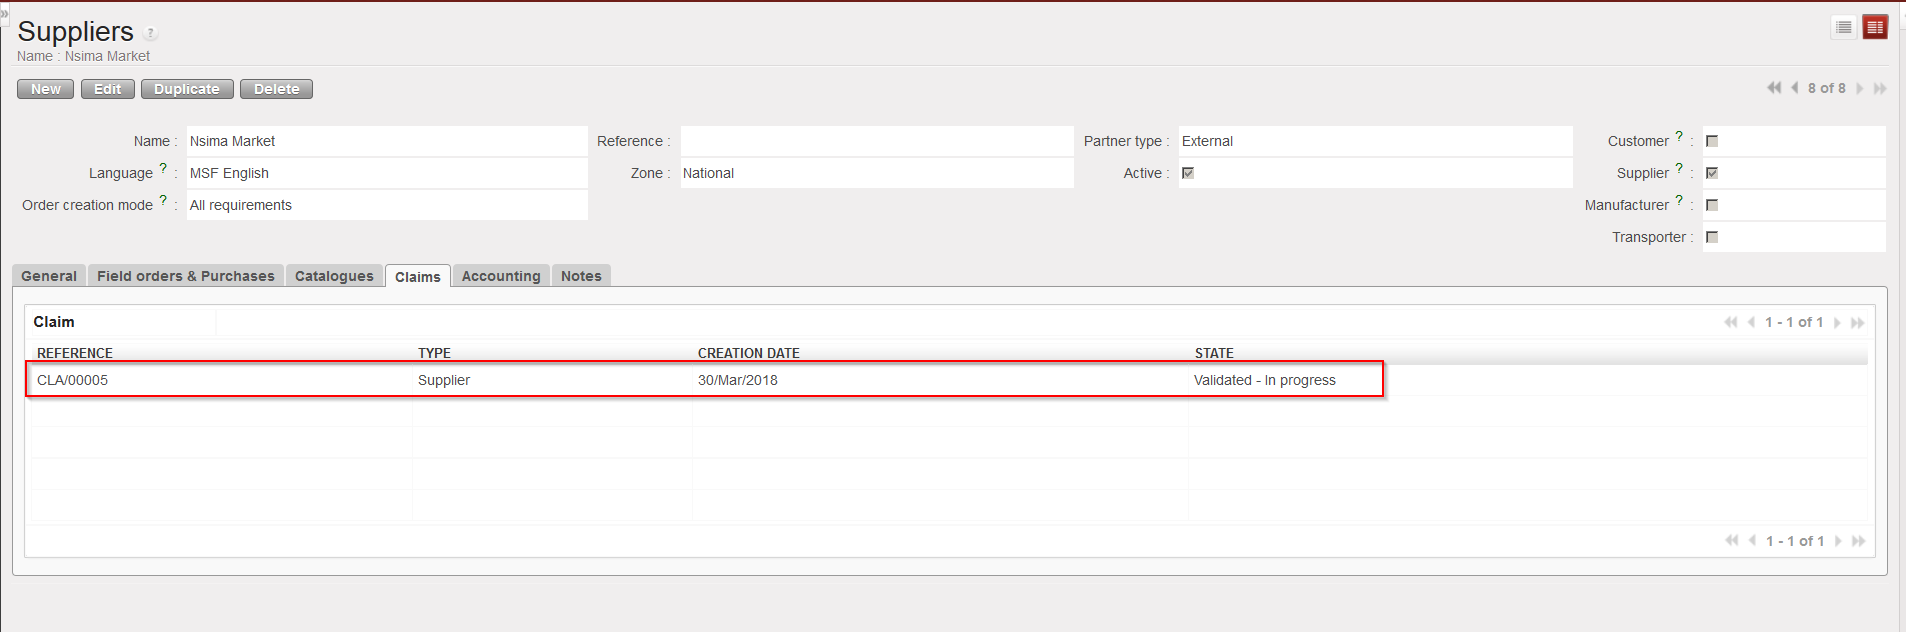
- Updates the partner master data sheet of the supplier (“Claims” tab) to show that a claim was raised to this supplier.
|
|
|
Claim created |
|
|
|
PICK-return created |
|
|
|
IN-replacement created |
|
|
|
Supplier master data sheet updated |


 to cancel the availability of the line and update the line as needed. After this you may recheck its availability.