Supply User Manual ENG -> 4. Procurement -> 4.8 LU-SU3203: Tenders (CFTs) and Requests for Quotations (RFQs) -> A. LU Introduction (LU-SU3203)
B. How to create a Tender from scratch
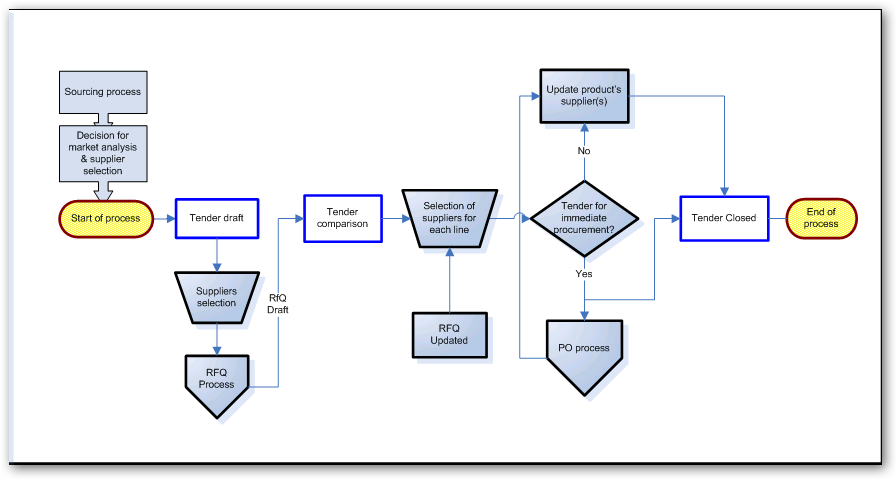
In most cases, the creation of a Tender will stem from the Sourcing process. A Draft Tender will be generated by the OST and populated with header information and product lines. Only, the suppliers will need to be added for these auto-generated Tenders.
However, to make a spontaneous market analysis (e.g. a review of stationery providers in order to make supplier contracts/agreements), a Tender can be created manually from scratch. Once the Tender process is completed, a PO can be created.
Go to: Purchases / Purchase Management / Tenders
- Click on New and fill in the header information (Tender Category, Tender Priority, Requested Date, Details,…).
2. Add Tender lines manually or import them from a file.
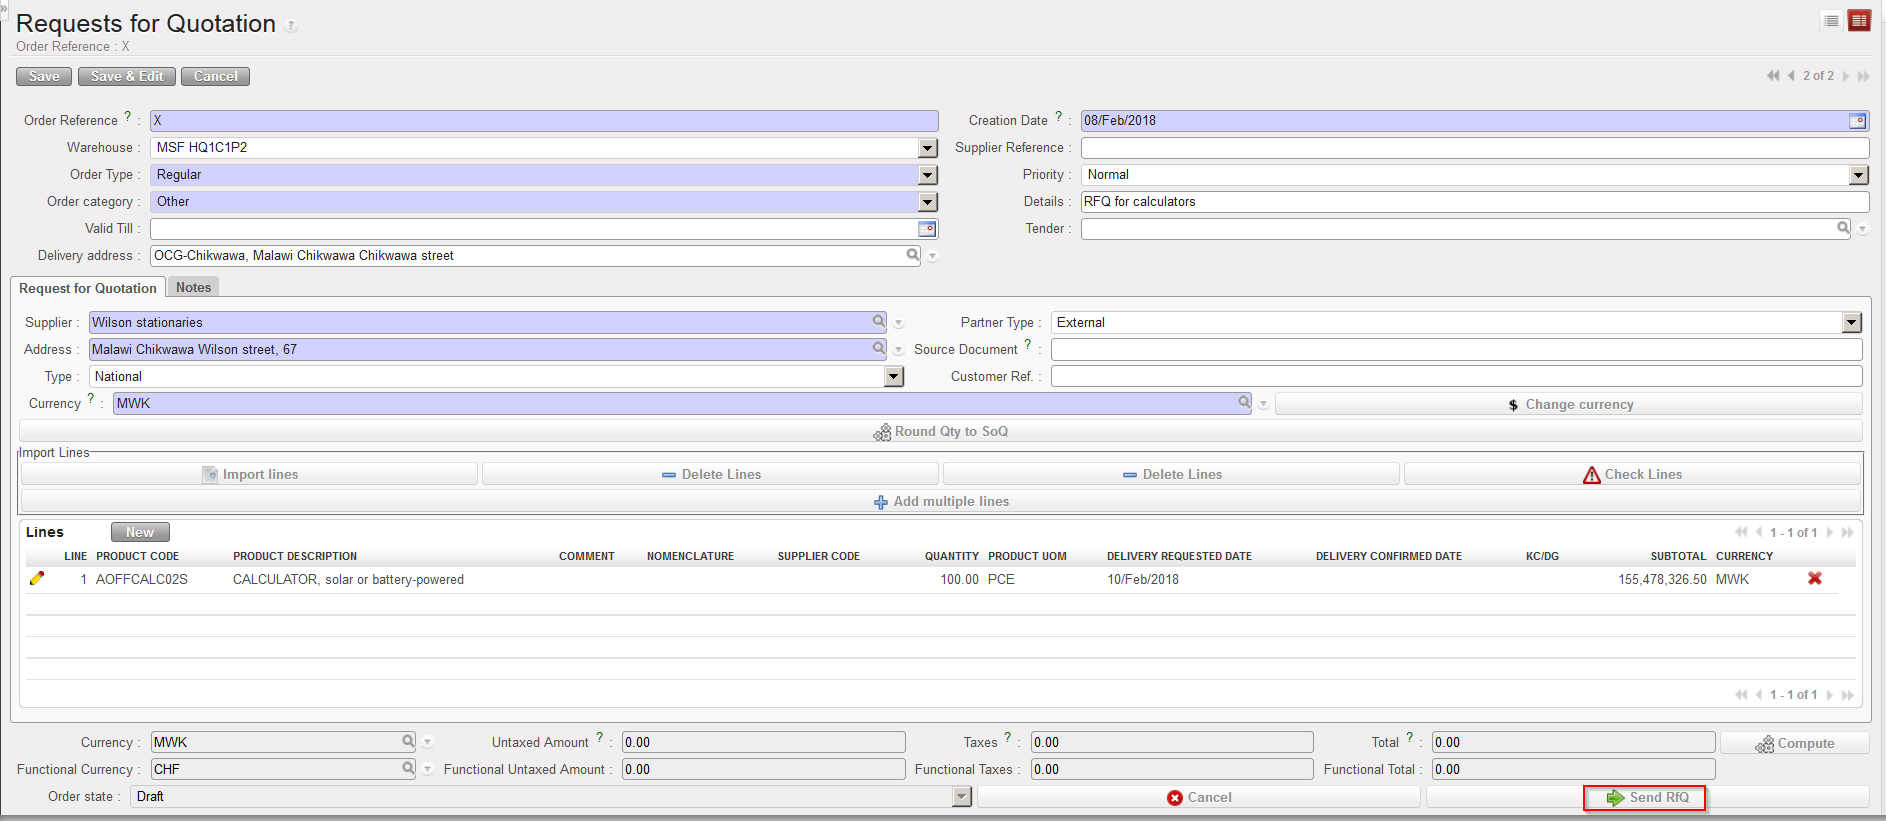
3. To add Tender lines manually, click on the “New” button to add product lines to the Tender (or on the “Add multiple lines” button to add several products at once).
3.1 Enter the product code in the “Product” field.
3.2 Enter the required quantity in the “Qty” field and the unit of measure in the “Product UOM” field.
3.3 Click on the floppy disk icon  at the right side of the screen to save the line and to create a new one to add additional items if needed.
 |
| Tender creation |
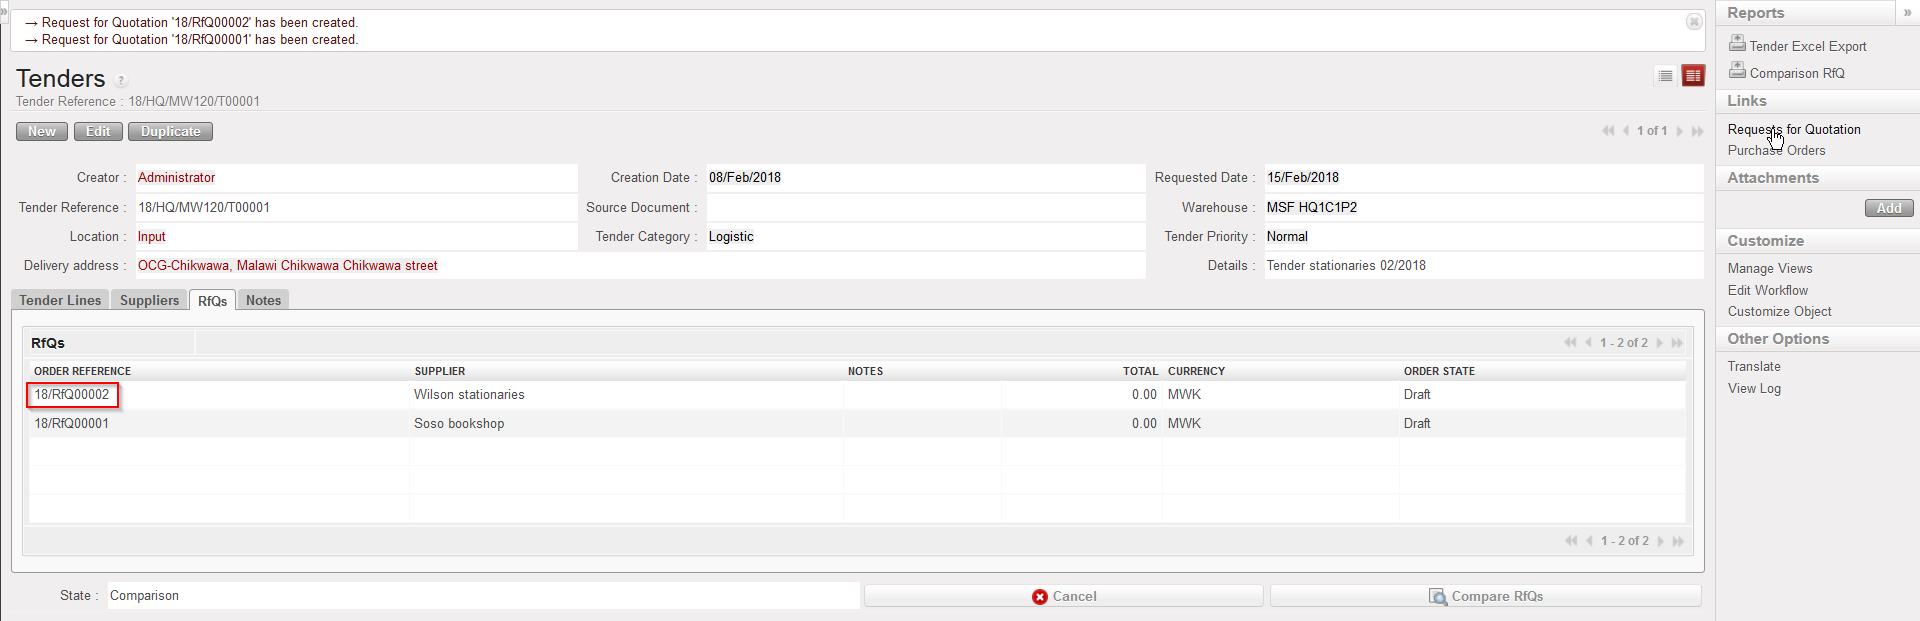
4. On the “Suppliers” tab click on “Add” and select the suppliers you will address the RFQs to (multi selection is possible). Validate your selection in the “Search Partner” screen by clicking on the “Select” button.
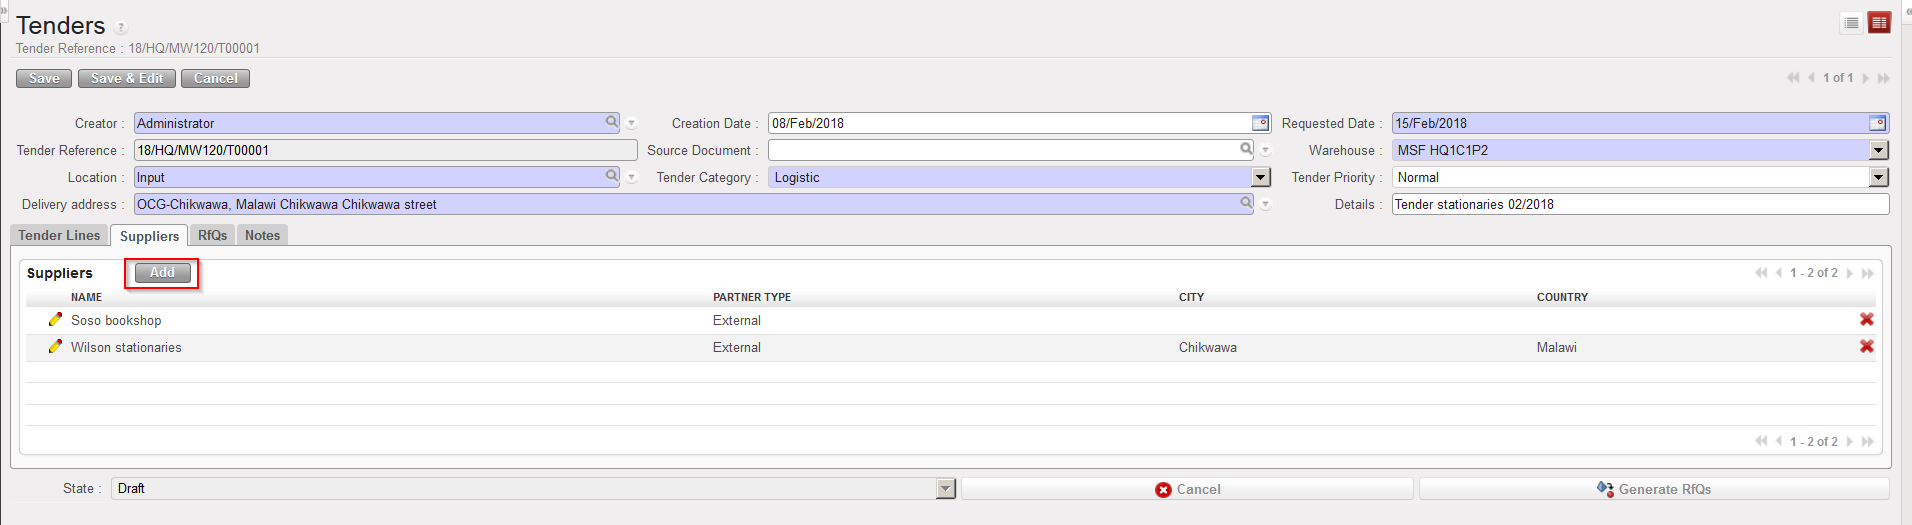 |
| Adding supplier to Tender |
5. Click on save at the top of the screen to save the Tender.
Please note that new Suppliers can still be added until the last minute as long as the Tender comparison hasn’t been done (i.e.: not beyond status “Comparison”).