Supply User Manual ENG -> Supply Configurations -> 2.4 LU-SU1104:Unifield instance data migration -> B. LU-SU1104: How to import local products for migration
B. LU-SU1104: How to import local products for migration
Two type of products are used in UniField: international products (UniData products) and local products (products created and maintained on a mission coordination).
International products are created on a new instance thanks to the synchronization mechanism. These products are actually created and maintained in UniData. An interface (linkage) is transferring these products from UniData to the OCs HQ instances following a set of rules. When a new coordination or project instance is created, the international products are synchronized from the HQ instance down to the new instance. After go live, if a product is created or updated in UniData, the linkage will trigger the creation or update of the product on the HQ instance and the synchronization will trigger the creation or update of the product on the related coordination and project instances (children).
Local products are products created and maintained on a coordination and shared with projects. A local product should never be created on a project instance. It must always be created and maintained at coordination level. These products (which are usually already existing on the legacy system) need to be migrated from the legacy system to the UniField coordination instance before going live. If a project is opened on an existing mission already using UniField, the initial synchronizations will create the local products on the new project instance. If a mission starts using UniField, the migration should be done, and local products created on the coordination instance.
Local products to be migrated are usually gathered on a file which is then imported on the coordination instance.
Before migration/import, it is important to make sure that the product data have been correctly configured, checked and validated according to OC procedure. Attributes such as Product Type (stockable/NO-stockable), Batch Managed, Expiry Date Managed, should be checked in details as they will have important impact in the system.
The local products used in the mission need to be imported from a CSV file in a specific format. To build this file, all local codes and attributes should be entered in an Excel tool (check with your OC support to get the latest version or see US-1286 in JIRA) from which the importable file (CSV) can be created by clicking on the “Create csv file” button. The csv file is created in the Directory D:\ in the computer (D:\product.product1.csv).
|
|
|
Tool used to prepare local products data and generate CSV file |
|
|
|
Example of CSV file for local products migration |


The created importable CSV file can then be imported on the COORDINATION instance.
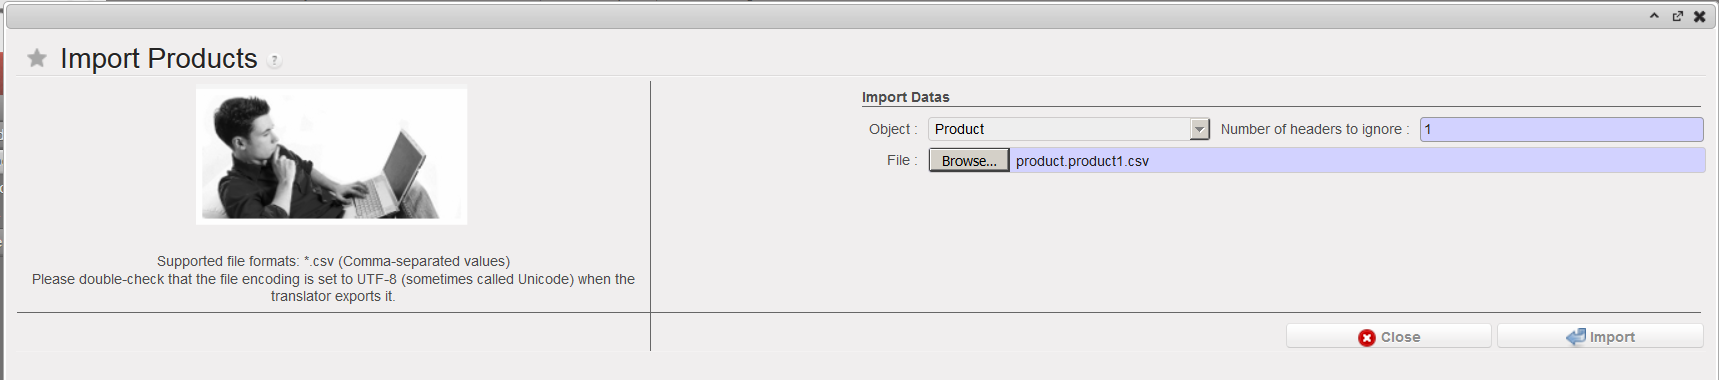
To import the local products,
Go to: Products / Import Products / Import Products.
1. Click on the “add attachment” button to browse for the CSV file created earlier and select it.
|
|
|
Import Products |
2. Click on the “Import” button to start the importation. You will get the following message.
|
|
|
Import Products |

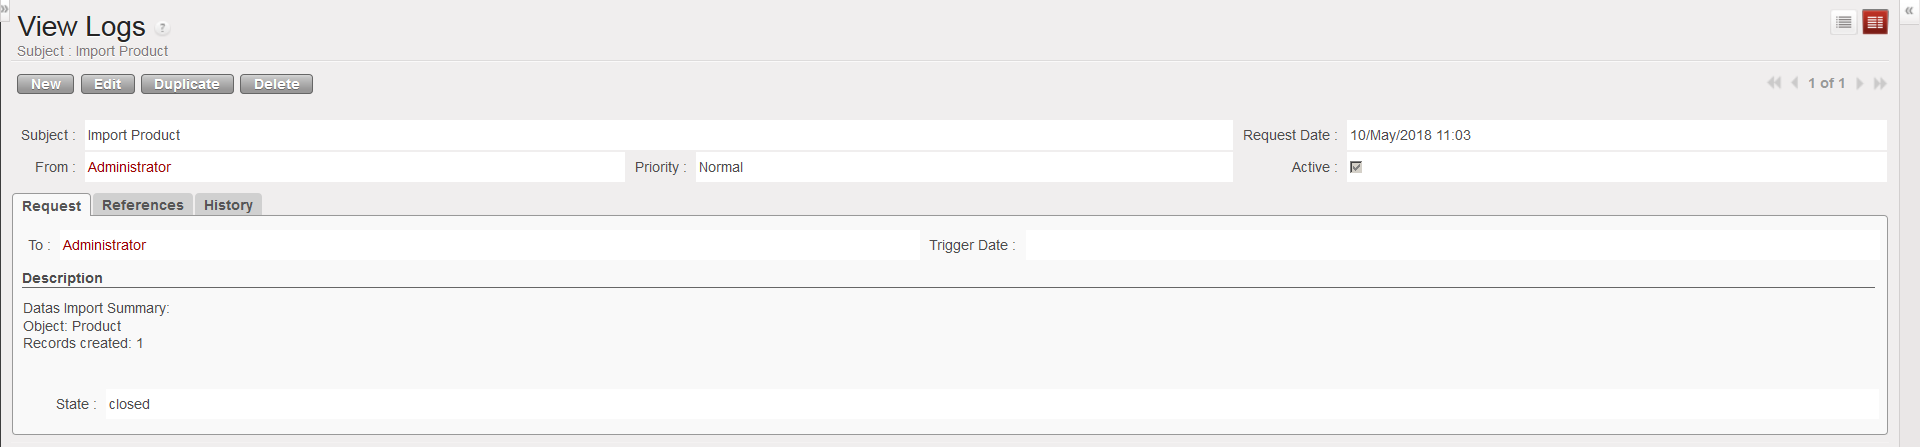
3. Click on “Close window” and go to Products / Import Products / View Logs to monitor the progress of the importation and display the log files after the import is complete.
4. Search for the log file related to your importation using the filters. Once you have found it, click on it to open it. You will see in details the result of the products import.
|
|
|
Import Products – View Logs |