B. LU-SU1103: Connection to the synchronization server

Supply User Manual ENG ->Supply Configurations -> 2.3 LU-SU1103:Synchronization -> B. LU-SU1103: Connection to the synchronization server

B. LU-SU1103: Connection to the synchronization server

To be able to synchronize, the UniField instance needs to be connected to the synchronization server. The connection to the synchronization server is done through the Connection Manager.

Go to: Synchronization / Registration / Connection Manager

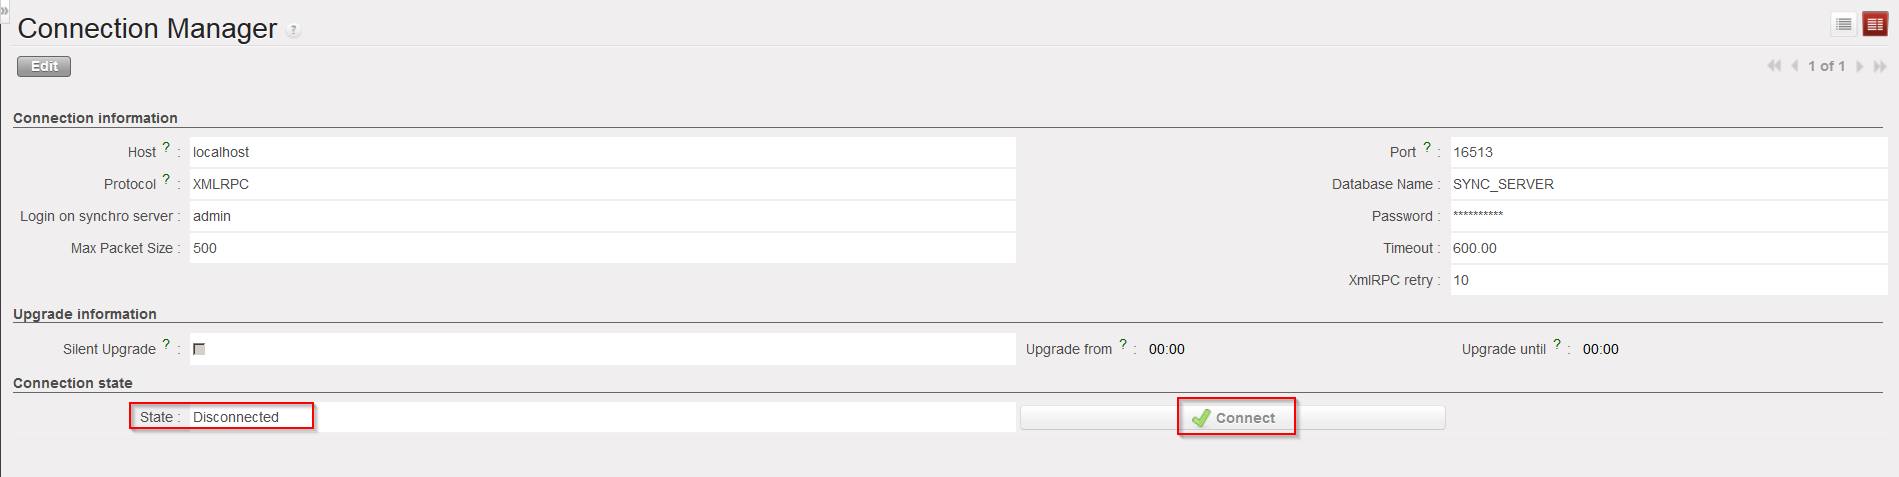
There should be one line appearing which represents the connection to the synchronization server.

Connection to synchronization server

  • Click on the line to open it and check the “Connection state“. If the “State” is “Disconnected“, click on the button “Connect” to connect the instance to the synchronization server.

Connection to synchronization server

A. LU-SU1103: SYNCHRONISATION

Supply User Manual ENG ->Supply Configurations -> 2.3 LU-SU1103:Synchronization -> LU Introduction

LU Introduction

In UniField, it is possible for one instance to send goods or orders to another instance or to receive goods or orders from another instance. This can be done thanks to the synchronization mechanism during which all the instances send data to (push) and receive data from (pull) the synchronization server.

When two UniField instances need to exchange data, the sending instance has to synchronize first to send (push) the data to the synchronization server, after which the receiving instance can synchronize to receive (pull) the data from the synchronization server. It is possible to do the synchronization manually or schedule it to happen on a regular basis (automatic synchronization).

E. LU-SU1102: Supplier catalogues

Supply User Manual ENG->Supply Configurations->2.2 LU-SU1102:Partners(customers and suppliers)-> E. LU-SU1102: Supplier catalogues

E. LU-SU1102: Supplier catalogues

You can see how to create a supplier catalogue in section :

Supply User Manual ENG -> Products -> 3.4 LU-SU2103: Products in Supplier Catalogues.


Supplier catalogues

The creation of a supplier catalogue is done from the partner master data sheet. The maintenance of a supplier catalogue is done from the Supplier catalogues menu.

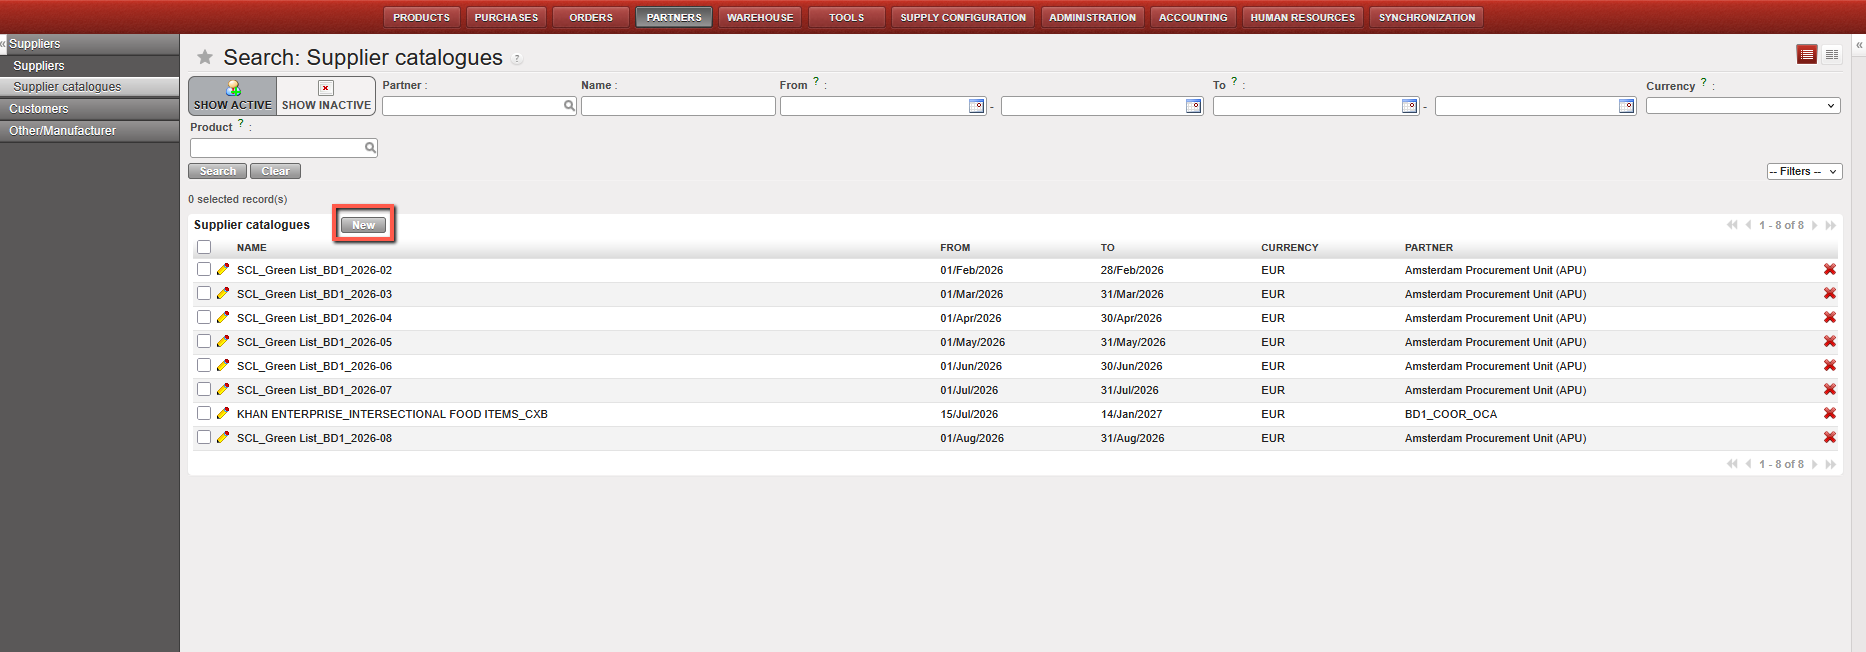
Go to: Partners / Suppliers / Supplier Catalogue

  1.  Click “New”
    OR

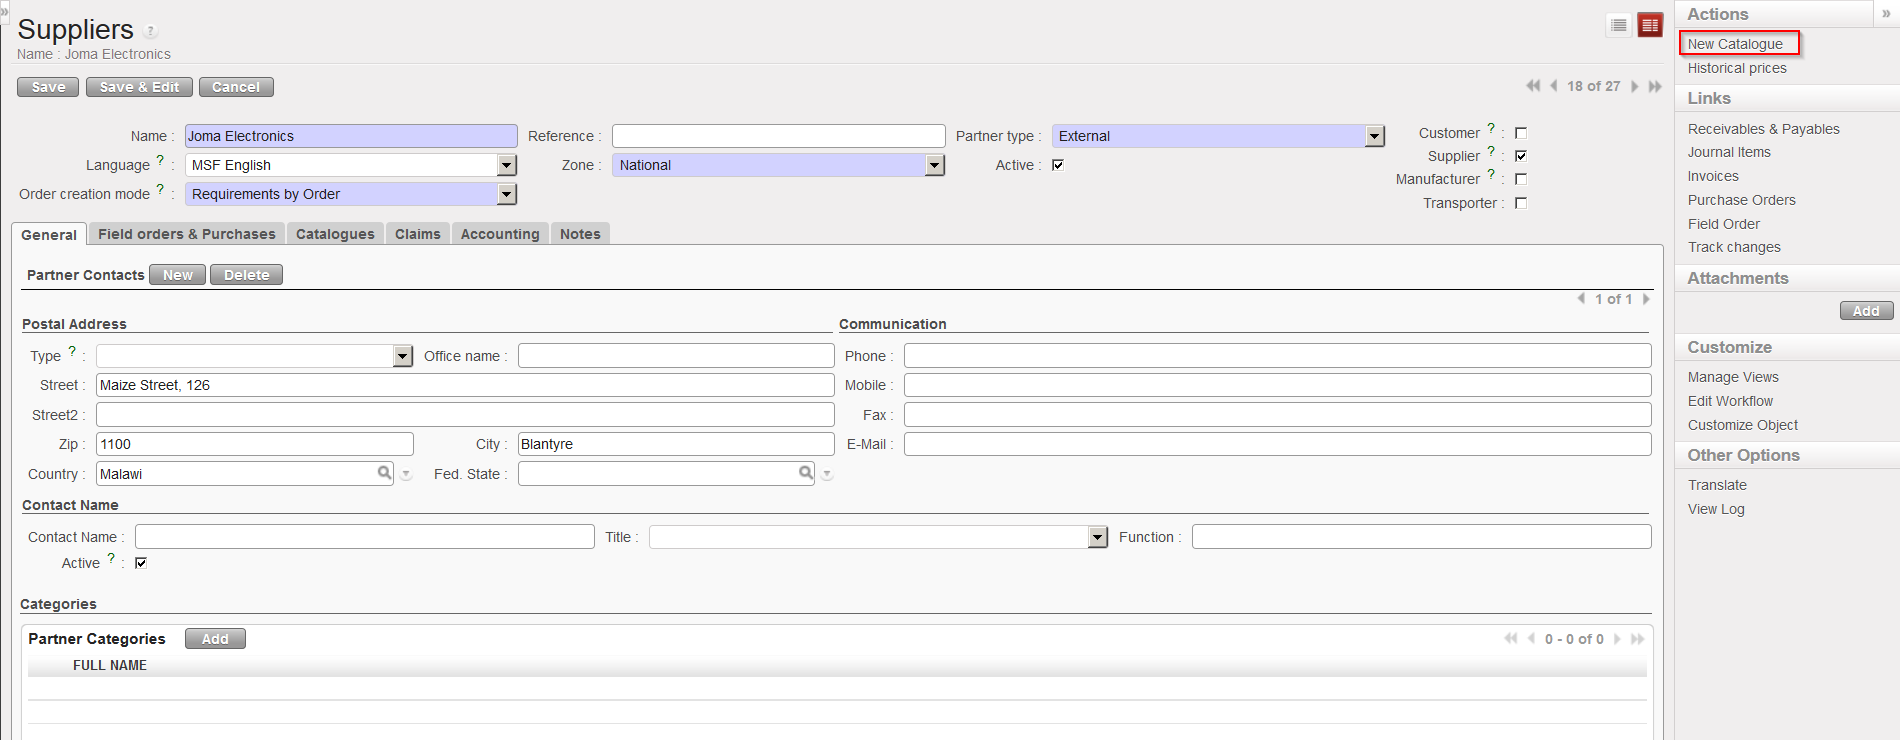
Go to: Partners / Suppliers / Suppliers

  1. Edit the supplier for which you want to create a catalogue.
  2. In the action menu, select the “New Catalogue” option.

Creation of a supplier catalogue

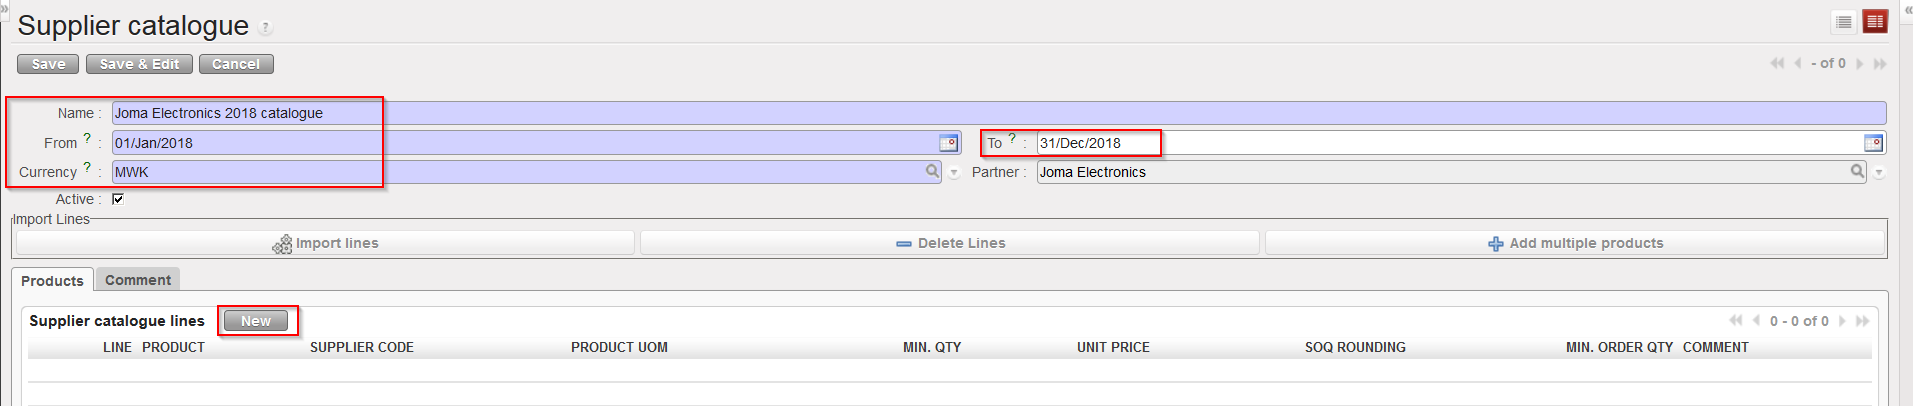
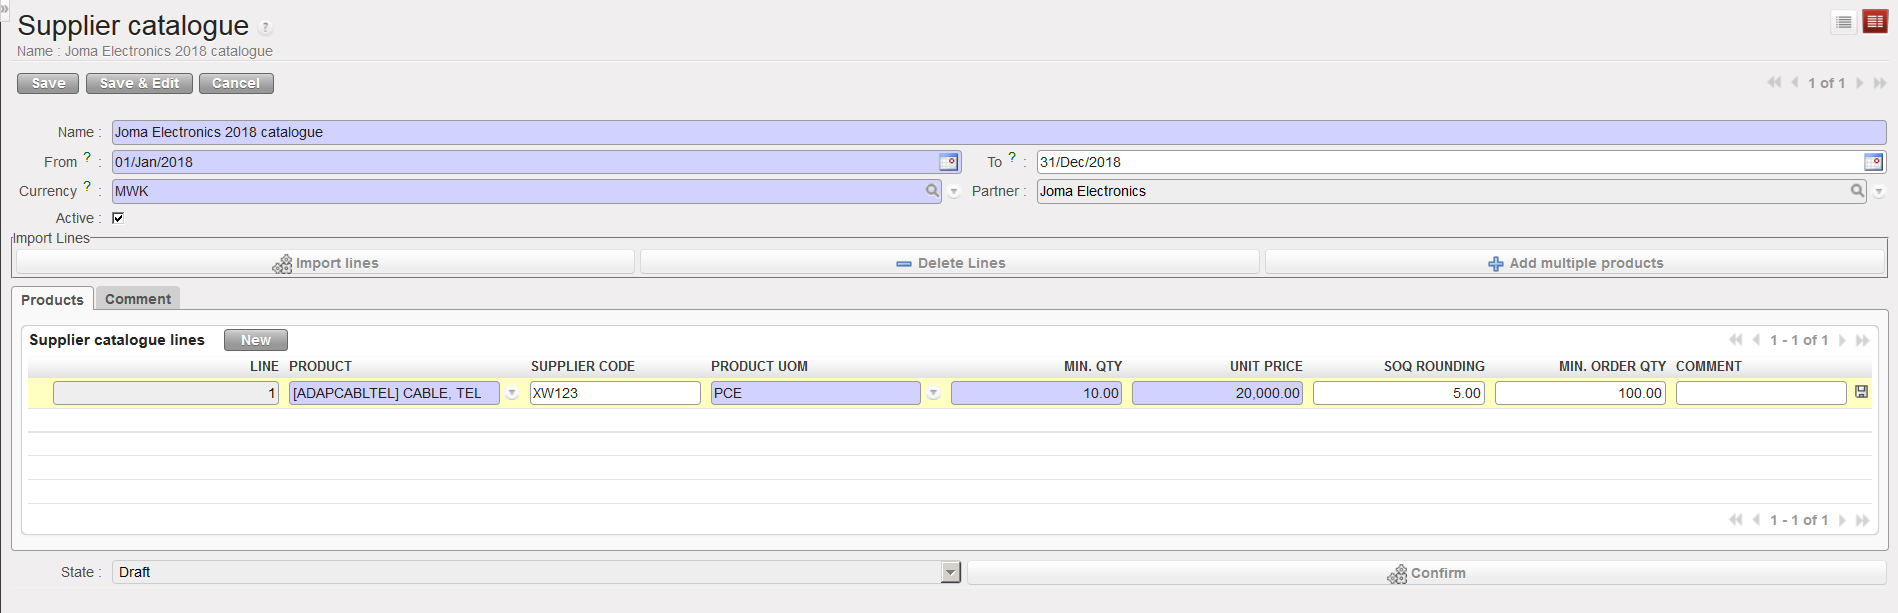
  1. Enter a “Name” for the catalogue.
  2. Enter the validity period for the catalogue using the “From” and “To” fields.
  3. Enter the “Currency” used in the catalogue (it must be the same for all lines).

Supplier catalogue header

  1. Click on the “New” button located on top of the “Products” tab
  2. Enter a product code in the “PRODUCT” field.
  3. Enter the supplier code in the “SUPPLIER CODE” field. This is the code used by the supplier for this product.
  4. Enter the minimum quantity in the “MIN. QTY” field. This is the quantity from which the unit price indicated in the catalogue applies.
  5. Enter a unit price in the “UNIT PRICE” field.
  6. Enter the Standard Ordering Quantity in the “SOQ ROUNDING” field. This is the typical ordering quantity. It may correspond to the packaging offered by the supplier.
  7. Enter the minimum order quantity in the “MIN. ORDER QTY” field. This is the quantity from which the supplier accepts a Purchase Order.
  8. Enter a comment in the “COMMENT” field if needed to include any additional useful information.
  9. Click on the floppy disk icon to save the line.
  10. Repeat the steps from 6 to 14 to enter additional lines in the catalogue.

Supplier catalogue line

  1. Once all lines have been included, the catalogue must be confirmed via the “Confirm” button.

To include several products in one step in a catalogue, use the “Add multiple products” button. After inclusion of the products, you will need to update all the lines to enter the correct information (unit price, min.qty, SOQ,…).

The content of a catalogue may be imported from an Excel file via the “Import lines” button. To get the correct file template, export an existing catalogue using the option “Export lines (csv)” from the action menu of a supplier catalogue.

ESC catalogues are created and maintained on the HQ instance and are synchronised down to coordination instances. This allows having a central update of ESC prices and conditions recorded at HQ level shared with all missions thanks to the synchronisation mechanism.

A coordination catalogue can be created at coordination level on the internal partner coordination. After synchronisation, this catalogue will be available in all related projects. Such a catalogue can be useful to create if a coordination wants to share its prices with customers (projects).

To update an existing supplier catalogue, another menu must be used.

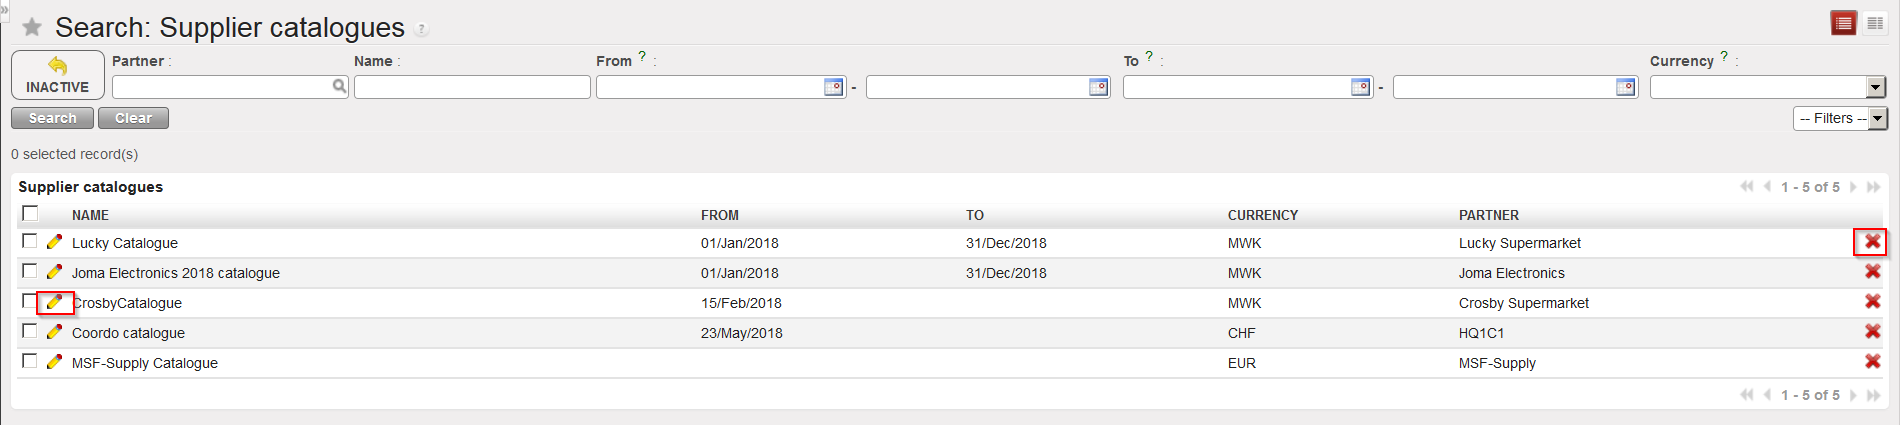
Go to: Partners / Suppliers / Supplier catalogues

Supplier catalogues can be deleted (via the red cross) or updated (via the pencil icon).

Supplier catalogues

D. LU-SU1102: How to de-activate a partner

Supply User Manual ENG->Supply Configurations->2.2 LU-SU1102:Partners(customers and suppliers)-> D. LU-SU1102: How to de-activate a partner

D. LU-SU1102: How to de-activate a partner

It may be necessary to de-activate a partner, so that it cannot be used for future transactions. By removing the tick from the “Active” checkbox, the system will hide the partner, so that it cannot be selected or used in any new transactions. In order for a partner to be de-activated, it should not be currently used in any open transaction. If the partner is used in an open transaction, the system will not allow you to de-activate it.

Go to: Partners / Suppliers / Suppliers or Customers / Customers

Partner – De-activation
  1. Click on the pencil lapiz next to the partner which you want to de-activate.
  2. Untick the “Active” check box on the partner header.
  3. Once complete, click on the “Save” button at the top of the screen.
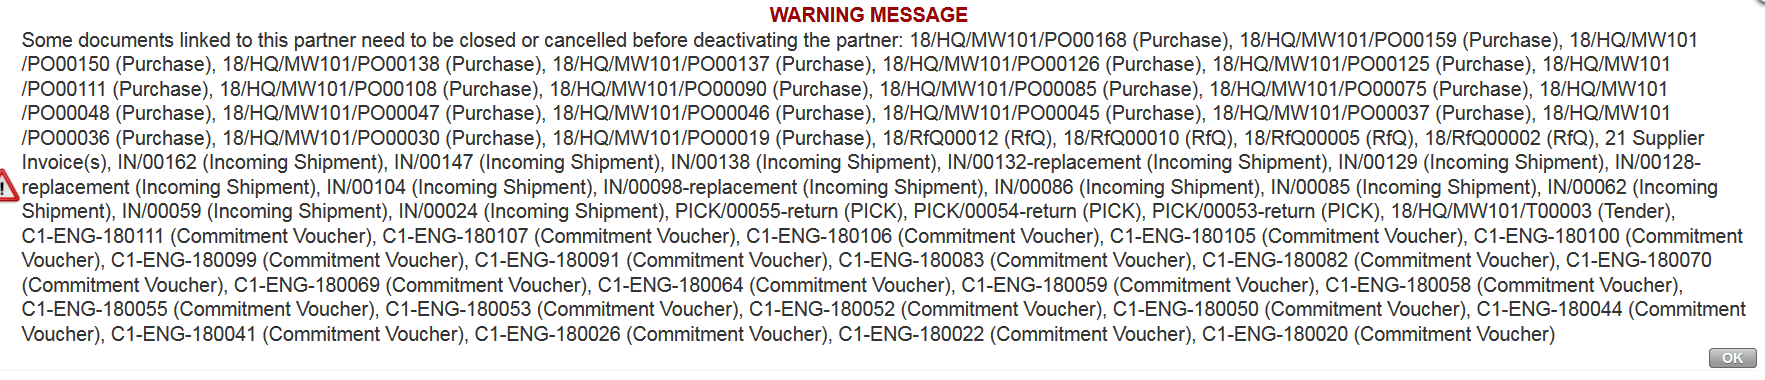
  4. If there are any open documents involving this partner, the system will display a warning message (see figure below) and will not allow the de-activation.
Impossibility to de-activate a partner

C. LU-SU1102: How to update a partner

Supply User Manual ENG->Supply Configurations->2.2 LU-SU1102:Partners(customers and suppliers)-> C. LU-SU1102: How to update a partner 

C. LU-SU1102: How to update a partner

Go to: Partners / Suppliers / Suppliers or Customers / Customers

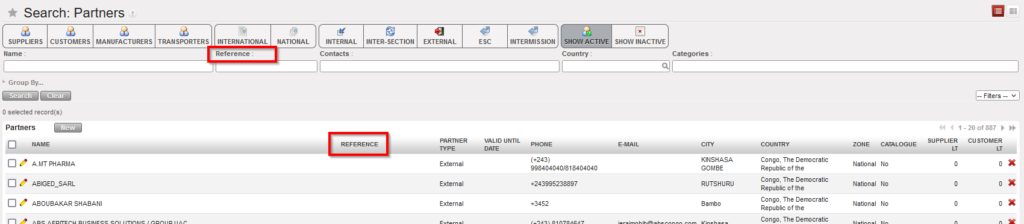
The Supplier and Customer main screens contain filters to refine your search and grouping options. The lower part of the search screen shows existing partners and displays information such as name, reference, partner type, phone number, e-mail address, city, country, …


Search: Suppliers” screen

  1. Click on the pencil lapiz next to the partner which you want to modify.
  2. The Supplier or Customer page opens in edit mode. Make the necessary changes.
  3. Once complete, click on the “Save” button at the top of the screen.

B. LU-SU1102: How to create a new partner

Supply User Manual ENG->Supply Configurations->2.2 LU-SU1102:Partners(customers and suppliers)-> B. LU-SU1102: How to create a new partner

B. LU-SU1102: How to create a new partner

The creation process for customers and suppliers is quite similar. The partner type selected will trigger the system to request specific information and will also impact processes in which partners can be involved. The partner type can be:

  • Internal, MSF entities which are on the UniField network within the same MSF mission are considered customers/suppliers and are created by the synchronization.
  • Intermission, coordination instances of your OC on the UniField network, they are created by the synchronization but need to be activated when needed. They are also considered as customers/suppliers.
  • Inter-section, coordination instances from other OCs on the UniField network, they are created by the synchronization but need to be activated when needed. They are also considered as customers/suppliers.
  • External, refers to all suppliers and customers outside of the UniField network. They must be created manually. Note that all external partners created on a coordination/project instance will be synchronized (as inactive) to all instances belonging to the same mission. This means that before creating an external partner manually, a check should be carried out to see if it has already been created (by the synchronization) and should simply be activated. Note that finance is also creating suppliers. Supply and finance should work in collaboration in partners creation/maintenance to avoid duplicates or data base hic-ups.
  • ESC, European Supply Centers such as such MSF Logistique, MSF Supply or APU are considered suppliers. They must be created on the HQ instance, are synchronized down to all coordinations and projects and need to be activated manually.

Internal, Intermission and Inter-section partners always correspond with a UniField instance. They are created automatically via the synchronization during the instance. Intermission and Inter-section partners must be activated if needed.

If you want to create a supplier, go to: Partners / Suppliers/ Suppliers

If you want to create a customer, go to: Partners / Customers / Customers

The example below shows how to create an external supplier.

Go to: Partners / Suppliers / Suppliers

  1. Click on the “New” button to create a new supplier. A supplier form appears (the Supplier checkbox is automatically ticked).
  2. Enter the supplier name in the “Name” field. A supplier name must be unique. You cannot name an external partner with the name of an existing instance.
  3. Enter the reference in the “Reference” field. This field is usually used to enter the acronym of the partner.
  4. As “Partner type”, select “External”.
    Note: “MSF Entity” checkbox allows users to flag whether an external partner is in fact an MSF entity, and when ticked, a mandatory dropdown appears to select the corresponding MSF section.
  5. Set the “Language” of communication. All documents related to this partner will be printed in this language.
  6. Set the “Zone” field to “National”. “National” is for all-in country partners while “International” is for all partners based abroad.
  7. The field “Order creation mode” is actually used by the Order Sourcing Tool (which is explained in details in the Procurement chapter). By default, when creating a Purchase Order, UniField will always try to gather all requests sourced to the same supplier on the same Purchase Order. However, you might prefer to segregate you requests on different POs according to the project which issued the request, the category of the request or even make sure that each request will be managed on a separate Purchase Order. This field helps to pilot this.
    • “All requirements” is set by default. All requests (even if for different projects) sourced to a same supplier are merged on a single PO.
    • “Requirements by project”. All requests from a same project sourced to a same supplier are merged on a single PO.
    • “Requirements by Category”. All requests with the same category sourced to a same supplier are merged on a single PO.
    • “Requirements by Category and Project”. All requests from a same project and with the same category sourced to a same supplier are merged on a single PO.
    • “Requirement by Order”. Different requests are never merged on a single PO. The relationship between request and PO is 1:1.
  8. The “Active” checkbox is ticked by default. The partner becomes operational as soon as you save the form.
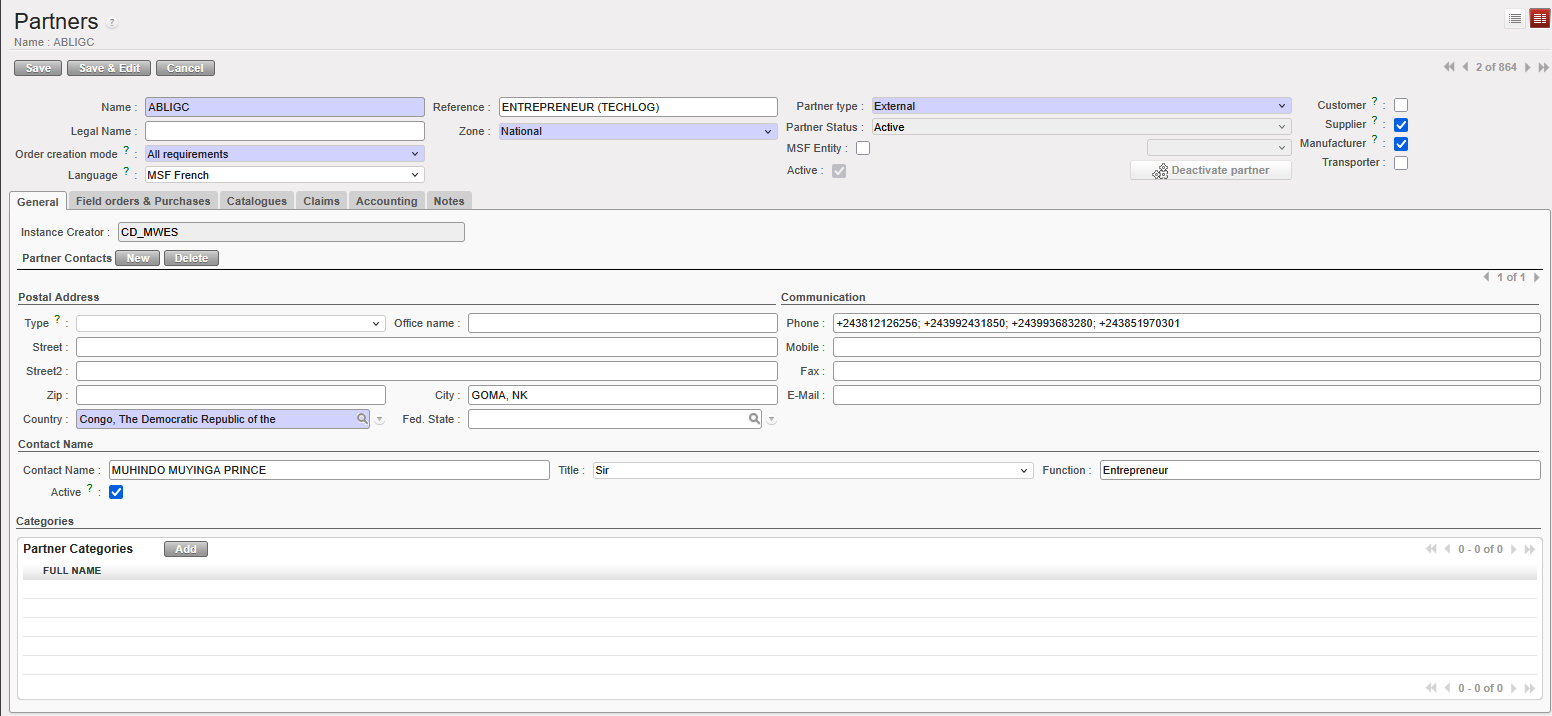
  9. In the “General” tab, in the “Postal address” section, complete the address of the supplier.
  10. On the same tab, in the “Communication” section, enter phone numbers, e-mail address,…
  11. On the same tab, in the “Contact Name” section, enter the name of your contact in “Contact Name” and his/her “Title” and “Function”
  12. Note that it is possible to enter multiple contacts/addresses, by clicking on the “New” button next to “Partner Contacts”. This option is important, as a partner can have different addresses for delivery invoice,… (e.g. in the case where the warehouse is not in the same location as the office).
  13. In the “Categories” section, it is possible to link a supplier/customer to partner categories which can be defined in configuration. Click on the “Add” button and select the partner categories related to the partner. You can select as many categories as needed. If you use this section, you will be able to retrieve your partner using the filter “Categories” available on the partners search screens.

Partner – General tab

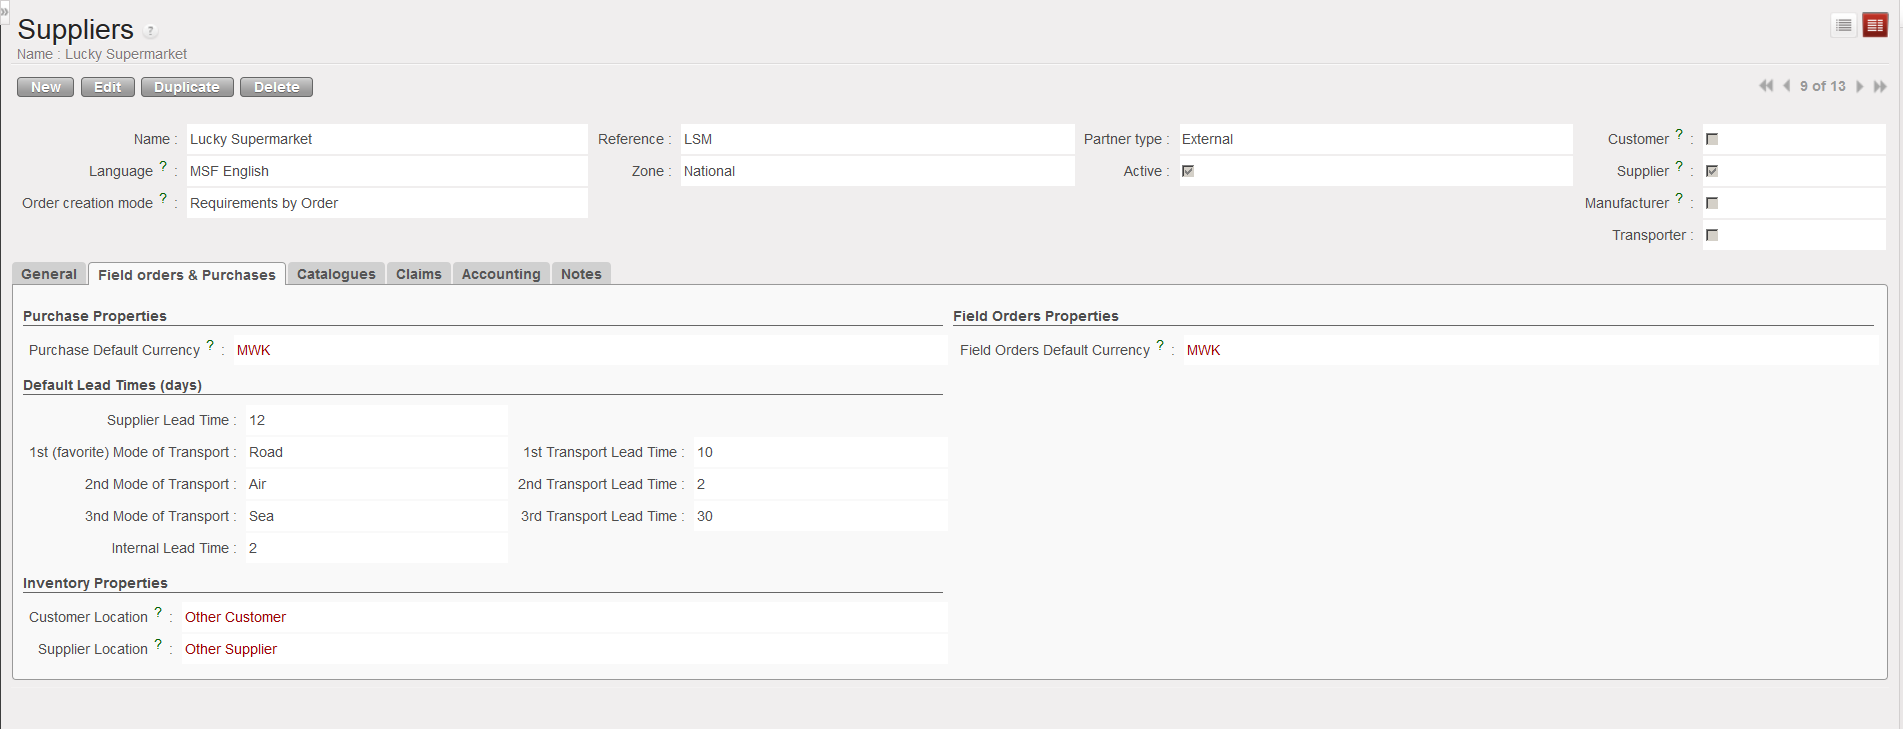
    14. On the “Field orders & Purchases” tab, section “Purchase Properties”, select the currency used by the supplier, for both “Purchase Default Currency” and “Field Orders Default Currency”.

Please note that this currency have to be defined thoroughly (functional, local or other) according to your needs especially for Internal, Inter-mission and Inter-section partners which are subject to synchronization. Indeed, this currency cannot be changed at document level (PO or FO) and in case of discrepancy form one instance to the other, a blocking synchronization message (Not Run) can be generated and therefore prevent the creation of an expected new document in the other instance.

This is why it is extremely important that within the same mission, all instances (intra-mission) are all defined with the same currency.

   15. In the “Default Lead Times (days)” section enter information about the default lead times of the supplier and the preferred transport methods. This information is required for the system to estimate delivery dates.

   16. The “Inventory Properties” section is usually left as default. The “Customer Location” is the destination location which will be used when goods will be distributed to this partner. The “Supplier Location” is the source location which will be used when goods will be received from this partner.

Partner – Field orders & Purchases tab

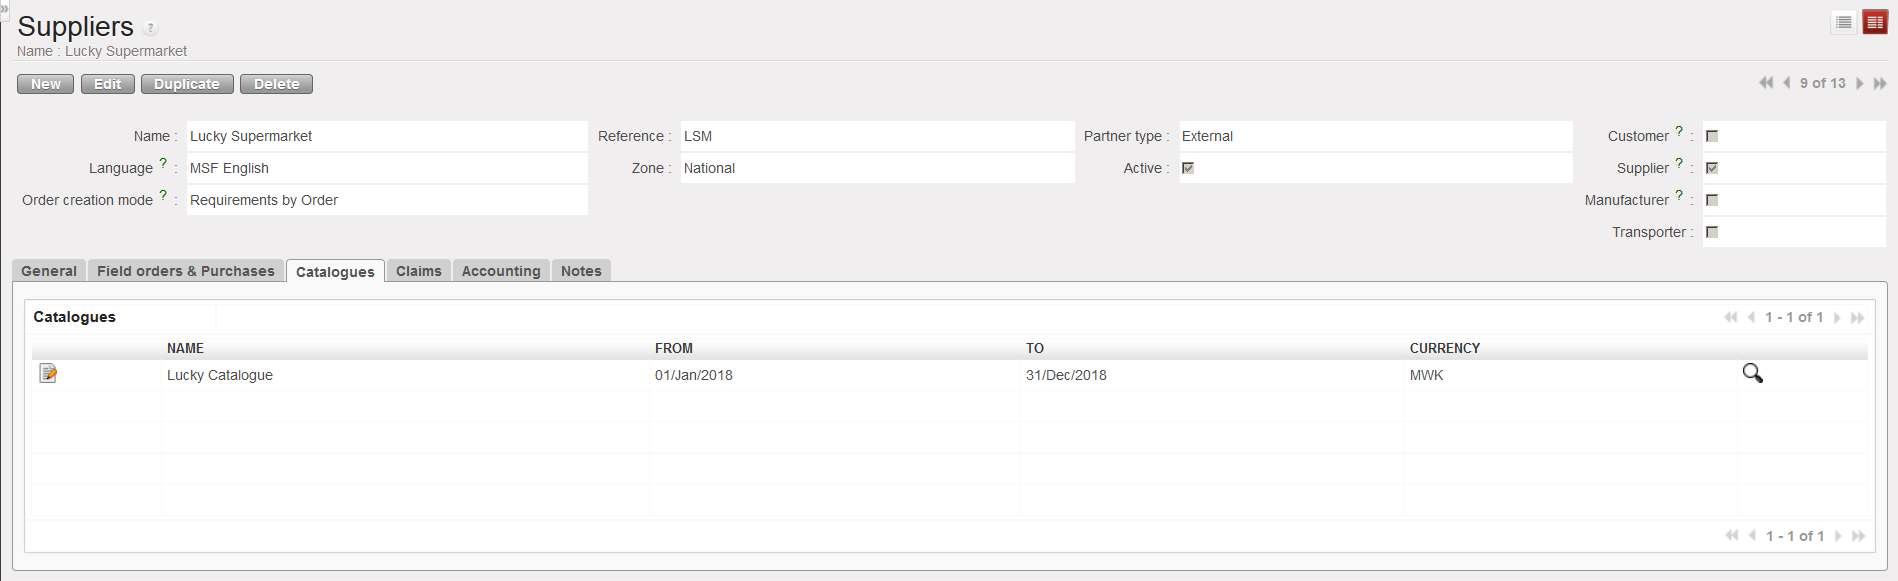
   17. If catalogues are created for the supplier, they will appear on the “Catalogues” tab. See chapters on Products and Procurement for further details.

Partner – Catalogues tab

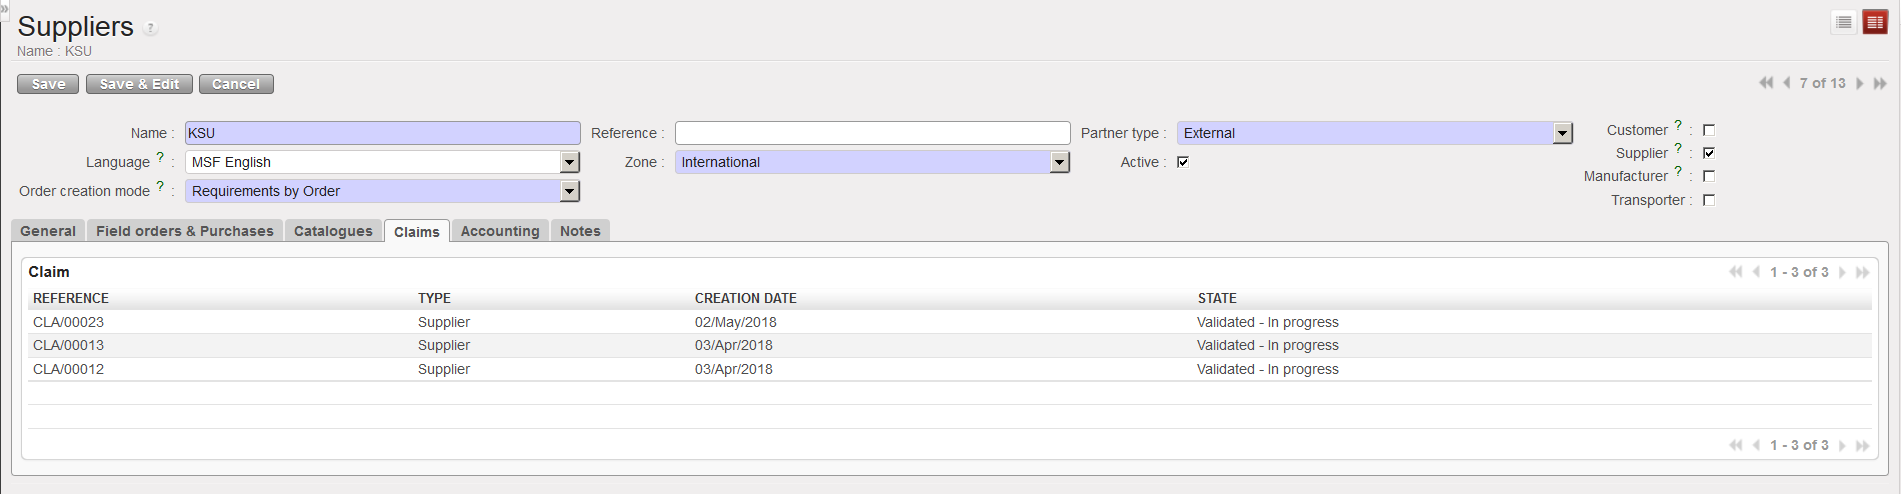
   18. The “Claims” tab will list all claims which have been raised to a partner. See section on claims in the Warehouse chapter for further details.

Partner – Claims tab

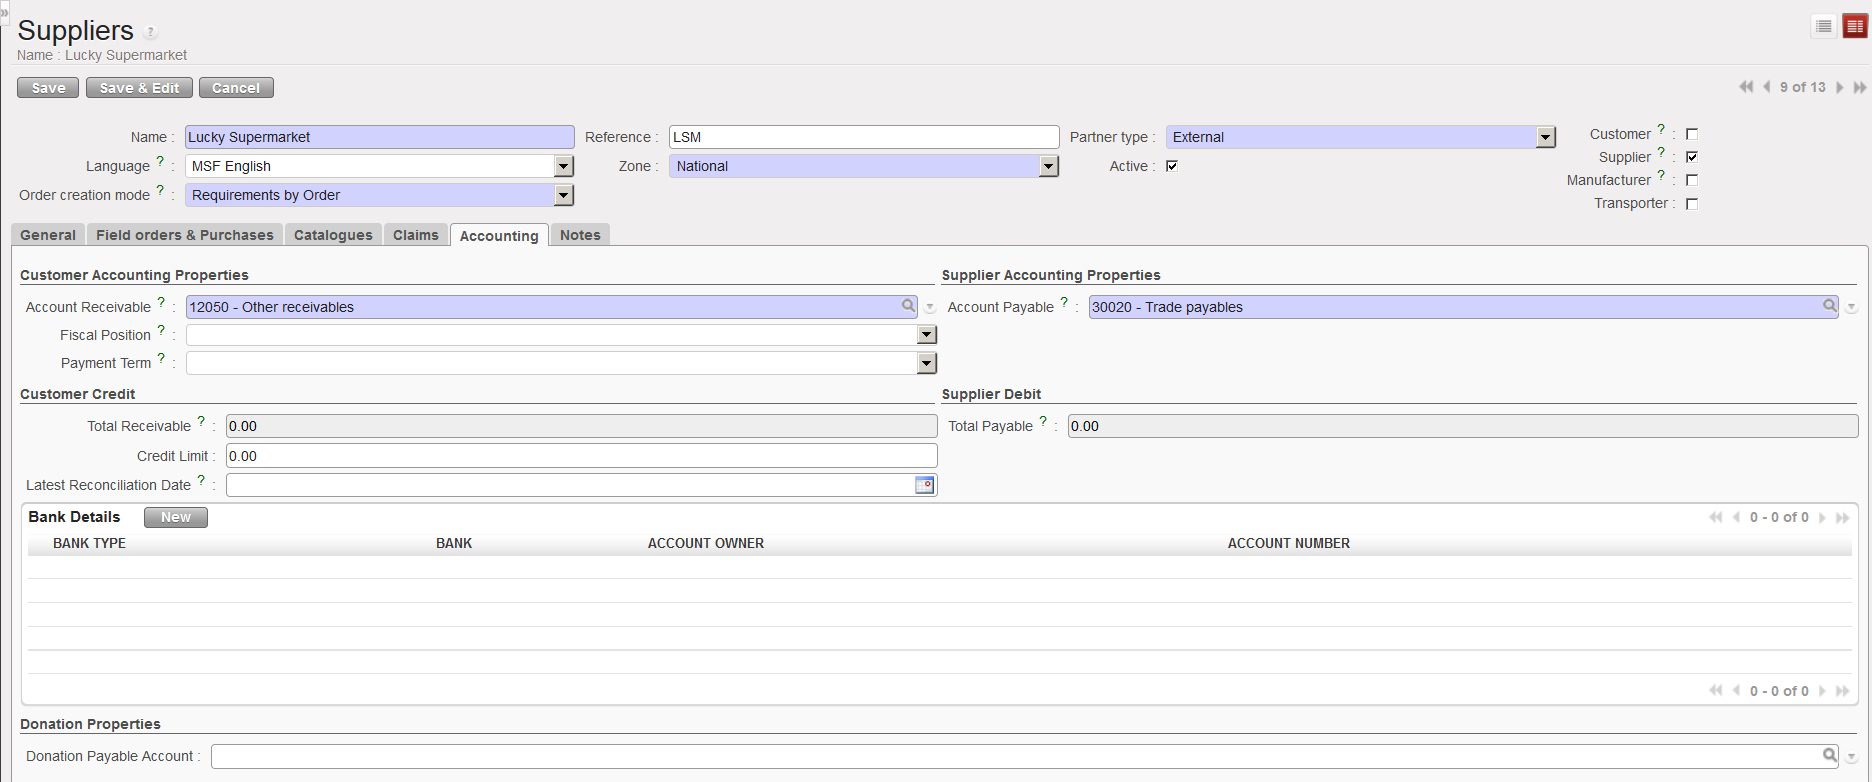
   19. On the “Accounting” tab, enter the appropriate account codes provided by Finance. These codes will vary according to the partner type. Do not enter any codes without being advised by Finance before as a wrong account will impact the accuracy of the financial statements.

Partner – Accounting tab

20. Complete the “Accounts Receivable” and “Account Payable” fields. The fiscal position remains blank as well as the payment term.

21. In the “Customer Credit” section, the “Total Receivable” is automatically computed and shows the outstanding debt your customer owes you. “Credit Limit” remains blank, as well as “Latest Reconciliation Date”. In the “Supplier Debit” section, the “Total Payable” indicates the outstanding debt you owe to your supplier.

22.  Finally, you can complete the partner “Banking Details” upon input from Finance.

23.  In the “Donation Properties” section, you need to complete the “Donation Payable Account” to record extra-accounting transactions (e.g. in-kind donations) for this supplier if relevant.

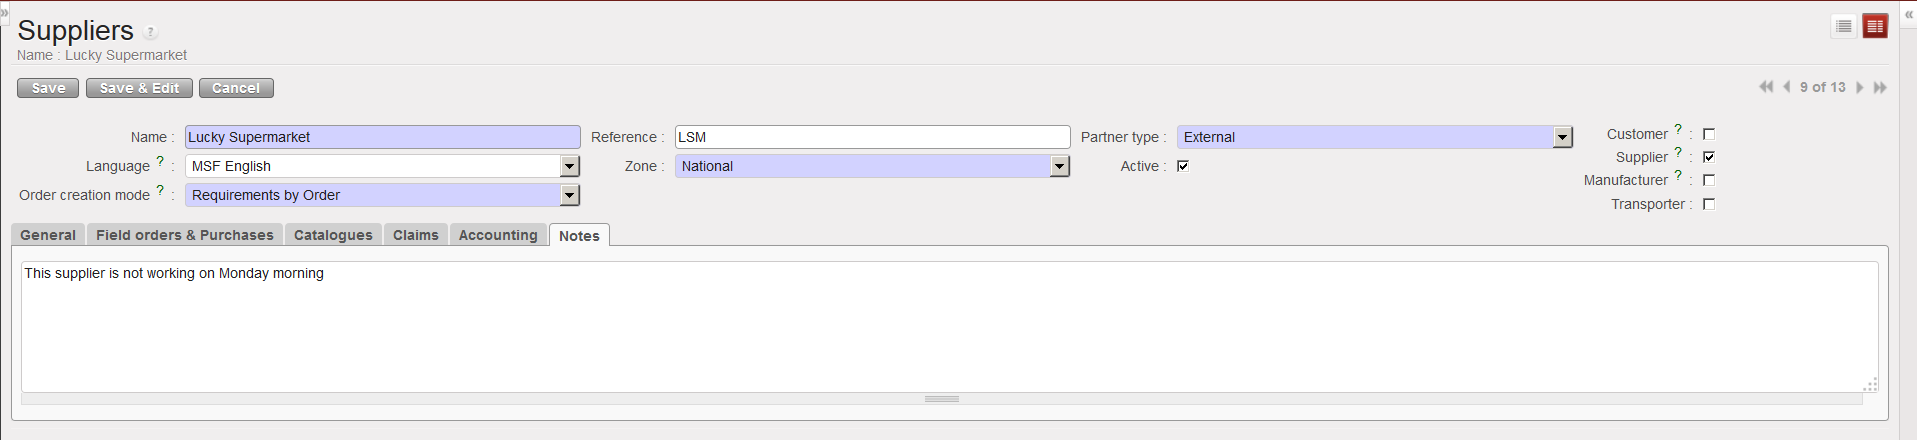
24. In the “Notes” tab, enter any additional relevant information related to the partner.

Partner – Notes tab

25. Click on the “Save” button.

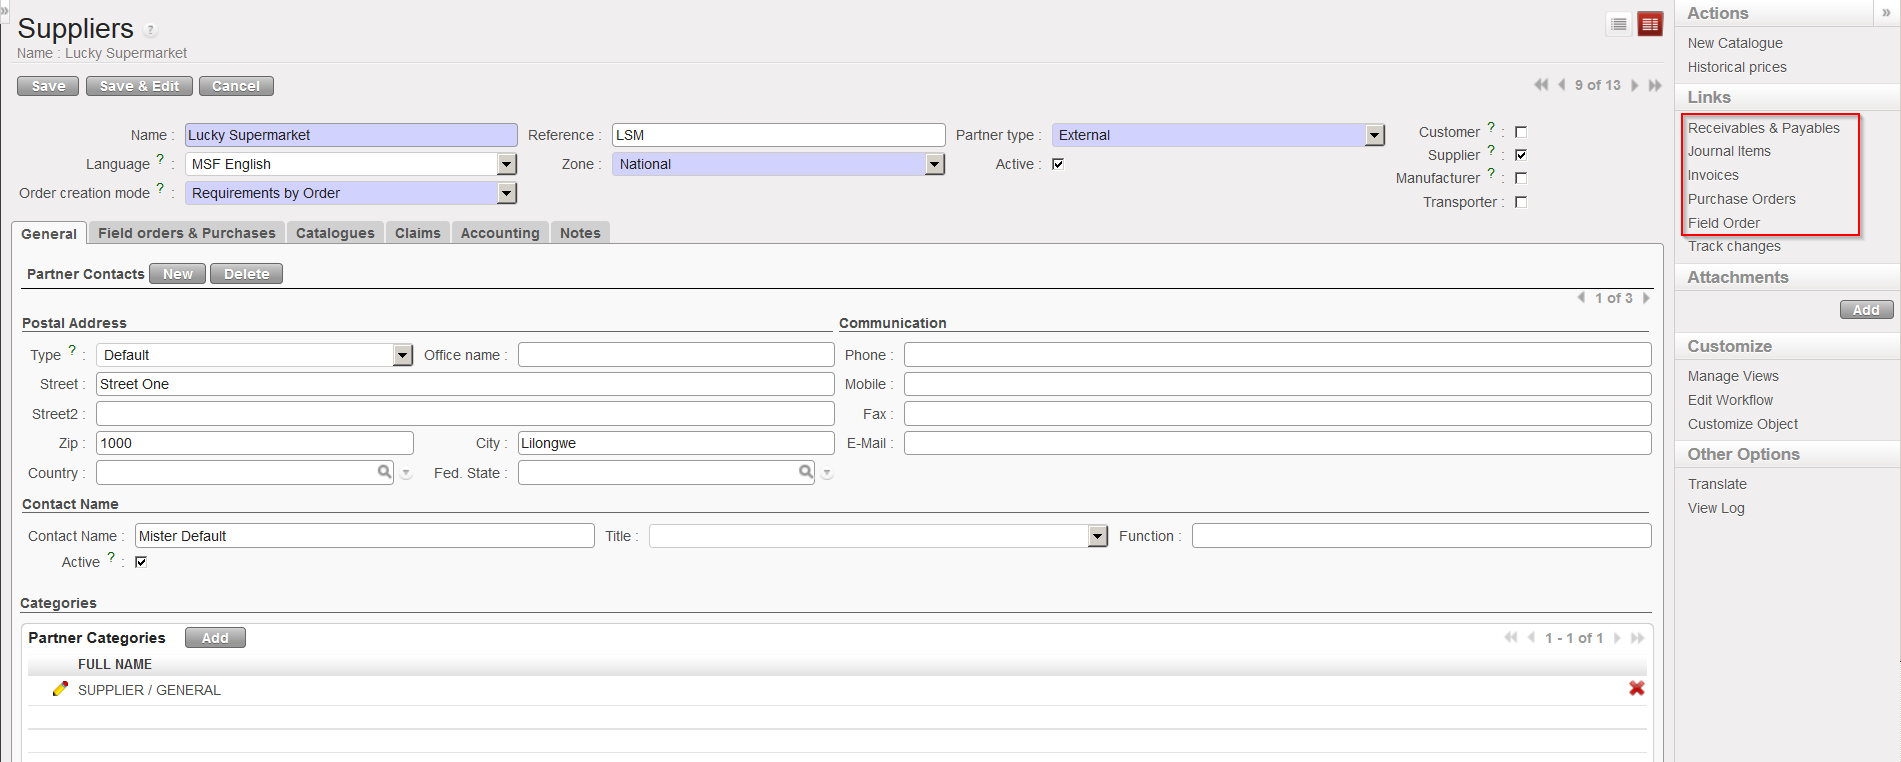
The Action Menu on the right-hand side contains additional links to other transactions such as Purchase Orders, Field Orders and Invoices which may involve the partner.

Partner – Action menu

Via the action menu, you also have the possibility to create a catalogue for the partner via the option “New Catalogue“.

A. LU-SU1102: PARTNERS

Supply User Manual ENG-> Supply Configurations-> 2.2 LU-SU1102:Partners(customers and suppliers)-> A. LU-SU1102: PARTNERS

LU Introduction

In UniField, a partner represents an entity that you do business with, such as a company or an organization.

A partner can be: Customer (a project or an organization you support), Supplier (any entity internal or external, which supplies the instance with goods), Transporter (partner providing logistics services) and Manufacturer (which may be relevant for certain drugs).

The partner type can be Internal (within the UF network and the mission), Intermission (within the UF network but from another mission of your OC) Inter-section (within the UF network but from another OC), External (all entities, MSF or not, not on the UniField network) or ESC (an MSF European Supply Center).

Example of external partner which is customer and supplier

H. LU-SU1101: How to inactivate configurable locations

Supply User Manual ENG -> Supply Configurations -> 2.1 LU-SU1101: Instance set-up -> H. LU-SU1101: How to inactivate configurable locations

H. LU-SU1101: How to inactivate configurable locations

The menu “Advanced Warehouse Management” should not be used but configurable locations which are not needed anymore can be inactivated.

Go to: Supply Configuration / Warehouse Configuration / Regular Warehouse Management / Remove a stock location

  1. In the field “Choose a location”, enter the name of the location you wish to inactivate.
  2. Click on the “Inactivate the location” button.
Inactivation of location

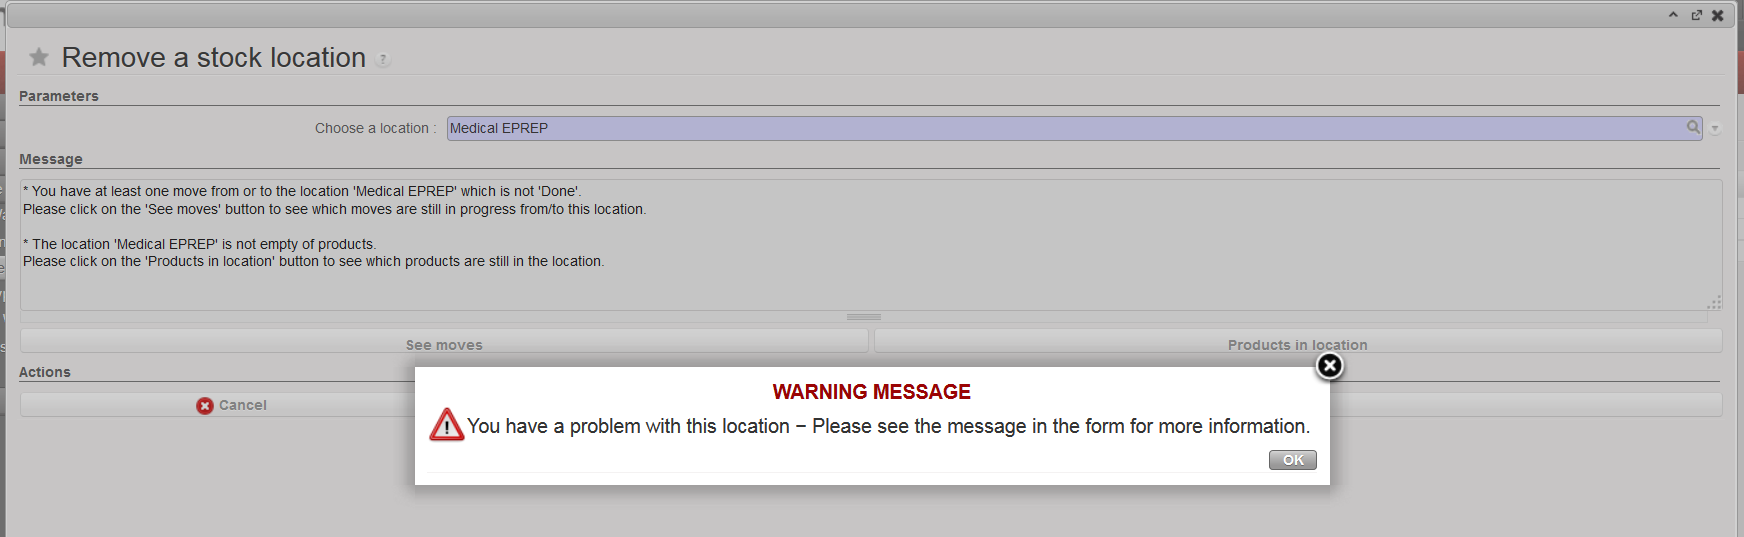
A location can only be inactivated if no stock movements related to this location are open and if no products are stored in this location. If this this not the case, when trying to inactivate a location, you will get the below message.

Inactivation of location not possible

The button “See moves” allows to see which stock movements related to this location are open.

The button “Products in location” allows to see which products are currently stored in the location.

If you want to inactivate a location, you will need to process the open stock movements and move the products out of the location.

F. LU-SU1101: Movements to/from the different type of locations.

Supply User Manual ENG-> Supply Configurations-> 2.1 LU-SU1101: Instance set-up-> F. LU-SU1101: Movements to/from the different type of locations.

F. LU-SU1101: Movements to/from the different type of locations.

How the different types of locations can be used can also be explained by listing the possibilities of movements to (destination) and from (source) these locations. This is what we try to do below. Note that the list of movements is not exhaustive. We only list the most commonly used movements. Additional information may be found in the Procurement chapter and in the Warehouse chapter.

1. Main stock (“Stock/MED/LOG”) as destination

If a PO is created from scratch, goods are received in the main stock “Stock/MED/LOG” (location selected according to the main type of the products) via the “Input” location after manual/automatic processing of the INT.

If a PO is created following the sourcing on order of an IR whose Location Requestor is a location of the main stock (“Stock/MED/LOG”), goods are received in the main stock “Stock/MED/LOG” (location selected according to the Location Requestor of the IR) via the “Input” location after manual/automatic processing of the INT.

Goods can be transferred to the main stock (locations “Stock/MED/LOG”) via an INT created from scratch.

Goods can be transferred to the main stock (locations “Stock/MED/LOG”) via an INT created following the sourcing from stock of an IR whose Location Requestor is a location from the main stock (“Stock/MED/LOG”).

Goods can be integrated into the main stock (locations “Stock/MED/LOG”) via an IN created from scratch.

2. Main stock (“Stock/MED/LOG”) as source

The main stock (“Stock/MED/LOG”) can be used as Source Location on a RCR.

The main stock (“Stock/MED/LOG”) can be used as Source Location in the OST when sourcing IR and FO.

The main stock (“Stock/MED/LOG”) can be used as Source Location on an INT created from scratch.

The main stock (“Stock/MED/LOG”) can be used as Source Location on an OUT created from scratch.

3. Intermediate Stock (IS) as destination

If a PO is created following the sourcing on order of an IR whose Location Requestor is an IS, goods are received in this IS via the “Input” location after manual/automatic processing of the INT.

Goods can be transferred to an IS via an INT created from scratch.

Goods can be transferred to an IS via an INT created following the sourcing from stock of an IR whose Location Requestor is this IS.

Goods can be integrated in an IS via an IN created from scratch.

4. Intermediate Stock (IS) as source

An IS can be used as Source Location on a RCR.

An IS can be used as Source Location in the OST when sourcing IR and FO.

An IS can be used as Source Location on an INT created from scratch.

An IS can be used as Source Location on an OUT created from scratch.

5. Internal Consumption Unit (ICU) as destination

If a PO is created following the sourcing on order of an IR whose Location Requestor is an ICU, goods are received in this ICU via the “Input” location after manual/automatic processing of the INT.

Goods can be transferred to an ICU via an INT created from scratch.

Goods can be transferred to an ICU via an INT created following the sourcing from stock of an IR whose Location Requestor is this ICU.

Goods can be integrated in an ICU via an IN created from scratch.

6. Internal Consumption Unit (ICU) as source

An ICU can be used as Source Location on a RCR.

An ICU can be used as Source Location in the OST when sourcing IR and FO.

An ICU can be used as Source Location on an INT created from scratch.

An ICU can be used as Source Location on an OUT created from scratch.

7. External Consumption Unit (ECU) as destination

If a PO is created following the sourcing on order of an IR whose Location Requestor is an ECU, goods are received in this ECU via the “Cross docking” location after manual processing of the OUT.

An ECU can be used as Destination Location on a RCR.

Goods can be transferred to an ECU via an OUT (or pick/pack/ship) created following the sourcing from stock of an IR whose Location Requestor is this ECU.

8. External Consumption Unit (ECU) as source

An ECU can be used as Source Location on an IN created from scratch in order to register a return to stock from a unit.

    PO from scratch PO < IR

RCR

Sourcing IR/FO in OST INT from scratch INT <IR sourced IN from scratch OUT from scratch OUT <IR sourced

Stock/MED/LOG

Destination

YES (1)

YES (1)

NO

YES

YES

YES

NO

NO

Stock/MED/LOG

Source

YES

YES

YES

NO

YES

IS

Destination

NO

YES (1)

NO

YES

YES

YES

NO

NO

IS

Source

YES

YES

YES

NO

YES

ICU

Destination

NO

YES (1)

NO

YES

YES

YES

NO

NO

ICU

Source

YES

YES

YES

NO

YES

ECU

Destination

NO

YES (2)

YES

NO

NO

NO

NO

YES

ECU

Source

NO

NO

NO

YES (3)

NO

  1. The destination is actually the destination of the INT linked to the IN (whose destination is “Input”) linked to the PO
  2. The destination is actually the destination of the OUT linked to the IN (whose destination is “Cross docking”) linked to the PO
  3. Used to return goods to stock from an ECU

The analysis could be pushed further by listing the possibilities of movements from/to:

-the “Input” location

-the “Cross docking” location

-the locations “Output”, “Packing”, “Dispatch”, “Distribution”

-the quarantine locations ” Quarantine (analyze)” and “Quarantine (before scrap)”

-the supplier locations “MSF Supplier” and “Other Supplier”

-the customer locations “MSF Customer” and “Other Customer”

-the virtual locations “Service”, “Procurement”, “Kitting”, “Inventory (loss & profit)”, “Destruction” and “Non stockable”.

Use cases for these locations are explained in the chapter Warehouse and in the chapter Procurement.


G. LU-SU1101: How to create configurable locations.

Supply User Manual ENG-> Supply Configurations-> 2.1 LU-SU1101: Instance set-up-> G. LU-SU1101: How to create configurable locations.

G. LU-SU1101: How to create configurable locations.

Go to: Supply Configuration / Warehouse Configuration / Regular Warehouse Management / Create new stock location

     1. Select the Location usage

  • Stock – to create an Intermediate Stock
  • Consumption Unit – to create a (Internal or External) Consumption Unit
  • EPREP – to create an emergency contingency stock

2. If you have selected Consumption Unit, you must specify the Location type

  • Internal – to create an Internal Consumption Unit
  • External – to create an External Consumption Unit

     3. Enter the Location Name

Note that as locations will often be sorted alphabetically in the system, it may be helpful to codify them properly.

4. Click on the Confirm button to create the location

Creation of location

Note that the menu “Advanced Warehouse Management” should not be used.