Supply User Manual ENG -> 5. Warehouse -> 5.12 LU-SU4205 Replenishment Rules -> C. HOW TO PARAMETER THE INVENTORY REVIEW CONFIGURATION
C. HOW TO PARAMETER THE INVENTORY REVIEW CONFIGURATION
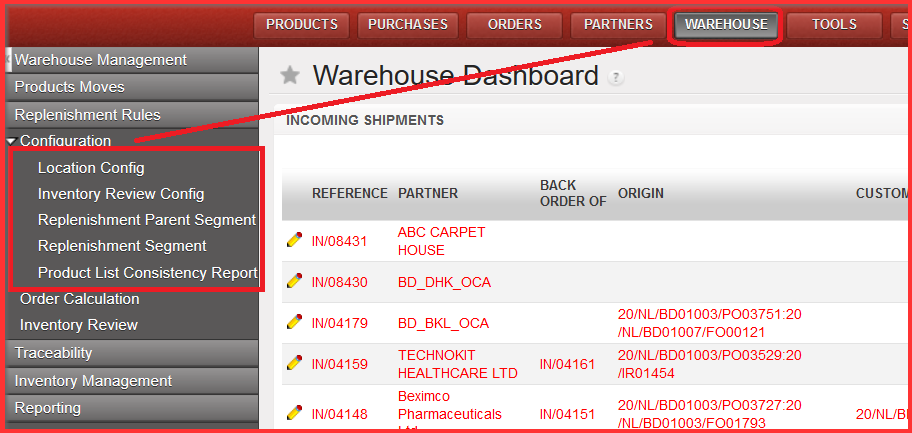
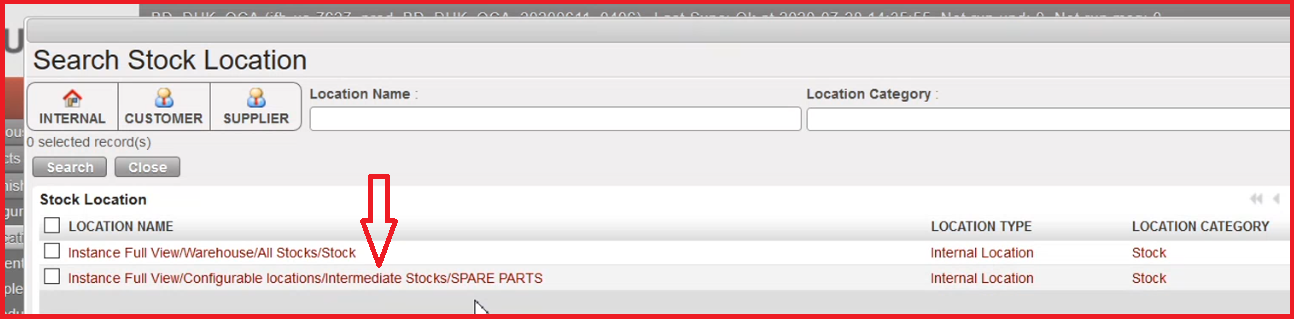
Go to: Warehouse / Replenishment Rules / Configuration / Inventory Review Config
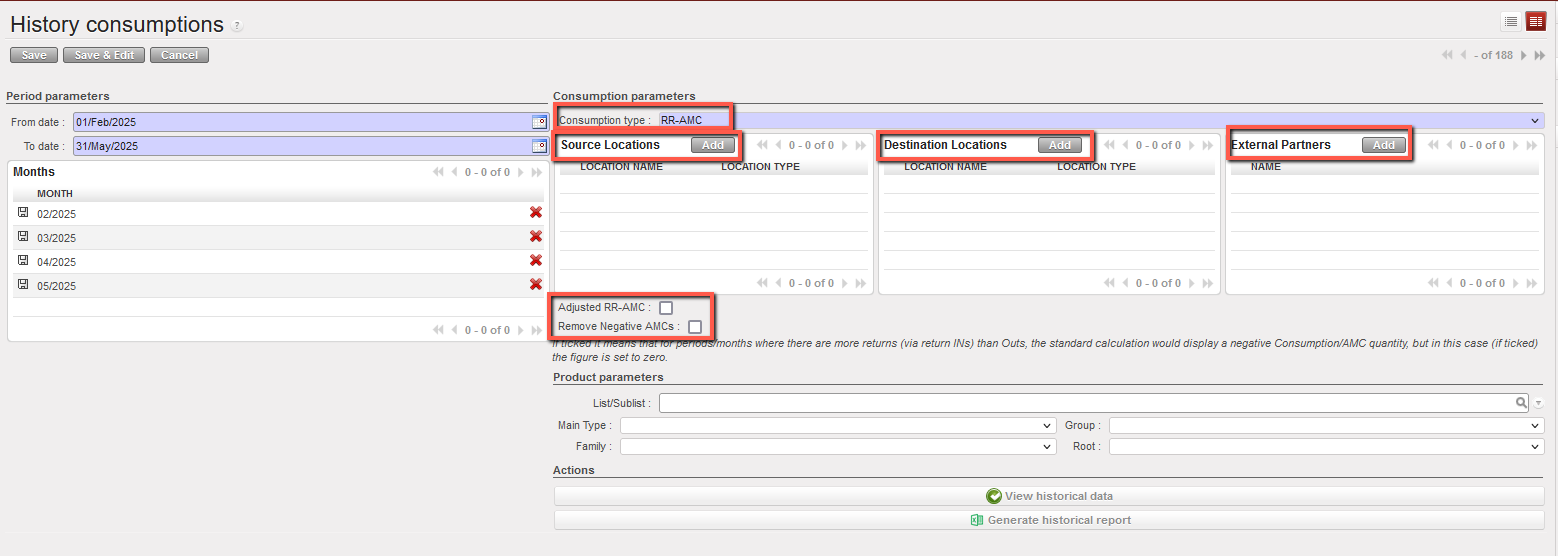
It is a configuration of the parameters needed to be shown in a whole inventory review. It is the screen in UF where the parameters are configured which we want to have displayed in the inventory review report after that step.
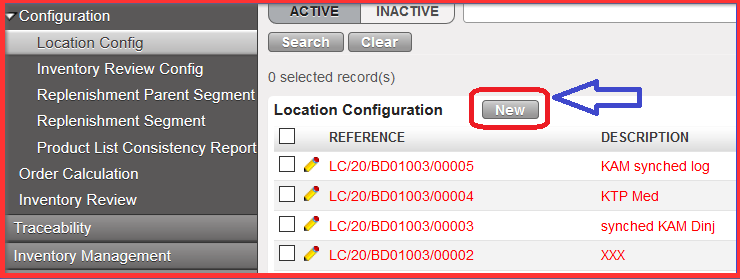
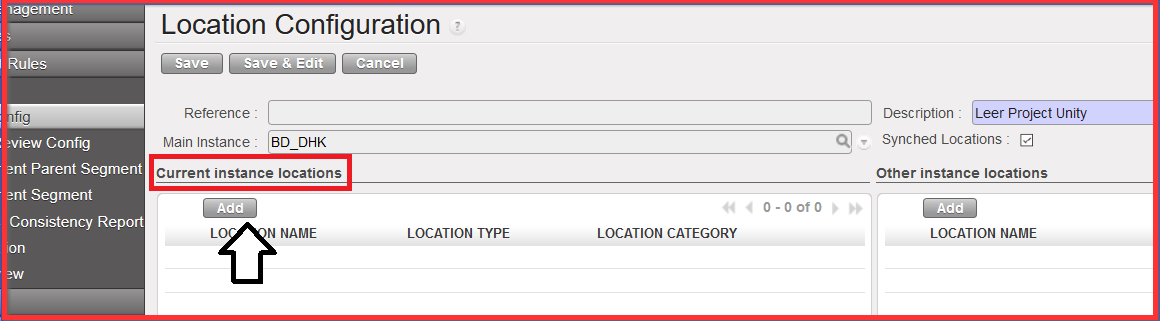
1.Choose the specific Location Configuration reference (created above)) and click on the desired line with relevant reference which is visible in specific format as follows (LC/XXX):
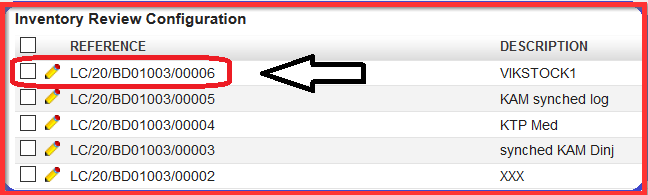
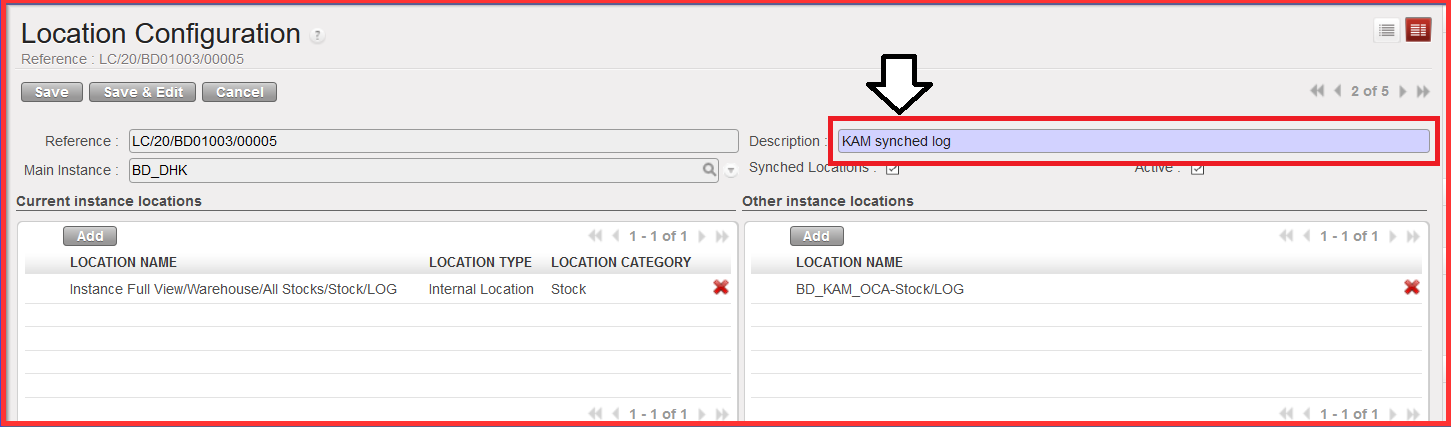
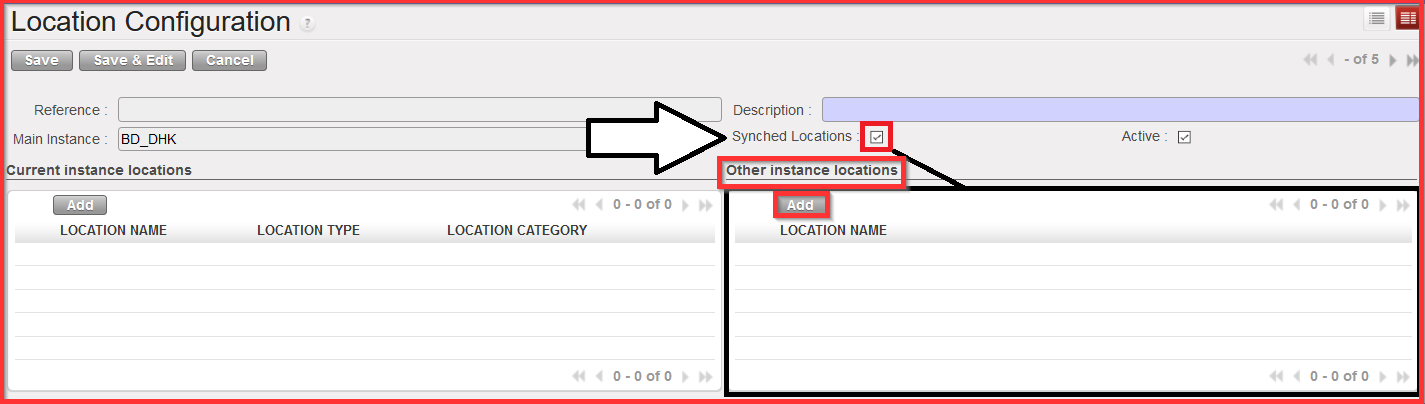
Or you click directly on the pencil ![]() (edit the line) of the needed “REFERENCE” number created the step before in order to get Inventory Review Configuration screen. Here we can decide what we can see in our Inventory Review which is the submenu section of Configuration. Basically, we must set up our needs and configuration in order to get desired output for our RR configuration.
(edit the line) of the needed “REFERENCE” number created the step before in order to get Inventory Review Configuration screen. Here we can decide what we can see in our Inventory Review which is the submenu section of Configuration. Basically, we must set up our needs and configuration in order to get desired output for our RR configuration.
|
|
|
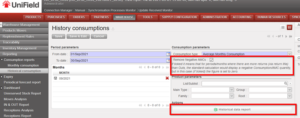
Inventory Review Configuration screen |
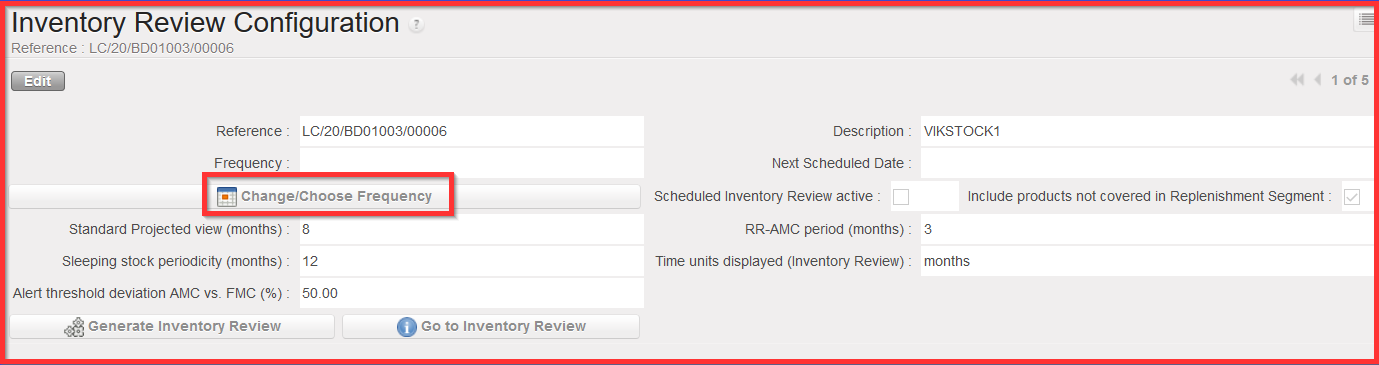
2. Click on “Change/Choose Frequency configuration” (see print screen above) in order to determine the choice of the frequency; how often the inventory review report is generated.
3. Chose “Periodicity” from the drop down list from the popup screen “Repeat Options” (see below): Daily, Weekly, Monthly or Yearly
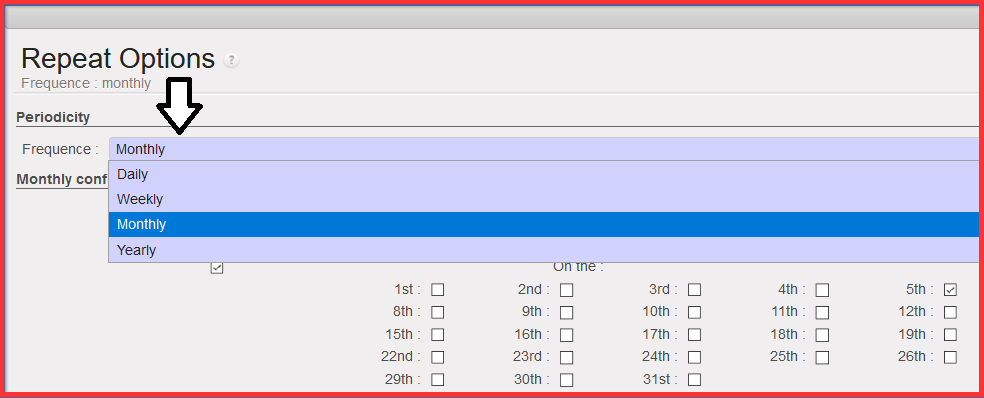
4. Chose the “Daily/ Weekly/ Monthly or Yearly configuration” (depending on the Frequency you selected above).
a) First select how often you need to generate the report: “Every” 1/2/3…Days/Weeks/ Months or Year.You will have different fine-tuning options depending on the Frequency you chose.
b) You can chose to run the Inventory every Monday/ Tuesday…of a week; or every first/second.. Monday/ Tuesday… of a month; or every 1st, 2d, 3rd…day of a month…
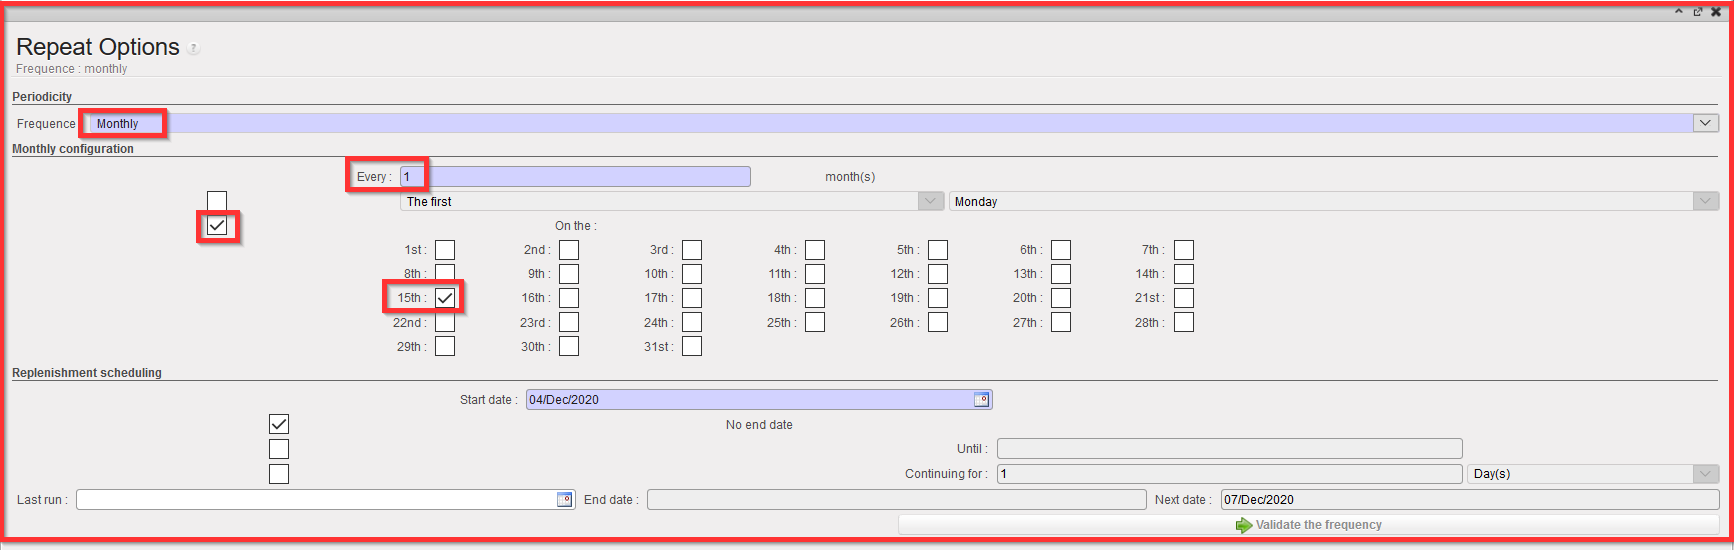
In the example below with the 2d checkbox ticked for a monthly Periodicity and the 15th of each month. The Inventory review will be run every 15th of a month.
|
|
|
Monthly Configuration – every 15th of the month (example) |
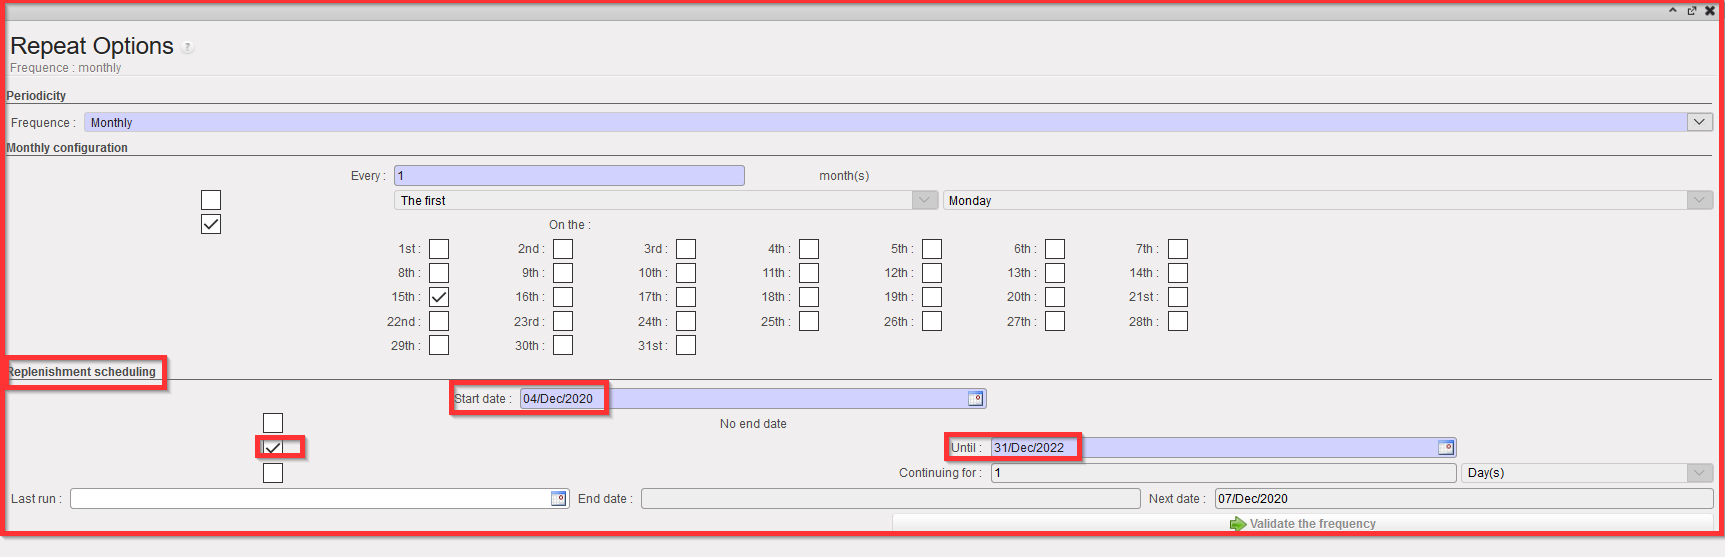
5. Set the “Replenishment scheduling” dates:
a) “Start date” is by default set to the date of the day but can be edited
b) Defines the date range between which the Inventory Review is generated.
i) Set “No end date” (if 1st check box is ticked)
ii) Set “Until” a specific date or (if 2d checkbox ticked) (example taken below)
iii) Set for a defined period of time (i.e.: for 1/2/3…days/Weeks/ Months or Years) by filling the “Continuing for” fields (if 3rd checkbox is filled)
The next ordering date will be updated at the bottom of the screen when it is validated in the “Next Date” field. Selected date is the start of the repeat options cycle.
|
|
|
Replenishment scheduling – from 04/Dec/2020 till 31/Dec/2022 (example) |
6. Click on “Validate the frequency”. You will be directed back to the “Inventory Review Configuration” screen. Note that the “Frequency” and “Next Scheduled Date” have been updated.

NB: if you click again on “Change/ Choose frequency” and go back to the “Repeat option” pop up, you will see that the “End date” and the “Next Date” have been updated as well.

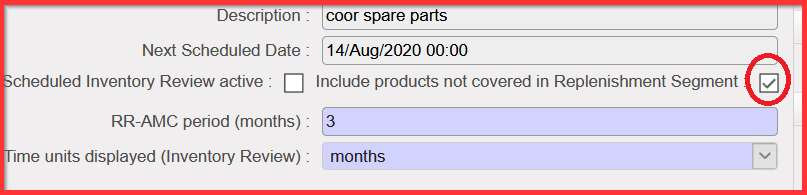
7. Back to the “Inventory Review Configuration” screen, the fields below all have a default value that you can/should review/update to customize your needs (see print screen below):
a) Standard Projected view (months): how far in the future the report will show us
b) Sleeping stock periodicity (months): if the products have no consumption for last (xxx months). Usual default sleeping stock periodicity configuration is 12 months.
c) Alert threshold deviation AMC vs. FMC (%): defines the difference of what we projected in our forecast and what is the actual committed status of the consumption based on the operations of relevant unit. It is configured based on the supply unit needs and alignment among the field stakeholders. Default ratio used for the scenario is value of 50.00.
d) RR-AMC period (months): number of months taken into account for the RR-Average Monthly Consumption calculation (please note that the RR-AMC is different from the AMC in the rest of the system since it is specific to the configured location)
e) Time Units displayed (Inventory Review): filter option to get displayed in months, weeks or days

f) Scheduled Inventory Review active (checkbox): if ticked it means that inventory Review Configuration will be generated according to “Change/Choose Frequency” option chosen.
If you untick it will be generated manually by user.

g) “Include products not covered in Replenishment Segment” (checkbox): if ticked (default) it includes every product in Location selected.
If unticked, it only includes the products in Replenishment Segment (to be explained in chapter below).
If the user unticks it means that all products (no matter what the user selects in created Replenishment Segment) in location which the user selected be also in the report. It means e.g. if you select particularly something like category “MED” it means the generation of all linked products to that category and it makes the report much larger. It might be useful to get entire overview of the products within that specific location, which is very good for planning purposes.