Supply User Manual ENG -> 4. Procurement -> 4.2 LU-SU3101: Internal Requests (IRs) -> B. How to create an Internal Request
B. How to create an Internal Request
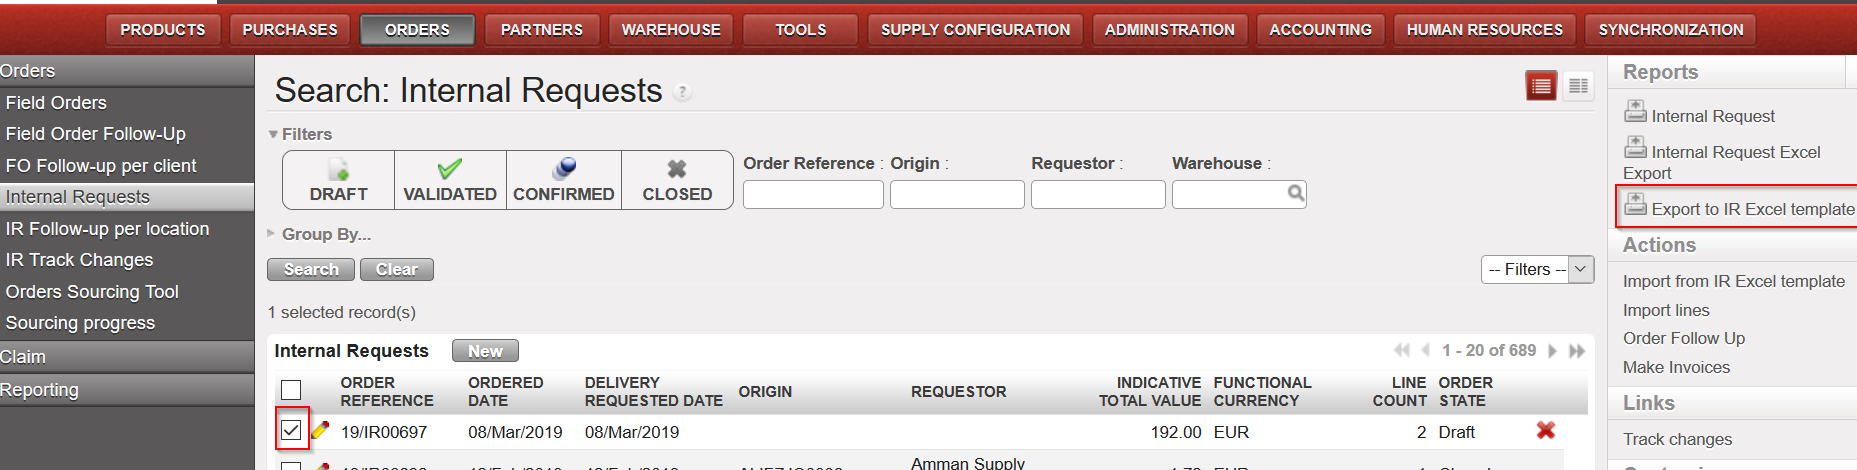
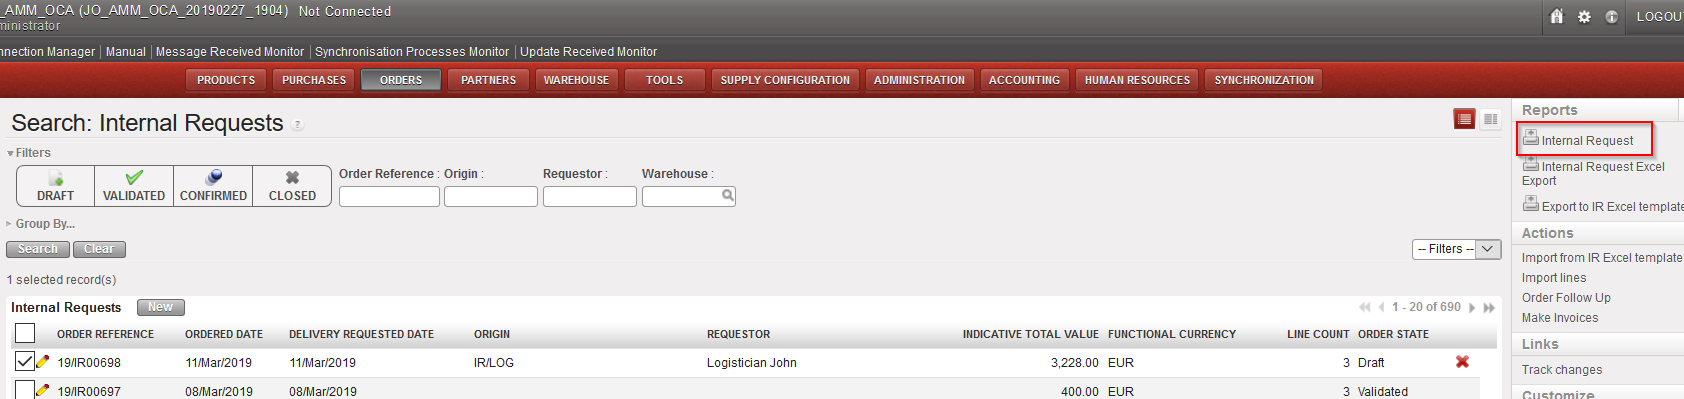
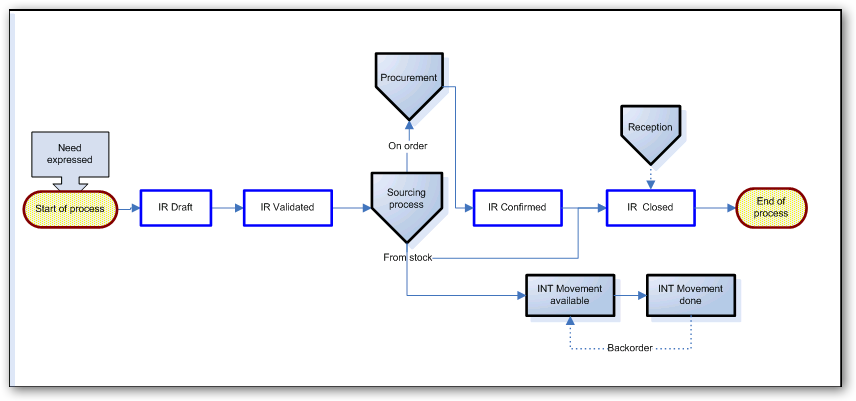
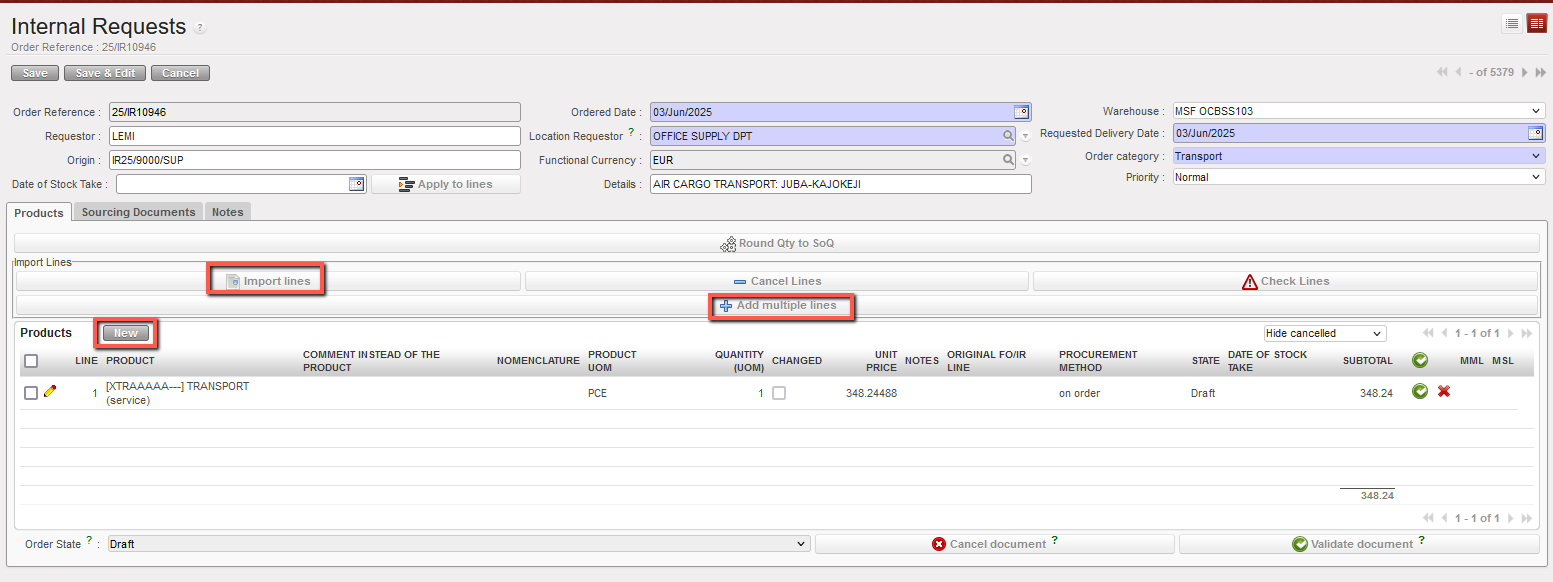
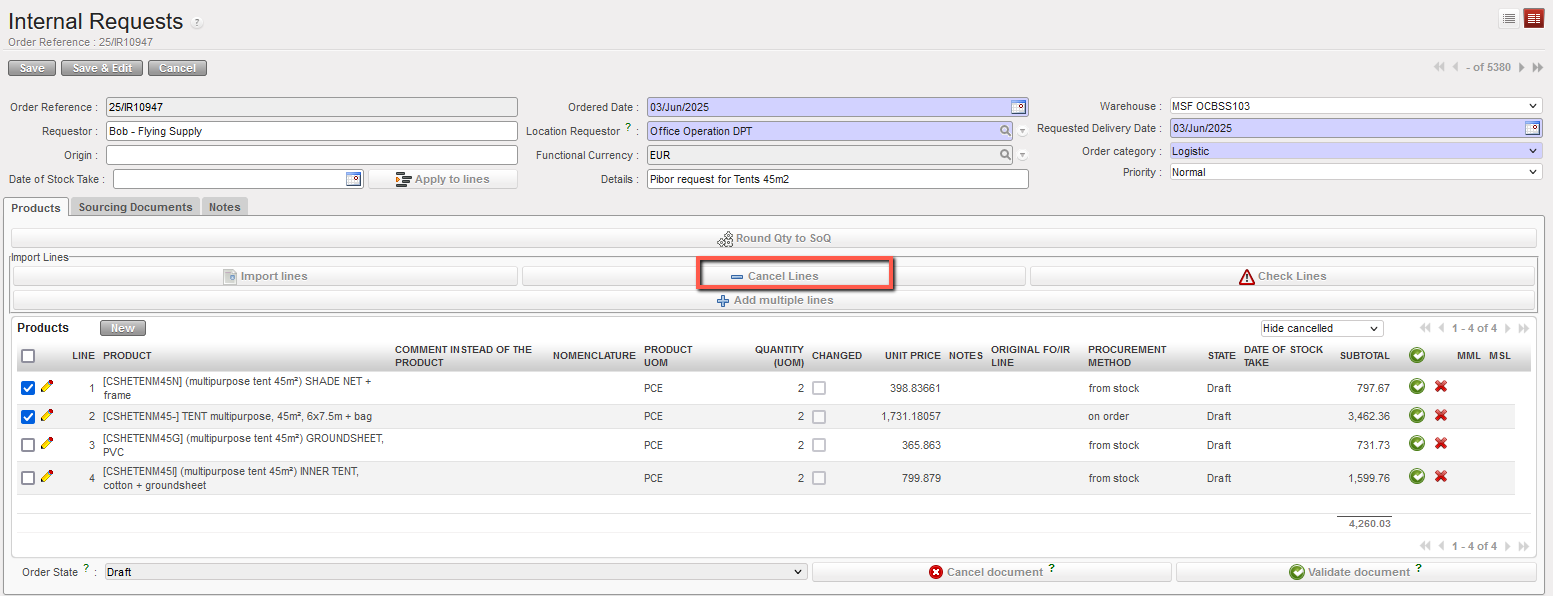
Go to: Orders / Orders / Internal Requests
- Click on the “New” button.
- Type the requestor’s name in the “Requestor” field.
- Enter the “Location Requestor“. This is actually the destination location, where the goods should be delivered. You may enter a regular stock location (LOG/MED), an intermediate stock, an internal consumption unit or an external consumption unit.
NB: These different locations types are explained in details in the Warehouse chapter It is important to determine correctly from the beginning where the goods are expected to be received since this information will follow through the whole procurement process till delivery and it will impact on other transactions such as IN or OUT (see LU-SU4101 Incoming Shipments and LU-SU4105 Delivery Orders in the Warehouse chapter).
4. Enter the requested (delivery) date in the “Requested date” field using the calendar button (i.e. when the goods are expected to be received by the requestor).
5. As “Origin”, you may type an information explaining what triggered the creation of the IR (paper request form reference, e-mail reference, …).
6. Select an order category available from the drop-down list next to the “Order category” field. Encoding the proper category will help you to better classify your Internal Requests. Note that if you try to include in an IR a product whose main type does not comply with the order category (i.e. if you try to include a LOG product on a MED IR), you will get a -non blocking- warning message.
 |
| Warning message on IR |
7. If the IR is created following an inventory that was done before, you may enter as “Date of Stock Take” the date at which this inventory was done. This information will be useful to measure key performance indicators (KPIs) in a later stage.
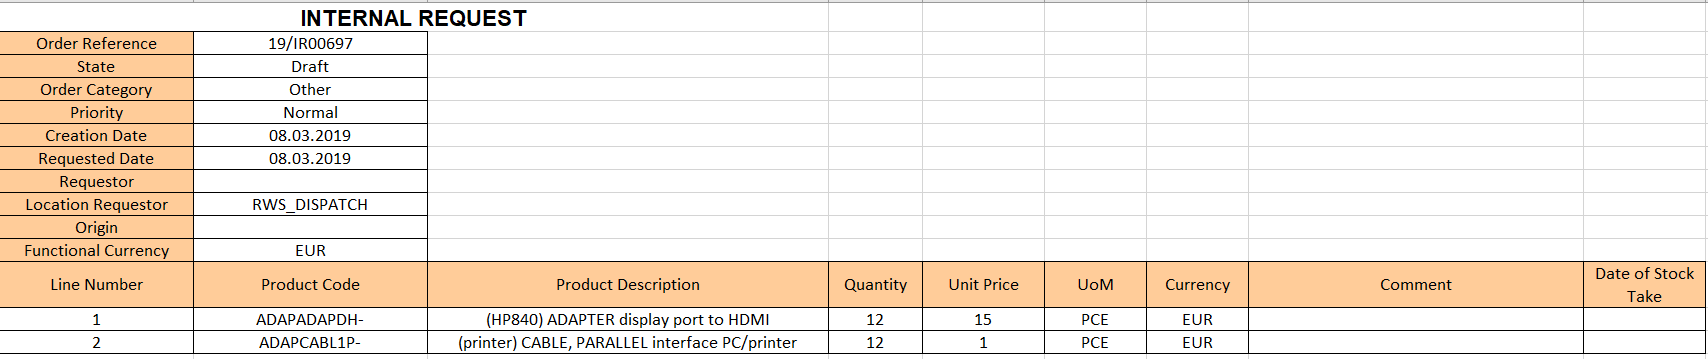
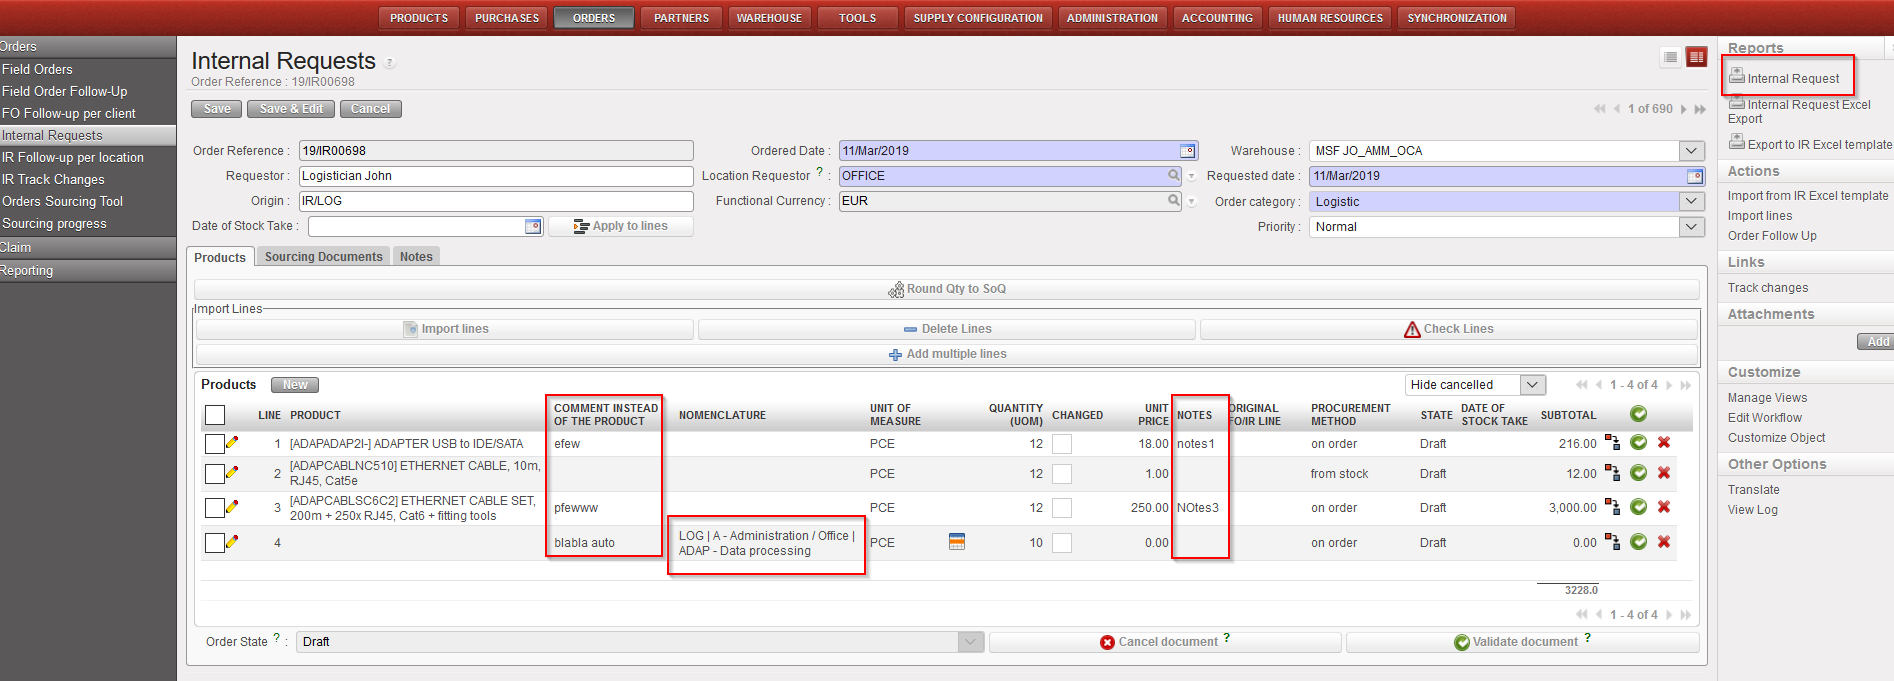
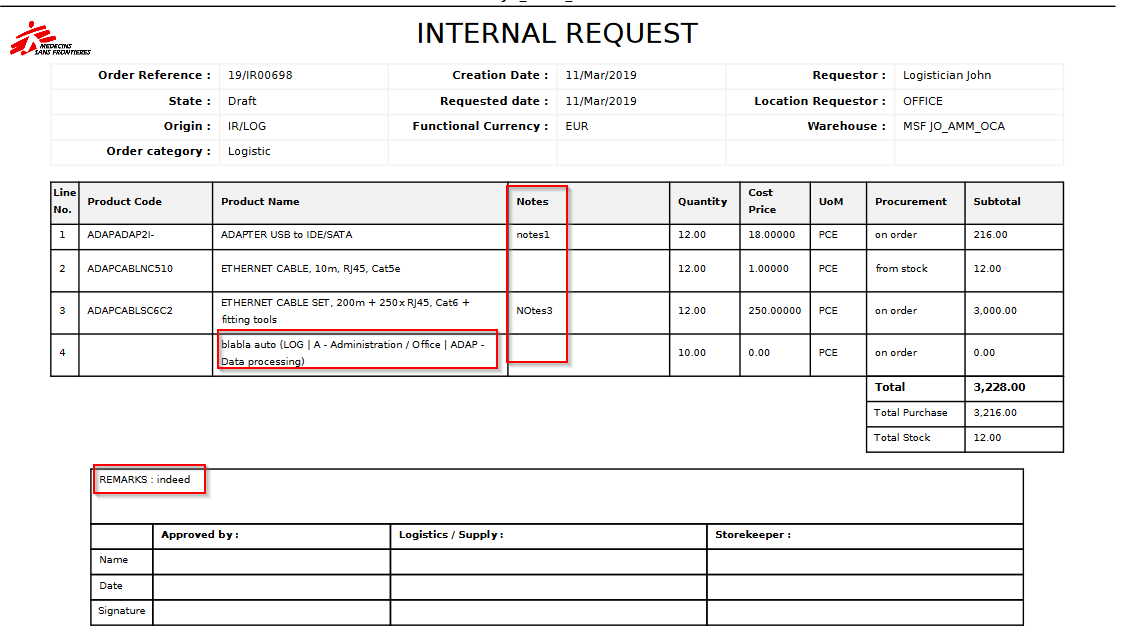
8. In the “Details” field, you can enter the order name or any details of the Internal Request and will be transferred to following documents including OUT (or Pick if converted).
9. On the “Notes” tab you may enter a description of the IR if needed. This text will appear on the PDF file if you decide to print the IR (but won’t be transferred to subsequent documents).
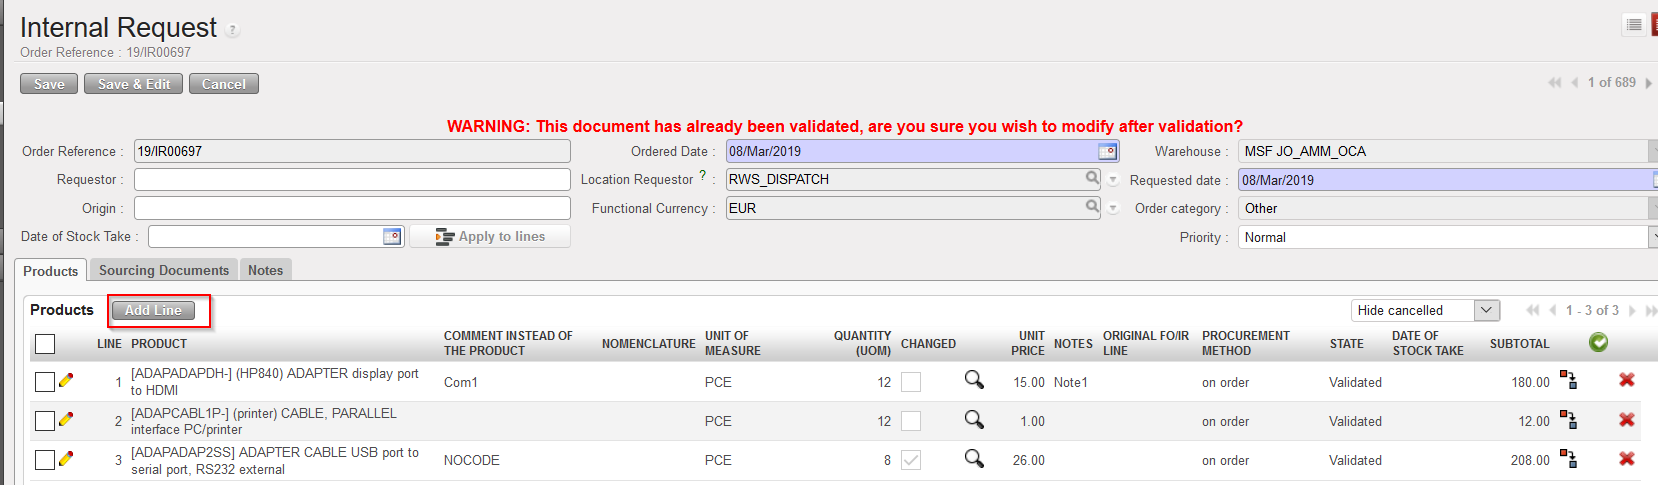
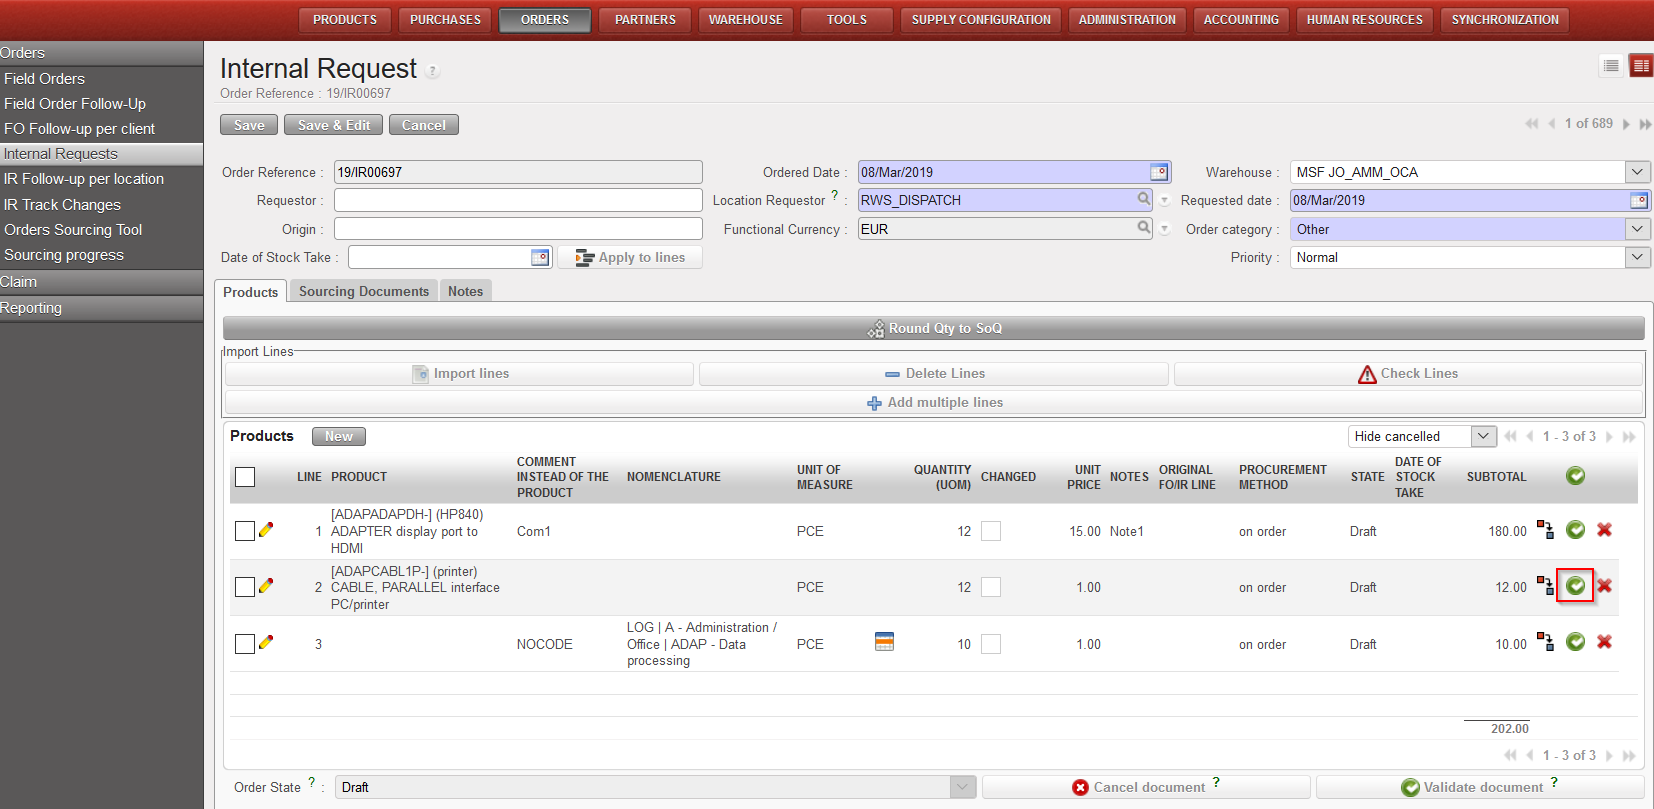
10. Insert product lines manually by clicking on the “New” button in the “Products” tab to add products one by one or on the “Add multiple lines” button to add several products at once.
10.1 “New” button: enter (part of) the product’s code or (part of) the description in the “Product” field and select the product you need or click on the magnifying glass icon to open the “Search Products” screen. Search and select the product you need by its name, nomenclature or any other filter available.
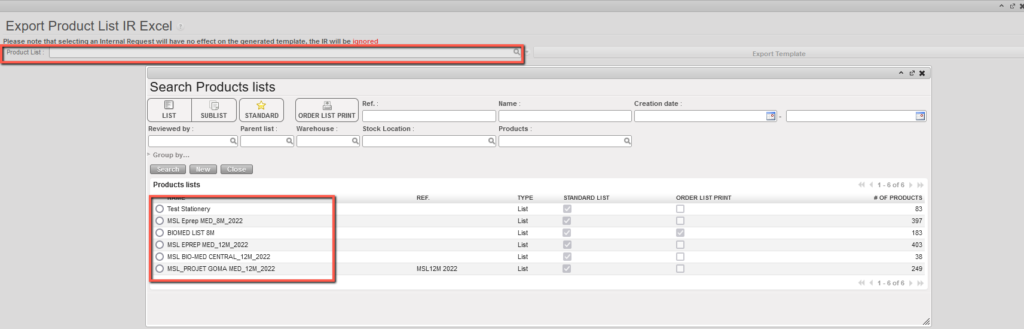
10.2 “Add multiple lines” button: click “Add” on the pop-up screen and search for the products you want to add from the “Search Products” screen. Use the relevant filters: Nomenclature, Description, Code, Lists, Catalogues,… Select the products you need by ticking the boxes at the left of the corresponding products lines and click on “Select” to add them in the list of products you want to include in your IR. Once you have all the products you need click on “Add products”. Note that quantities can already be entered on the “Add multiple products” pop-up screen.
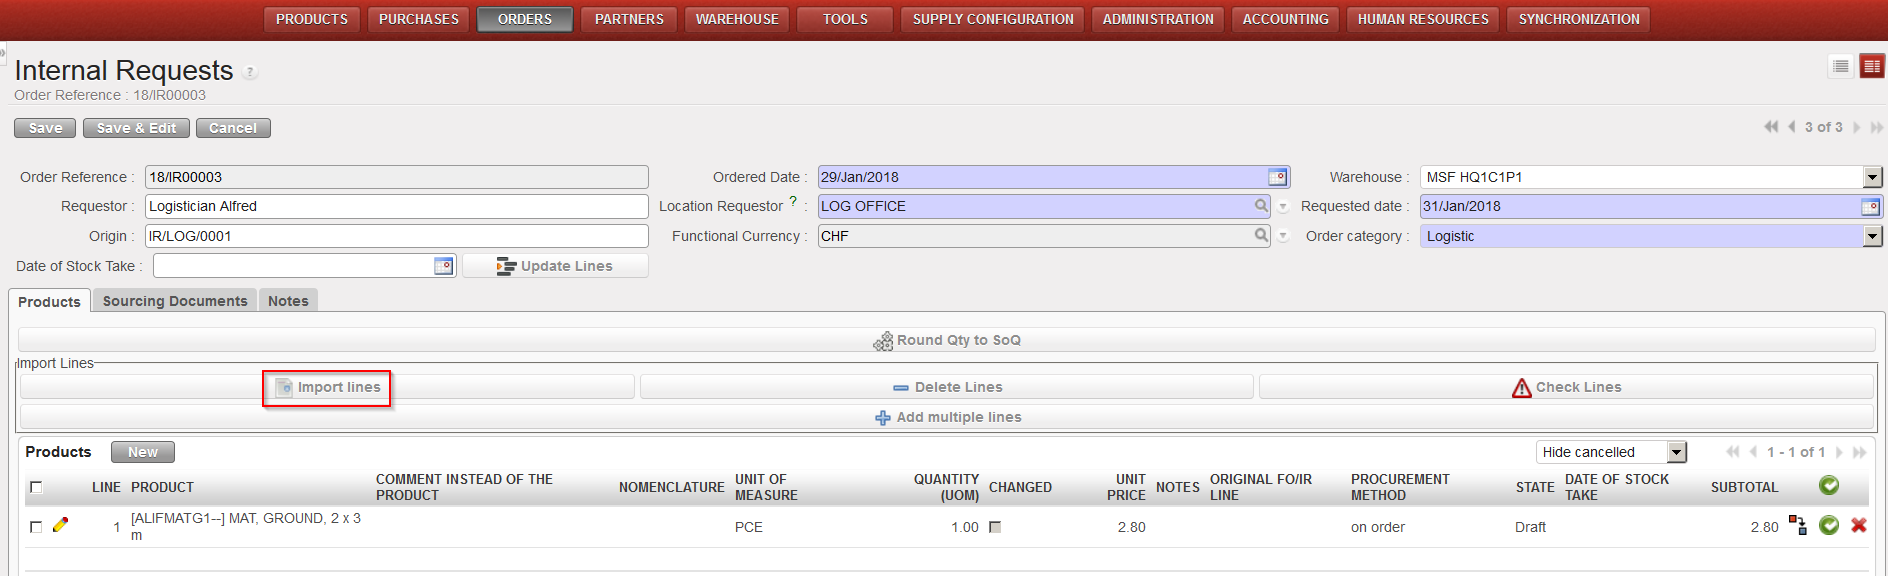
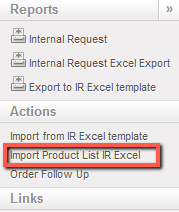
NB: We will see later that it is also possible to import product lines from an Excel file (via the “Import lines” button). This may highly facilitate the encoding as requestors often transfer their requests to the supply department via Excel file.
| |
| Adding lines on an Internal Request |
11. If you want to enter in the IR a generic (non-codified) product to be specified (codified) later, encode its description in the “Comment instead of the product” field (see below for more details on this). This comment will be carried out through all the documents of the supply flow from the ordering process till the final stock movement (and will be transmitted via synchronization). Note that this field is also available if you have entered a regular (codified) product and can be used to further clarify your request. This comment will be printed on the IR (PDF) if no codified product has been entered but won’t appear on the print-out (PDF) if a codified product has been entered.
12. On the product line, check and change the UoM (Unit of Measure) if necessary. This is usually not needed as most of the products are managed in pieces (PCE).
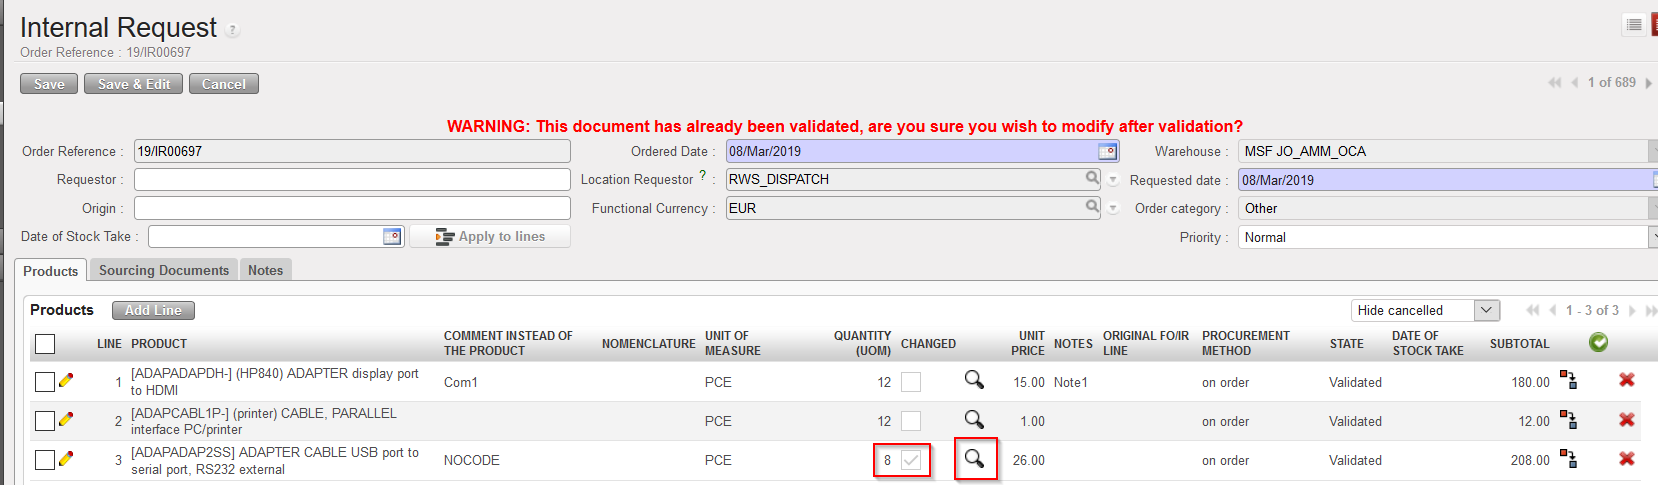
13. Enter the required quantity in the “Quantity” field.
Note: Note that “Quantity” and “Unit Price” can not exceed a certain number of digits (but still quite large numbers are allowed and a warning message will be displayed in case you reach that maximal capacity).
14. Enter a price or modify the price proposed by the system if needed. The price proposed by the system is coming from the PMD sheet. Note that the price which appears on IR will not be pulled through to any following document (so is for visibility within IR document only).
15. In the “Notes” field you may enter additional information if required. This information will appear if you print the IR (PDF) but will not be transferred to subsequent supply documents.
16. If you wish to change the procurement method (from stock/on order) proposed by the system (and coming from the PMD sheet), modify it in the “Procurement Method” field. Note that this method will be decided definitively at a later stage in the Orders Sourcing Tool.
17. The date of stock take can be specified at line level as inventories may have been done at different dates according to the products.
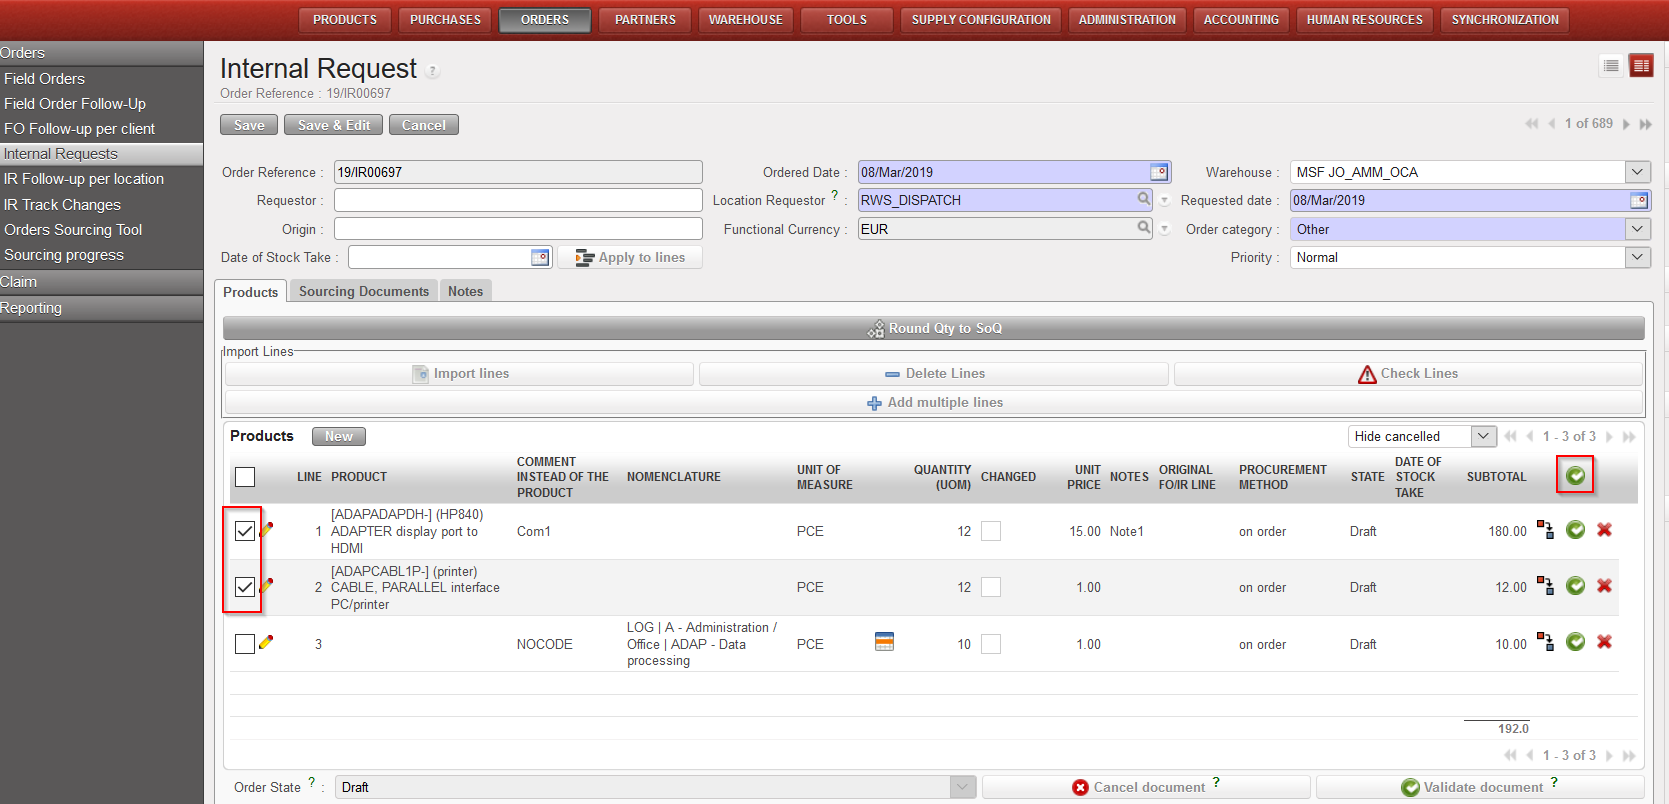
18. Save the line by clicking on the floppy disk  at the right of the line or via a click on “Enter”.
19. For multiple items, repeat for as many lines as needed.
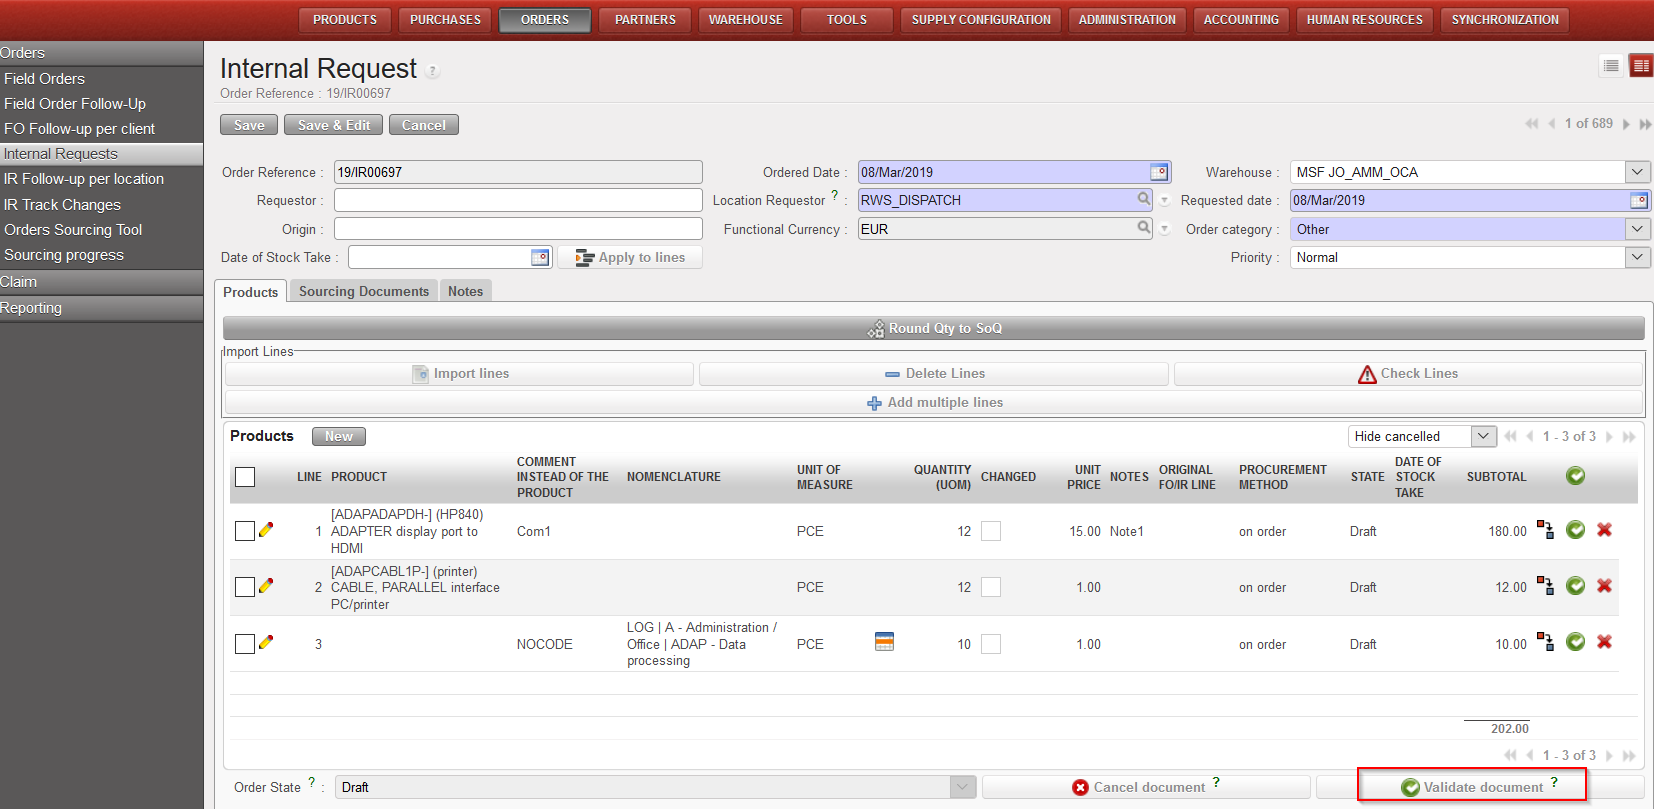
20. Click on the “Save” button at the top of the screen to save the Internal Request.
21. Optionally, you can click on “Round qty to SoQ” (see LU-SU3401 for further details on this feature).
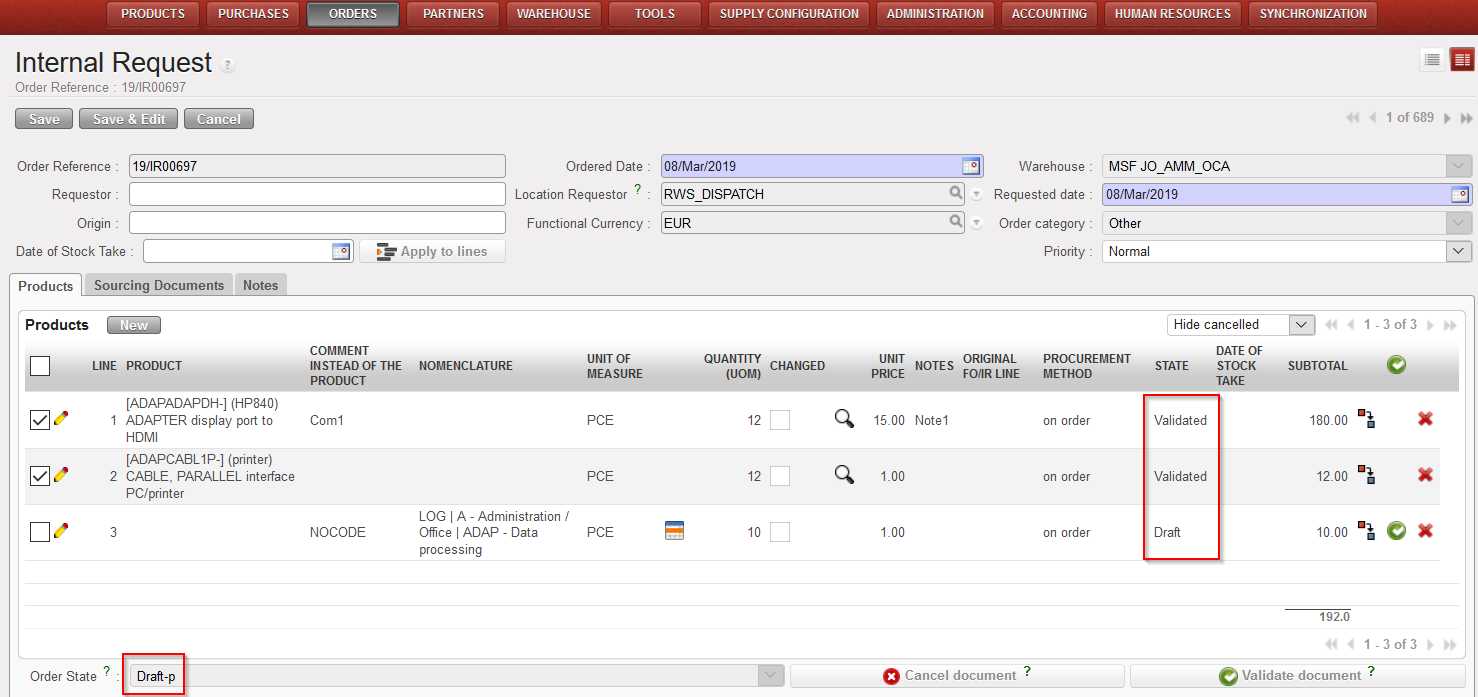
22. The Internal Request is saved in “Draft” status and all the lines of the IR are in “Draft” status.

| |
| Adding a product line on an IR |
In case you made a mistake and need to delete some lines you can delete them either by clicking on the red cross at the end of the product line or by clicking on the “Delete lines” button if you want to delete several lines in one click .
 next to the IR you wish to update to open it in edit mode.
 at the left of the line you wish to update.
 at the right of the line or via a click on “Enter“.