Finance User Manual ENG -> 2. Finance Configurations -> 2.5 Analytic Accounts -> LUFI-20502 Cost Centers and Proprietary Instances
LUFI-20502 Cost Centers and Proprietary Instances
A. LU Introduction
The cost centers set-up is done when creating the instances at HQ level by the person in charge of the finance master data creation and maintenance. (See IT User Manual for more information).
The set-up assigns the cost centers to a defined proprietary instance. It enables limiting the selection of cost centers available when booking an entry on an income or expense account. It indicates how budgets should be consolidated within a mission and automates the cost center reference for PO and FO. This is an important task to perform to ensure costs and incomes are properly tracked.
The set-up encompasses:
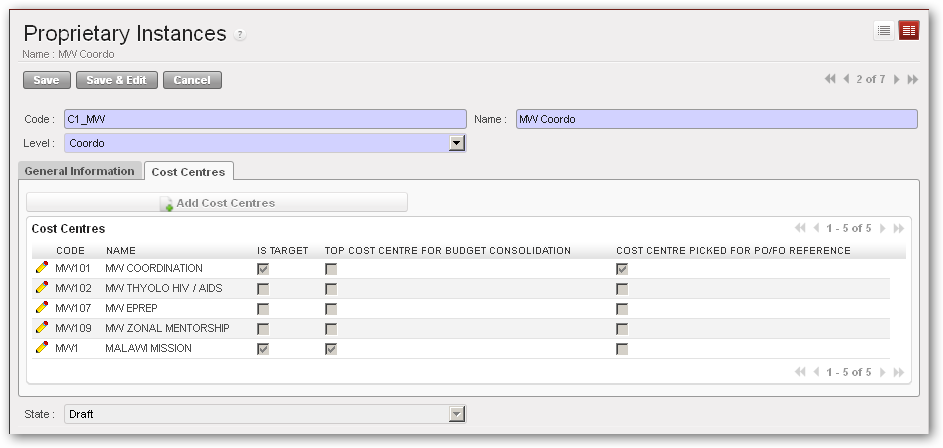
- Linking associated cost centers to a proprietary instance to define which cost centers should be synchronized to a specific proprietary instance (mission or field). In the example below the proprietary instance/mission is Malawi Coordination.
- The “Is Target” attribute is used for synchronization purposes and to define which cost center is managed through the concerned proprietary instance. Several target cost centers will be linked to one instance in case coordination or project manages several cost centers, for example a coordination managing an emergency preparedness (EPREP) budget, or, a project managing a hospital and mobile clinic activities. A cost center can be set as {Target} in one and only one proprietary instance.
- The top cost center is chosen for budget consolidation attribute definition. In the example below MW1 will group together all Malawi Cost Centers.
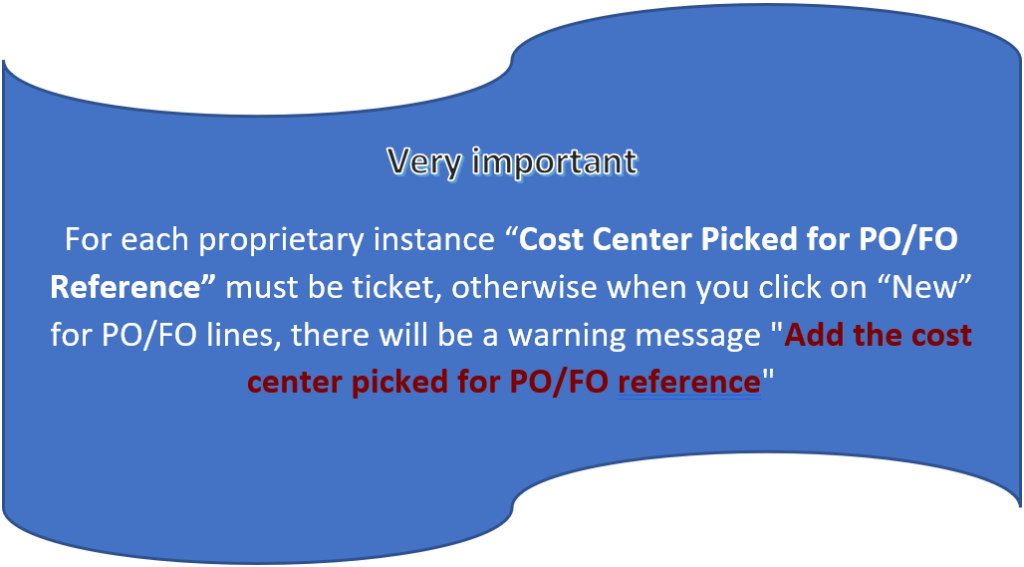
- The Cost Center Picked for PO/FO Reference must be selected in order to be used as a reference in the supply documents like Purchase Orders or Field Orders. In the example below this would be MW101.
This configuration is created in Administration/Configuration/Proprietary Instances.
In case several projects are managed from a single location (at project level, not from coordination), HQ will need to create an intermediate cost center in order to consolidate budgets at project level. See below an example:
Creation of an intermediate cost center to consolidate budgets at project level.
Proprietary instances form view accessible from Administration/Configuration menu
In the case above budget consolidations can be made for both at ZW00 level and at ZW1 level.

B. How to Configure Cost Centers Linked to a Proprietary Instance
HQ will need to link specific cost centers to the appropriate instance.
Go to: Administration/Configuration/Proprietary Instances
- In the proprietary instance Search view, select the instance to link to cost centers
- In the proprietary instance Form view, go to the Cost Centers tab
- Click on the {Add Cost centers} button
- Select all cost centers from the instance and Add Cost Centers to close the window
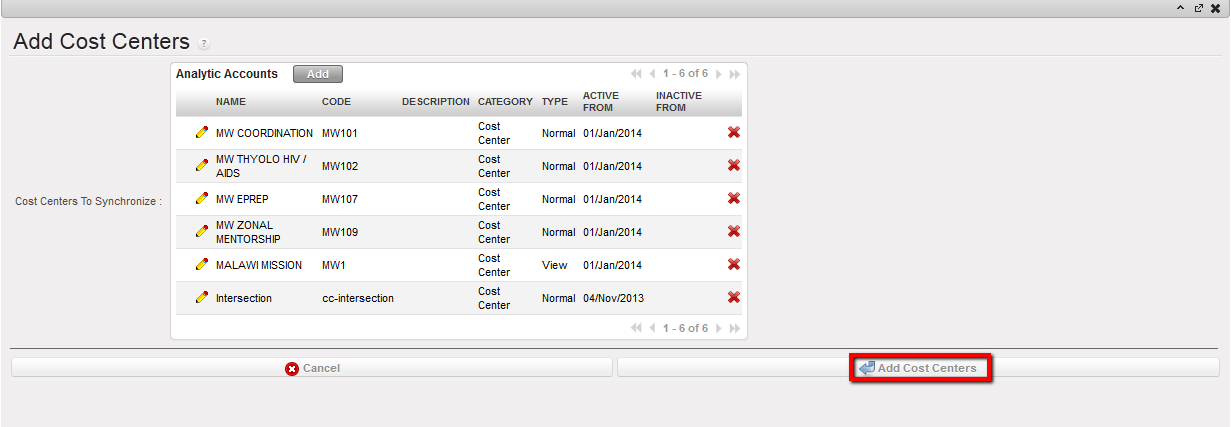 Adding cost centers to a proprietary instance
5. Select one {IS Target} cost center representing the instance. A cost center can be set as target in only one instance. Click on  to edit the line and save
  .
.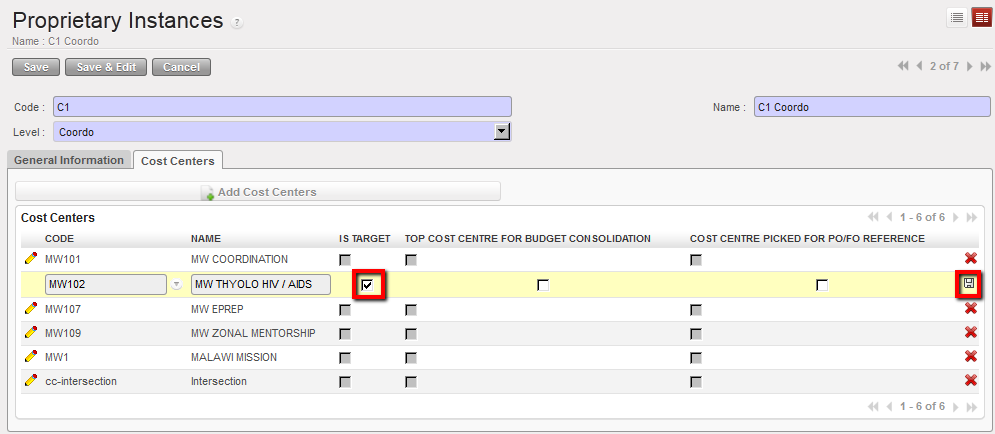 Selecting IS TARGET
6. You will select the code of the cost center that will determine up to which level the system will automatically create consolidation budgets (the one corresponding to the view cost center). You perform this action by ticking a {Top cost for budget consolidation}.
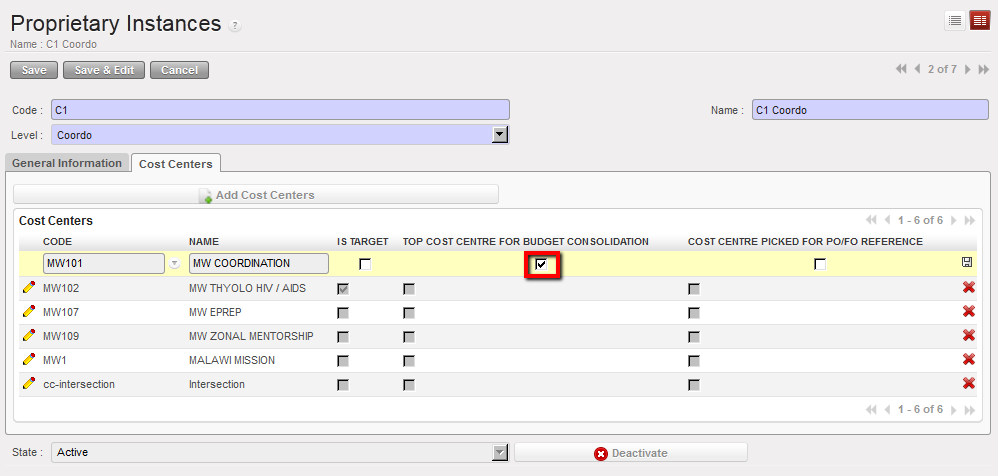 Selecting Top cost center for budget consolidation
7. Finally you will choose the cost center used in all Purchase Order (PO) / Field Order (FO) identification (i.e.MW101). The system will use this parameter as a reference in all PO/FO codes. It is a key reference on the supply side that could be used for international orders billing (from ESC to HQ).
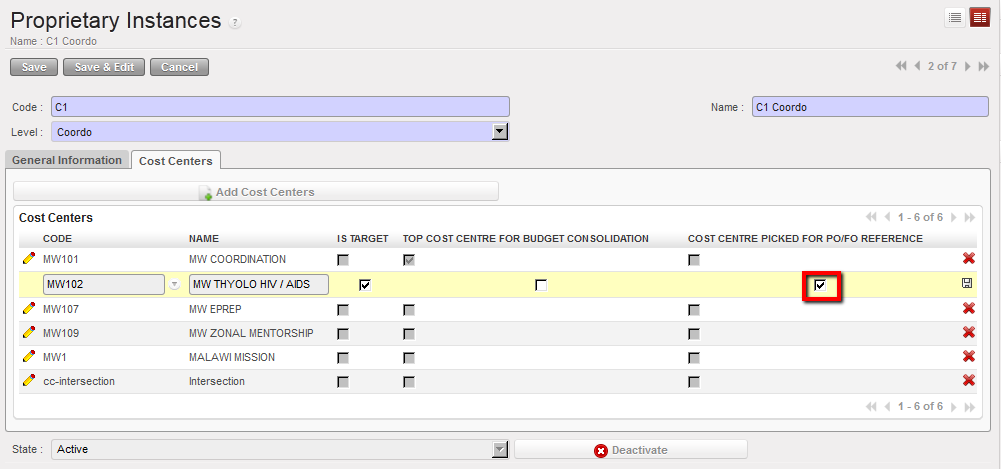 Selecting Cost center for PO/FO reference
8. Save your selection.
C. How to Remove a Cost Center Linked to a Proprietary Instance
Go to: Administration/Configuration/Proprietary Instances
If you need to remove a cost center from the set of cost centers linked to a proprietary instance, click on the  of the cost center line.
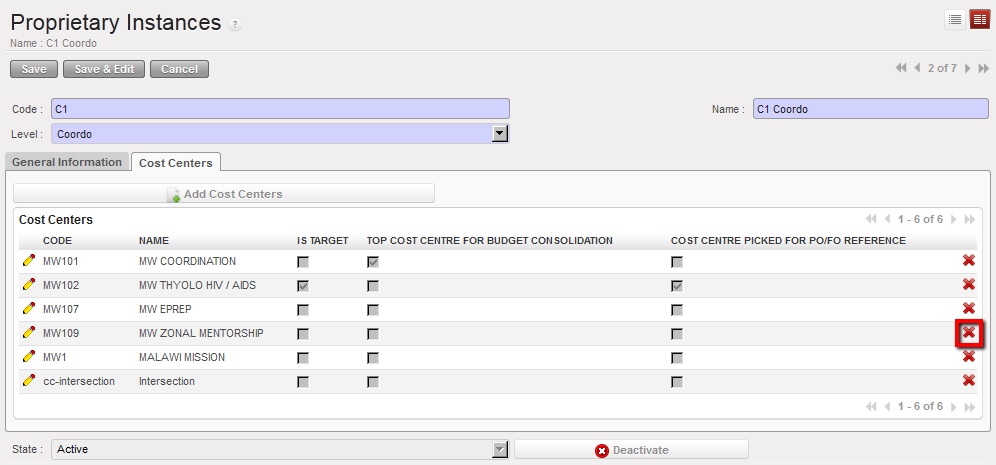 Using located on the cost center line to remove the cost center from the proprietary’s cost center setting
How to Set Up Cost Centers When Several Projects Are Managed in One Location
In case several projects are managed from a single location (at project level, not from coordination), HQ will need to create an intermediate cost center in order to consolidate budgets at project level. See below an example:
Go to: Administration/Configuration/Proprietary Instances
- Follow the steps above
- Create an additional cost center and add it to the instance which is managing two projects. In the example below the user would create ZW00 in proprietary instance 2 (Harare Project) as a view account to be used as a top cost center for budget consolidation.
Creation of an intermediate cost center to consolidate budgets at project level.
In the above case, budget consolidations will be in done in ZW00 to cover both ZW007 & ZW020.
How to Manually Create a Cost Center
Go to: Accounting/Configuration/Analytic Accounting/Analytic Accounts
- To create a new cost center, select {New} button
- In the {Name} field, enter a cost center name.
- In the {Code} field enter a cost center code.
- In the {Category} field, select {Cost Center}.
- In the {Parent Analytic Account} field, select the associated parent analytical account using the magnifying glass
 . To do so, check your cost center tree.
 - In the {Type} field, select {Normal}.
- In the {Activation period} tab, select a date.
- In the {description} tab, add notes if relevant
- Click {Save} button.
The cost center is created
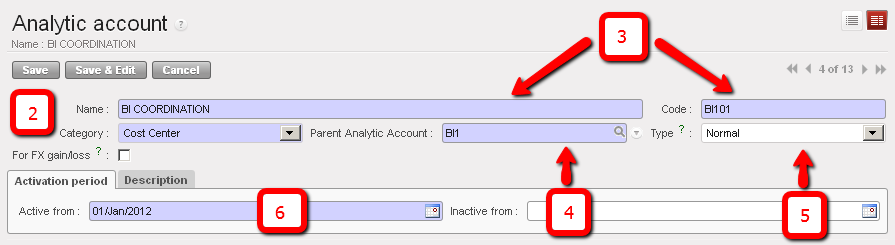
Cost center creation

Change account code of FXA entries allocation based on account code involved in the reconciliation
Some FXA entries might be generated when performing the reconciliation, whether the account was internal transfer currency exchange or any other account in case of rounding difference.
You can decide on which FXA account you want the FXA entries generated by reconciliation to be booked. You can define that by changing the setting on any Balance sheet account to be reconciled. If you didn’t specify that, then the FXA entries will take automatically the default FXA account.
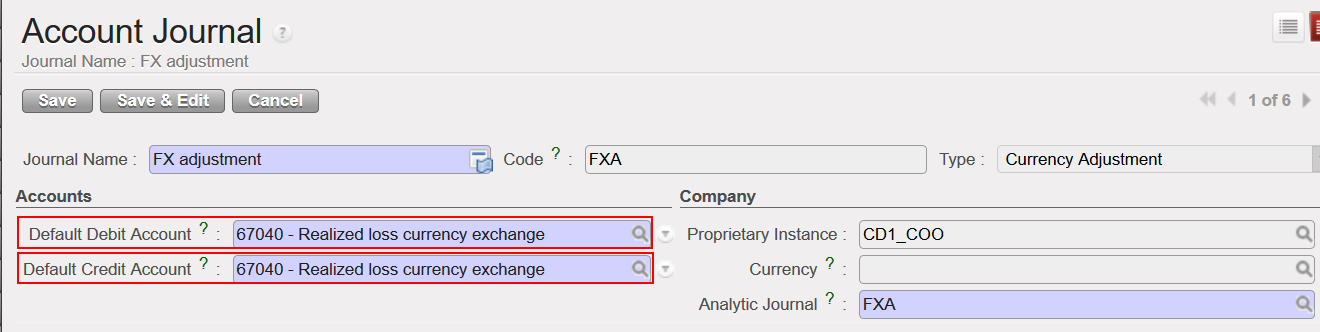
The default account for FXA entries is set in the FXA Journal (usually 67040 and or 71110) and those account codes are used for any FXA entries generated by the system.
In the chart of account, each account code “Reconcilable” have now 2 additional fields (Default Debit / Credit Account for Reconciliation) where account code for FXA can be filled. Those account codes will prevail on the default account code for FXA set in the FXA Journal.
For instance, you can choose to have automatically the account 67050 to be used for any FXA entry related to the account 14130 (internal transfer currency exchange rate) by defining that in the configuration of this account otherwise the system will keep taking automatically the default FXA account set in the FXA Journal (67040).
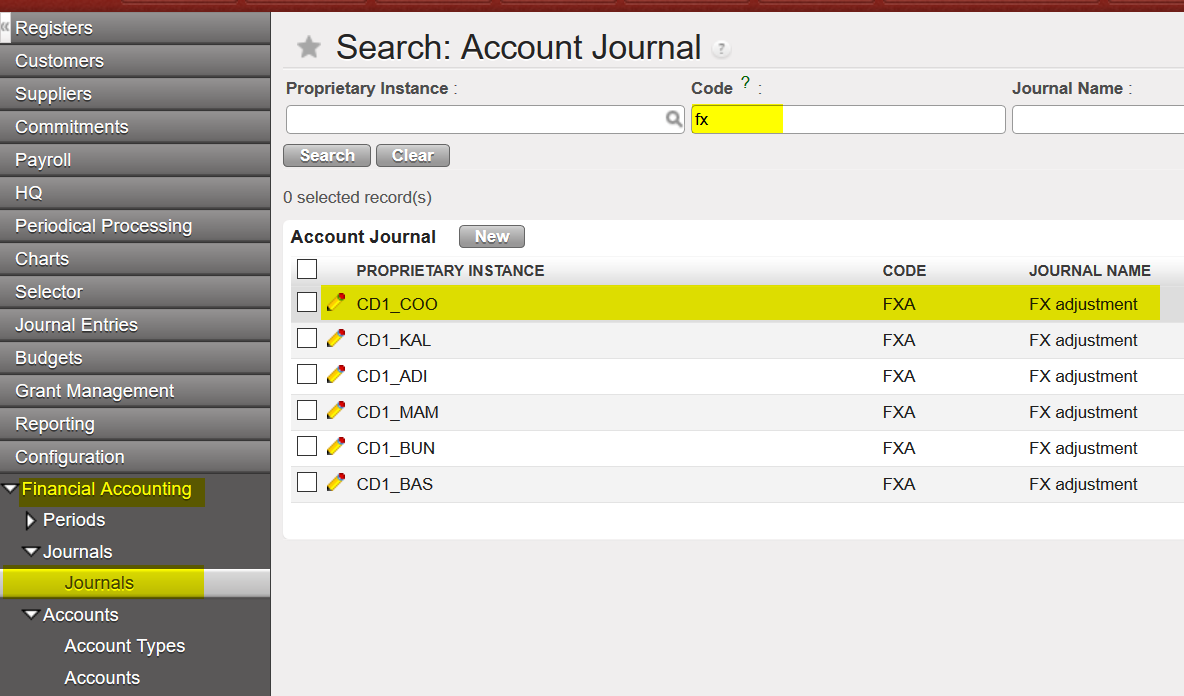
Go to: Configuration/Financial Accounting/Journals
- Go to Journals/ Search for the Code {FXA}/ Select
2. The default Debit/Credit account here is 67040. This will be the default account for any FXA entries generated from reconciliation when doing reconciliation for a balance sheet account, unless you set another expense account for FXA reconciliation on specific B/S account.
To do that, you can follow the below steps:
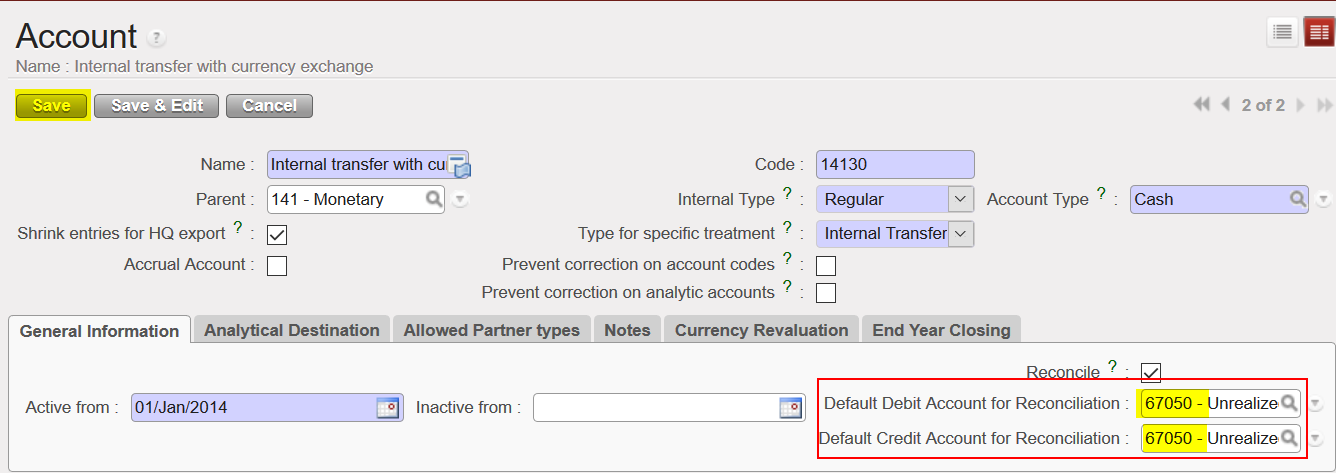
Go to: Configuration/Financial Accounting/Accounts
- Select the account you want, in our example we will choose (Internal transfer with currency exchange – 14130)
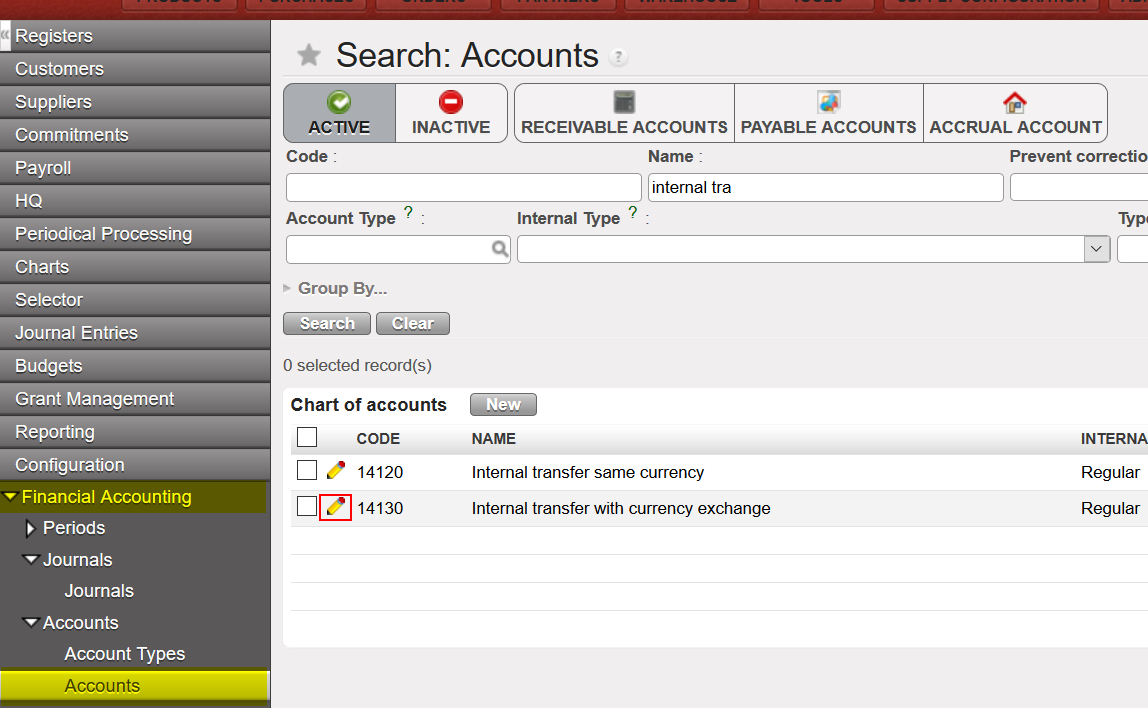
2. The default account for reconciliation for both debit and credit will be empty, you can add 67050 as the default account and then {Save}.
3. When you do any reconciliation for (Internal transfer with currency exchange – 14130), the FXA entries generated from that will be booked under 67050 and not 67040.
You can filter “active” and “inactive” CC through form view of Proprietary Instance, to see follow below:
Go to ADMINISTRATION > Configuration > Proprietary Instance
In “Code” filter by instance code
Click on “Cost centers” tab.
The filter set with default with “Hide inactive”, when click on it will show also “Show all”
When select “Show all” it will show inactive in red color and active in black color.

