Finance User Manual ENG -> 2. Finance Configurations -> 2.7 Liquidity Journals and Their Corresponding Registers -> LUFI-20702 Register Creation
LUFI-20702 Register Creation
LU Introduction
A liquidity journal and a register must be created for each physical cashbox, safe, cheque book or bank account. The creation of a liquidity journal (cash, cheque or bank) triggers the automatic creation of the related register in {Draft} state in the same currency. The liquidity journals remain indefinitely open while the associated registers will be monthly closed and re-created again for next period.
As the register is opened in {Draft} state, the user needs to open the register to book entries. When a new register is opened for the first time, the user needs to enter an opening balance by changing the {CashBox} cash count value or bank opening balance in UniField unless the opening balances are recorder as a direct entry in register (please check your OC’s procedures).
Same process applies to creating cash, cheque or bank journals with slight field differences for the cheque registers. For the purpose of this exercise we will create a cash register.
How to Create and Open a Register
In this example we will create a Cash register. You will first need to create a Cash Journal.
Go to: Accounting/Configuration/Financial Accounting/Journals/Journals
- Click on {New} to create a new journal.
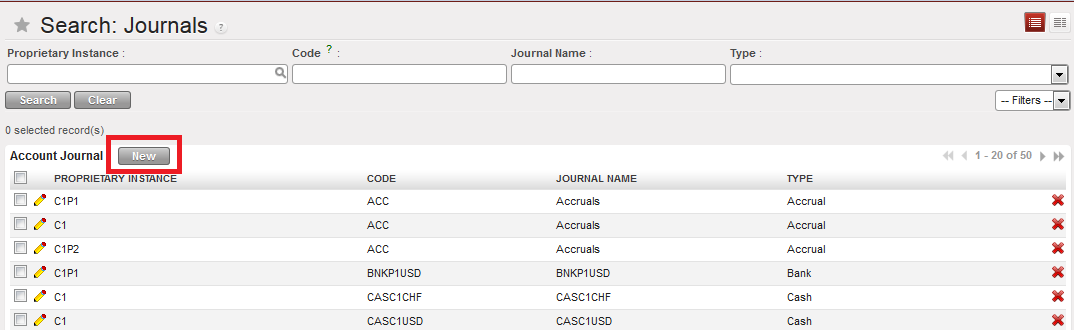 {Journals Search} view and {New} button
A new journal form appears
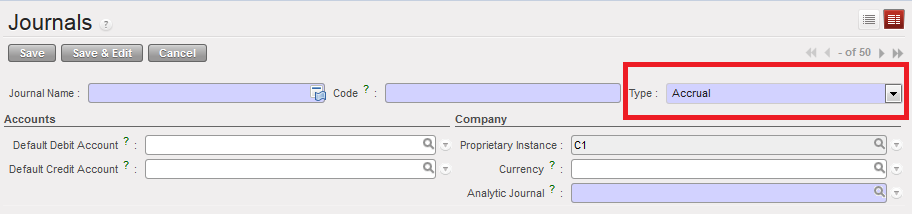 {Journal Form} view and journal type defaults to {Accrual}
- Complete the {Journal Name} and {Journal Code}. The Journal name and code must indicate the currency and the location to easily spot the corresponding register.
- Choose Journal type {Cash}. You would have chosen a {Bank} or {Cheque} types to create a bank or cheque journal.
- In the {Accounts} section, choose the account {10100 Cash on Hand} to set the default debit and credit accounts. You would have chosen {10200 Cash at Bank} and {10210 Outstanding Cheques} for Bank and Cheque Accounts.
- In the {Currency} field, select the currency of your cashbox.
- The Analytic Journal defaults to {CAS}
- Save the form
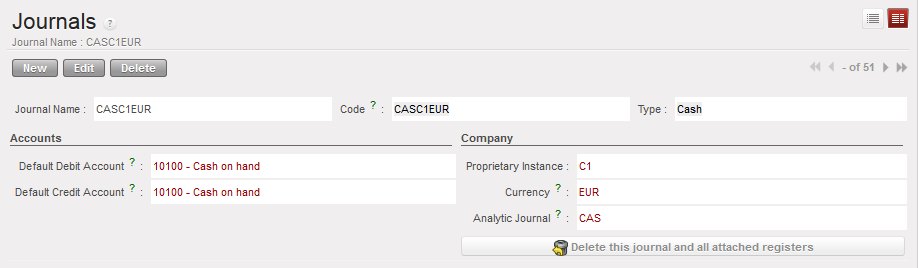
A cash journal is created
| Title of field | Entry protocol | Source for Information |
| Journal Name | <CASH/BANK/CHEQUE> <CUR> <TYPE> <PROJ>
<CUR> is the currency code, <TYPE> is MAIN or PETTY, and <PROJ> is COORD or the short name for the project, e.g. 01 CASH PGK MAIN POM 03 CHEQUE PGK LAE 02 CASH PGK PETTY POM 04 BANK PGK LAE | FinCo/HQ |
| Code | ## <CAS/BNK/CHE>-<CUR>, e.g. 01 CAS PGK | FinCo/HQ |
| Type | Drop down: Cash, Bank, Cheque | FinCo/HQ |
| Default Debit Account | 10100 Cash on hand for cash journals
10200 Cash at Bank for bank journals 10210 Outstanding Cheques | FinCo/HQ |
| Default Credit Account | 10100 Cash on hand for cash journals
10200 Cash at Bank for bank journals 10210 Outstanding Cheques | FinCo/HQ |
| Proprietary Instance | System Default | |
| Currency | Select the currency appropriate for this journal | FinCo/HQ |
| Analytic Journal | Cash, Bank, Cheque | FinCo/HQ |
| Bank Account Name (only bank journals) | Optional field for Name of the bank account from bank statement | FinCo/HQ |
| Bank Account Number (only bank journals) | Optional field for Bank Account Number | FinCo/HQ |
| Swift Code (only bank journals) | Optional field for Bank Swift Code | FinCo/HQ |
| Address (only bank journals) | Optional field for Bank address | FinCo/HQ |
When the creation of the cash journal is completed you need to open the corresponding cash register.
Go to: Accounting/Registers/Cash Registers
A list of open cash registers displays (if you have created and open cash registers before)
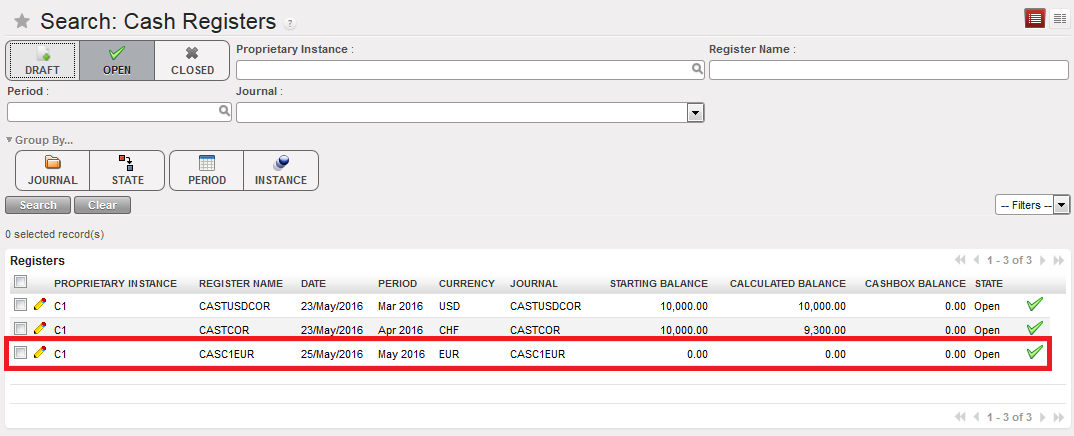
- Search for the draft registers. You need to clear the current filter {Open} and select the filter {Draft}
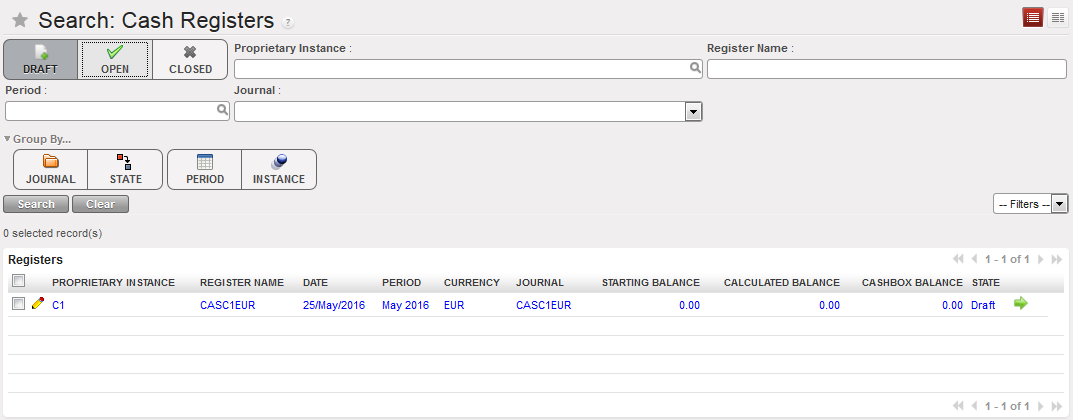 {Cash registers} Search view showing a draft register as the filter Draft was selected
2. Click on the Green Arrow ![]() located on the register line to open the register form
located on the register line to open the register form
A wizard asks you to confirm the period of the register.
 {Open Register confirmation} wizard
3. Select {Yes}
The draft cash register disappears from the draft cash registers list and becomes Open. The starting balance is zero.
4. Select the filter {Open} to access the register
 Open Cash register and starting balance of 0.00
The next step will be to record a cash transfer by creating a register line. This is addressed in Chapter 3 – Payments LUFI-30301.
If you are opening a register with a cash balance for instance in case of data migration*, you will report the closing balance of the previous period in the register cashbox. For instance, you want to report 2,000 USD in the register cashbox:
- In the Search Cash register view, open the relevant Draft Cash register.
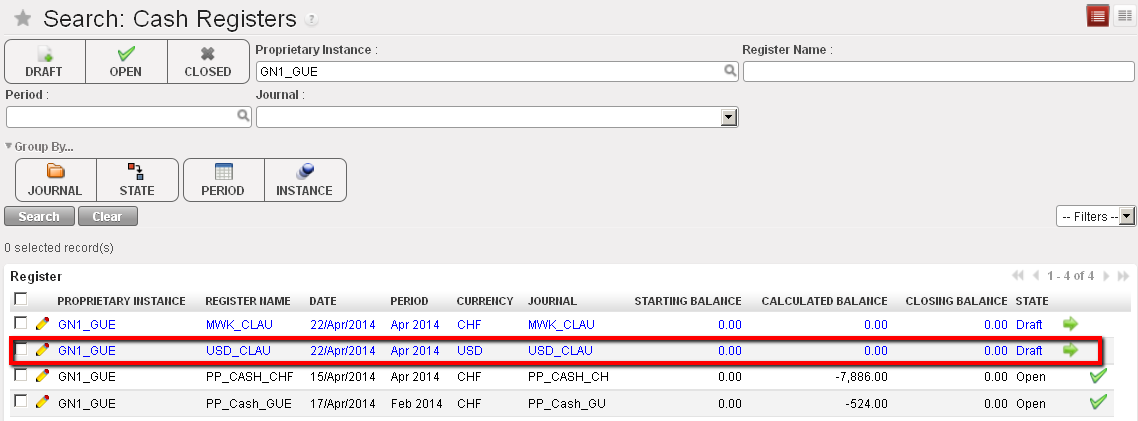 List of Draft cash registers
2. On the Cash register form view, select the {Edit} button to be able to input the opening balance in the register cashbox.
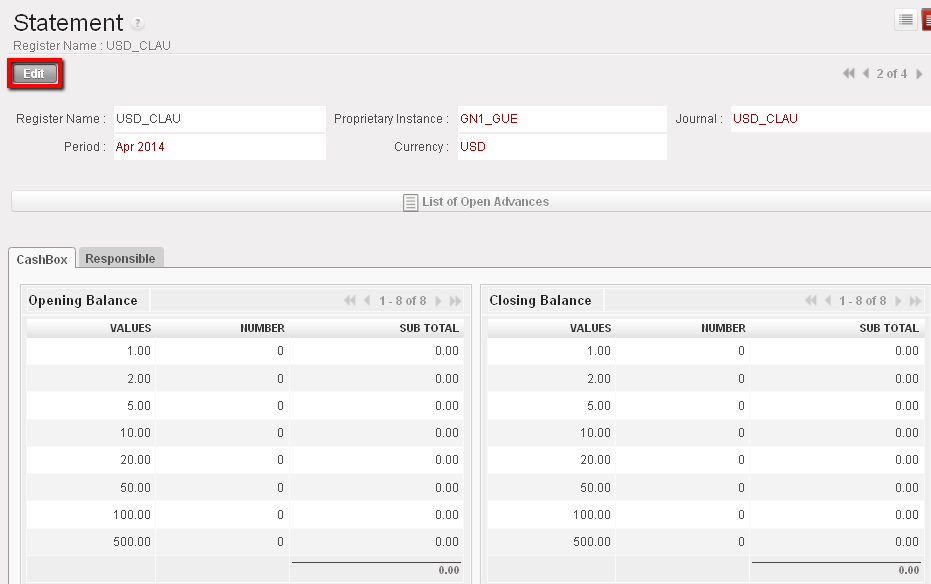 Draft cash register and Cashbox to edit
3. Change the value of the cashbox by selecting the ![]()
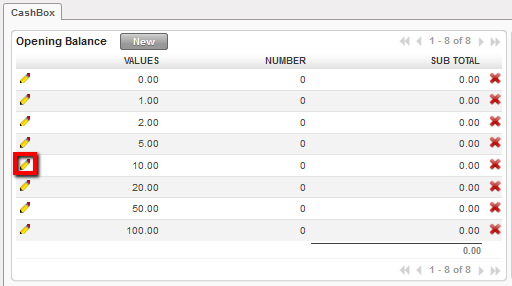
Edit button used to change the the cashbox value
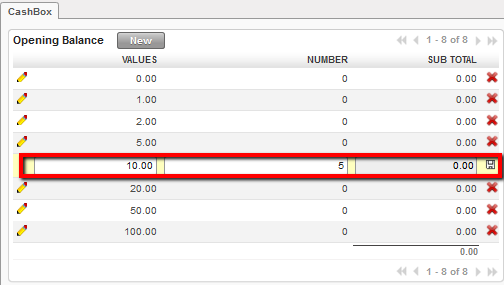
Changing the value of the cashbox
4. Save each line by clicking on ![]() .
.
5. At the bottom of the screen, select to open the register ![]()
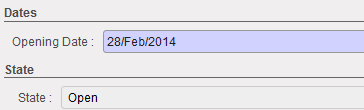
The cash register becomes Open displaying an opening balance of 2,000 USD
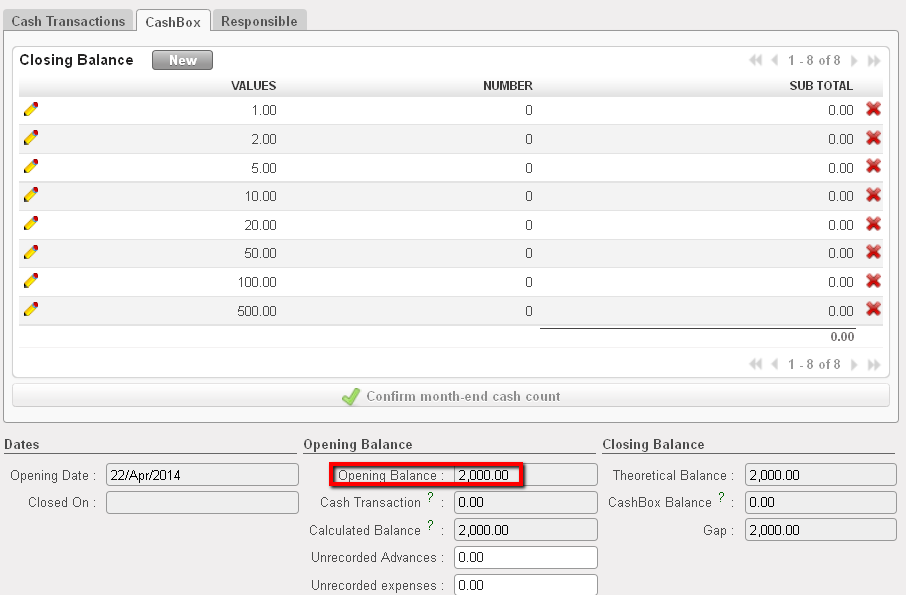 Opening balance reported in the register cashbox
If you are opening a register with a bank balance linked to data migration, you will report the closing balance of the previous period in the bank register form view. For instance, you want to report 40,000 USD in the bank register:
- In the Search Cash register view, open the relevant Draft Bank register.
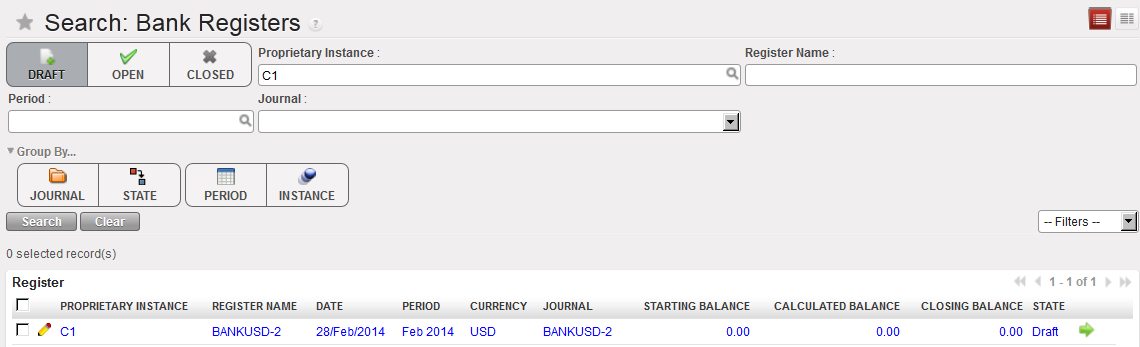 List of Bank cash registers
2. In the Bank statement form view, insert the starting balance 40,000 USD.
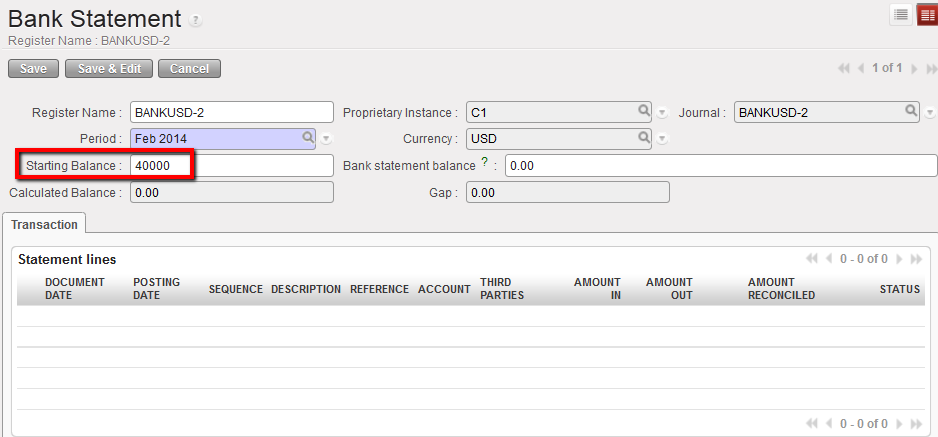 Opening balance reported in the bank register
3. Save the form by clicking the {Save} button.
4. At the bottom of the screen, select ![]()
The bank register is in {Open} status displaying an opening balance of 40,000 USD
Bank register state changed to Open
Finally, in the tab {Responsible} you specify the users authorized to access the register.
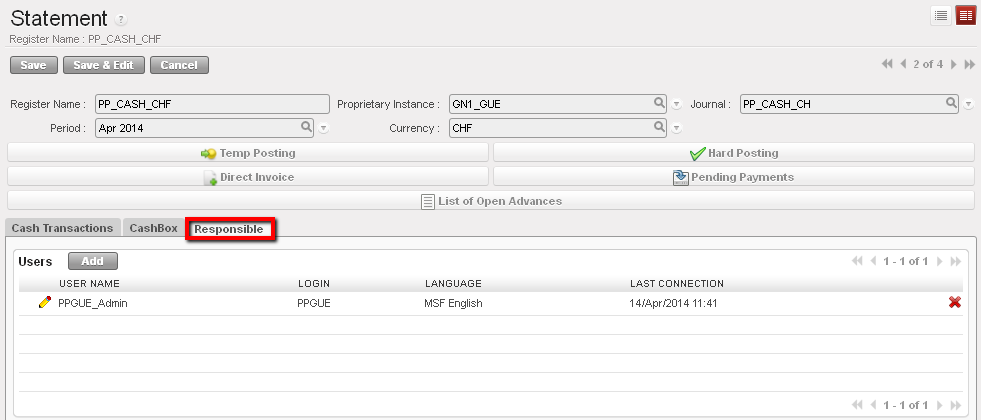 List of authorised user who can access to this cash register
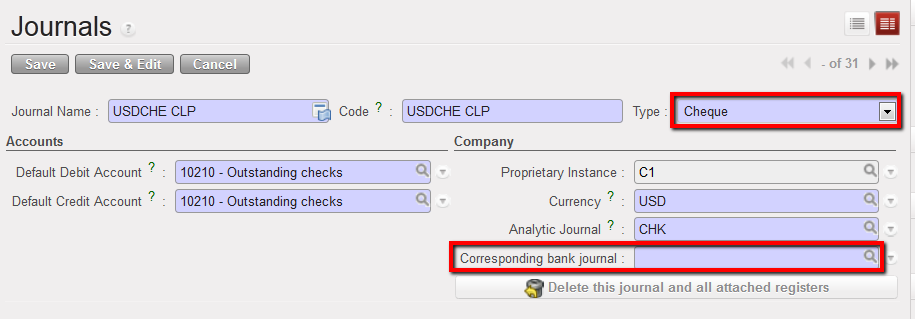
Case of Cheque registers:
To limit the import of a cheque into the wrong bank register (See Chapter 3 – Payments), it is required to link a cheque register, where cheque payments are recorded, to its corresponding bank register when the cheque register is being created.
It will restrict the cheques selection to the cheques associated to the bank register when using the {Import Cheques} function.
- In the Journals Form view, select the type of journal {Cheque}
The field {Corresponding bank journal displays}
 Journal form view and creation of a Cheque journal.
The field Corresponding to a bank journal displays as soon as the type: cheque is selected.
2. Select a bank journal the cheque journal will be tied to using the magnifying glass. Remember, the bank journal must be open.
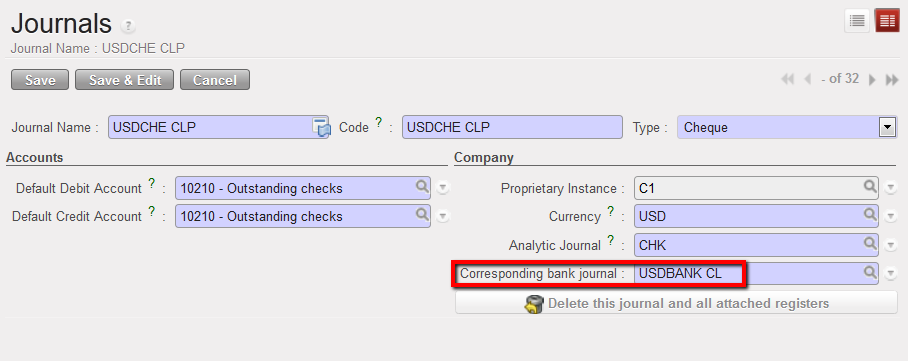 Bank journal associated to a cheque journal
3. Save the form ![]()
For OCA* please refer to OCA Migration Guidelines
Remember, the period of a register can be changed if the register is in {Draft} and if it is the first register of the chain:
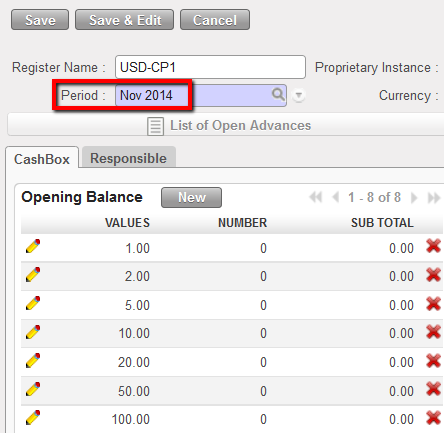
Period field editable on a register form view
How to have default liquidity default accounts when creating a new liquidity Journal
If you want to have a default debit/credit account when any user creates a liquidity journal (Bank, Cash and cheque) in order to avoid any mistake in the chosen accounts for the liquidity journal, you can then add the default accounts to be used for each liquidity journal in the company configuration.
Go to: Administration/Company/Configuration/Liquidity Accounts
- The Cheque Default Debit/Credit Account should be (15630 – Outstanding Cheques) for OCA and (10210 -Outstanding Cheques) for OCB, OCG and OCP.
- The Bank Default Debit/Credit Account should be (10200 – Cash In Bank) for all OCs.
- The Cash Default Debit/Credit Account should be (10100 – Cash On Hand) for all OCs.
OCA:

OCB, OCG and OCP:

