Supply User Manual ENG -> 5. Warehouse -> 5.3 LU-SU4102: Picking -> D. HOW TO DO A PARTIAL PICKING
D. HOW TO DO A PARTIAL PICKING
A partial picking can be done if some products or some quantities indicated as “Available” in stock by the system are actually not available or if, for any other reason, you do not wish to pick all the products or all the quantities.
When a sub PICK is created from a main PICK, all available lines will be included on the sub PICK. However, it may happen that you do not want to include all lines or all quantities if, for example, lines and/or quantities said “Available” by the system are actually not available.
Go to: Warehouse / Warehouse Management / Deliveries / Picking
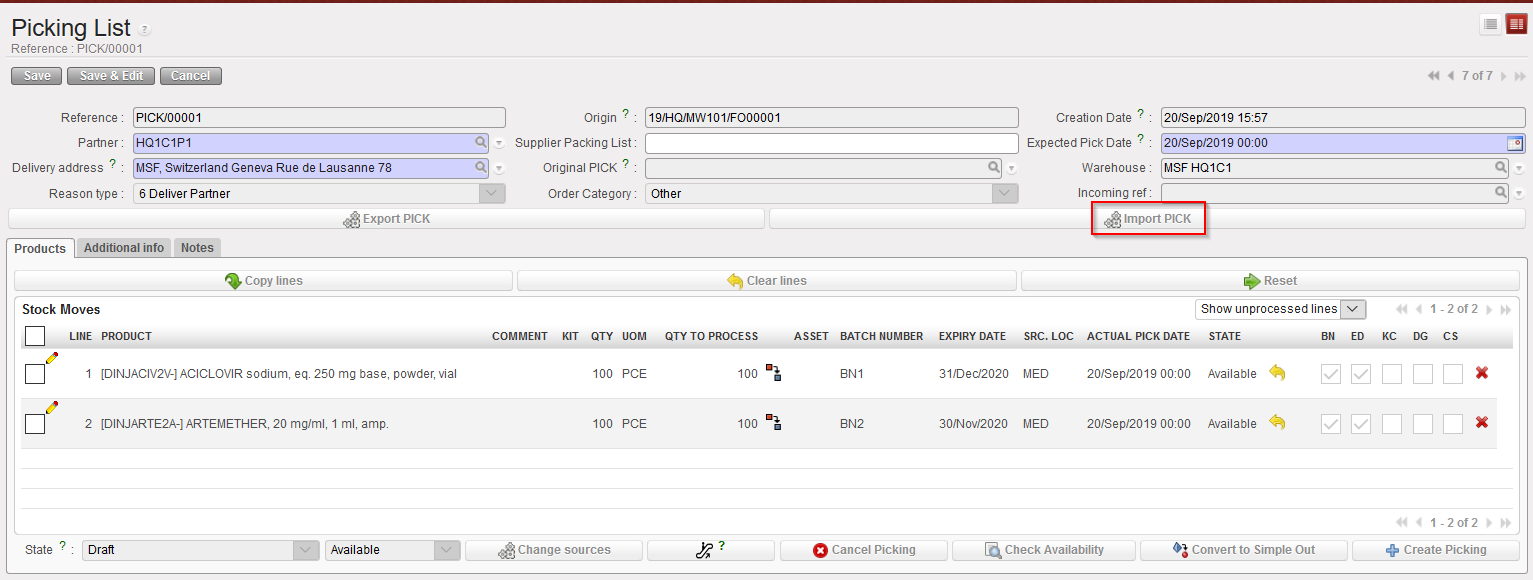
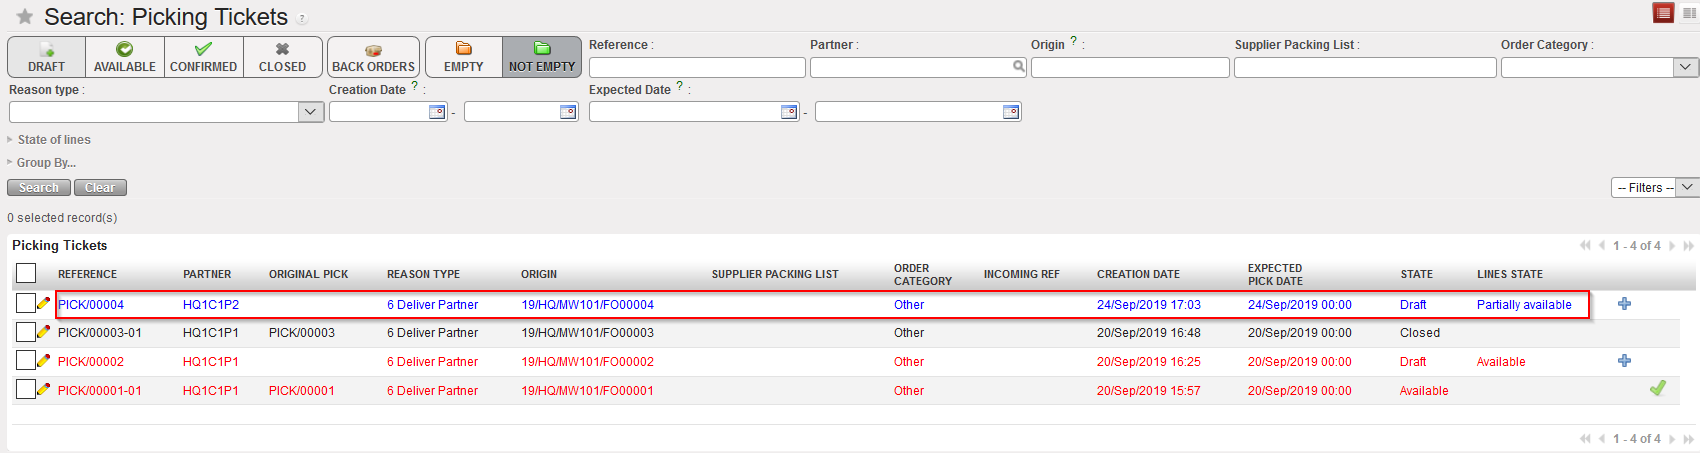
- Locate the relevant Picking Ticket for the picking you are about to process.
- Click on the line corresponding to the Picking Ticket you want to process.
|
|
|
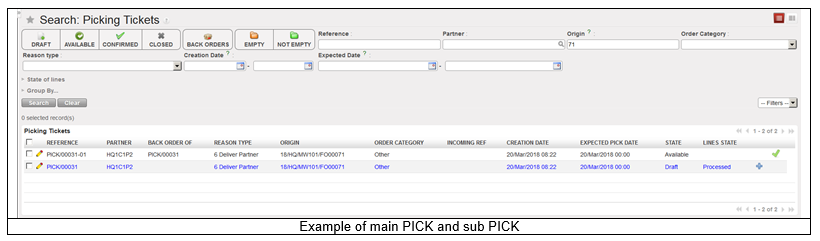
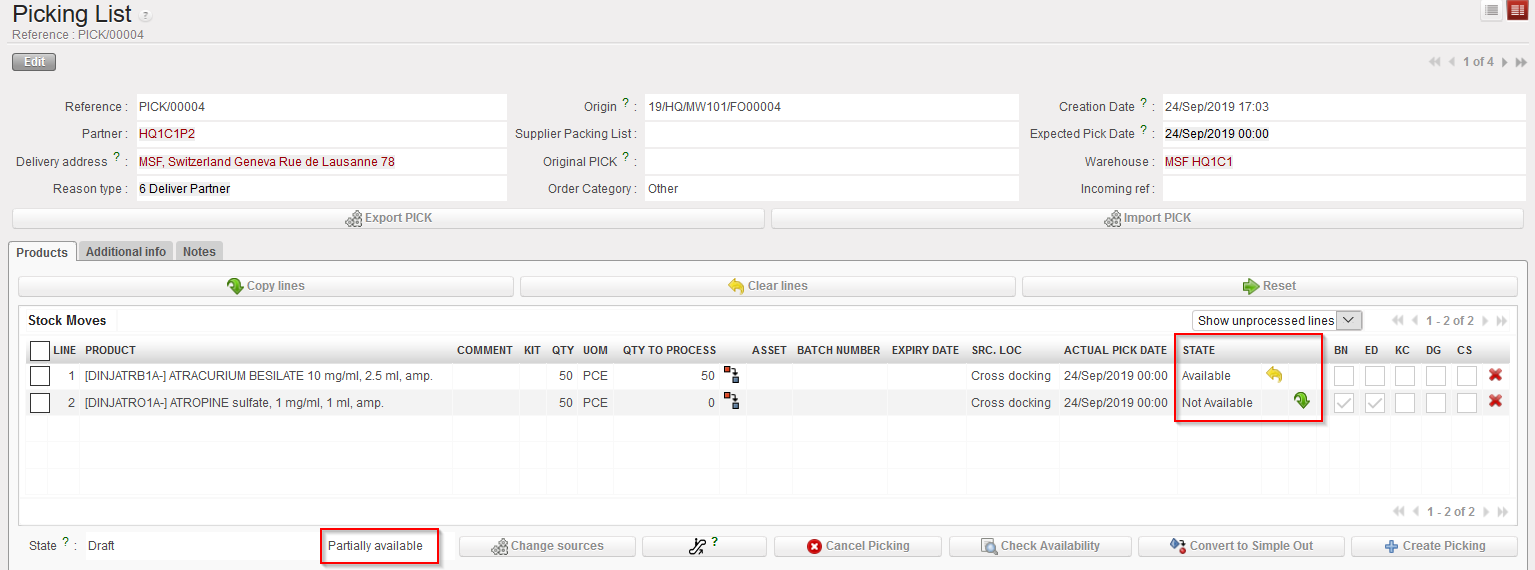
Main PICK
|
|
|
|
Detail of the main PICK
|
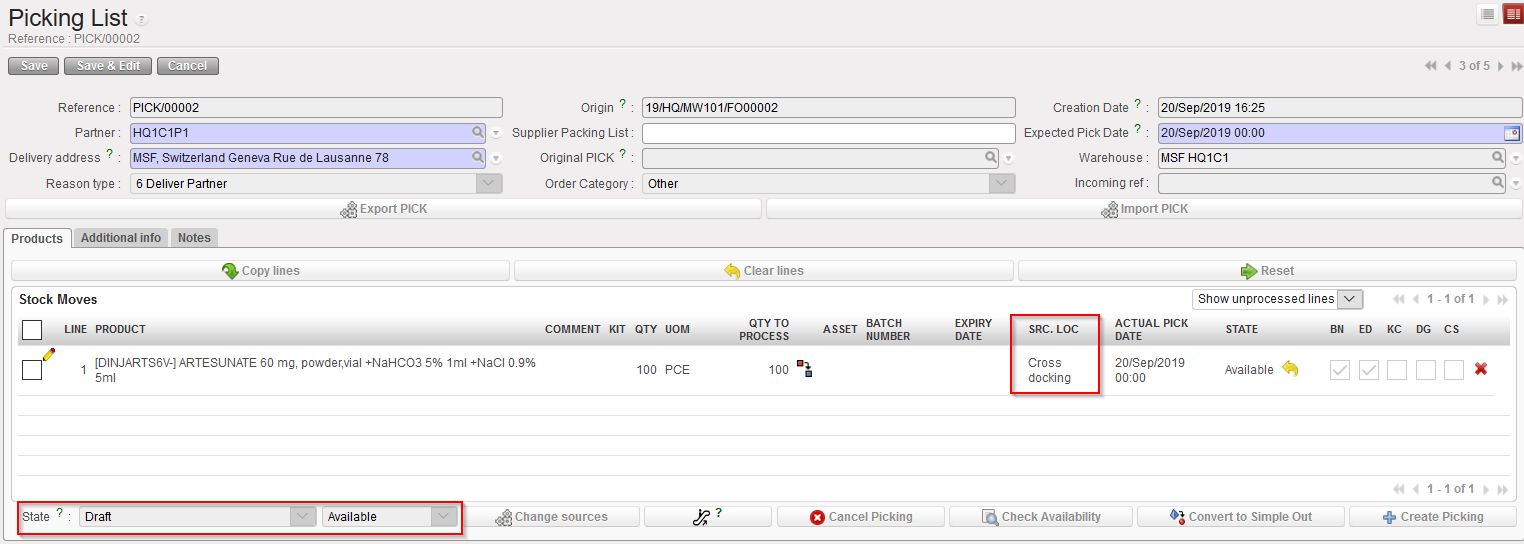
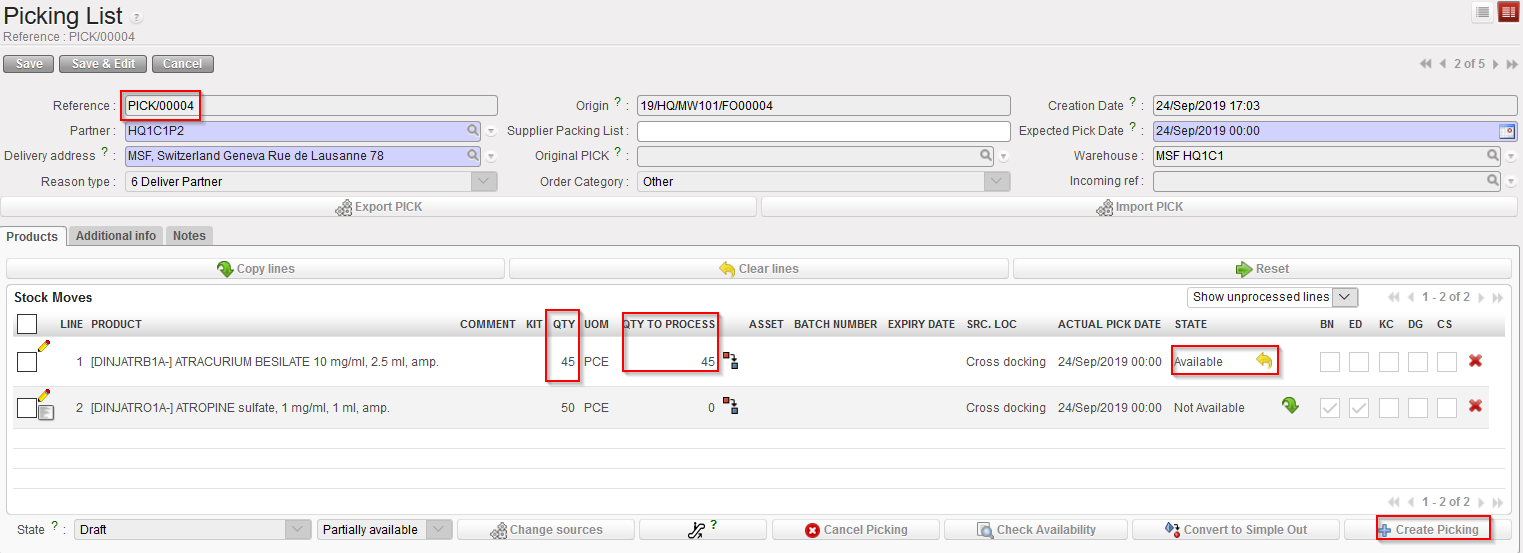
In the above example, the main PICK was created following a PO confirmation. This main PICK is “Partially available“. One of its line is “Available” as products have already been received in Cross docking. The other line is “Not Available” as products have not yet been received.
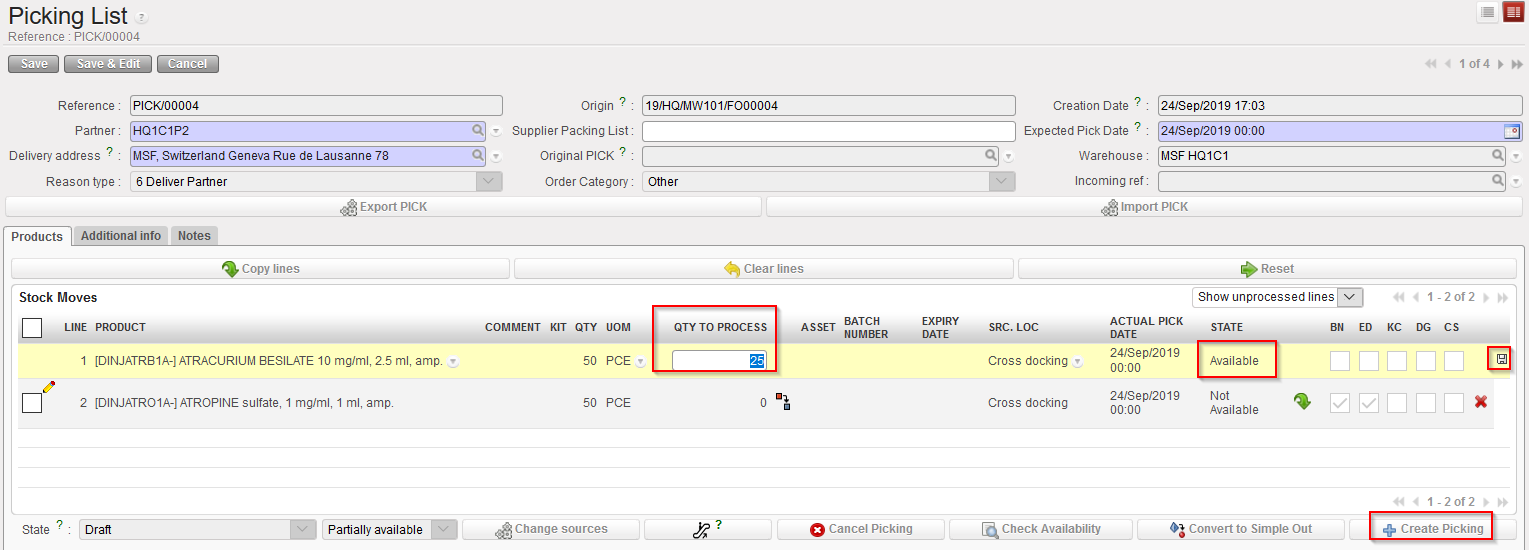
The system includes in the sub PICK the lines which are “Available” in the main PICK. This means that you have the possibility to include in a sub PICK quantities which are not available if you force the availability on the main PICK. This should only be done with great caution.
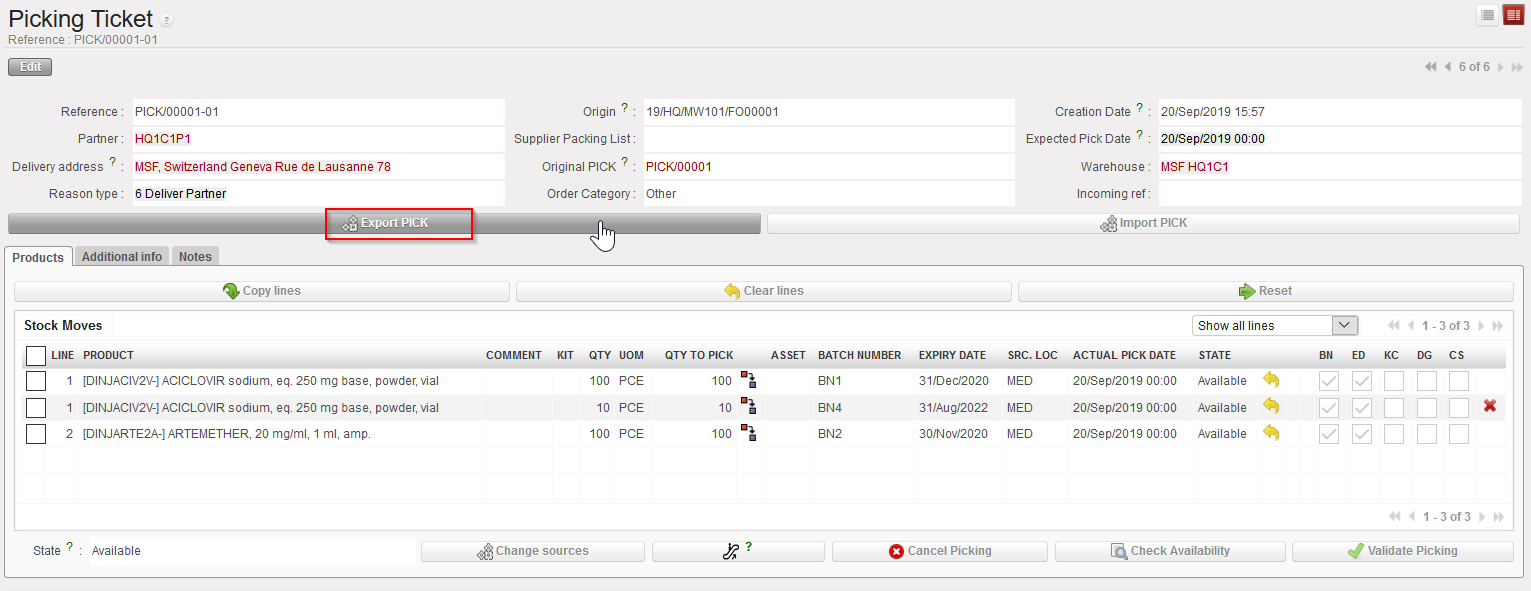
3. Edit the line via the pencil icon and enter the quantity you which to include in the sub PICK. In this scenario, we decide to include only half of the quantity. Save the line and click on “Create Picking” in order to create the sub PICK.
|
|
|
Creation of the sub PICK
|
|
|
|
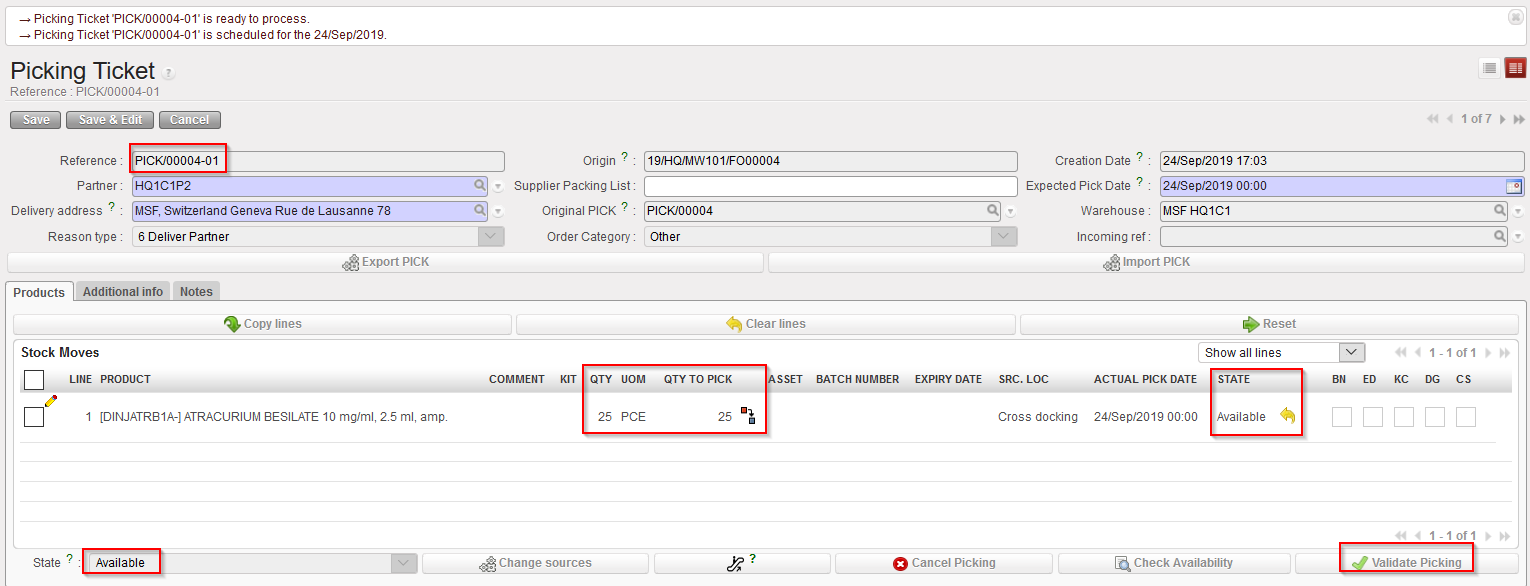
Sub PICK created
|
|
|
|
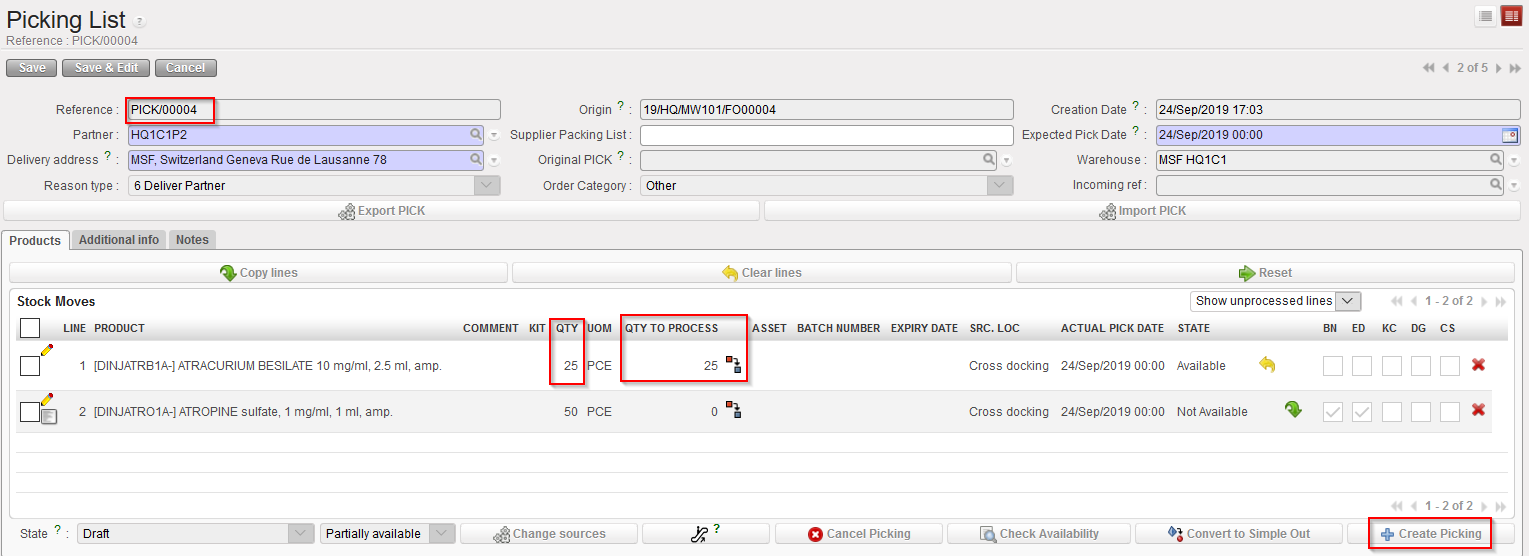
Main PICK updated
|
The sub PICK is created and includes the quantity which was entered on the previous step. This quantity is “Available“. Note that the reference of the sub PICK is PICK/00004-01. The sub PICK may be printed in order to instruct the storekeeper to pick the selected items.
The main PICK is updated. The first line includes the quantity which remains to be picked (still “Available”) while the second line did not change (and is still “Not Available”). This main PICK is actually a back-order (i.e. what remains to be picked).
Again, the system includes in this screen the available quantities from the sub PICK but it may happen that physically, these quantities are actually not fully available.
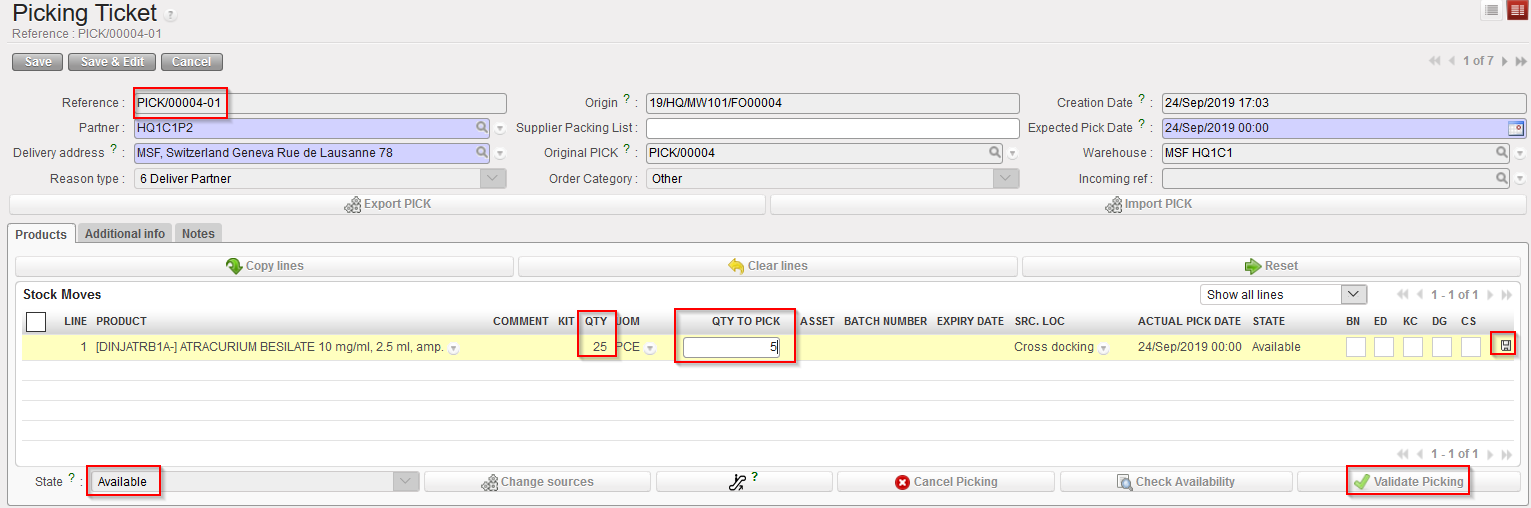
4. Use the pencil icon to enter the quantities which have actually been picked. In this example we assume that the full quantity was not picked (100 out of 25 products are picked). Save the line. Click on the “Validate Picking” button to register the picking done.
|
|
|
Validation of the sub PICK
|
|
|
|
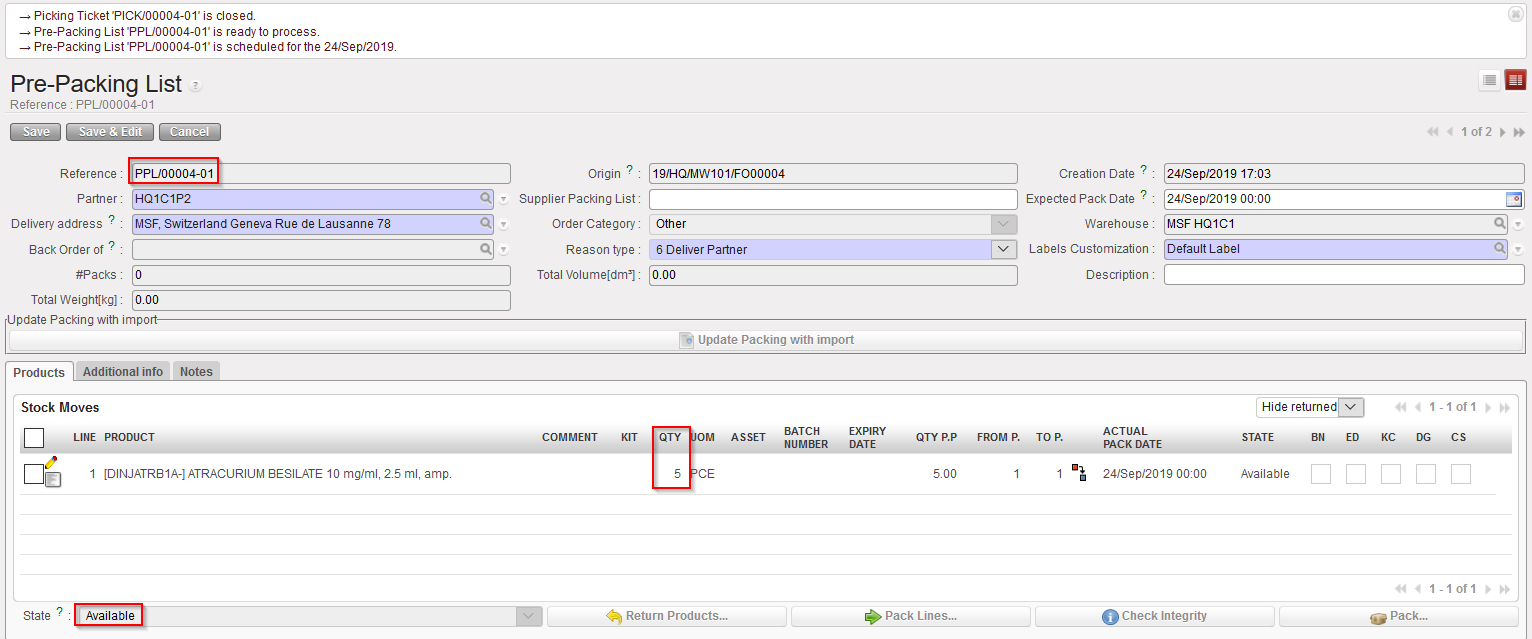
Pre-Packing list created following partial picking
|
|
|
|
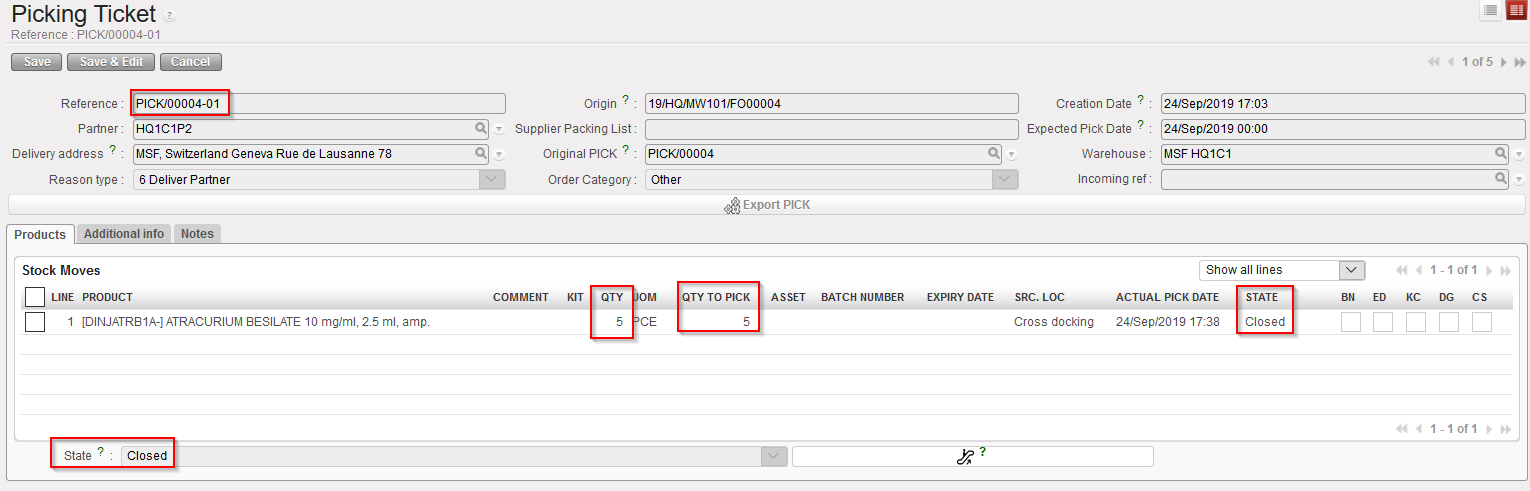
Sub PICK following partial picking
|
|
|
|
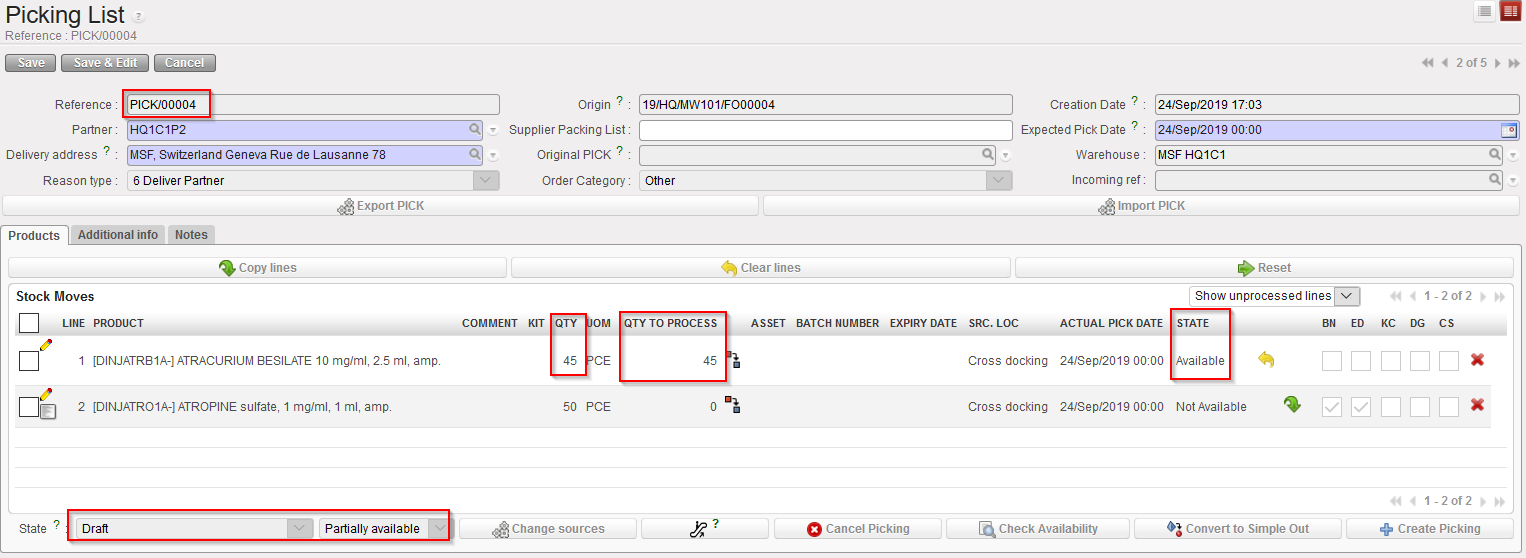
Main PICK following partial picking
|
A Pre-Packing list is created by the system in order to prepare the next stage (packing the picked goods in parcels). Note that the reference of the PPL (PPL/00004-01) matches with the reference of the sub PICK (PICK/00004-01). The PPL is in state “Available” and all its lines are “Available”.
The sub PICK is now “Closed“. Quantities have been updated to what was actually picked.
The main PICK has been updated. Quantities which were not picked on the sub PICK return to the main PICK (the first line changes from 25 to 45 pces). This main PICK will be used when subsequent pickings related to the same transaction will be done (i.e. when the back-order will be processed).
5. Open the main PICK and create a new sub PICK via the button “Create Picking”
|
|
|
Creation of a second sub PICK
|
Again, available quantities from the main PICK are transferred to the sub PICK. You may choose to follow this (use the button “Copy all”) or to transfer only a partial quantity (use the pencil icon”).
|
|
|
Sub PICK created
|
|

|
|
Main PICK updated
|
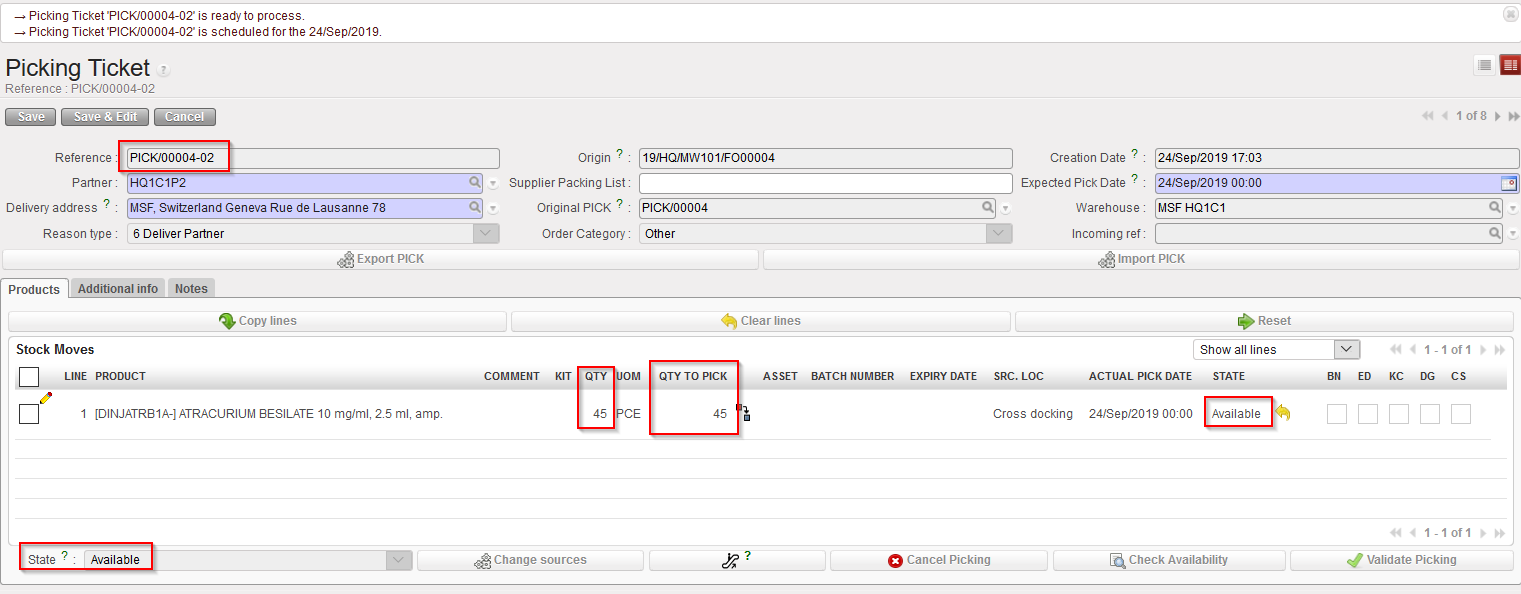
A second sub PICK is created. It includes all lines/quantities selected in the previous step. Note the reference PICK/00004-02. The state of this second sub PICK is “Available”.
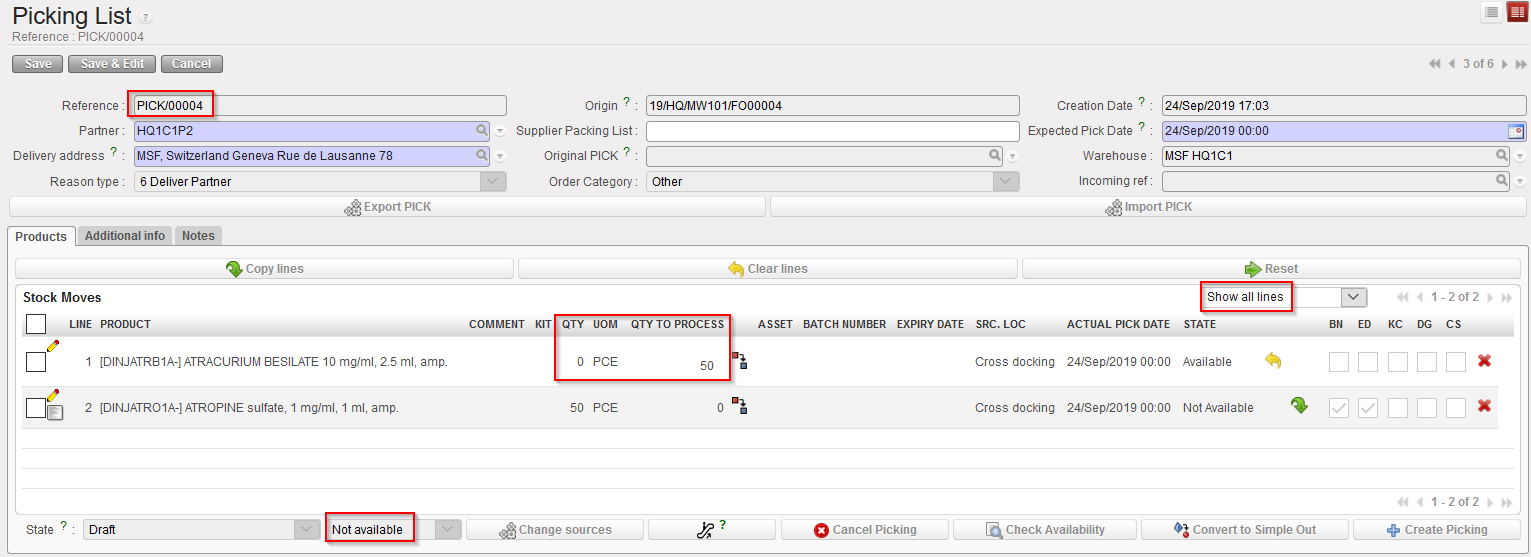
The main PICK is updated. The first line is now at zero “QTY” = 0 as all quantities has the full quantity been selected) while the second line did not change (and is still “Not Available”). Please note that filter has been set to “Show all lines” in order to show this processed line #1 and “QTY” is set to “0” and “QTY TO PROCESS” = “50”.
6. Again, the created sub PICK can be printed to instruct the storekeeper on the picking to be done. Click on “Validate Picking” to actually register the picking done.
|
|
|
Pre-Packing list created
|
|
|
|
Sub PICK updated
|
|
|
|
Main PICK
|
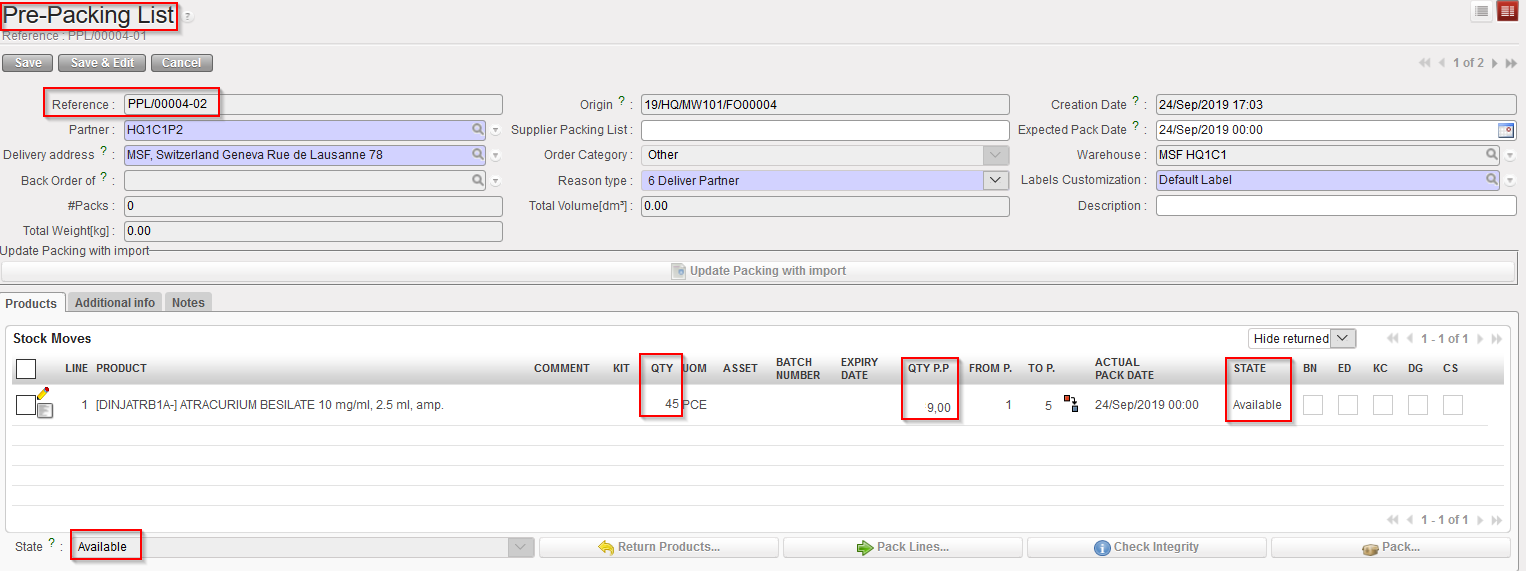
Another Pre-Packing list is created by the system in order to prepare the next stage (packing the picked goods in parcels). Note that the reference of the PPL (PPL/00004-02) matches with the reference of the sub PICK (PICK/00004-02). The PPL is in state “Available” and all its lines are “Available”.
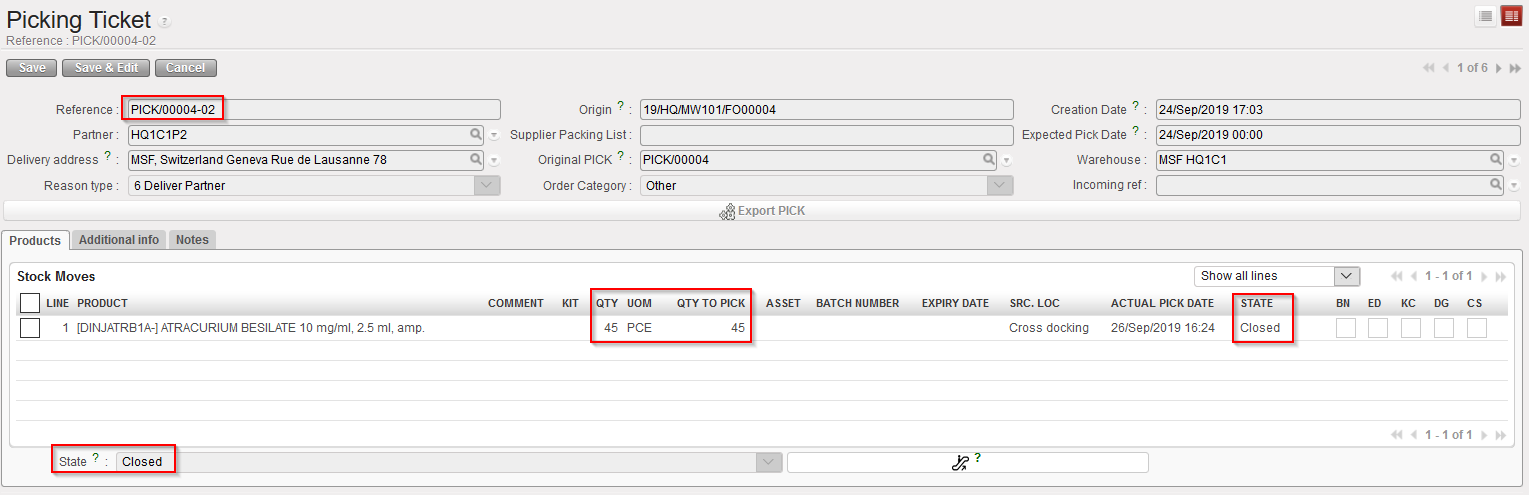
The sub PICK is now “Closed”.
The main did not change as full quantities were actually picked on the sub PICK. However it stays in the state “Draft” as additional products are expected but is “Not available” as these products were not received yet.
|
|
|
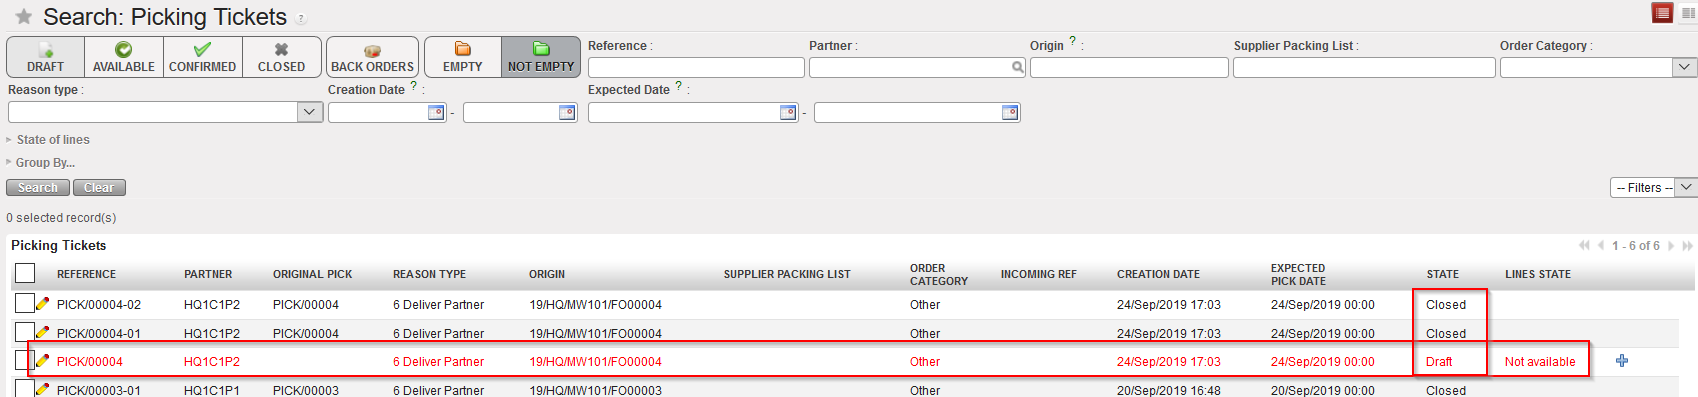
Picking Tickets created in this process
|
|

|
|
Pre-packing lists created in this process
|
Sub PICKS created via this process are now closed. However, the main PICK stays in draft as further actions are expected to happen on this Picking Ticket.
Two Pre-Packing Lists have been created in this process and still need to be handled.
Conclusion of the section:
In this section, we explained how the partial picking in UniField is working. However, as many scenario are possible, we could not go into all details but preferred to use an example where partial picking was done. This scenario used a Picking Ticket related to a PO (created following FO sourcing).
Another possible scenario could be to use a Picking Ticket created following the sourcing of an FO to stock.
Remember that partial picking may be registered on main PICKS and sub PICKS.