Supply User Manual ENG -> 4. Procurement -> 4.7 PURCHASE ORDERS (POs) - SPECIFICS -> B. How to create a Direct Purchase Order (DPO)
C. How to create a Purchase Order for (receiving) a standard donation.
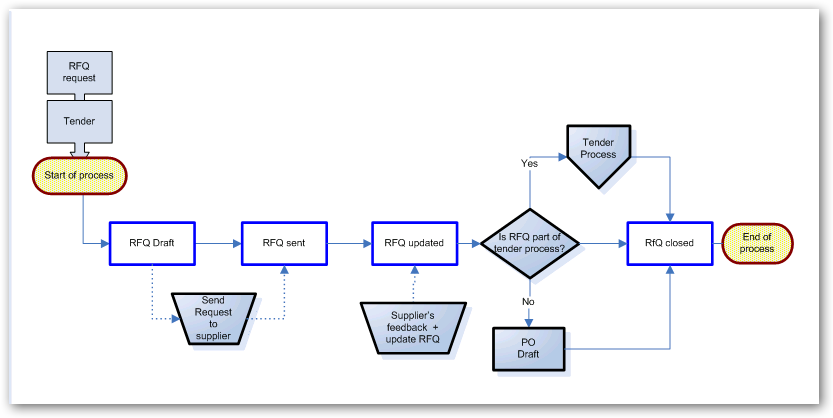
Normally a donation process will be initiated by the instance donating (i.e. via an FO). However, the receiving instance might also create a PO from scratch to receive the goods.
Standard donation POs will never be created by the OST; they should be created either by synchronization either from scratch.
If the process starts at the donating instance (i.e. with an FO), the customer must be an internal partner, an inter-mission partner, an, inter-section partner or an external partner (customer). If the process starts at the receiving instance (i.e. with a PO), the supplier must be another instance (i.e. an internal partner, an inter-mission partner or an inter-section partner).
Goods can be donated or received via standard donation because they are no longer needed or because a project or a mission is closing.
Go to: Purchases / Purchase Management / Purchase Orders
1.Create a new PO by clicking on the “New” button.
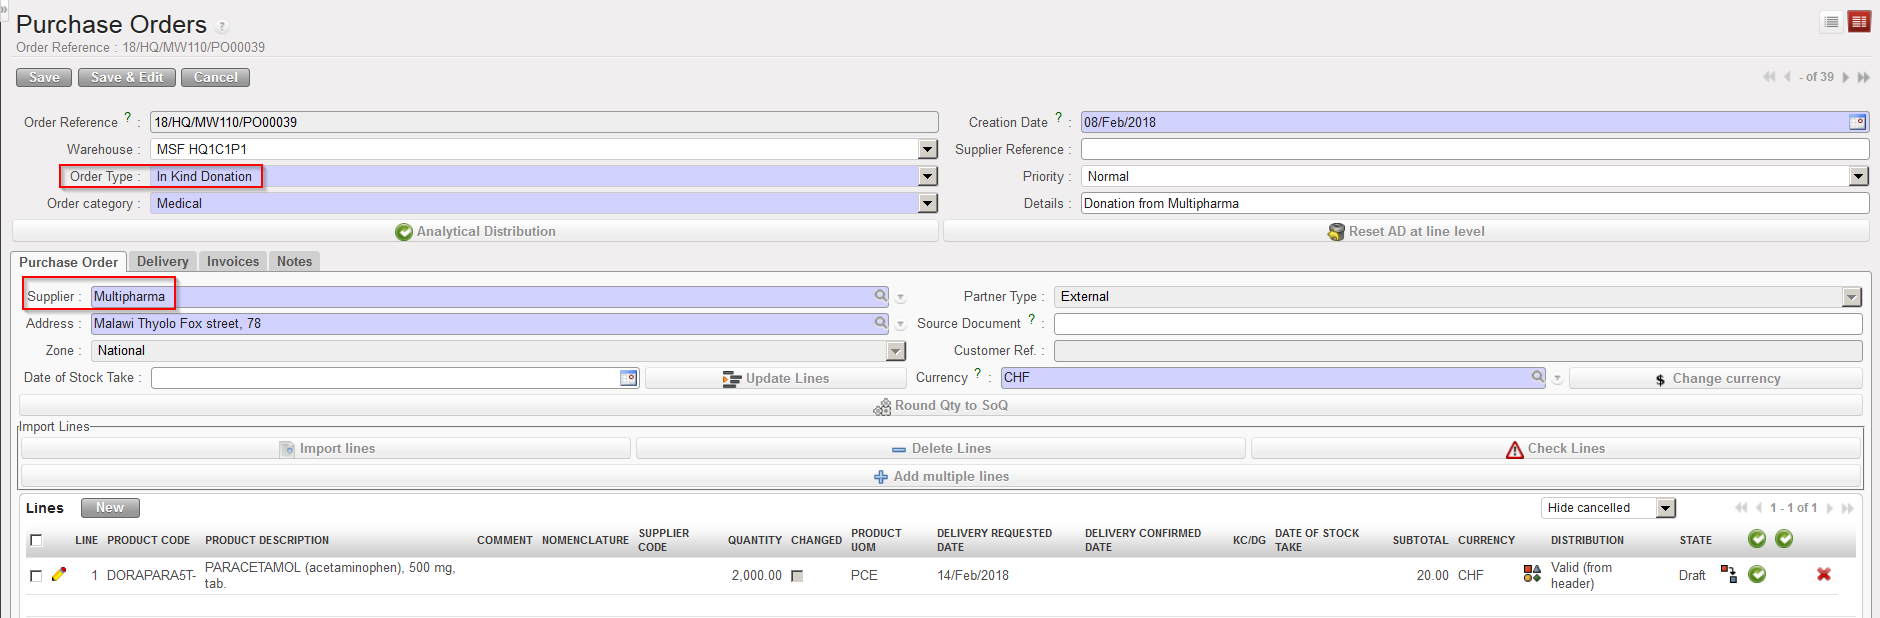
2. As “Order Type“, select “Standard donation”.
3. Fill in the rest of the header information (order category, priority, details,...).
4. As “Supplier“, select the instance which will donate the goods (the giver).
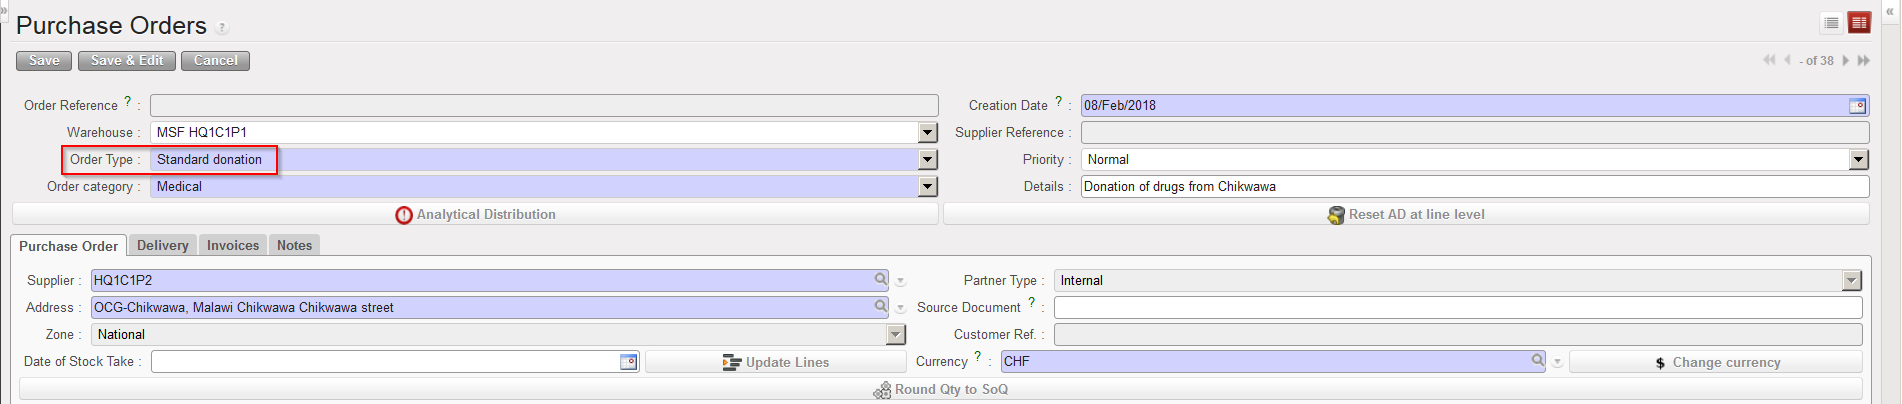 |
| Standard donation PO |
5. Add product lines manually or via file import (including quantities, delivery requested dates,…).
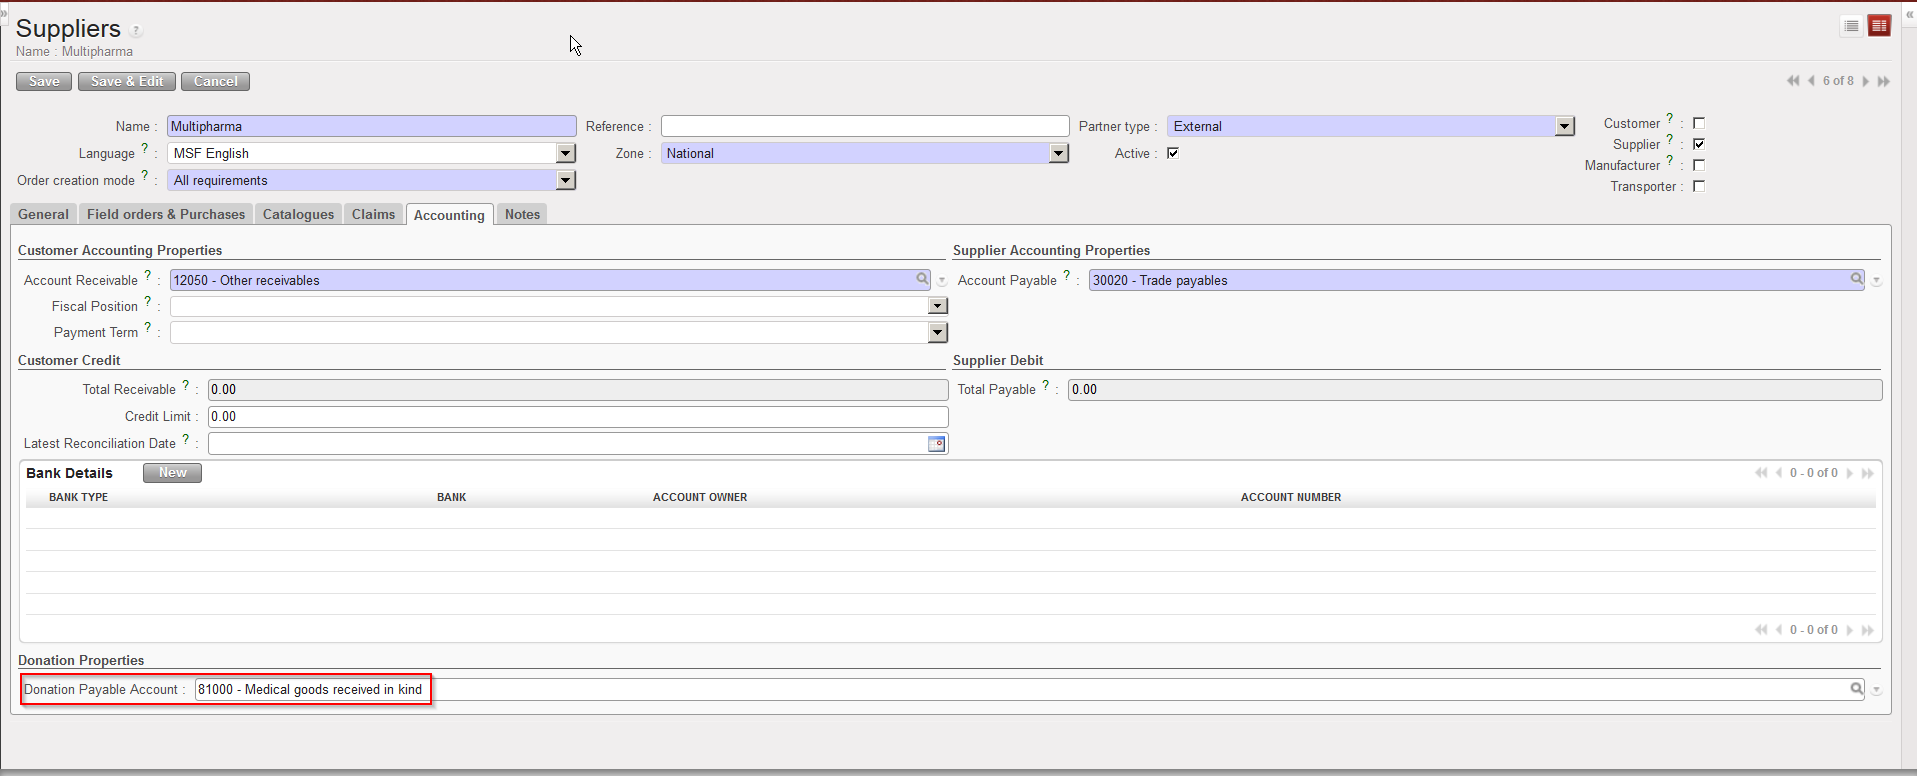
6. Enter an analytical distribution.
7. On the “Delivery” tab of the PO, check the “Destination Address” (linked to the receiving instance).
8. Save the PO by clicking on the “Save” button on the top of the screen.
9. The PO should be printed and signed for approval by the appropriate responsible person, then validated.