
F. How to export asset records to excel
Supply User Manual ENG -> Products -> 3.5 Assets -> F. How to export asset records to excel
F. How to export asset records to excel
Go to: Products/ Assets /Asset Forms
- Select one asset or several assets by ticking the check box next to each asset. If no asset is selected the system will export the details of all assets.
- In the actions menu ( on the right), click on “export”
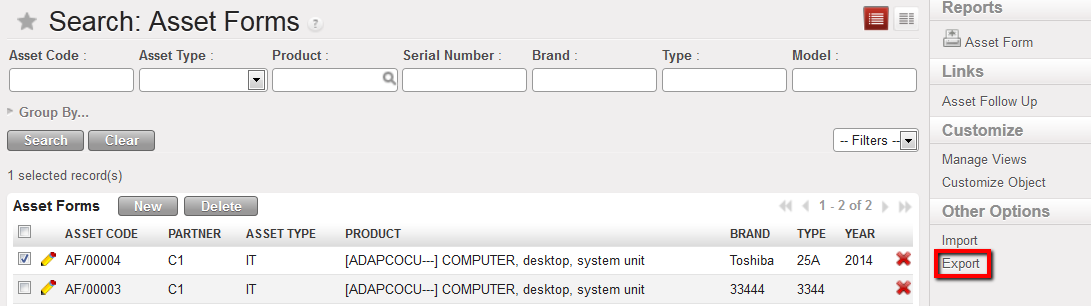
Exporting asset information using the Action Menu
3. The export wizard will appear.
3.1 Check the default fields suggested by the system, that will be exported in the right hand window
3.2 If necessary, select new fields to be exported
3.3 To add or remove any fields according to your export preferences use the “Add” and “Remove” buttons
4. Click on the “Export to File” button
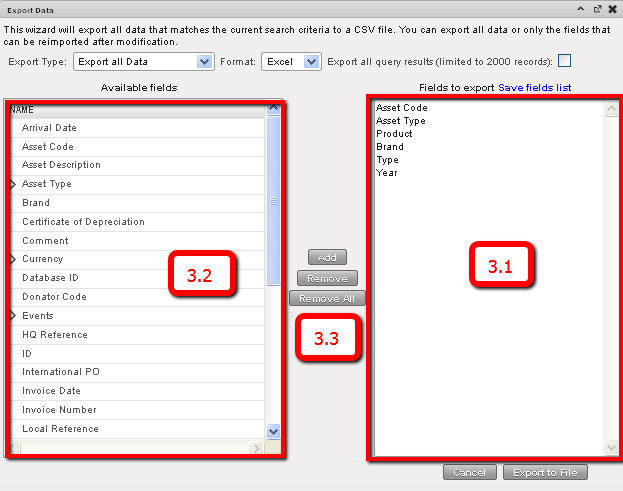
Asset Export Data wizard, with default fields which will be exported
5. Click on “Ok” ;the file options which appear (by default this will be opened with Microsoft Office Excel)
6. The Excel file will be generated.

Example view of excel export file
E. How to print asset records
Supply User Manual ENG -> Products -> 3.5 Assets -> E. How to print asset records
E. How to print asset records
Go to: Products/ Assets /Asset Forms
- Use the search fields in the header to find the assets that you want to see the records
- Tick the checkbox of all those you wish to see (to select all assets from search result, tick the checkbox immediately below Asset Forms)
- In the Action menu on the right, click on Asset Form under Reports
- The system will display all of the asset forms of the selected assets in printable format
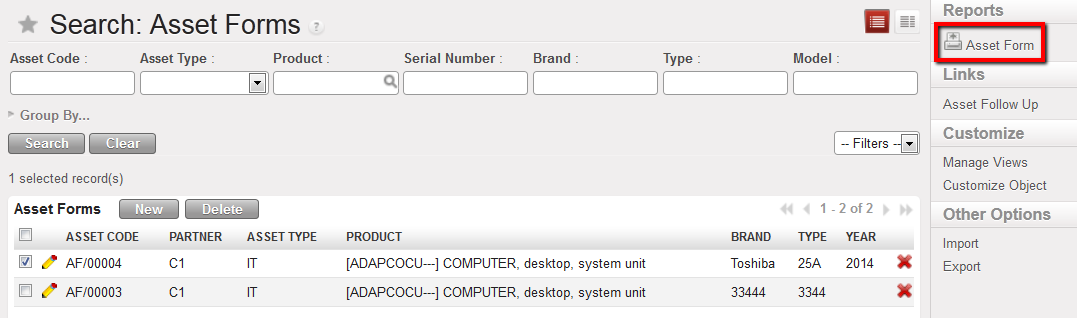
Assets for which the Asset Forms can be printed
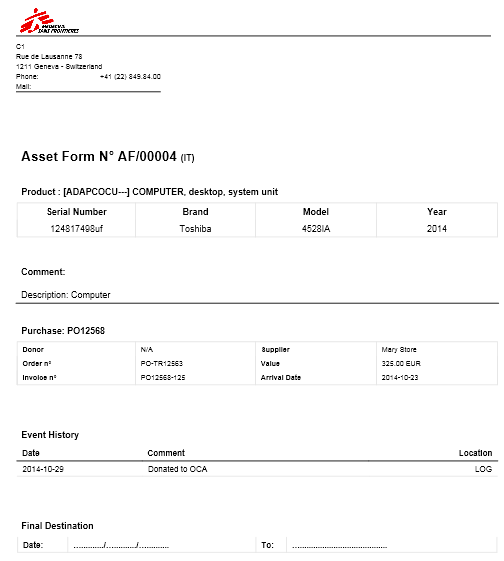
Print view of example Asset Form
D. How to view the events and follow up (history) of an asset
Supply User Manual ENG -> Products -> 3.5 Assets -> D. How to view the events and follow up (history) of an asset
D. How to view the events and follow up (history) of an asset
Go to: Products/ Assets /Asset Forms
- Use the search fields in the header to find the asset that you want to see the history
- Click anywhere on the line of the asset you would like to see (except on the pencil/edit icon!) the record of this asset will open
- Click on the “Event History” tab at the top of the page to view the history for this specific asset
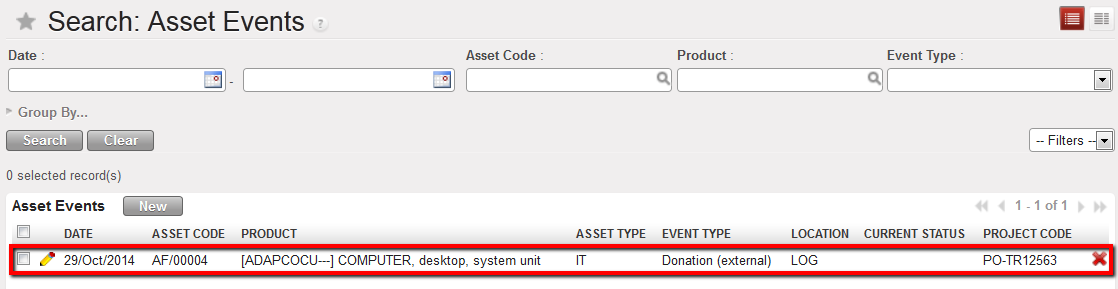
Asset follow-up
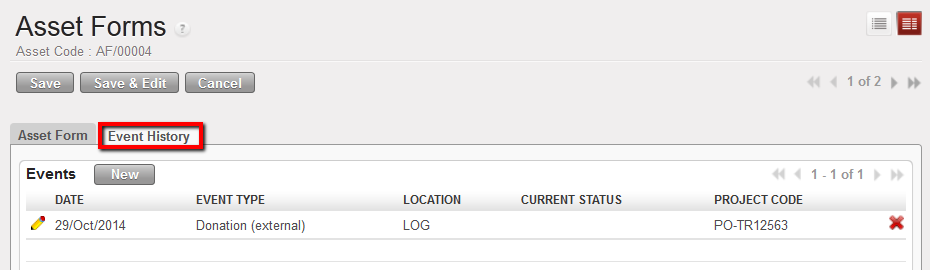
Asset Event History tab showing history/events for asset selected

Please note: It is important for the asset to be treated as a product when receiving it (e.g. in an incoming shipment), it needs to be processed the same way (and the appropriate documents created and managed) as for products for the stock when they are ordered, sent, stored etc,