5.6 Verify the Status of pull and push of Synchronized Entries (only at sync_server instance)
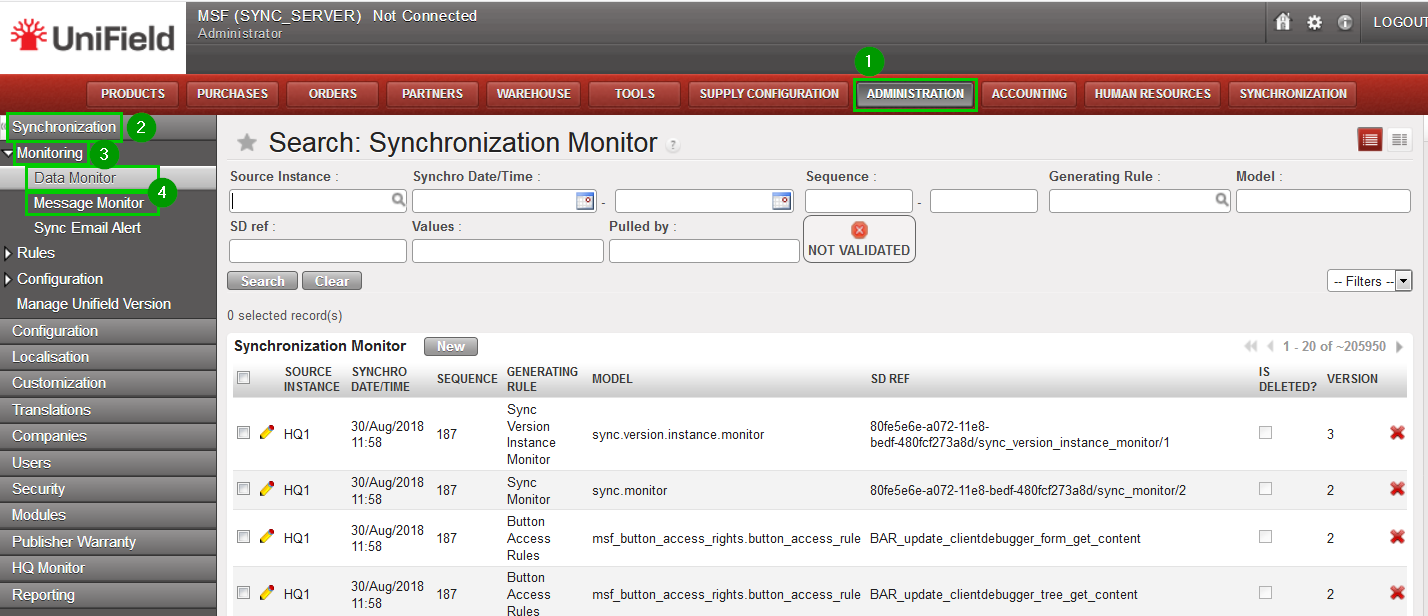
Click on the menu Administration 1, Synchronistaion 2, Monitoring 3, Data Monitor or Message Monitor 4. You will see all the data or messages that have been pushed and pulled between instances via the synchronization server.
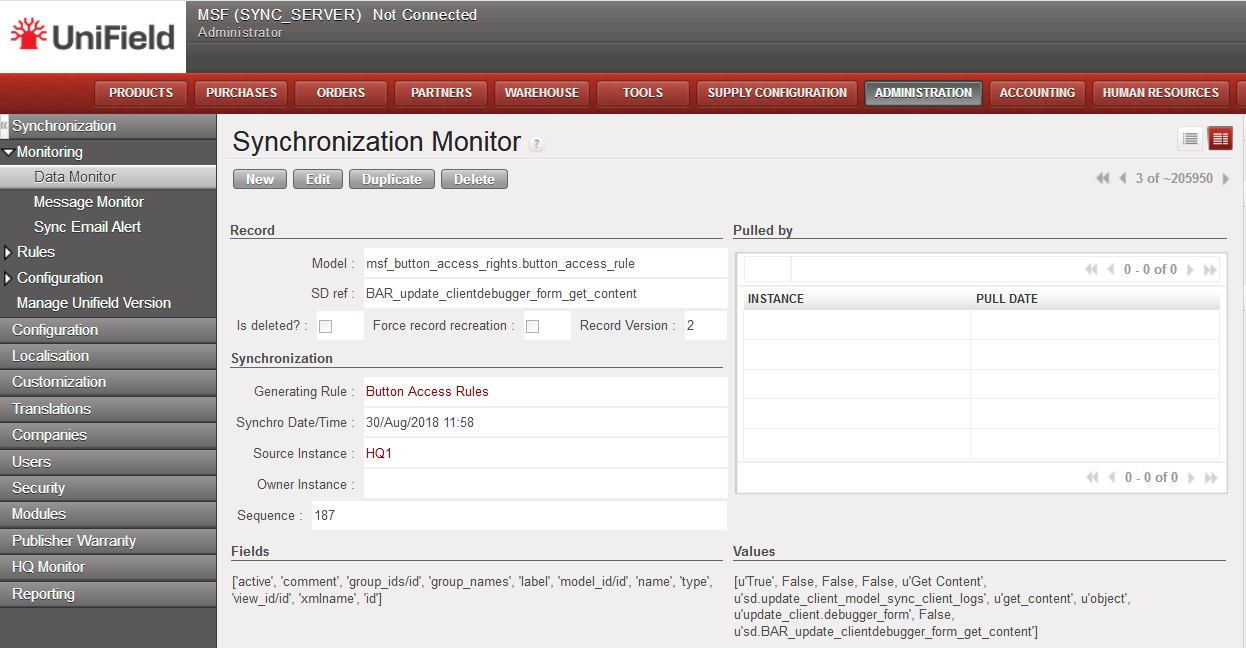
Click on a line in this list view to display the instance that pushed the entry to the server and the instances that pulled this entry from the server.
5.5 Monitoring the Data and Messages Exchanged (only at client instance)
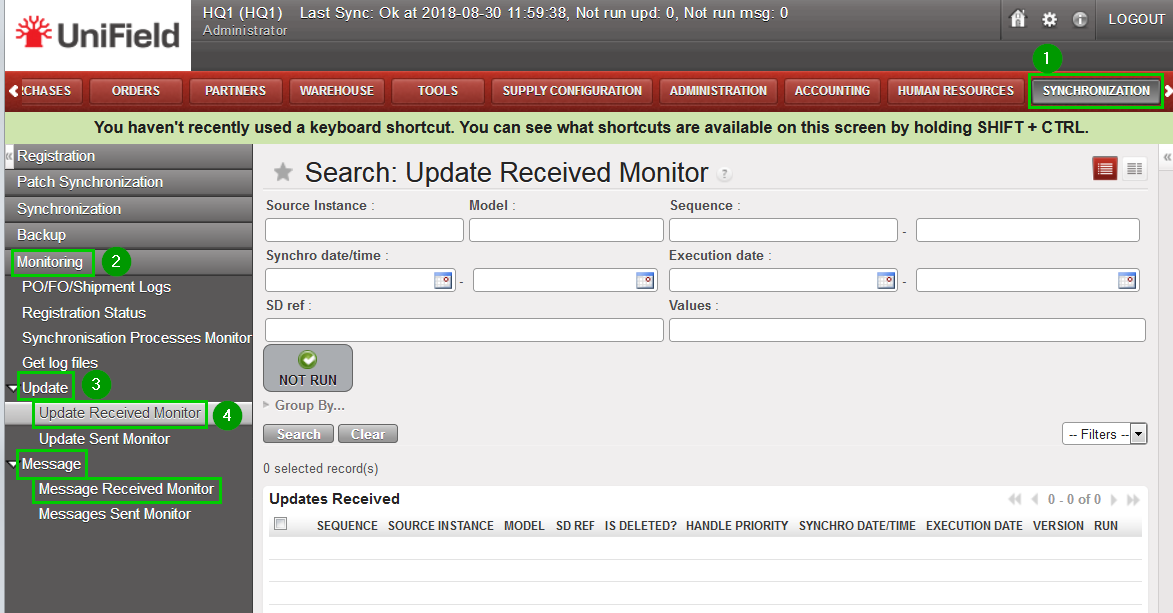
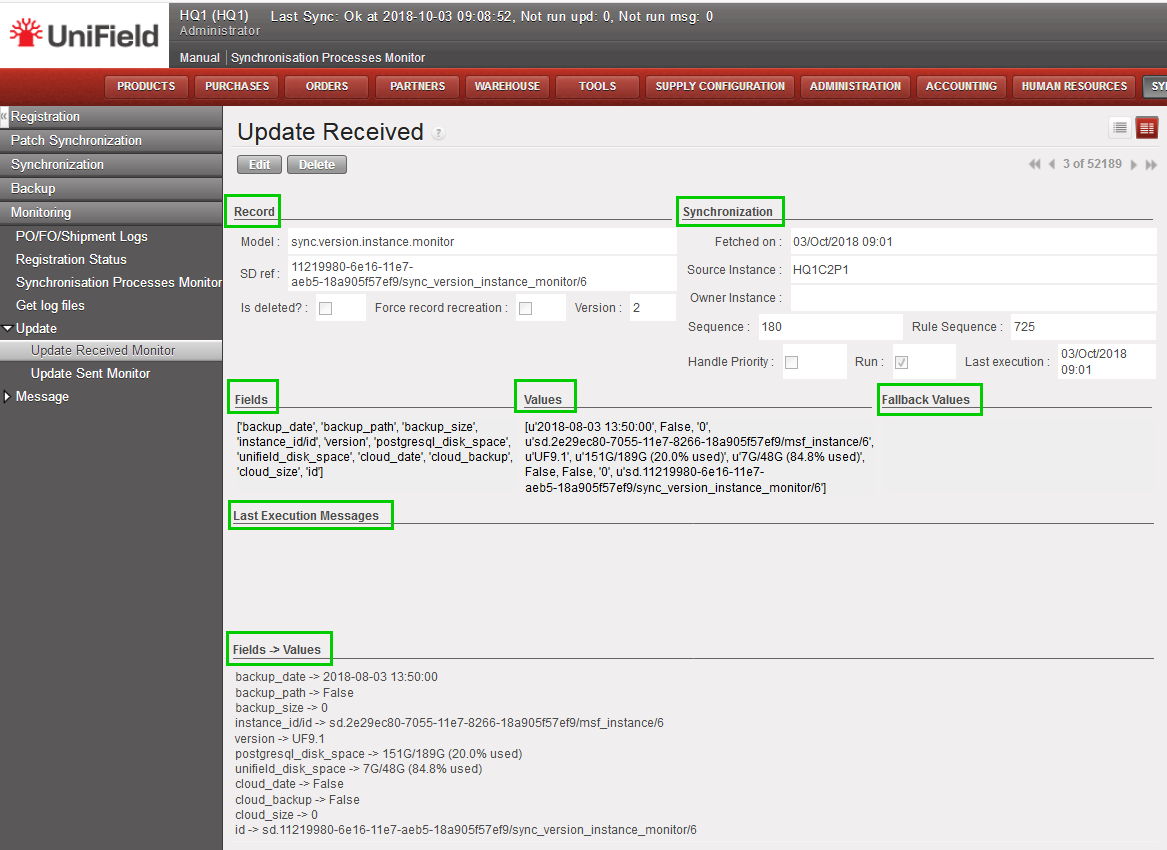
Click on menu Synchronization 1, Monitoring 2, Update or Message 3. The sub-menu Update Received 4 displays the data exchanged and Message display the messages exchanged between the current instance and other instances.
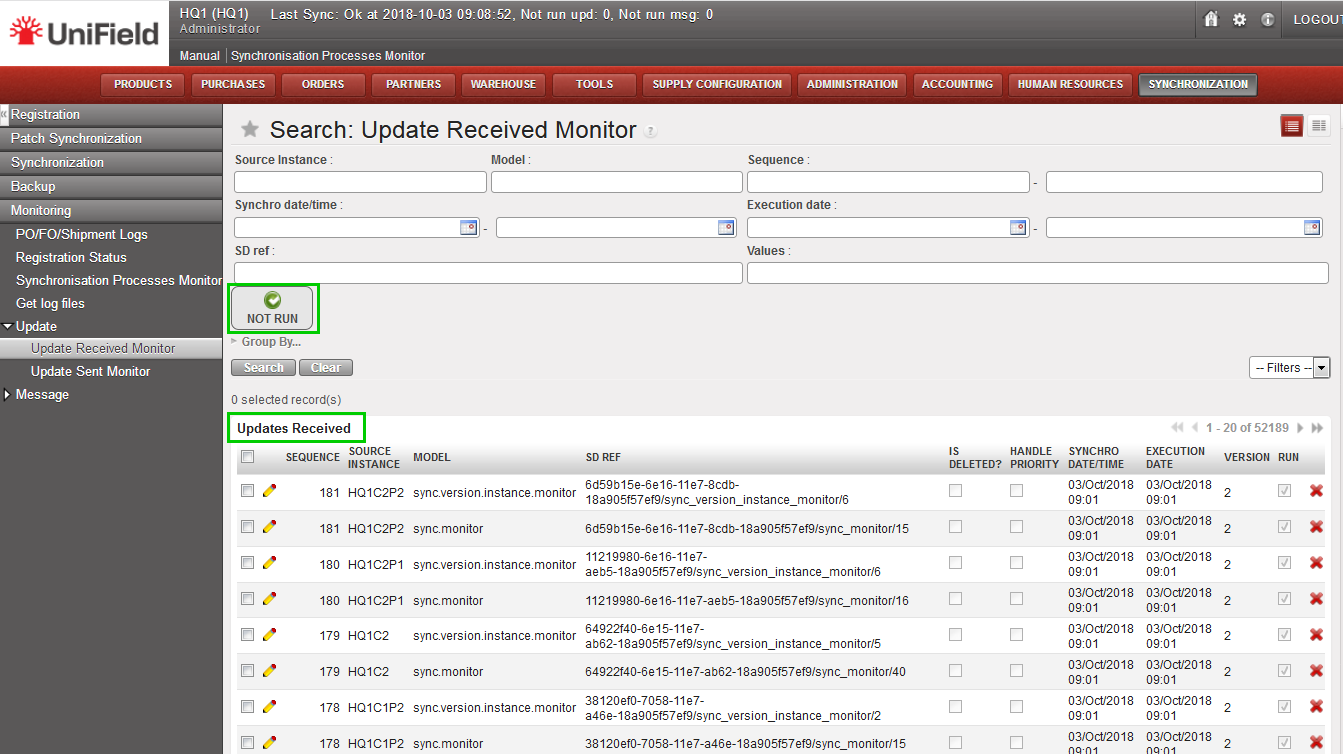
Click/Unclick the Not Run button 1 to show the lines that successfully executed or not; the entries that were exchanged but failed to be executed are highlighted in red.
Click on a line of this list to show the content of the data or message exchanged with all relevant information to the run status and error message. More information on what to do with the Not Run lines in the troubleshooting section.
5.4 Synchronization Task Status (only at client instance)
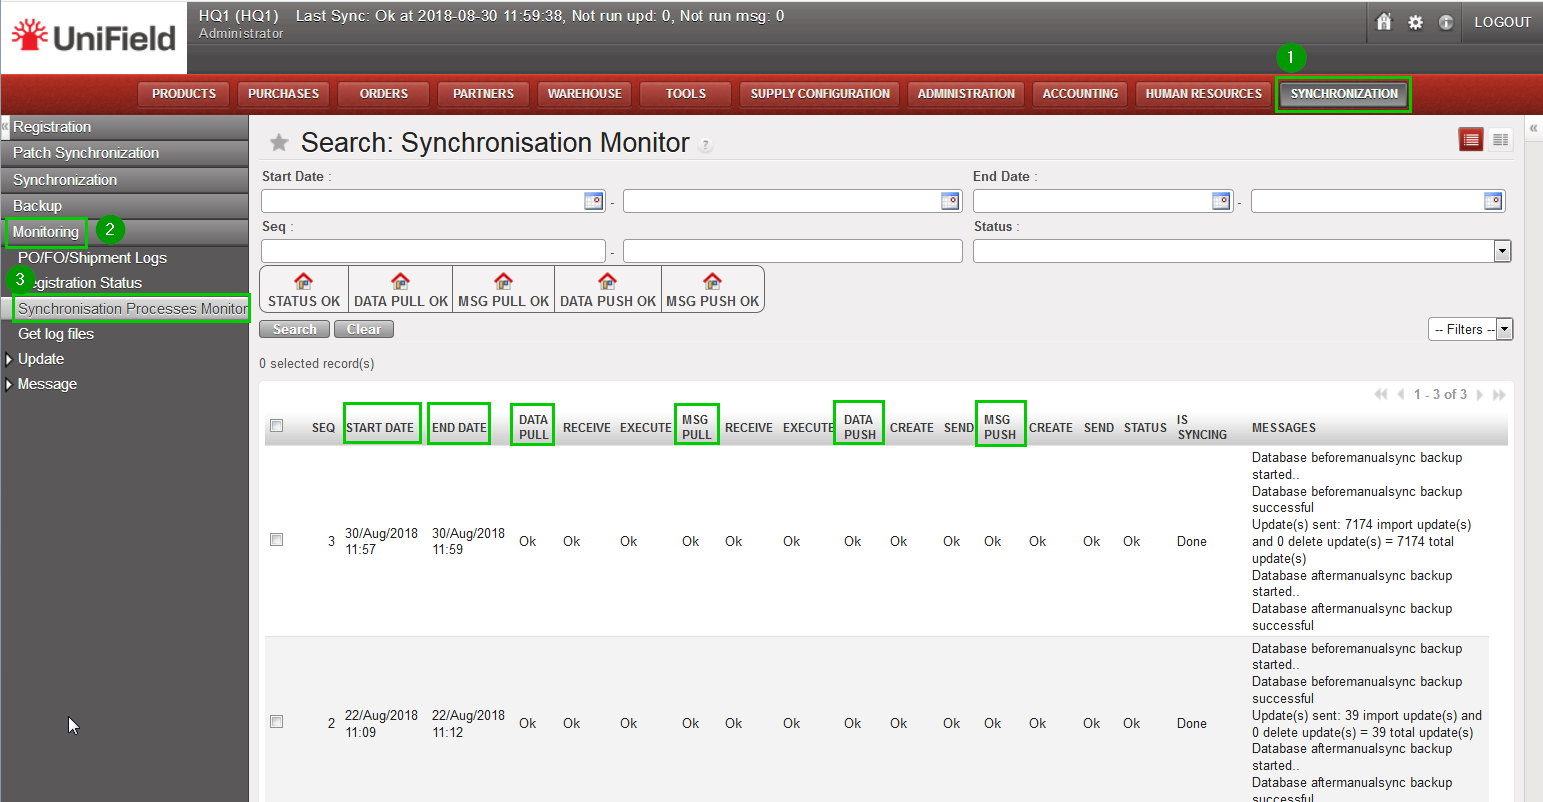
Click menu Synchronization 1, Monitoring2, Synchronisation Processes Monitor3. The Synchronization Processes Monitor shows a list of all synchronization rounds that have been made from this instance with the timestamp of the synchronization tasks. The first line in the list indicates the status of the very last synchronization round. For each synchronization round, there are 4 synchronization tasks and the order of the columns is also the order of executing the tasks: Pull Data, Pull Message, Push Data, Push Message.
There are 3 statuses’: Fail, OK and In Progress:
In Progress: the task is currently running.
OK: the task has been successfully executed.
Fail: some problem occurs during the execution of the task. An error message to explain the failure is also added in the Error Message column.
In some cases, there is another special status: “/” —not applicable . The Error Message is explained in the column. The column “Status” indicates the final result of the synchronization round: one of the 3 possible values will be shown for the single task described above.
5.3 Instance Hierarchy Information (only at sync_server instance)
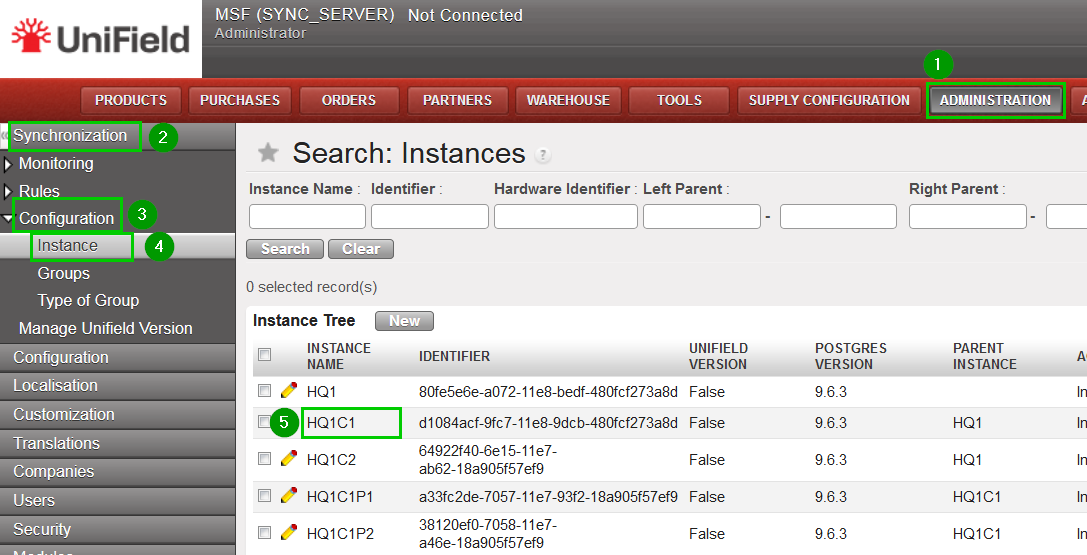
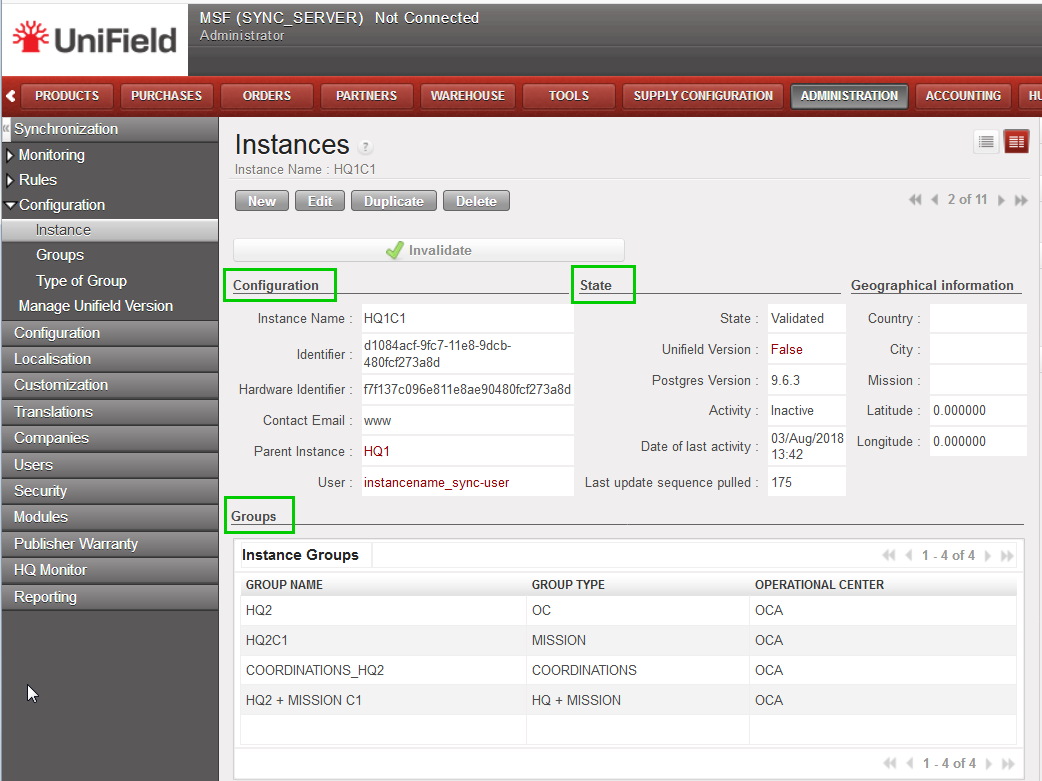
Click on menu Administration 1, Synchronisation 2, Configuration 3, Instance 4. This view shows different information about each instances. To have more detailed information about an instance click on the line of an instance 5
This print screen show you important information about an instance such as its state, parent instance, groups it belongs and children under it.
5.2 Connection Status of an Instance (ready to synchronize)
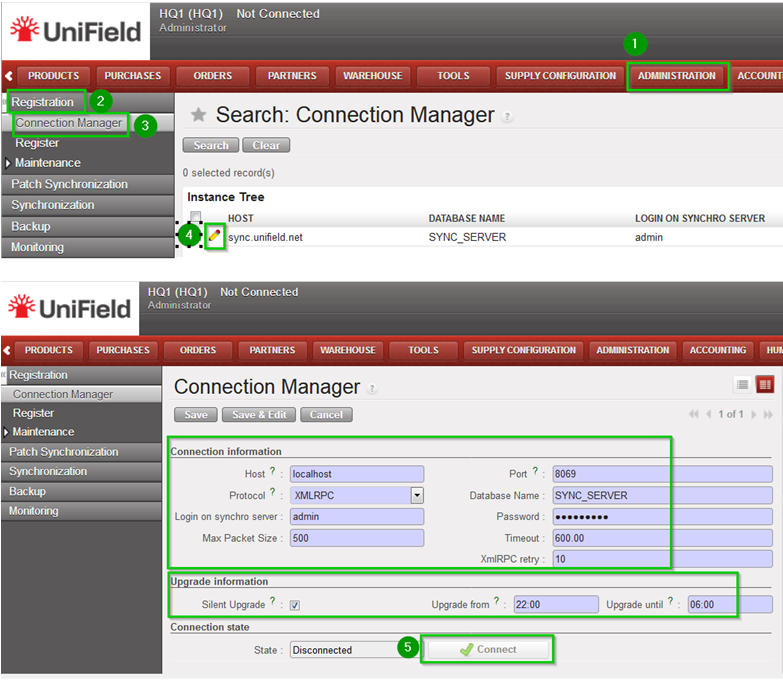
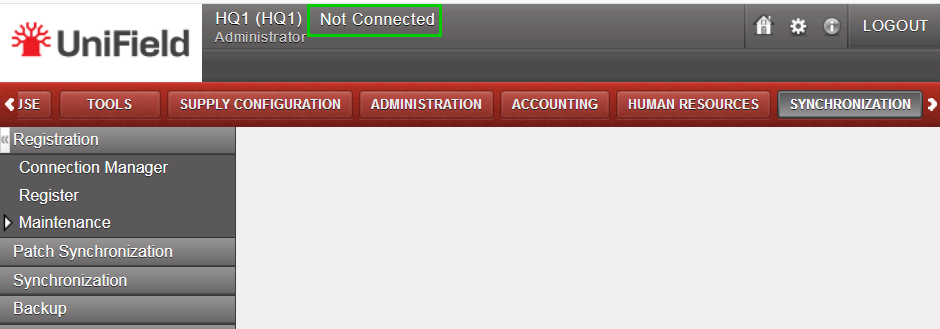
Click on menu Synchronization 1, Registration 2, Connection Manager 3 Click on the edit button 4 to see the details Among others you can see the connection status (connected, disconnected) and a button to allow connecting to or disconnecting from the server. You also have the possibility to enable the Silent Upgrade option to allow patching during a slot time defined.
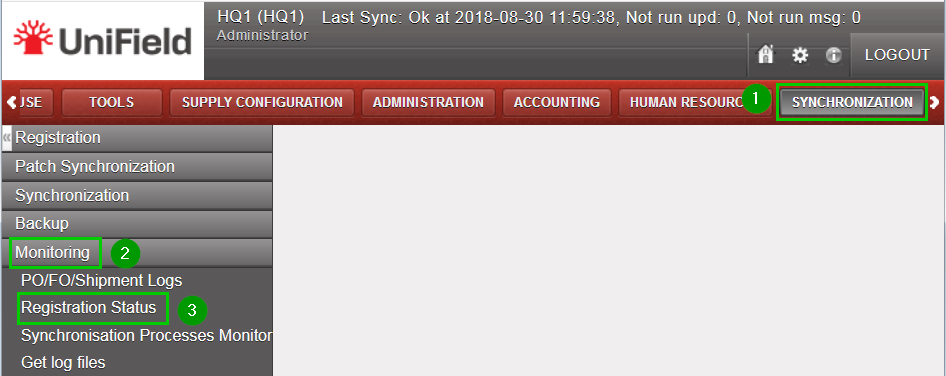
Click on menu Synchronization 1, Monitoring2, Registration Status 3
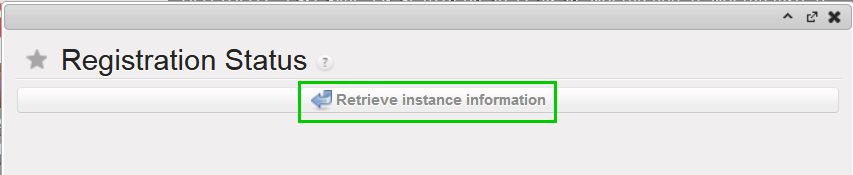
A new popup appears, click on Retrieve instance information button.
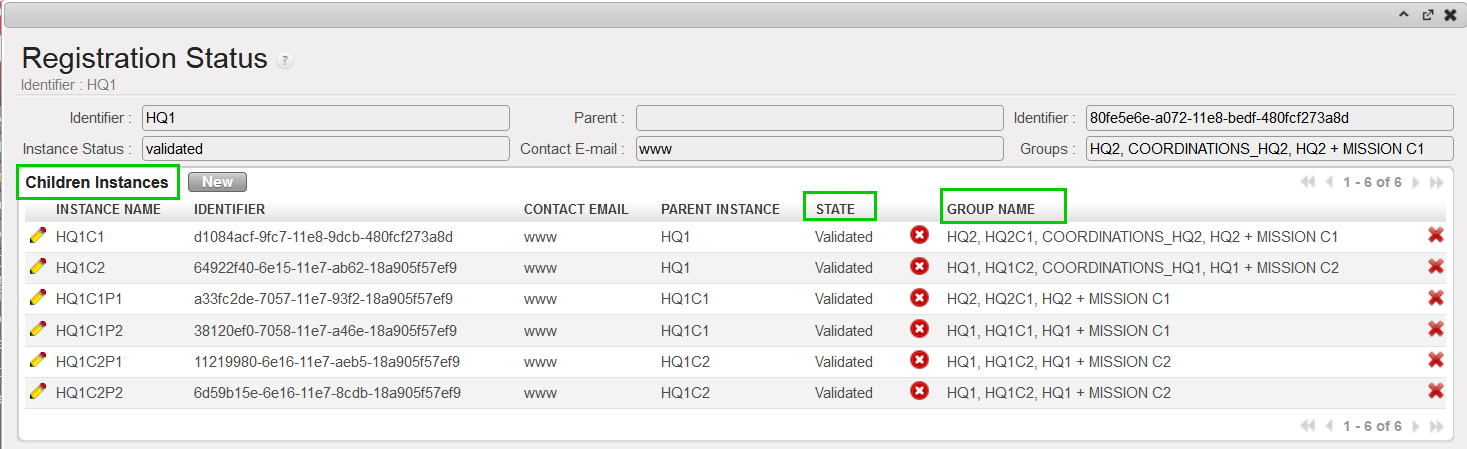
The result shows the registration status of the instance. It includes the validation status, the groups that the instance belongs to, the children instances, etc.
It is possible to configure the connection of your instance connected to the synchronization without the need to reconnect it (refer to the connection manager) every time OpenERP starts (standard set up). This feature is named auto-connect synchronisation and is a specific set-up developed for emergency context to release the workload of the user on the site. For the set-up the Support Team (ST) and the User would have to perform the correspondent steps:
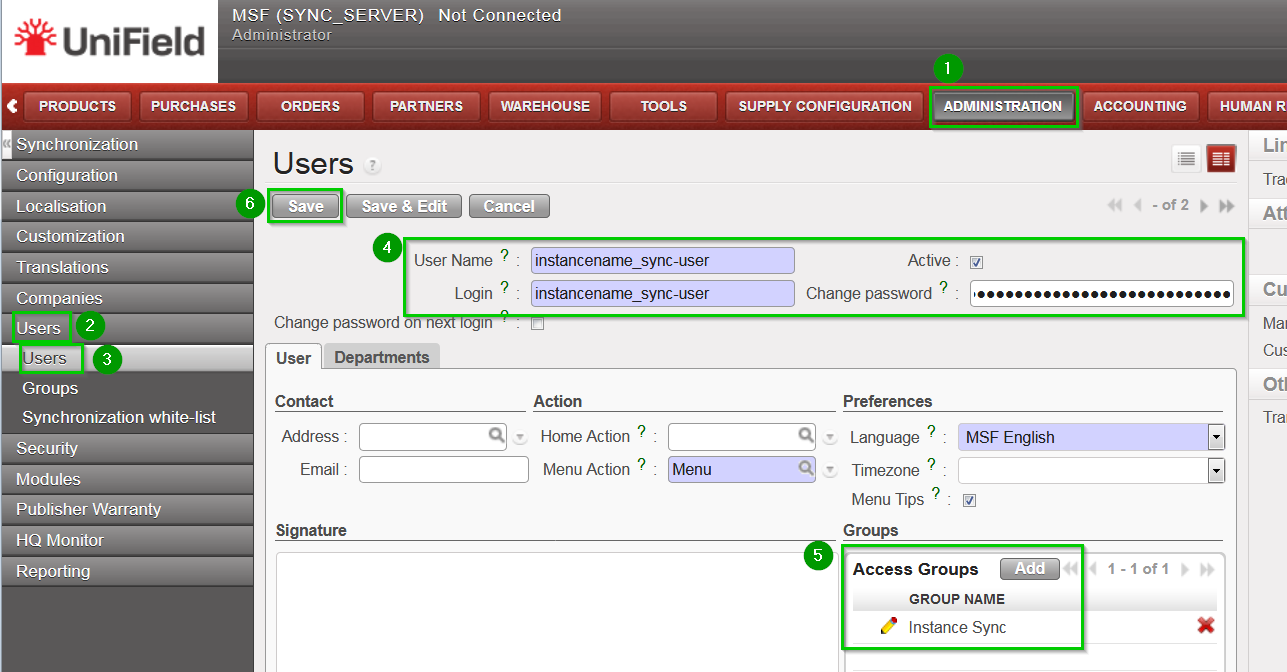
ST:[Done during instance creation step1 by coreteam] Create a new user in the SYNC_SERVER side on Administration1, Users 2, Users3. Fill in the information 4:
User Name: instancename_sync-user
Login: instancename_sync-user
Password: to set a random and complex password (from keePass2)
Add 5 the group Instance Sync Click on Save 6
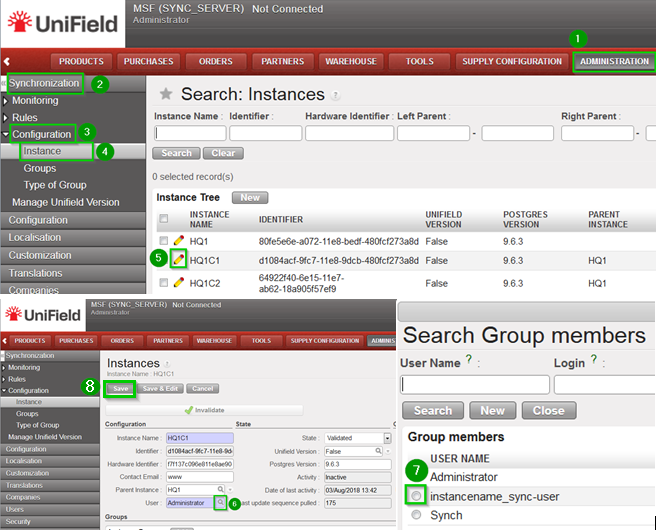
On menu Administration 1, Synchronisation 2, Configuration 3, Instance 4. Click on the Edit icon 5 of the instance. On the User field click on the look up icon 6 Select the newly created user 7 Click on Save 8
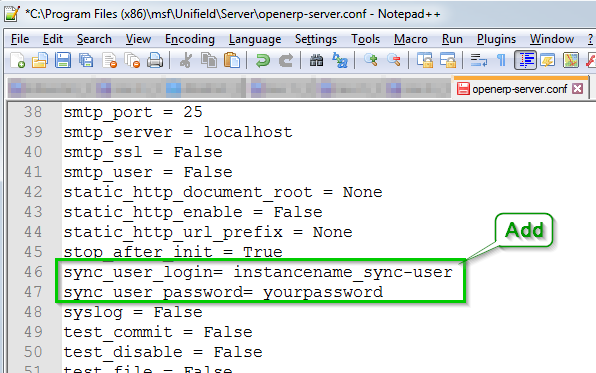
User:[can be done by only UF IT referent or coreteam] Open as Administrator with Notepad the file openerp-server.conf in C:\Program Files (x86)\msf\Unifield\Server Edit the following lines in the file:
sync_user_login= instancename_sync-user
sync_user_password= yourpassword
Save the file. Please note that sync_user_password accepts password on cleat text OR encoded in Base64. Login and password are forwarded by the ST.
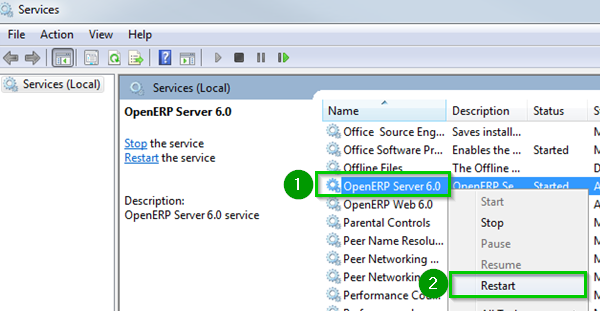
Right click 1 on OpenERP Server service and click on Restart 2
When logged back in your instance you can skip the Connection Manager step in menu SYNCHRONIZATION, Registration, Connection Manager even if the state mentions Not Connected.
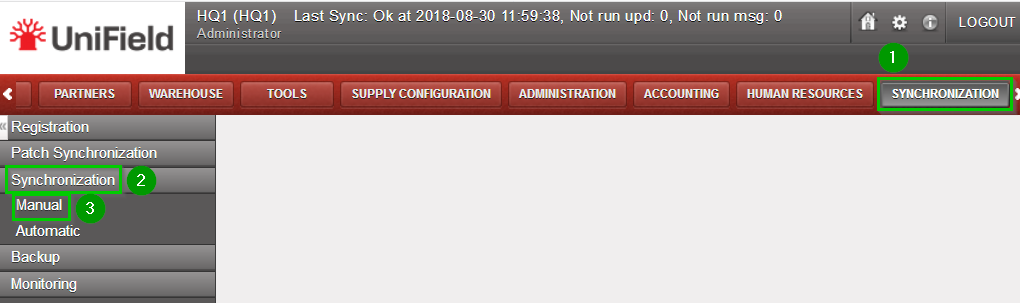
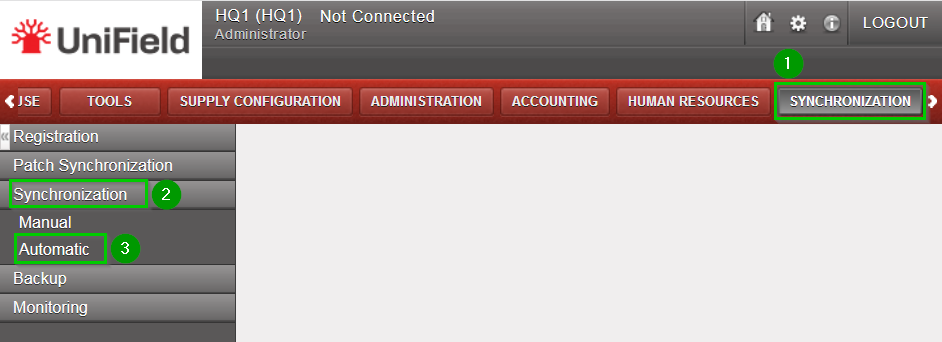
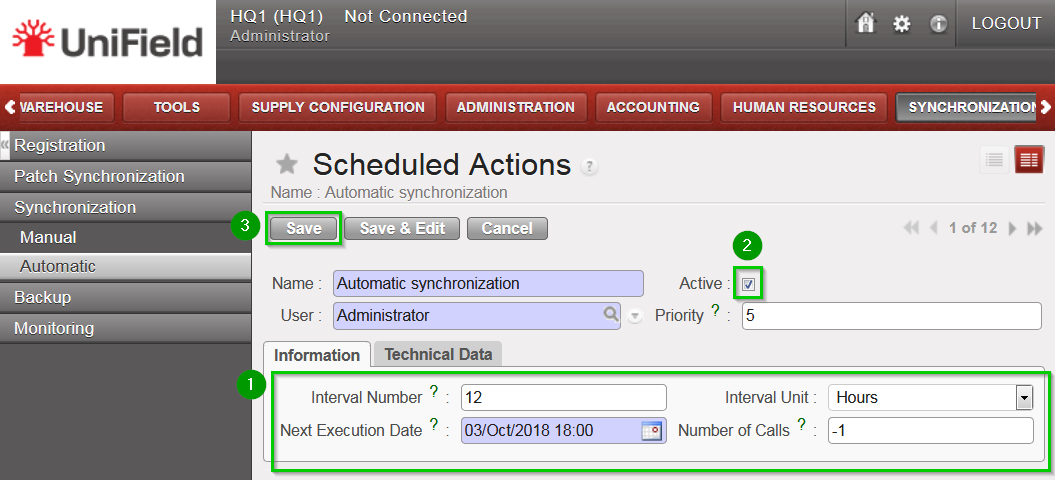
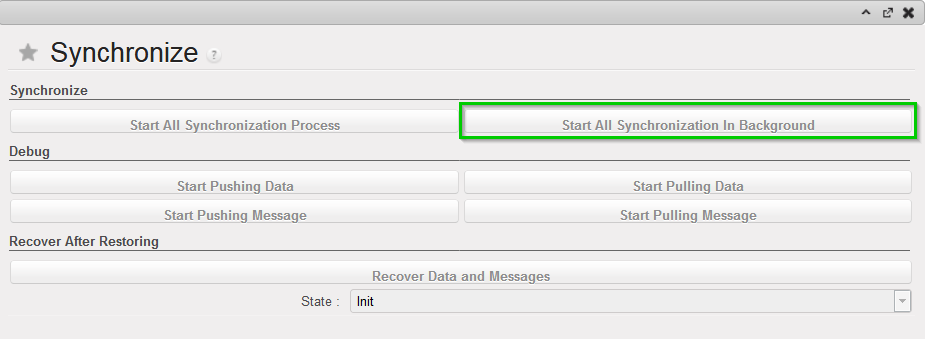
To synchronize: Go to menu Synchronisation, Registration, Synchronization, Manual. Then click on Start All Synchronization in Background. The connection will automatically be made and the synchronization will start.
It is assumed that the instance is well configured, already connected to the synchronization server and registered.
Click on menu Synchronization , Synchronization, Manual The next synchronization wizard will open.
Click on Start All Synchronization In Background. This launches the synchronization process in background. It is recommended to back up the data after a successful synchronization. Please refer to the “Procedure for backing up and restoring local instances”. To know when the synchronization is over, refer to the monitoring documentation. Instead of starting the synchronization, you may be advised that there is an upgrade to apply. Refer to the upgrade chapter.
We use cookies to ensure that we give you the best experience on our website. If you continue to use this site we will assume that you are happy with it.