UNIFIELD V.40 RELEASE NOTES

1       Release Details

Release version: UF 40.0

Date of production synchronization server patch: 11th March 2026 / 18:00 Geneva time

Latest user rights files updated: UF40.0 can be found here

Note that no user rights need to be loaded at each HQ. This will be done at the Sync Server by the Core team and will update the user rights via Sync for all HQs and missions.

JIRA filter for all integrated tickets:

https://jira.unifield.org/issues/?filter=12568

2       Supply

2.1         (US-14529) Auto-VI: e-mail notification for partially/failed PO import

A first automated email notification is introduced for PO Auto-VI when processing results are partial or failed, based on the job report. The notification applies only to OCA Auto-VI and aims to enable proactive follow-up and reduce downstream issues (e.g., ePPL failures). Each job report can trigger a maximum of three emails, with duplicate notifications prevented for the same job. The email content includes the job ID and time, list of affected POs, imported file names, and a summary of detected errors. Configuration allows enabling/disabling notifications, selecting notification type (partial, failed, or both), and defining up to three recipient email addresses. Email sending and failed attempts are logged for traceability.

2.2         (US-15483, US-14763) Supplier performance report update

The Supplier Performance report is updated to better reflect Supplier Invoice discounts. New columns show the unit price before and after discount, as well as the discounted amount, based on data from Accounting. The discount value is pulled from the Supplier Invoice, where it is applied directly by Finance and not accessible to Supply users. Columns T and AB are renamed to “SI Unit Price Discounted Amount (Before vs After Discount)” (including functional currency). A “+” or “–” sign now indicates whether the adjustment is a markup or a discount, without affecting existing XLS formulas. This change improves transparency and avoids confusion when reviewing price differences.

2.3         (US-15117) PO Follow-up Export Update

The “Export PO Follow-up” Excel report is updated to include a new “Comment” column at line level, placed between “Product description” and “Qty Ordered,” aligned with IR and FO Follow-up exports. The change applies to all XLS exports from Purchase → Reporting → Export PO Follow-up and from the PO Action Menu → Order Follow-up → Export to XLS. Due to space constraints, no changes are made to the PDF PO Follow-up export.

2.4         (US-14434) Export Merged PO option is available only to merged POs

A validation is added to the “Purchase Order (Merged)” PDF export to prevent its use on non-merged POs. When a user selects this option on an ordinary PO, a pop-up error is displayed: “This PDF is only available for merged POs.” The standard PO PDF and other reports remain unchanged, and no error is shown when exporting the merged PO PDF for a merged PO. The change is not retrospective and applies only to POs created from the UF40 release onward.

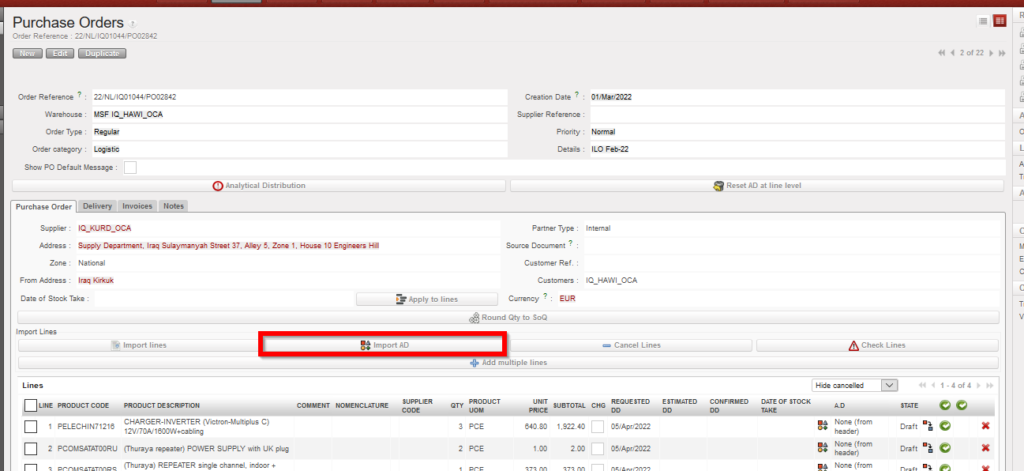
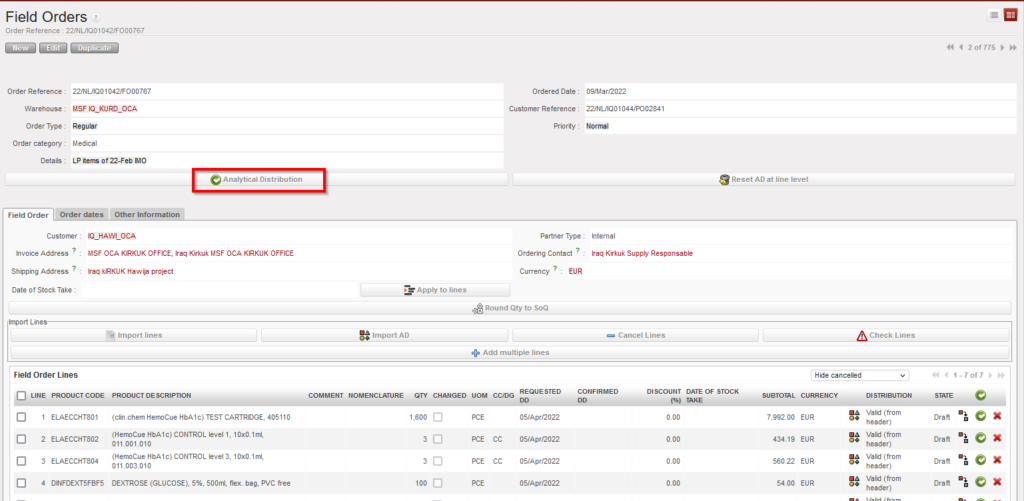
2.5         (US-15226, US-15225, US-15224, US-15212, US-15207) Custom & Transport Module Layout Adjustment

The Custom and Transport module layout is adjusted to improve usability and correct structural inconsistencies in ITO/OTO. The “Macroprocess and Steps” section is moved to the first tab, and in ITO/OTO the supplier/customer and their addresses are relocated from the Transport Object to the document header. The Transport PO field is removed from the Transport Object to streamline data entry. These improvements are linked to the correction and optimization of the Custom and Transport module structure.

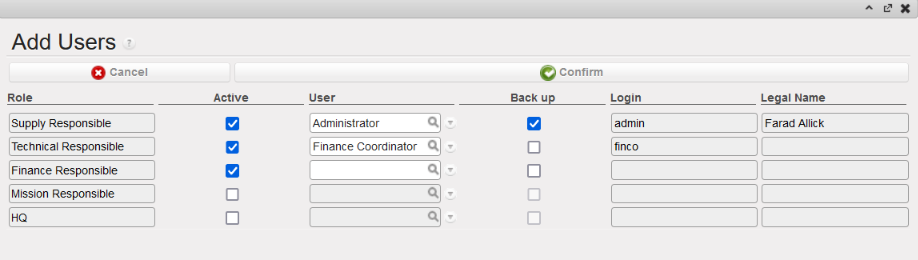
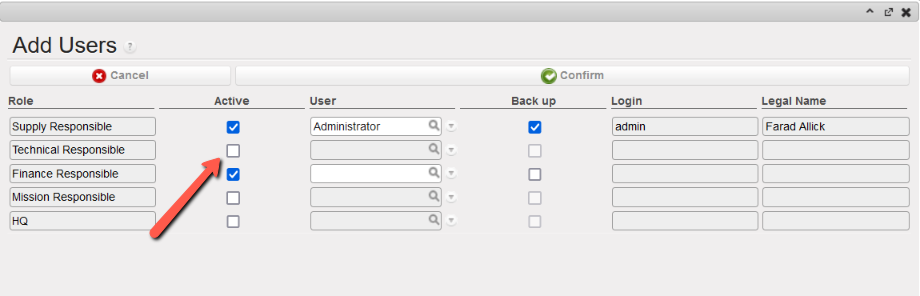
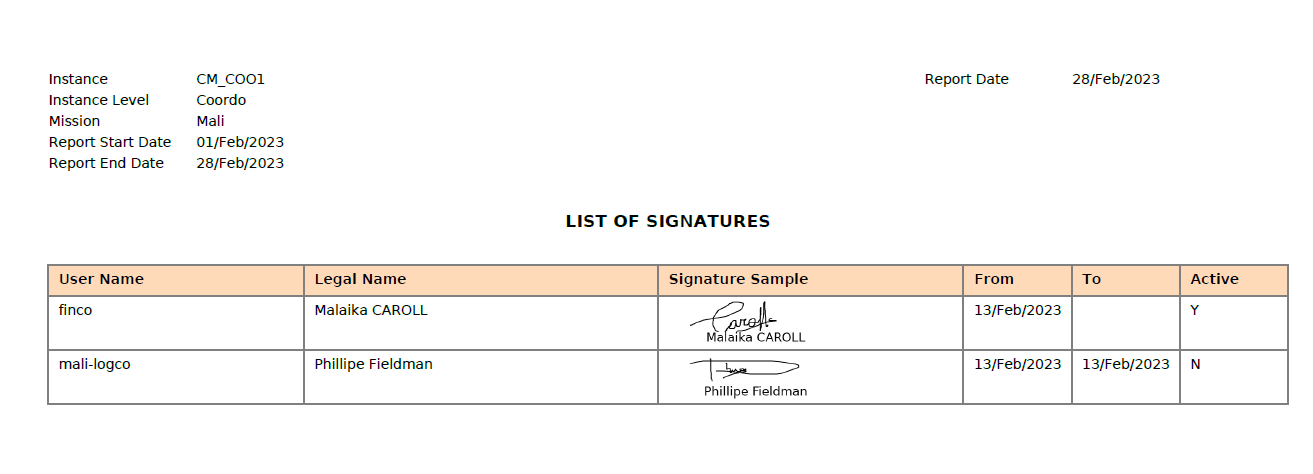
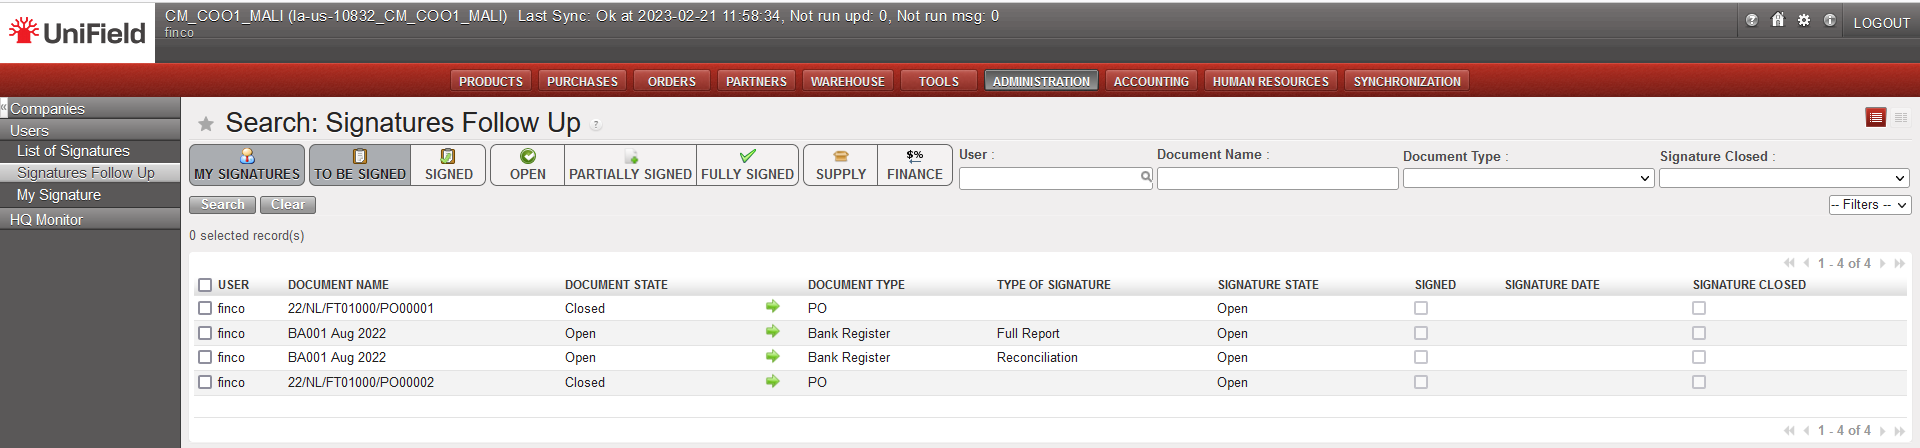
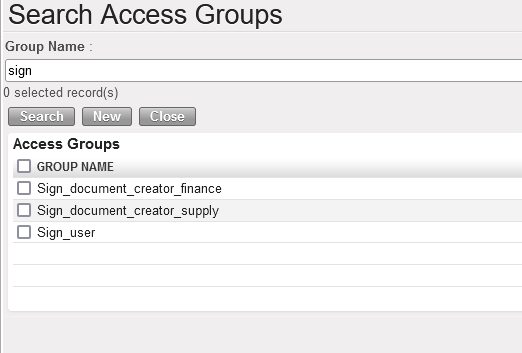
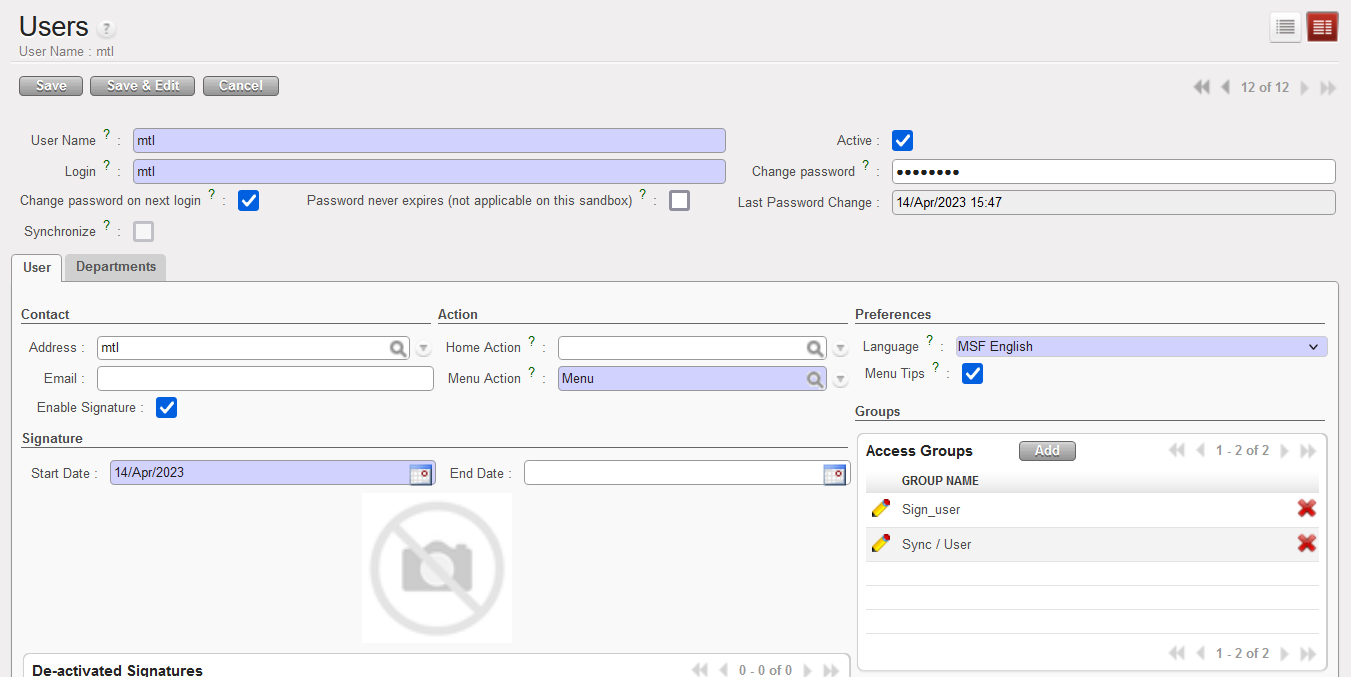
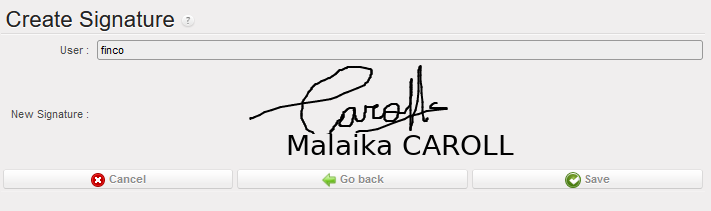
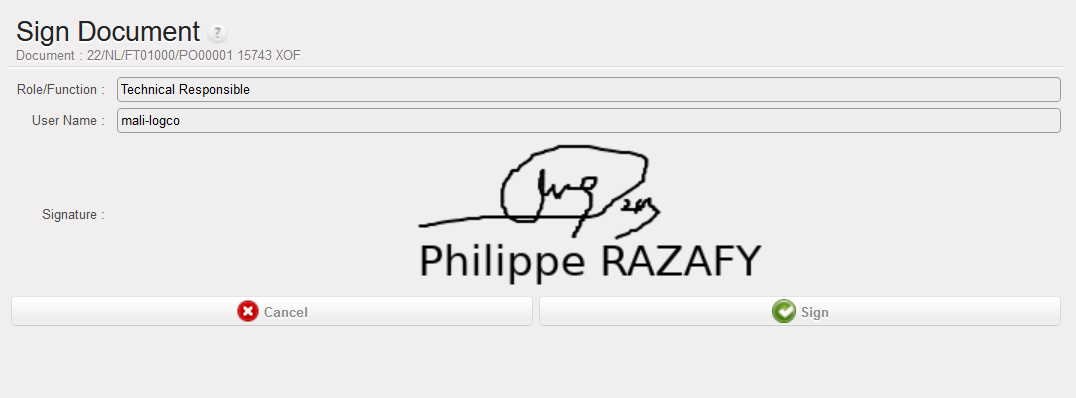
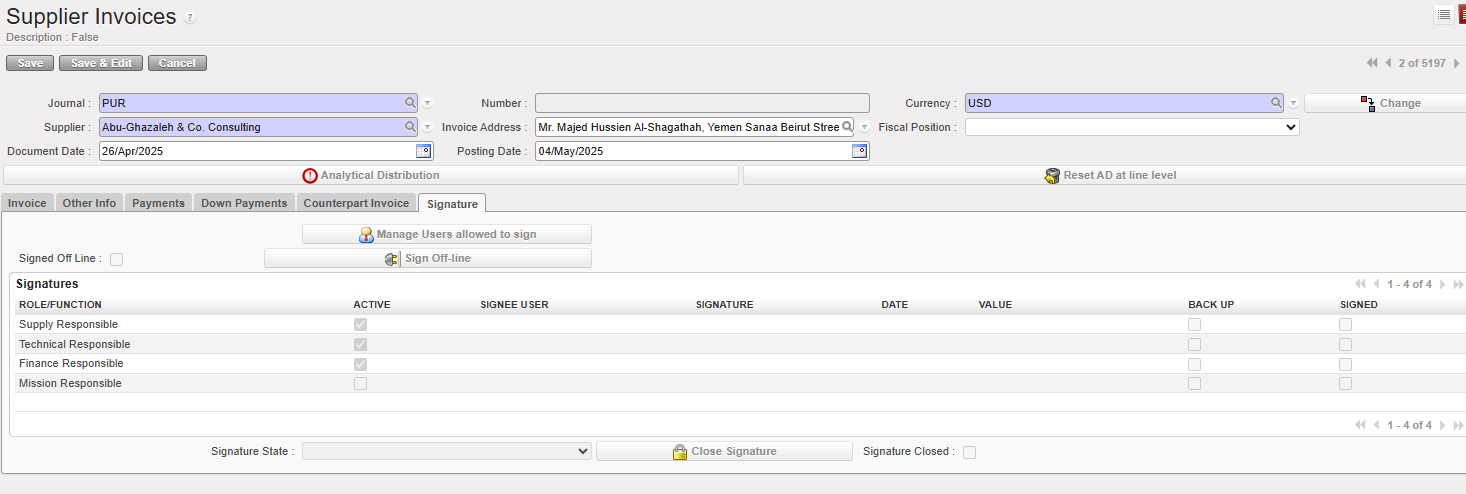
2.6         (US-15245, US-15152, US-14735, US-14734) E-Signature Alignment & Controls

E-signature behaviour is reinforced across documents to ensure consistency and prevent signature inconsistencies. On Purchase Orders, signatures are now automatically removed when the supplier or partner is changed after signing (including IS/IM/ESC/Internal).
For Incoming Shipments, signing is restricted to Closed status only, the “Close Signature” button is disabled in non-closed statuses, and previous conflicting logic is reverted to align with the physical process.
A warning pop-up and cascading removal mechanism are introduced when deleting a signature, and the signature status (Partially/Fully Signed) is now strictly aligned with active assigned signees across all e-validation documents. This prevents gaps in the sequence and eliminates the possibility of applying signatures out of order.

2.7         (US-14982) An NSL code can be reactivated multiple times without affecting the UniField status.

For Non-Standard Local (NSL) UniData codes at Coordination and Project level, the status is now automatically set to Valid when a product is reactivated at coordination level. The change prevents active NSL products from remaining in Archived status and being blocked in order flows. Manual admin correction is no longer required.

2.8         (US-15206, US-14673) UniData Merge & Product Status Alignment

Improvements are implemented to better align UniData (UD) merge logic with UniField product status. The “New Code” field is now populated from UniData, and a patch script cleans previously incorrect values where codes were not actually merged. Products already marked as Merged (Non-kept product) in both UD and UF will no longer be updated. A daily scheduled HQ script ensures that non-kept products are automatically set to inactive/phase-out when the kept product becomes inactive. These changes improve merge traceability, prevent status inconsistencies, and support controlled product phase-out.

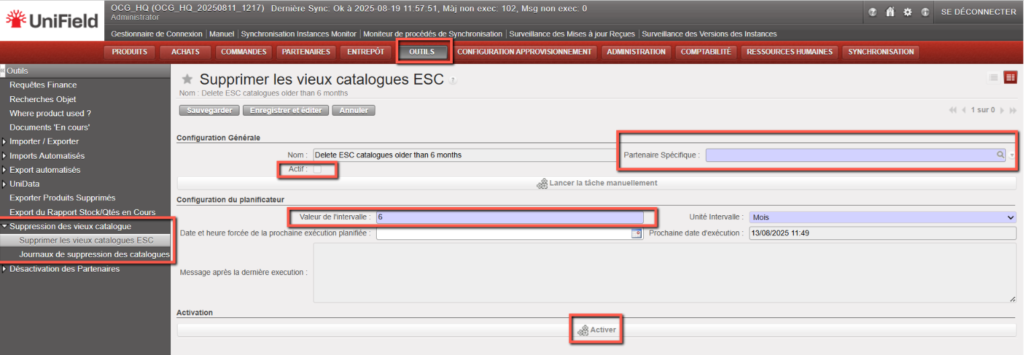
2.9         (US-14372) ESC Auto-VI Catalogue Date Management

Automatic date management is introduced for ESC catalogues imported via Auto-VI only. When a new ESC Auto-VI catalogue is imported, the previous active ESC Auto-VI catalogue is automatically closed, and its To Date is adjusted to ensure continuity (To Date = new From Date – 1 day), preventing date overlaps. If multiple identical Auto-VI catalogues exist, the system recalculates periods to maintain consistent, non-overlapping validity ranges. This rule applies strictly to ESC catalogues imported through Auto-VI and does not impact manual catalogues or other partner catalogue flows.

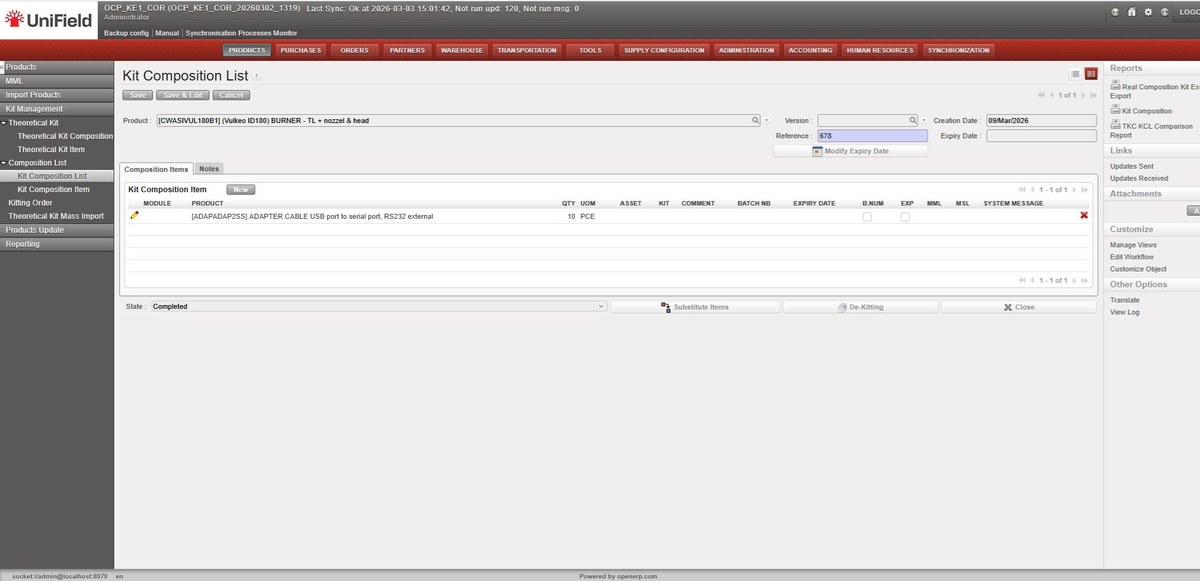
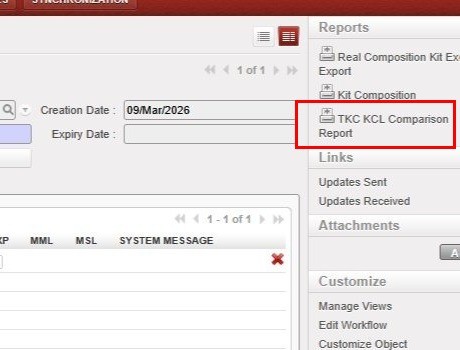
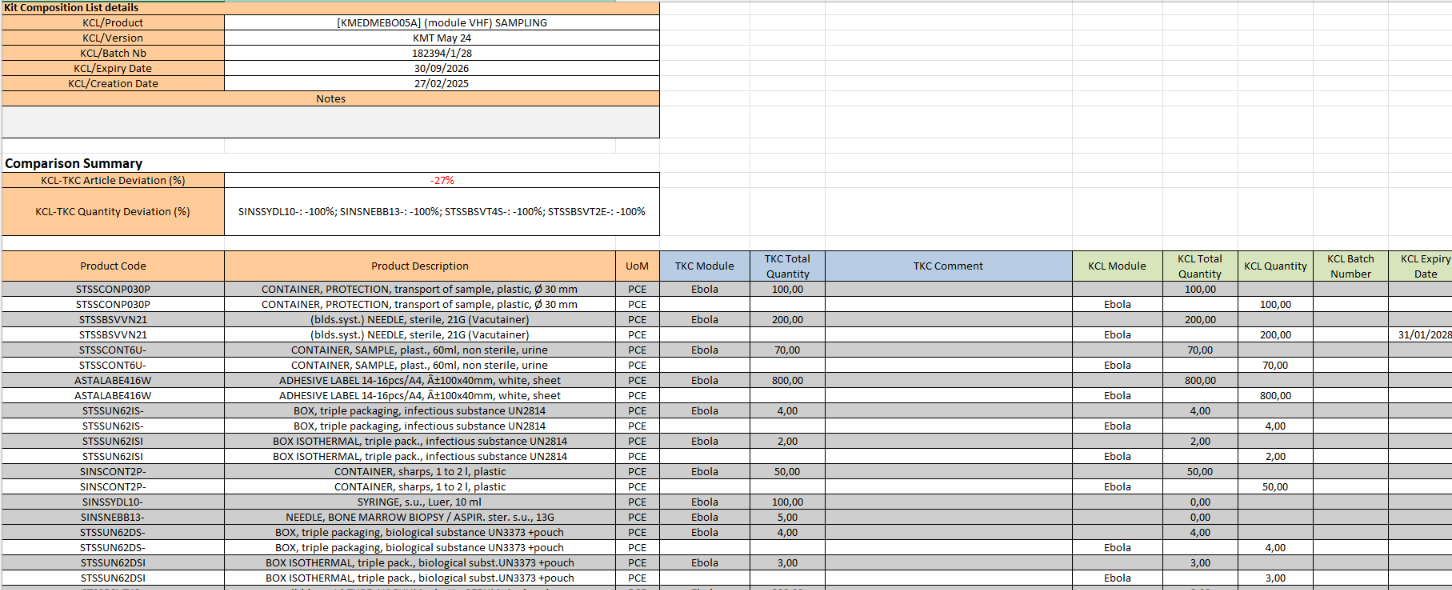
2.10      (US-13049, US-13220) Missing Components Report (KCL vs TCL)

A new “Missing Components” report is requested for Kit Composition Lists (KCL). The report compares the actual composition of a KCL against the corresponding Theoretical Composition List (TCL/TKC) to provide a clear and quick view of kit completion. It is available for Completed and Closed KCLs.

Two key indicators are introduced: Article Deviation (%), showing differences in the number of codes between KCL and TCL, and Quantity Deviation (%), showing differences in total quantities per code. Positive and negative signs clearly indicates over- or under-composition versus the theoretical list.

2.11      (US-12951) Reserved Product Report Update

The Reserved Product report in Warehouse → Inventory Management is streamlined by removing the on-screen view and opening a configuration pop-up directly, with optional filters for Location Stock and Product. The report structure is aligned with the existing Export Reserved Products logic, with updated and clarified columns (including IR/FO reference, customer/location requester, ordered quantity, reserved value, and currency) and removal of obsolete fields.

2.12      (US-12411) Warehouse / Traceability : change in ordering and naming

The Warehouse menus are reorganized for better structure. In Traceability, batch items are grouped under a new Batch Number Management submenu, and the Destruction Report is moved to Reporting. The Reporting menu is rearranged with consistent naming and capitalization. No change to report logic or data.

2.13      (US-15013) Pack ID: Pre-packing List not distinguishing packing list and merging lines from different packing list

The parcel grouping logic in PACK is corrected to prevent unintended merging of parcels when identical parcel_from/parcel_to values are used across different Packing Lists. When a Pack ID is present on the PPL line, parcel grouping now considers parcel_from/parcel_to together with the Pack ID, ensuring distinct parcels remain separated. If no Pack ID is available, grouping continues to rely on parcel_from/parcel_to only. This fix prevents incorrect parcel consolidation during PICK and PACK processing while maintaining existing behaviour when Pack IDs are not used.

2.14      (US-14254) Partners: Allow report generation on Inactive partners

A new checkbox “Include inactive partners” is added to the Supplier Performance report to allow retrieval of data linked to deactivated partners. Other reports (Donation, Loan, FO Follow-up, PO Lines Allocation, IN & OUT, Deliveries, Receptions) already allow access to such data when no specific partner is selected, so no checkbox is added there.

In all listed reports, the partner lookup (magnifying glass) now allows selection of inactive partners. This applies to all partner types (customer, supplier, manufacturer, transporter, internal, intermission, intersection).

2.15      (US-15234, US-14145) Replenishment Rules: Order calculation display the FMC or AMC set in the segment

The Order Calculation (RR) “Order Cycle” screen is enhanced with additional visibility of consumption data at line level. A new RR-AMC field is introduced, aligned with the representation used in Replenishment Segment lines. The first three RR-FMC periods (FMC 1, 2, 3 with respective From/To dates) are displayed directly on screen and in the Excel export, followed by a “More FMC” label and button to access detailed values.

These changes apply only to newly generated Order Calculations and are not retrospective.

2.16      (US-14637) Introduce a final check for imported lines when the reference document is open in more than one window

A status validation is added to the Import Lines process to prevent inconsistencies caused by parallel window usage, as identified in US-14623. Before importing each line, the system now performs a final status check and skips the import if the document is Cancelled, displaying an error message. This validation applies to FO, IR, PO, IN, INT, OUT, Pick, TKC, and KCL, with specific behaviours aligned per document type (including RfQ, Tender, Inventory, Replenishment Segment, and Product Mass Update). The change prevents unnoticed document conflicts and ensures data consistency during imports.

2.17      (US-14571) Improvement to Shipment Filters List View Page

The Shipment Dashboard is enhanced with additional filtering options to improve traceability and usability. A new “Origin” filter is added to allow filtering of shipments by FO or IR number, returning SHIPs linked via PPLs. A Product filter is also introduced on the second row as the last filter. Additionally, the existing PPL filter is updated to search by sequential number only, enabling users to copy and paste values such as PICK/XXXXX or PPL/XXXXX.

2.18      (US-14550) Claims can’t be processed by supply users due to split and check of CV

An issue preventing Supply users from processing Claims with replacement has been resolved. During the claim flow, the system was incorrectly triggering the creation of a Commitment Voucher (CV) when splitting and confirming a PO line, requiring Finance access (Fin_Budget group). The logic is corrected so that no CV is generated during this claim process, restoring the ability for Supply users to process claims without additional Finance permissions.

2.19      All Supply tickets integrated in UF40.0

KeySummaryDetailed
US-15483Supplier performance report indicates discount only in absolute valueX
US-15252Transport existing reports: error in the displayed lines
US-15245PO signatures are not reset if the ESC/internal/IS/IM partner changed to external      X
US-15234OCA RR: Error blocking the creation of Order Calc in SandboxX
US-15226C&T Configuration Macroprocess: removing all filters by defaultX
US-15225C&T Configuration Macroprocess: ERROR in filtersX
US-15224C&T: bring the ‘Macroprocess and Steps’ box on the main ITO / OTO pageX
US-15212Custom and Transport: ITO/OTO to make cost mandatory field in Custom fees/ transport feesX
US-15207C&T: to add “Ship Reference” column on the ITO and OTO dashboardX
US-15206UD Merged Product: New Code Value IncorrectX
US-15195PO supplier catalogue – reduce number of digit for Catalogue subtotal
US-15170preventin SSDTHCTE014 NR in OCB instances
US-15152[E-Validation] Incoming Shipment Partial Reception ImprovementX
US-15148export IR follow up file naming issue (XLS/PDF)
US-15117Export PO Follow-up: Add line commentX
US-15013Pack ID: Pre-packing List not distinguishing packing list and merging lines from different packing _listX
US-14982Prevent NSL Multiple Activations Creating Archived StatusX
US-14966IN export: to exclude canceled lines from XLS export
US-14763Supplier performance report to include applied discount in the reportX
US-14735E-Validation: Correct Possibility to Sign PO out of SequenceX
US-14734E-Validation: Signature Status not aligned with Applied SignaturesX
US-14673Merged UD codes to link to UF statusX
US-14637Introduce a final check for imported lines when the reference document is open in more than one windowX
US-14571Improvement to Shipment Filters List View PageX
US-14550Claims can’t processed by supply users due to split and check of CVX
US-14529PO Auto VI: partial or failed email pushedX
US-14434Purchase Order (Merged) PDF not showing merged POsX
US-14372ESC supplier catalogueX
US-14254Partners: Allow report generation on Inactive partnersX
US-14145OCA RR: Order calculation does not display the FMC or AMC set in the segmentX
US-13220Kit Composition Items – BN are displyed in Kit/ProductX
US-13049Kit Management: Compare KCL and TKCX
US-12951Reserved Products Report – ImprovementX
US-12411Warehouse / Traceability : ordering and namingX
US-11840Align “Return from Unit” Template Terminology

3       Finance

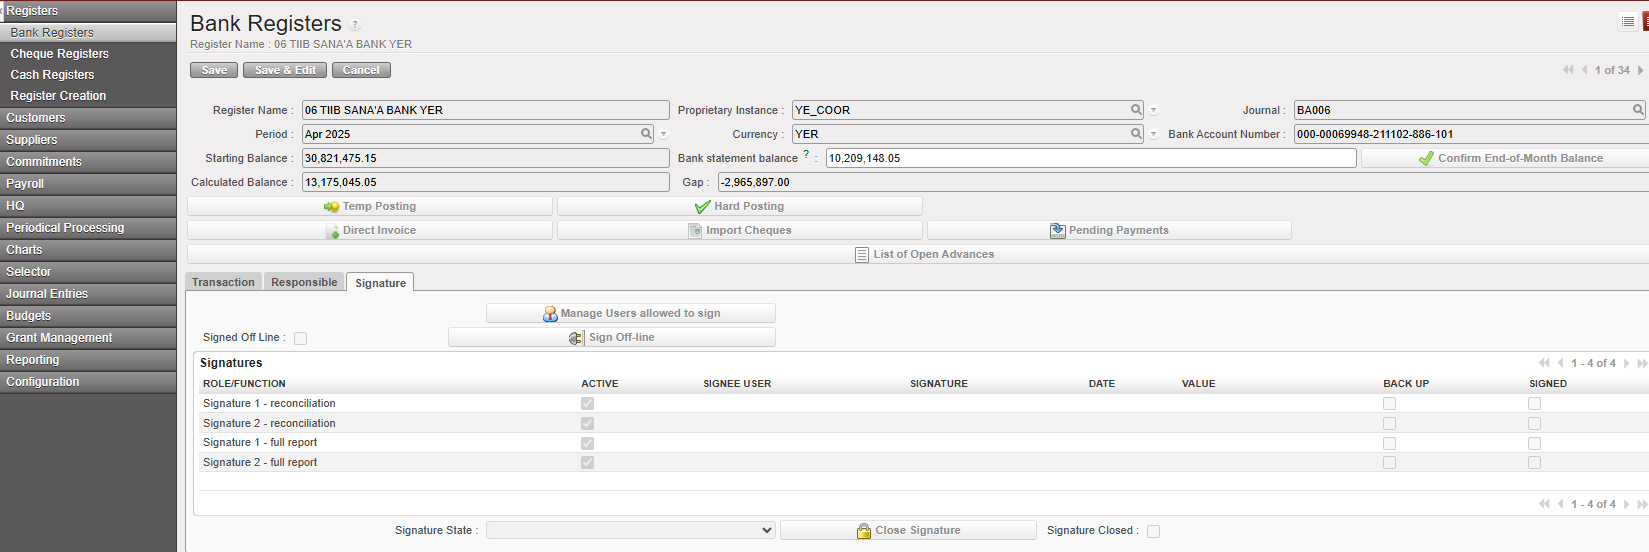
3.1         (US-11973) Bank registers from the project created at coordo level but end-of-month balance confirmed on project

This release fixes a bug reported in several tickets. The initial balances were not reported for several registers. This issue is now resolved.

3.2         (US-14891) When lines added to certain invoices, the product is grayed out (not possible to add a product)

A development has been implemented to remove the possibility of selecting a product code when adding a new line in an invoice, for all invoicing objects created by Finance.

This rule now applies to:

We also acknowledge that donations received are not taken into account (extra‑accounting).

3.3         (US-14893) Refunds: Refund-modify – Invoice and Refund-Refund documents: restriction on modifying product code and quantity.

A development has been implemented to fully restrict the editing of the product code and to restrict quantity changes so that they cannot exceed the original quantity in the following cases:

3.4         (US-14898) Duplicated Supply invoices – restriction on modification of product and source document

This improvement concerns duplicated invoices generated from the supply flow.

For these duplicated invoices:

3.5         (US-14967) Currency tables: button filters, filtering fields and default filtering

This improvement concerns the Currency Tables page.

In Configuration → Currency Management → Currency Tables, the following enhancements have been implemented:

  •  Three status‑based buttons have been added: [Draft], [Valid], and [Closed].
  •  Only Draft and Valid tables are shown by default. Closed tables are filtered out.
    • free‑text search field.
    • free‑text search field.
    • drop‑down field with Yes / No.
    • free‑text search field (e.g. typing “USD” displays all tables containing USD).

3.6         (US-15012) Addition of “not blocking” notification message for closing period with “not validated IVI” – Intermission voucher IN –

This improvement introduces warning messages when closing a period under specific IVI conditions.

A non‑blocking warning message has been added when attempting to close a period while draft IVIs exist in the instance.

The message is large, red, and centered on the screen so it cannot be ignored.

EN: “Are you sure you want to close the period while there are draft IVIs?”

FR: “Est‑ce que vous voulez clôturer la période alors qu’il y a des IVI en mode brouillon?”

Condition:
Display the warning when there are draft IVIs with a posting date before or equal to the end of the period being closed.
 Example: draft IVIs dated 28/05/25 when closing June 2025.

A warning must also be displayed if at least one IVI has no posting date.

EN: “Are you sure you want to close the period while there is an IVI with an empty posting date?”
 FR: “Est‑ce que vous voulez clôturer la période alors qu’il y a des IVI avec une date d’enregistrement vide?”

3.7         (US-15097) OCB_HQ: Tool cost center creation: Correction to allow creation of combination of cost centres with valid validity dates

A development has been implemented to address an issue encountered when using the tool to create cost centers
 (Tool → Import/Export → Finance → Cost Center Creation Mapping).

When attempting to import a file containing two cost centers—one view and one normal—both with identical start and end dates, UniField incorrectly displayed the following error message:

“The sub‑cost center validity date is greater than the parent cost center validity date!”

However, the dates in both records were identical.

The following tests confirmed the issue:

The development has now been completed to correct this behavior, ensuring that cost centers with matching validity dates can be created without triggering a false validation error.

3.8         (US-15310) OCP: patch script: configuration alignment all instances: “Default Credit Account: 71110 – Realized gain currency exchange”

For OCP, a development has been implemented to update the account configuration of the FXA journal across all instances.

The patch script has been executed to modify the following account:

  • 71110 – Realized gain currency exchange

In addition, the OCP configuration file has been updated with the new accounts for the new instances to ensure full alignment of FXA journal settings.
 The FXA journal is now consistently configured as follows across all environments:

  • 67040 – Realized loss currency exchange
  • 71110 – Realized gain currency exchange

3.9         (US-15484) OCP – VI:  New report “Export to HQ system (OCP Workday)”

OCP has requested a third excel file. It contains the same data as the current second Excel file, “monthly export”. The key difference is the addition of the HQ journal to this new excel file.

3.10      All Finance tickets integrated in UF40.0

KeySummaryDetailed
US-11973Bank registers from the project created at coordo level but end-of-month balance confirmed on projectX
US-14891When we add a line in an invoice, the product must be grayed (not possible to add a product)X
US-14893Draft new SI from Refund-Modify and SR from Refund-Refund : to restrict editing product code = in gray and quantity up to the original quantityX
US-14898Duplicated invoice coming from supply – product and source document should be empty and not editable (grayed)X
US-14967Currency tables: button filters, filtering fields and default filteringX
US-15012To add a “not blocking” notification message for closing period with “not validated IVI” – Intermission voucher IN –X
US-15097OCB_HQ: Tool cost center creation: Impossible to create cost center view and normal with same dates by importX
US-15310OCP: patch script : configuration alignment all instances: “Default Credit Account: 71110 – Realized gain currency exchange”X
US-15484OCP – improve report “Export to HQ system (OCP Workday)”  X  

4       Non- functional

4.1         (US-15079) User email address cleaning + improvement

It was identified during analysis for the password reset request that multiple users had duplicate email addresses which had automatically been assigned by the system based on the Partner/instance address selected. The link between these 2 types of records has been removed (change to data tables).  Additionally all email addresses linked to Admin users have been removed, and system will now prevent Admin users from having email address added via warning message. Pop-up displayed when preferences icon is clicked on will no longer request email address and department for Admin user and for synched users.

4.2         (US-15402) UF is able to gather WaCA & Ubuntu subscribed and validated product from UniData

UniField calls to APIs of UniData have been updated so as to be ready for the Products subscribed by WaCA and Ubuntu “OC Subscribed=true” and will also gather the product attribute if product is part of those OCs’ MML, “OC Validated=true”. Work has been done on Spinco/UniData side also to facilitate this.

4.3         (US-15949) PostgreSQL version updated to 14.22

In line with the strategy to continue regular updates to this database management, and specifically due to 5 identified security vulnerabilities, the UF version of PostgreSQL has been updated from v.14.20 to v.14.22. This upgrade will be automatic for all UniField instances already on v.14.20. For those on older versions, the specific process to follow is details in ticket US-15494.

4.4         (US-15159) Correction to Partner logs for when no partner deactivation

This is a correction to logs found in Tools-> Partners deactivation->Partners deactivation logs: There should no longer be an entry added to these logs for the case that no partner was deactivated. Previous log entries for this case were removed.

4.5         All Non-functional tickets integrated in UF40.0

KeySummaryDetailed
US-15079Disable link between email in Partner record and user recordX
US-15402Ubuntu: update UniData call for Ubuntu + WaCA productsX
US-15949PostgreSQL 14.22X
US-15159Partners de-activation log: log behaviour correctionX
   

DIGITAL SIGNATURE

UNIFIELD DIGITAL SIGNATURE

INTRODUCTION

A- Definition

B- Scopes

PREREQUISITES AND CONFIGURATION

C- Prerequisites

D- Activation of the signature functionality in an instance

E- Available Sign Options

F- Provide access: User allowed to sign on existing user

G- Provide access: signature access only

H- Provide access: Document creator

I- Closing signature functionality in an instance

SIGNATORY USER EXPERIENCE

J- Creating the signature sample

K- Search the object/report to sign via Signature Follow-Up

L- Applying signature on objects/reports

M- Self-maintenance – edit/inactivate signature

DOCUMENT CREATOR EXPERIENCE

N- Document creator definition

O- About Signature Fields

P- Invite users to sign object/report

Q- Remove a user from list of users invited to sign object/report

R- Signature statuses and closing signature

SIGNATURE REPORTS

S- List of signatures

T- Signature follow up

INTRODUCTION

Definition

UniField Digital Signature is a functionality developed in UniField allowing UniField users to sign documents created and produced in UniField. The signature is applied on the object/report in UniField and could be exported/printed out on PDF from UniField anytime as far as the instance is accessible. The functionality is activated on instances and is not synched. It is possible therefore to have it activated in some instances only within a country program.

UniField

Scopes

At the time of pilot, the scope of the functionality is limited to the following objects/reports.

Finance and Supply documents created in UniField.

  1. Supply objects in following modules (Statuses indicated where Digital Signature is available):
    • Orders:
      • IR Internal Request (Draft; Validated)
      • FO Field Order (Draft; Validated/-p; Confirmed/p)
    • Purchases:
      • PO Purchase Order (Draft; Validated/-p)
    • Warehouse:
      • IN Incoming shipment (Draft; Not/Available; Available Shipped; Closed)
      • INT Internal Move (Draft, Not Available/Available)
      • OUT Delivery Orders (Not Available/Available, Dispatched; Received, Cancelled)
      • PICK Picking (Draft; Available; Closed)
      • PI Physical Inventory (Validated; Confirmed)
  2. Finance objects and reports: Cash Reconciliation, Bank Reconciliation, Full Report, Supplier invoice, Donation invoice.

Notes:

  • The scope does not include external attachments which were created/generated outside of UniField (hard copy invoice from suppliers, quotations from suppliers, contract, …).
  • The signature functionality does not have any impact on object statuses and vice versa. It is possible to sign draft or validated, open, or cancelled object.
  • The signature functionality could be closed on object of all statusesA “Closed” signature blocks the digital signature functionality and cannot be modified.
  • Any objects with a digital signature available can be signed offline. The “Sign Off line” button is accessible in the “Signature” tab of the object.

Digital Signature functionality does not manage workflow. As consequence, the use of the digital signature needs to be handled in line with the prescriptions of the Authorization Table in regards of who needs to sign on a document, when a document is signed, in which status the signature should be applied, and on which order the signature fields should be filled.

PREREQUISITES AND CONFIGURATION

Prerequisites

Digital signature is an optional functionality which could be turned on and later off in a specific UniField instance. The activation/configuration of the functionality is handled at HQ by UniField support team.

The country programs request the UniField HQ support to activate the functionality

  1. Request to activate the digital functionality on specific instance
  2. List of users and their specific “sign” access requested for them. See below the options available.

Activation of the signature functionality in an instance

Digital signature is an optional functionality which could be turned on and later off in a specific UniField instance. The activation/configuration of the functionality is from “Reconfigure” module. This module is accessible by support profiles/admin profile only.

Go to Administration/Configuration/Reconfigure. The screen below is displayed. It allows to navigate to various reconfiguration screens.

Click on [next] button until you see the “Activate Electronic Validation” screen. The check box is not active.

Tick the check box and click on [finish] . There is no specific save button. Finish will save the modification and roll out the digital signature functionality in the system.

Available Sign Options

There are three access rights related to digital signature:

  • Sign_user: allows a user to actually apply signature on an object/report. It does not give access to “document creator” tasks – see below definition of “document creator”. This group is given to user who are due to sign documents as per Authorization Table: e.g. LogCo, FinCo, Supply Manager, MedCo, Pc, HoM.
  • Sign_document_creator_supply or finance: it opens the “document creator” functionality, on supply or finance objects/report. A document creator is able to select objects he/she has access and invite people to sign them. This access does not allow to apply signature. Drafting signature sample is not needed for a user with this access. This group is provided to supply users/finance users in order to allow them to invite other users to signing on objects and monitor the progression of the signature. It could be combined with Sign_user – in case the user needs to sign.
    1. Sign_document_creator_supply :. The user should be experienced inUniField with knowledge of how to search and find objects in UniField with key words like a PO#.
    2. Sign_document_creator_finance: The user should be experienced inUniField with knowledge of how to search and find objects/reports in UniField like a draft invoice or a register.

Provide access: User allowed to sign on existing user

The country programs define which user in each instance has access to sign. Note that there is only one access group allowing users to sign: “Sign_user “. It is valid to sign on supply or finance objects/report.

Two complementary steps are required to proper activate signature on user profile.

Go to Administration/users/users. Search the user profile to allow to sign.

Tick on check box [Enable signature]

It opens the signature fields of the user form.

    1. Specify the [start date] (could be in the past or in the future): this will be shown on the report of list of valid signatures. The user will be able to apply signature starting that date even on objects created before.
    2. [End date] could be left empty unless specific request by the country program to close a signature at specific date. The user self could also inactivate the signature at end of the contract.

    1. The user form could not be saved if the next step (add sign_user) is not done. Error message popping up.

Add the group [sign_user]

When [enable signature] has been checked, go to group, click on [add] button and search the group [sign_user] and add to the profile.

The profile could then be saved. The user has from now on access to signature.

Notes:

  • Adding [sign_user] without activating [enable signature] does not open the signature option for the user. This is why it is good to start by activation.
  • If the user is also document creator, the appropriate (supply or finance) document creator group needs also to be added.

Provide access: signature access only

The country programs define which signature access only need to be created for non UniField users (Medical, HR, …). Note that there is only one access group allowing users to sign: “Sign_user “. It is valid to sign on supply or finance objects/report.

Two complementary steps are required to proper activate signature on user profile.

Go to Administration/users/users.

Create the profile

Click on [new] to create new UniField profile. Fill the user header mandatory form and respective department as per Section’s instructions

Tick on check box [Enable signature] and add the access groups

Tick the check box [Enable signature] and add two groups: sync_user and sign_user. Then save the user form.

This user will be able to access document he/she has been invited to sign.

Provide access: Document creator

This group is given to experienced/regular UniField users who don’t necessarily need to sign document. They are allowed to draft, edit document and invite users to sign them. If the document creator is also allowed to sign, sign access should be added.

There are two types of document creator access:

  • Sign_document_creator_supply to be provided to supply users.
  • Sign_document_creator_finance to be provided to finance users.

Add Sign_Document_creator group

Go to Administration/users/users. Search the user profile to add the “document creator” access. Go to group, click on [add] button and search the appropriate group [sign_document_creator] and add to the profile.

The profile could be saved. The user has access to document creator’s role in object he/she has access to.

Notes

  • Document creator does not open right to sign on objects/reports. It allows the user to invite other users to sign.
  • Document creator does not open menus where the user does not have access to. E.g. a supply user with Sign_document_creator_finance will not have access to registers.
  • If the user is allowed to sign, Sign_user group needs also to be added.

Closing signature functionality in an instance

When the country program does not need any more to use the digital signature in a given instance, the functionality could be inactivated. Inactivation is from Reconfigure.

Click on [next] button until you see the “Activate Electronic Validation” screen. The check box is active.

Un-tick the check box “Activate Electronic Validation” and click on [finish] . There is no specific save button. Finish will save the modification and close the digital signature functionality in the system.

  • Conditions: all signatures have been inactivated.
  • Consequence: All signature menus will be hidden but old signed document will stay signed. Signed PDF could still be exported.
  • HQ UniField support proceed to the inactivation after receiving a request from the country program.
  • It still could be turned on back later. See above how to activate the functionality.

SIGNATORY USER EXPERIENCE

This chapter is about the experience of users allowed to sign.

Creating the signature sample

When a user has been given right to sign on object/reports in UniField, he/she needs to configurate a signature sample in order to be able to sign documents/reports. When the user is logging in UniField, the system will prompt to draft the signature. The user could postpone it for later and will be able to work without problem – just not able to apply signature on objects.

The signature sample designed will be applied on the objects/reports.

New signature required

This screen is popping up after login screen until the signature is configured. Click on [Ask Later] to postpone or [Create my signature] to proceed.

Ask Later

The user is able to continue to work but not able to apply signature on reports/object.

Create my signature

Follow the steps below to create the signature:

  • Type the legal name: actual name of the person. The field user names are role based, this step allows each individual user to specify the person’s name. Do not fill here the job role.
  • When adding their signature, user can choose “Type of signature creation” options “importing” (scanned signature) or “drawing” (directly in UniField with mouse etc).
  • [For the import option, the template can be exported, and then user must sign in the designated signature zone. This should then be scanned and saved as*.png, *.jpg, *.jpeg or *.pdf file. This can then be added to the field “Import your signature” by clicked to add attachment. ]
  • Draw the signature sample, as it would look on handwritten signature.
  • [Clear signature] to remove sample applied and restart.
  • [Cancel] the process and go back to UniField screen without finishing the signature sample.

  • [Preview] to show how Name and signature go together and progress to next step.

  • [Cancel] to go back to UniField screen without finishing the signature sample.
  • [Go back] to return to the previous screen and modify the signature
  • [Save] to create the signature.

The user is now able to apply signature on objects/reports.

Search the object/report to sign via Signature Follow-Up

This menu gathers the list of objects/reports the user has been requested by document creators to sign. This is a handy tool for non-regular users. It replaces search and filtering of objects to be signed.

Go to Administration/Users/Signature follow-up menu. Click on the green arrow to access the object to be signed.

Then apply the signature on the object/report (see below how to do so). This menu is used to monitor/check the documents to be signed and their respective status.

Applying signature on objects/reports

Retrieve the object to be signed via

  1. Filtering/searching in UniField (for regular users who are working on the menus and are also document creators)
  2. Or go to Administration/Users/Signature Follow-Up, and click on the green arrow

Check the details of the object (amount, tax, total, etc.) and go to the [Signature] tab.

Click on the green check box related to the applicable signature field to apply the signature. E.g. Logco is the “Technical Responsible” for logistic order.

A confirmation screen is shown up, displaying the reference of the object/report to sign, the name of the signature field, in this example “Technical Responsible”, signature sample and legal name.

Click on [cancel] to go back to previous screen, or [sign] to apply the signature.

  • The signature is displayed on the related signature field with the date of signature, the control info (for PO = amount and currency)
  • The signature could be removed with the red X (unsign button) and reapplied/modified if required.

Information control is the amount of report/object at the time of the signature. It cannot be modified manually.

Example of tab signature for a Bank register:

Here you have the tab with the Signatures:

A screenshot of a computer

AI-generated content may be incorrect.

If you click in you will have a screen where you can add Users as follows:

You can sign full reports and reconciliations.

A user can have a backup user

A screenshot of a computer

AI-generated content may be incorrect.

Example of tab signature in a cheque register:

A screenshot of a computer

AI-generated content may be incorrect.

Example of tab signature in a cash register:

A screenshot of a computer

AI-generated content may be incorrect.

Example of tab signature in a supplier invoice:

A screenshot of a computer

AI-generated content may be incorrect.

Self-maintenance – edit/inactivate signature

Users allowed to sign have self-maintenance menu, to help change signature, inactivate the signature and create new one. This menu is intended to be used during hand-over or any change of legal name or any need of editing the signature sample. No external support is required.

Go to Administration/Users/My signature, user name, status validity date, sample signature and legal name are displayed.

[Replace signature] allows to draft new signature: retype legal name, draft signature.

[Inactivate signature] is inactivating the signature at the date and time of system clock. [Create signature] button allows to draft new one if required.

The user could not anymore apply the signature until new signature sample is created.

DOCUMENT CREATOR EXPERIENCE

This chapter is about the experience of the users with document creator access.

Document creator definition

Document creators are experienced/regular UniField users who don’t necessarily need to sign document. They are allowed to draft/edit document and invite users to sign them. If the document creator is also allowed to sign, sign access should be added.

The document creator navigates the modules of the business application (supply or finance) in order to prepare the documents for signature. The document creator is responsible that:

  • The documents are ready to be signed (all edit have been applied and quantity/amounts as well as other details are correct).
  • The rules defined by the Authorization Table are followed (who to sign, when and what signature field, which amount?)

When a user is given right to be document creator (supply or finance), the following functionalities are available.

About Signature Fields

A document has always multiple signature fields. E.g. on PO, there are “Supply responsible”, “Technical Responsible”, “Finance Responsible”, “Mission Responsible” and “HQ”. On cash reconciliation, there are two signature fields.

  • A tick on “active” check box means, the signature field is active, and could be digitally signed.
  • Empty on “active” check box 
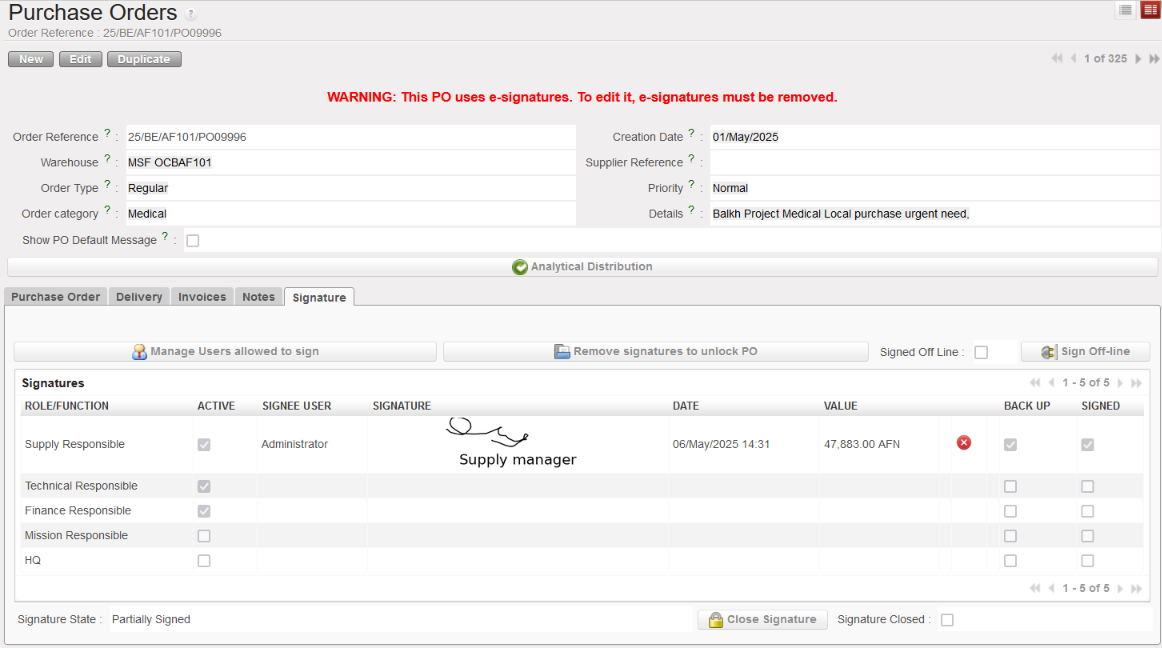
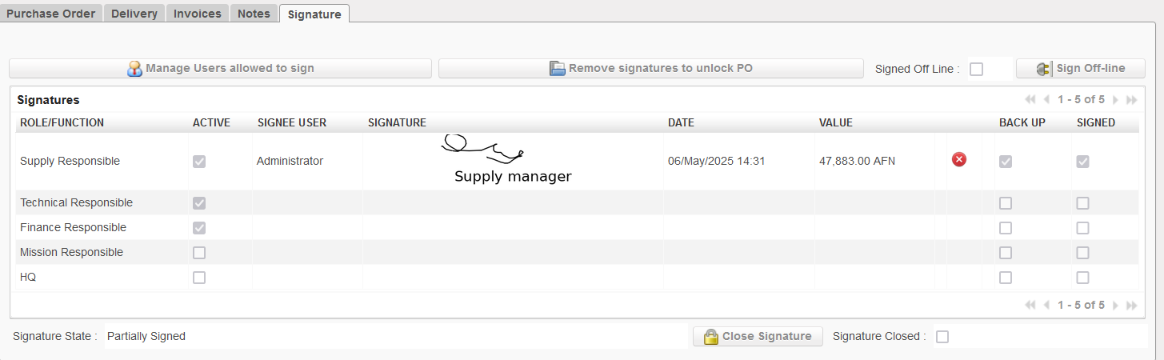
means that the field is not required. In this example “Finance Responsible” could digitally sign while HQ could not.
  • Backup at the line level indicates that the user is acting as a backup for the main user designated to sign.Signed indicated if the user already signed the document

To activate a field refer to section P-Invite users to sign

[Sign off line] means the document has been signed on paper and digital signature is not required.

[Close signature] is the final step to freeze the signatures applied on the document and prevent further modification. This task is irreversible even with admin profile. It is necessary nevertheless to proper close the signature on documents when it has been reviewed and approved. This is to prevent possibility of tempering with signature in later stage.

Invite users to sign object/report

Invite users to sign on object/report

Navigate the business application (finance or supply) and search for the document to be signed. Check and ensure the object/report is ready to be signed. The Authorization Table defines which field is required on which document. Document creator consults the Authorization Table and makes adjustment when required.

Go to the [signature] tab of the object and click on [Manage Users allowed to sign] in order to invite users having signature access for them to sign the object/report.

Select the users to be added By clicking on magnifying glass. Select the [Active] checkbox if the user’s signature is mandatory. The checkbox in the [Backup] column indicates that the user is serving as a backup for the primary user assigned to sign.

To confirm selection click on Confirm button.

It is the responsibility of the document creator to select the relevant users on a given object. In this example, Supply responsible, Technical Responsible, And Finance responsible are invited to sign the PO.

The object/report will then be listed on the “Signature Follow-up” module of the invited users. UniField does not send automatic notification. Notification is handled outside of UniField.

Specific for bank/cash register reports

There are two reports which could be signed on bank and cash registers: the (bank/cash) reconciliation and the Full Report.

The button [Manage user allowed to sign] offers then the option of selecting signatories for both reports and add specific list of users. Note that the 2 lists could be different.

Register signature fields are labelled “Signature 1” and “Signature 2” – without specified role. The signature fields are used in line with the OC’s accounting procedures. There is one report to sign on cheque registers: The Full Report.

Remove a user from list of users invited to sign object/report.

To remove a user from the list of signatories on an object/report, find the document to be signed. Two options are possible:

  • Go to Administration/Users/Signature Follow-Up. Click on the green arrow to access the document to be signed.
  • Using usual searching and filtering, find de document to be signed.

From the “Signature” tab, click on [Manage Users allowed to sign]. Uncheck the box [Active] to remove a user Click on [Confirm] to save the change.

In this example Technical responsible was remouved from the users to sign

Signature statuses and closing signature

Object/Report signature statuses

Objects/reports supporting signature option have the following signature statuses

  • Open: users have been invited to sign but none have applied signature.
  • Partially signed: users have been invited to sign, some have applied signature. Other did not yet.
  • Fully signed: all required signature fields are filled.
  • Closed: when a document creator has closed the signature option on the object via [close signature] button.

Notes: Signatory list can be edited (remove a user who has not signed and replace) for all of them except on “closed” signature.

Object/report signature status is completely independent from object/report status.

Closing the signature on an object/report

When all signatures have been applied and control/review done, the signature option on a specific object/report could be closed. This action is carried out on each document.

Click on [Close signature] button. This button will inactivate all possibilities of editing the signature fields on the document. This is irreversible action, even with Admin profile.

  • There is no impact on object/report status.
  • It is possible to close the signature regardless of number of signatures applied (open, partially signed, fully signed)

It is the responsibility of the document creator to close the signatures when it is required.

For register reports: it is advisable to close the signatures when the scan of BKK has been finished and submitted to HQ.

SIGNATURE REPORTS

From the administration application, there are two modules accessible to all users with “sign” access with nice reporting.

List of signatures

Go to Administration/Users/List of signatures. This menu is displaying the signature samples and their respective validity dates. From right hand [action] menu, click on [List of signatures] in order to extract the list of signatures for a given period. Fill the start and end date. Then click on [Export].

It will export a PDF report with the instance name, mission, level of instance and the period selected + date of the report.

The list shows UniField user names, legal names, signature samples, and respected validity dates and status. This report could be used to replace the hand filled signature sample currently collected manually.

Signature follow up

Go to Administration/Users/Signature Follow-Up. Document creators have access to “Signature Follow-Up” menu from Administration module. This menu is used to follow-up the progression of the signature on documents. It is also used to modify the list of users requested to sign on objects/report. Click on the green arrows to access the documents/reports and make the changes.

Signature follow up allows also signatory users to check doc they are due to sign. From this report, they see only object/report they were invited to sign.

UNIFIELD V.35.1 RELEASE NOTES

1      Release Details

Release version: UF 35.1

Date of production synchronization server patch: 15th January 2025 / 18:00 Geneva time

Latest user rights files updated (no change): UF35.0 can be found here

Note that no user rights need to be loaded at each HQ. This will be done at the Sync Server by the Core team and will update the user rights via Sync for all HQs and missions.

JIRA filter for all integrated tickets: https://jira.unifield.org/issues/?filter=12528

2      Supply

No tickets for supply

3      Finance

These tickets were included as they impact the Finance year closure.

3.1       (US-13766) OCG_YE1_COO: wrong filtering in the analytical selector when a second Journal Item correction is done

An issue has been identified in the Analytic Selector filter, which previously ignored the case of a second Journal Item correction. A fix has been done in this release.

3.2       (US-13830) “Let me fix” error message on Accrual functionality in Sunday Sandbox in Dec 2024

A bug was detected while using the accruals functions. It was not possible to post entries, and an error message was displayed. This issue has been fixed in this release.

3.3       All Finance tickets integrated in UF35.1

KeySummaryDetailed
US-13766OCG_YE1_COO: wrong filtering in the analytical selector when a second Journal Item correction is doneX
US-13830“Let me fix” error message on Accrual functionality in Sunday Sandbox in Dec 2024X

4      Non- functional

4.1       (US-13842) Not Run due to User Rights group

This ticket was included so as to avoid Synch Not runs being created on newly created instances. The User Rights group sign_document_creator_supply (only used when E-validation module is active) should no longer create this issue.

4.2       All Non-functional tickets integrated in UF35.1

KeySummaryDetailed
US-13842Init Sync: NR on Sign_document_creator groupX

L. HOW TO PICK A KIT COMPOSITION LIST (KCL)

Supply User Manual ENG -> 5. Warehouse -> 5.3 LU-SU4102: Picking -> L. HOW TO PICK A KIT COMPOSITION LIST (KCL)

L. HOW TO PICK A KIT COMPOSITION LIST (KCL)

The picking/delivering of a kit doesn’t differ from the picking/delivering of a simple product. however, when processing the KCL, Kitting Orders, PICK, Pack, Ship, Delivery Orders and Real Consumption, there is a “Kit” column in these outgoing documents, when it is filled with “Kit Reference”, the processing kit will be selected, it is not mandatory to specify KCL in “Kit” column, but when you select one, the kit being processed will be linked with the KCL. This information will be displayed on the relevant documents.

When a Kit is processed in an OUT, the KCL will automatically be set to Status “Closed” when it is sent out of the instance. If a KCL has kit as a component, the component KCLs will also automatically be set to Closed status when the top KCL is closed.  

H. How to add one or multiple Analytical Distribution (AD) to Purchase orders Line/lines

Supply User Manual ENG -> 4. Procurement -> 4.6 LU-SU3201: Purchase Orders (POs) - Generals -> H. How to add one or multiple Analytical Distribution (AD) to Purchase orders Line/lines

H. How to add one or multiple Analytical Distribution (AD) to Purchase orders Line/lines

This functionality enables users to add or update the Analytical distributions (ADs), (Cost Centers and Destinations) the Draft PO lines, users have 3 options to use for adding or updating the ADs:

1- Adding AD/ADs at the header level:

Go to: PURCHASES > Purchase Orders > Analytical Distribution

This image has an empty alt attribute; its file name is PO-1024x471.png

PO AD at header level

by clicking on the “Analytical distribution”, new screen will be opened, and then by clicking on “New” user can add one AD or more to be applied on all PO lines the same way “Global analytic distribution”

AD at header level

2- Adding AD/ADs at line level manually:

User can add the AD to the line manually by clicking on AD icon on the line level, new screen will be opened, and then by clicking on “New” user can add the AD to the line:

This image has an empty alt attribute; its file name is PO-22.png
AD at line level

3- Adding AD/ADs by importing, this third option makes it easier for users to add 1 AD or multiple ADs to single line or to add different ADs to multiple lines in the same Draft PO, in case user wants to add different ADs to Different lines, Which means that not all lines have the same ADs, unlike the first option (adding AD at header level), this functionality could be done by using “Import ADs” button, 1 AD or multiple ADs  (Cost Centre/s and Destination/s) can be added onto each line and must be separated by semicolon (;). The action to export / import templates are both via the “Import AD” button.  

In case of splitted lines, when importing one or multiple ADs to the first line, the values entered in the first line will be used to fill all lines split from the same line number.

In the import file, only the AD values will be imported. No other information can be modified or added via the import file. Percentage must add up to “100%” and the total number of semicolons in the Percentage, Cost Center and Destination columns must be the same, and system will check that Line number and Product Code match those of onscreen PO.

If there is already an AD added in onscreen PO, exported template will show this. If at header level there are multiple ADs added, the exported template will show percentage values and ADs data.  In the case that there are already ADs in the onscreen PO, it is possible to remove (delete) them by importing the file with blank AD values. At import, there is a check that AD values exist, but the main/secondary check will remain after import, when line/PO is validated.  

Adding multiple ADs

*** Same options are available for Draft FO.

D. How to add one or multiple Analytical Distribution (AD) to Field Orders Line/lines

Supply User Manual ENG -> 4. Procurement -> 4.4 LU-SU3103: Field Orders (FOs) – General -> D. How to add one or multiple Analytical Distribution (AD) to Field Orders Line/lines

D. How to add one or multiple Analytical Distribution (AD) to Field Orders Line/lines

This functionality enables users to add or update the Analytical distributions (ADs), (Cost Centers and Destinations) the Draft FO lines, users have 3 options to use for adding or updating the ADs:

1- Adding AD/ADs at the header level:

Go to: Orders > Field Order > Analytical Distribution

FO AD at header level

by clicking on the “Analytical distribution”, new screen will be opened, and then by clicking on “New” user can add one AD or more to be applied on all FO lines same way.

2- Adding AD/ADs at line level manually:

User can add the AD to the line manually by clicking on AD icon on the line level, new screen will be opened, and then by clicking on “New” user can add the AD to the line:

3- Adding AD/ADs by importing

This option makes it easier for users to add one or more ADs to a single line or to add different ADs to multiple lines in the same Draft FO. Unlike with the first option (adding AD at header level), this option can be used to add different ADs to different lines,

This can be done by clicking the “Import AD” button, exporting the template shown from the page that pops up and entering the Cost Centre, Destination and Percentage information for each line in the exported document. If a line has multiple ADs, the values in these three columns must be separated by semicolon (;).

If a line has been split and AD information is entered in the import document, the values entered in the first line will be used to fill all lines split from the same line number.

In the import file, only the AD values will be imported. No other information can be modified or added via the import file. Percentages must add up to “100%” and the total number of semicolons in the Percentage, Cost Center and Destination columns must be the same. The system will check that Line number and Product Code match those of onscreen PO. 

If there is already an AD added in onscreen FO, the exported template will show entered values. It is possible to remove (delete) AD values that were already entered on screen by importing a file where the line’s AD values are blank. At import, there is a check that AD values exist, but the main/secondary check will remain after import, when line/FO is validated.  

Adding AD to FO by import
Adding multiple ADs

*** Same options are available for Draft PO.

L. Comment générer un Chronogramme

Manuel de l’Utilisateur Supply -> 5. Entrepôt -> 5.12 LU-SU4205 Règles de Réapprovisonnement - en cours -> L. Comment générer un Chronogramme

L. Comment générer un Chronogramme

Il est possible d’exporter un schéma d’un Chronogramme sur format excel depuis le panneau de droite sur l’écran du Segment de Réappro Parent. Il donne une vue d’ensemble du horzon de 2 ans de planification, et montre jusqu’à 5 cycles de commande en fonction des dates saisies dans le Segment de Réappro Parent. Il y donne des indications des délais / dates clées pour le préparation de la commande, la création de la commande et la validation de la commande ainsi que les les délais fournisseur et de manutention et la couverture de la commande. Le Chronogramme sera généré avec l’Unité de Temps qui était sélectionné dans le Segment (jours/semaines/mois). Certaines contraintes ont été appliqué poue assurer que l’Unité de Temps sélectionnée soit pertinant aux délais saisis et il y a un message d’avertissement pour les indiquer.

Allez à: Entrepôt / Règles de Réapprovisionnement / Configuration / Segment de Réappro Parent

E. Comment configurer la suppression automatique du catalogue des fournisseurs ESC

Manuel de l’Utilisateur Supply -> 3. Produits -> 3.4 Produits d'un Catalogue Fournisseur -> E. Comment configurer la suppression automatique du catalogue des fournisseurs ESC

La tâche est disponible sous Outils > Outils > Supprimer les anciens catalogues ESC. Elle est désactivée par défaut et, si elle est active, s’exécutera avec un intervalle par défaut de six mois entre les exécutions.

La fonctionnalité sera étendue avec un nouveau champ «Partenaire spécifique», permettant aux utilisateurs de supprimer les catalogues ESC d’un fournisseur sélectionné uniquement. Ce champ est obligatoire.

La configuration de la suppression est définie au niveau de l’instance.

La liste affichera :

  • Instance source
  • Date de suppression
  • Nombre de catalogues supprimés
    Cliquer sur un enregistrement affichera ces informations ainsi que le message de dernière exécution (avec les noms des catalogues).

F. Kit Management: Compare KCL and TKC

Supply User Manual ENG -> Products -> 3.6 LU-SU2105: Kits/Modules -> F. Kit Management: Compare KCL and TKC

1 Overview

The Compare KCL and TKC function is a reporting tool within the Kit Management module that allows you to generate a Missing Components report. It compares the actual contents of a Kit Composition List (KCL) against the Theoretical Kit Composition (TKC) — the standard expected composition of that kit type.

The report is exported as an Excel file (.xlsx) and is designed to help supply and warehouse teams:

  • Quickly assess the completion status of kits held in stock.
  • Identify items that are missing or in lower quantities than expected.
  • Support replenishment planning and needs assessments.
  • Track kit quality using deviation KPIs.

Understanding the two documents being compared:


KCL — Kit Composition List

TKC — Theoretical Kit Composition

Definition

The actual contents of a physical kit currently in stock

The standard / expected composition for that kit type (the template)

Purpose

Records what is in the kit

Defines what should be in the kit

Status for comparison

Must be Completed or Closed

Referenced via the TKL version linked in the KCL

TIP: Closed KCLs include kits or modules that form part of a parent kit — these are eligible for comparison.

NOTE: Matching between KCL and TKC lines uses a degressive approach: first matching on Product + Quantity + Batch/Expiry Date, then Product + Batch/Expiry Date, then Product only. This ensures the most accurate comparison possible.

2. Step-by-Step: Generating the Report

Follow the steps below to generate the KCL vs TKC Comparison Report.

1

Open the Supply module

Log in to UniField and click Supply in the main navigation menu.

2

Go to Kit Management

Select Kit Management from the left-hand or top navigation bar.

3

Open Kit Composition Lists

Click on Kit Composition Lists (KCL) to view the list of all KCLs.

4

Filter and locate your KCL

Use the search and filter options to find the KCL you want to analyse. Look for KCLs with a Completed or Closed status.

WARNING: Draft or in-progress KCLs cannot be used for comparison. If your KCL is still in progress, complete or close it first.

5

Open the KCL

Click on the KCL row to open the record and review its details.

6

Confirm the TKC version is linked

In the KCL header, verify that a TKC version (TKL) is referenced. This is the standard against which your report will compare.

The screen below shows a typical KCL record in Completed status, ready for comparison:

Kit Composition List — Completed status, showing product, version, reference and composition items

Figure: Kit Composition List — Completed status, showing product, version, reference and composition items

7

Open the right-side action menu

With the KCL open, locate the Actions or right-side menu panel.

8

Click “TKC KCL Comparison Report”

Select this option from the Reports section of the right-side panel. It is only visible for KCLs with Completed or Closed status.

The TKC KCL Comparison Report link is located in the Reports section of the right-side panel (highlighted below):

Right-side Reports panel — TKC KCL Comparison Report button (highlighted)

Figure: Right-side Reports panel — TKC KCL Comparison Report button (highlighted)

9

Save or open the Excel report

UniField will generate the report automatically and prompt you to download or open the .xlsx file.

TIP: The report is generated in Excel format (.xlsx) so that supply teams can use it for filtering, further analysis, or sharing with other stakeholders.

3 Report Layout and Content

The generated Excel report uses layout: TKC columns appear first (columns A–F), followed by KCL columns (columns G–M, highlighted in light green). This order reflects the operational logic used by warehouse teams — starting from what is expected in a kit, then comparing with what is actually present.

Report Header: The top section of the report displays summary information about the kit:
  • Kit (Product) Reference
  • Kit Creation Date
  • TKC Version (TKL)
  • Batch Number and Expiry Date
  • Date the Report was Generated

The screenshot below shows an example report generated for kit KMEDMEBO05A (Ebola VHF Sampling module), including TKC and KCL details and the Comparison Summary section:

A screenshot of a computer

AI-generated content may be incorrect.

Figure: TKC KCL Comparison Report — header, TKC & KCL details, Comparison Summary and product lines (KMEDMEBO05A, batch 182394/1/28)

Report Columns: Each row in the report represents a product line. Columns are split between TKC (expected) and KCL (actual) data:

Column

Section

Description

Product Code

TKC

Product reference from the Theoretical Kit Composition

TKC Quantity

TKC

Expected quantity per the TKC standard

TKC Batch No / Expiry Date

TKC

Batch number and expiry date from the TKC

TKC Comment

TKC

Any comment recorded on the TKC line

KCL Module

KCL

The module within the KCL — positioned between TKC Comment and KCL Total Qty

KCL Total Quantity

KCL

Actual total quantity of the product found in the kit

KCL Batch No / Expiry Date

KCL

Actual batch/expiry of products in the kit

Deviation

Summary

Difference between KCL and TKC quantity (+/−)

NOTE: The KCL Stock Location column is not included in the report. The focus is on product references and quantities, not physical storage locations.

4. Comparison Summary and KPIs

The report includes a Comparison Summary section with two key performance indicators (KPIs) that provide an at-a-glance view of kit completion status. These KPIs follow the same logic as the PO vs Catalogue mismatch reporting already familiar to UniField users.

KPI

Formula

What it Tells You

KCL–TKC Article Deviation (%)

((# codes in KCL − # codes in TKC) / # codes in TKC) × 100

Positive = more product types in KCL than expected. Negative = product types are missing from the KCL.

KCL–TKC Qty Deviation (%) per product

((Qty in KCL − Qty in TKC) / Qty in TKC) × 100

Shown per product. 0% is excluded. Negative values appear in red in the report summary.

Quantity Deviation — Worked Examples:

Scenario

KCL Qty

Calculation

Deviation

Kit complete

100 (matches TKC of 100)

(100 − 100) / 100 × 100

0% — excluded from summary

Slight shortage

95 (TKC requires 100)

(95 − 100) / 100 × 100

−5% (highlighted red)

Surplus

110 (TKC requires 100)

(110 − 100) / 100 × 100

+10%

Major shortage

60 (TKC requires 100)

(60 − 100) / 100 × 100

−40% (highlighted red)

NOTE: Negative deviation values are highlighted in red in the Comparison Summary. 0% deviations are excluded from the Quantity Deviation field to keep the summary uncluttered.

TIP: If all items match the TKC exactly, the summary will show 0% deviation or display a message confirming the kit is complete with no missing items.