Finance User Manual ENG -> 5. Searching, Correcting and Closing.
LUFI-40302 Budget Reports
Finance User Manual ENG -> 4. Imports -> 4.3 Budgets. -> LUFI-40302 Budget Reports
LUFI-40302 Budget Reports
LU Introduction
In UniField you can produce a set of reports depending on the data you need to check. For each report type, we explain which data they show and the function you should use to generate them.
Under the {Actions} menu on the right hand side bar, {Budget Status} allows you to have a quick overview of the budget status. Only validated Budget are displayed. By clicking on any budget, you will be able to drill down into the budget details: you will be able to see the budget, actual and balance amounts on a parent account or account level. By clicking on an account, a new window with related AJIs will be displayed.

Budget Status in {Actions} menu
For budget follow-up, you can generate the following budget reports located under the Reports menu on the right hand side bar.
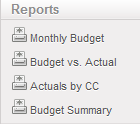
Action Menu Budget Report Options
How to Produce a PO Impact on Budget Report
Before a PO is validated, Supply and Finance users with the appropriate user rights can check the current status of the budget against actual expenses plus outstanding confirmed POs.
Go to: Purchase
Select the relevant PO and open the {Reports} Menu.
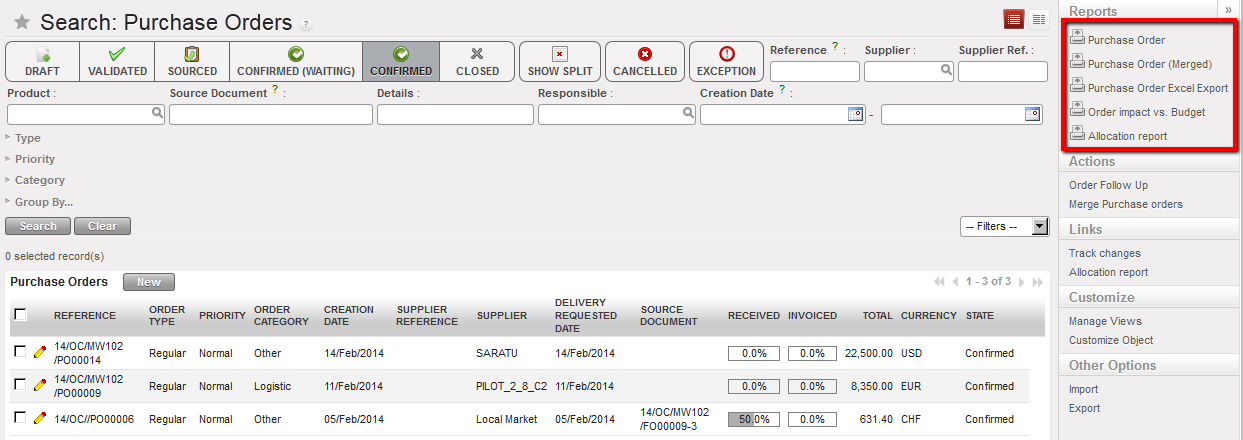
Order impact vs Budget report functionality
Select {Order Impact Vs Budget}
A PDF report will display
The PDF will show the impact of the PO on the budget in functional currency.

Order impact vs Budget report
In this example the order is worth 17’532 and is allocated to one cost center MW COORDINATION.
All amounts presented are in functional currency
- {Budget amount} is retrieved from the budget uploaded in the system and corresponding to the cost center the PO was assigned to. If several versions of a budget have been uploaded, the report will pick the latest version (highest number) that is not {Draft}.
- {Actuals amount} are expenses already recorded; this column also includes pending commitments which are confirmed but not validated POs.
- {Remaining budget} is a calculated column equal to “Budget amount – Actuals amount”.
- {PO amount} is a subtotal by cost centers, expenses accounts and destination. To retrieve these figures, the system takes the analytic distributions defined at header / line level as well as expense accounts linked to each product / product category and destination.
- {PO impact} is a calculated column equal to Remaining budget – PO amount.
How to Produce a Monthly Budget Report
{Monthly budget}, XLS and PDF: this monthly report shows a breakdown of budgeted expenses. This actually reflects the budget displayed on your screen.
Go to Accounting/Budgets
A list of validated budget appears.
- Select a budget to open in Form view
The budget displays in Form view and a list of reports displays in the right-hand side menu.
- Select a budget display type: parent only, account only or account and destination.
- Select {Monthly budget}, XLS and PDF:
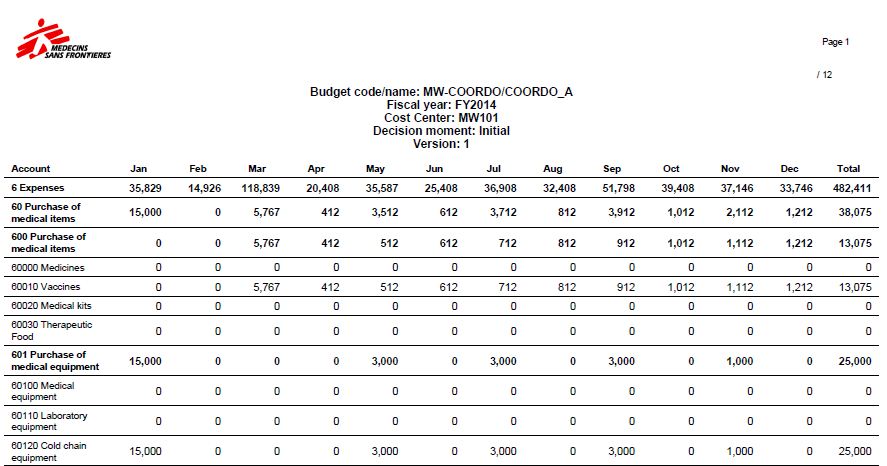
Monthly Budget PDF– Expenses only
How to Produce a Budget vs. Actual Report
{Budget vs Actual}: this report shows a breakdown of budgeted vs. actual expenses (including commitments). You can choose to display the total figure or monthly figure. This is the most complete report designed to follow-up on budgets.
Go to Accounting/Budgets
A list of validated budget appears.
Select a budget to open
The budget displays in Form view and a list of reports displays in the right-hand side menu.
Select a budget display type: parent only, account only or account and destination.
Select {Budget vs Actual Report}
Select from the following criteria:
- Currency table: to value budget and actual at budget rates provided by a donor
- Year-to-date or full year figures,
- Include or exclude pending commitments
- Expenses display granularity: By expense and destination, by expense, by parent account
- Monthly or total figures: Depending on the variances analysis you want to perform.

Budget vs Actual reporting options
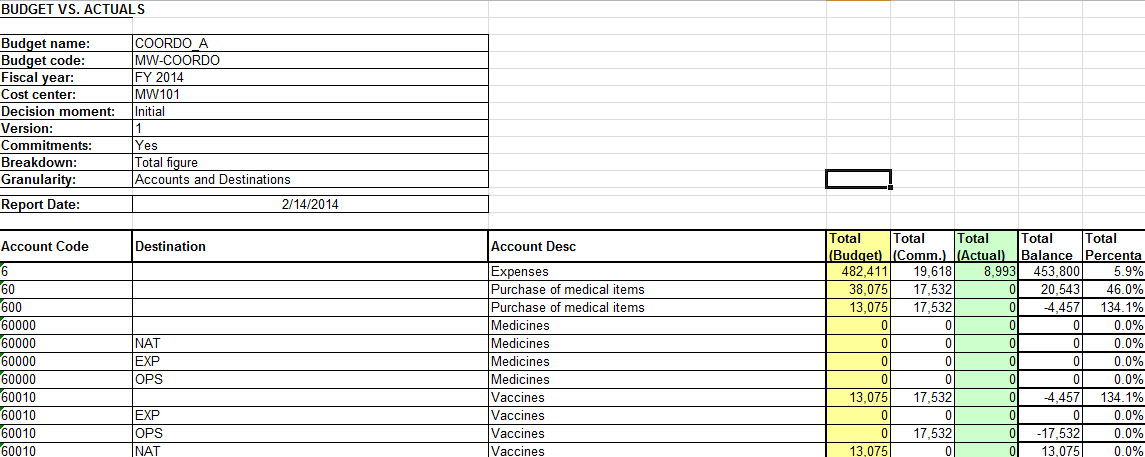
Budget vs Actuals (Accounts only)
How to Produce an Actuals by Cost Center Budget Report
{Actuals by CC}, CSV: this monthly report displays a breakdown of actual expenses per cost center (by expense accounts only). Actual expenses are split into actual, commitment and accruals.
Go to Accounting/Budgets
A list of validated budget appears.
- Select a budget to open
The budget displays in Form view and a list of reports displays in the right-hand side menu.
2. Select a budget display type: parent only, account only or account and destination.
3. Select {Actuals by CC}
4. Select the following parameters as needed:
- Currency table is optional and allows the user to apply a currency table that defines the donor currency in the report.
- Cost Centers is used to select the projects for analysis. It is designed to be imported in a budget follow-up matrix or to produce costs follow-up reports.

Actuals by CC – report parameters
5. Confirm the opening (CSV or PDF)
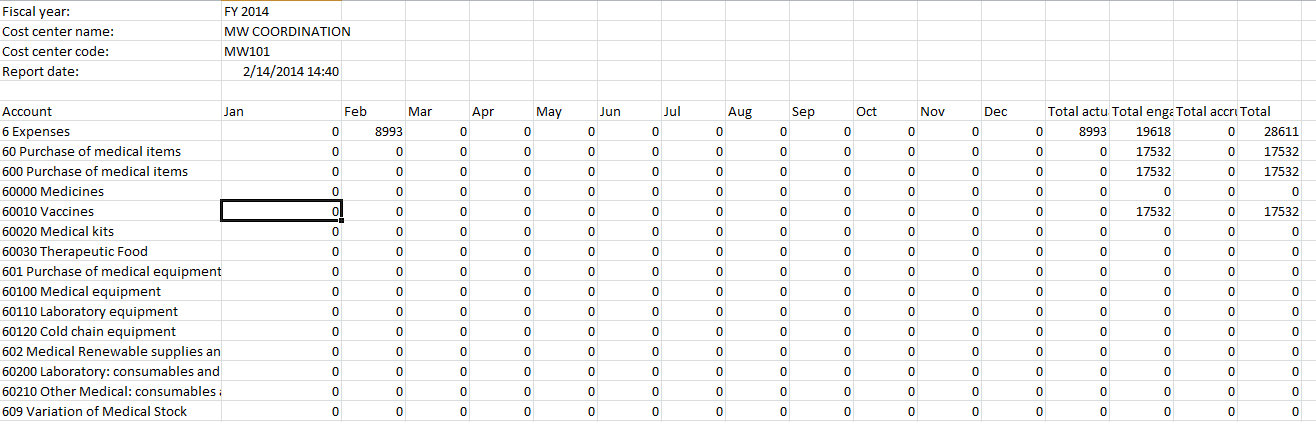
Actuals by CC – Expenses only
How to Produce a Budget Summary Report
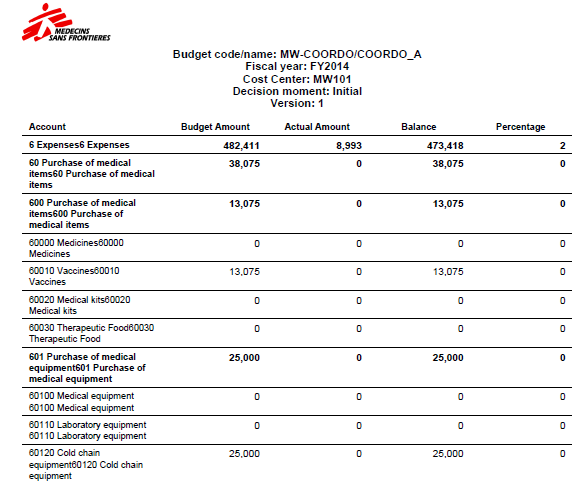
{Budget Summary}, PDF: this report shows the total figure of budgeted vs. actual expenses (including commitment). It also informs on the remaining budget and budget consumption rate.
Go to Accounting/Budgets
A list of validated budget appears.
- Select a budget to open in {Form} view
The budget displays in Form view and a list of reports displays in the right-hand side menu.
- Select a budget display type: parent only, account only or account and destination.
- Select {Budget Summary} PDF

4.3 Budgets.
Finance User Manual ENG -> 4. Imports -> 4.3 Budgets.
BUDGETS
LUFI-40301 Budget Imports
LU Introduction
Within UniField, budget management consists of following actual expenses against expected expenses. Budgets are built outside UniField and imported in the system through a csv file. Each instance (coordination and project) must import its own budgets. Once imported, the budget is created in {Draft} state. An authorised user must review the {Draft} version and validate it. From that moment on, the budget lines cannot be modified and the will synchronize to other instances.

Budgets are imported and validated in each project location and synchronized upwards to Coordination and HQ.
When the period covered by the budget is over or when a new revised budget version is issued, a new budget can be loaded. It is possible to load a new budget while the first budget is still open.
The user can upload up to 4 versions of the same budget at different decisions moments. Default decision moments available in UniField are: Initial, First Revision, Second Revision, Third Revision (as presented below); they can be modified from the HQ instance to match each OC’s terminology. They represent a re-forecast and the number of revisions depends on your OC policy. The budget decision name on the file should be the same as on the excel file otherwise the system will not let import it.

Once the project’s budgets are validated at project level, they are synchronized to the coordination.
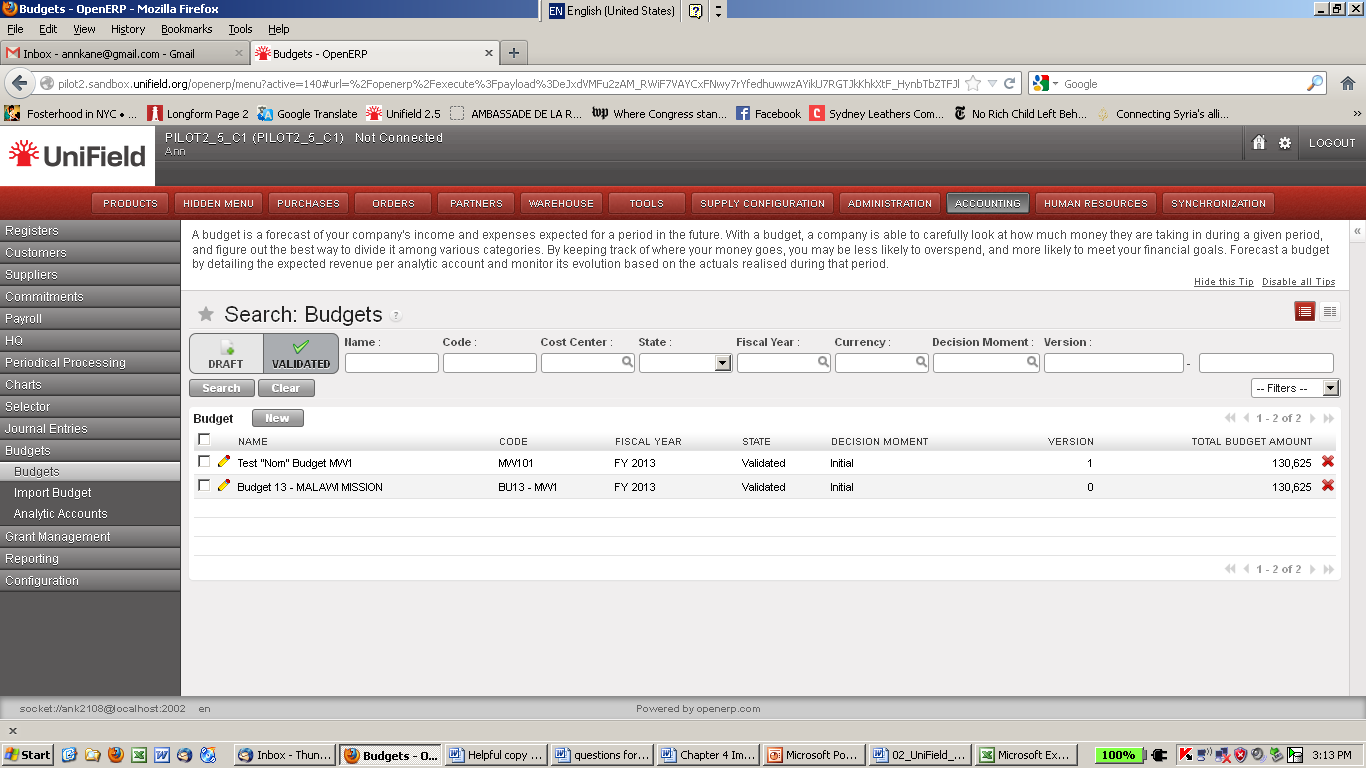
{Budge} Search view. You can retrieve your budget through different filters, including budget states
(Draft, validated or Done)
Once uploaded, in {Form} view, you can choose a display type to view the budget in various ways:
In the Budget display – Parent accounts only, the consolidated budget lines are displayed; it shows a summary of the totals at the Parent accounts level, e.g. 60 Purchase of Medical Items, 61 Purchase of Non-Medical Items etc.

Budget display – Parent accounts only
In the Budget display – Accounts only, the summary of the totals at the Parent level budget lines along with the subtotals for each expense account are displayed.
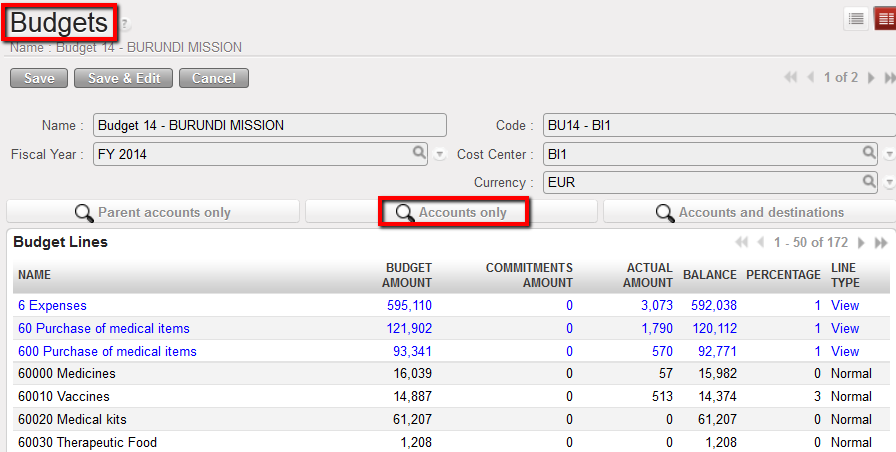
Budget display – Accounts only
In the Budget display – Accounts and destinations expense codes are listed for each expense/destination pair that exists in the system.
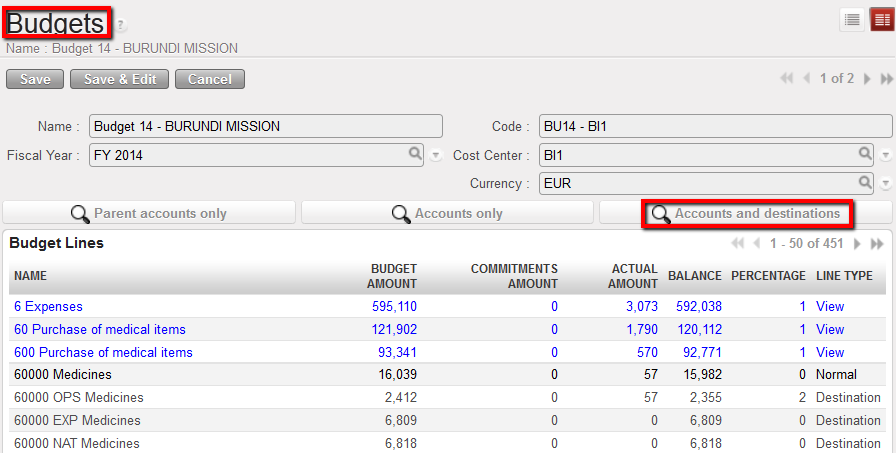
Budget display – Accounts and destinations
Go to: Budgets/Import Budget
- Click on {add attachment}.
- Browse to the file you want to upload. Each section will manage how to create the budget file differently. Please follow your mission’s financial procedures.

One budget import file could contain several budgets to be imported in one instance in the following cases:
- OCs managing activities in their cost center tree (OCBA, OCG)
- For locations managing several projects from the same UniField instance
3. Click on {Import Budget} button.

Import Budget wizard
-
- The system indicates that the budget has been properly uploaded
4. Click {OK} button.
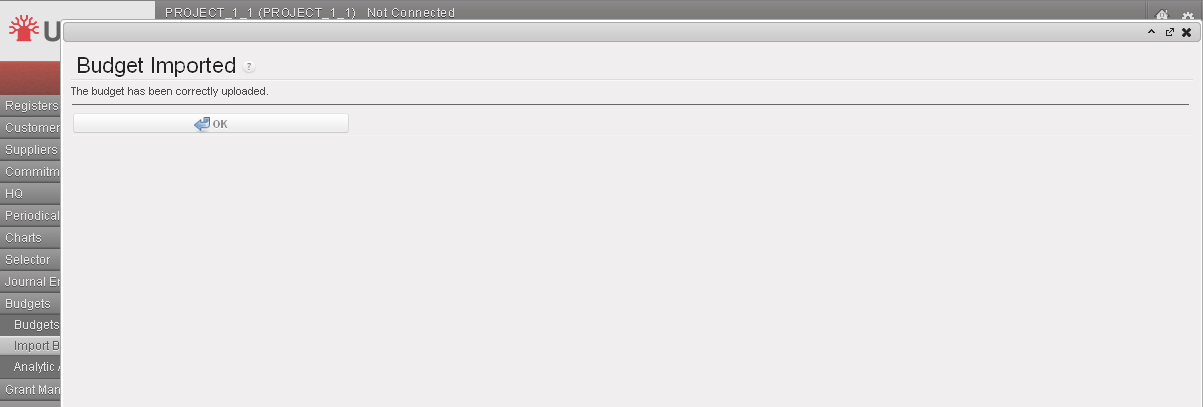
Budget import confirmation
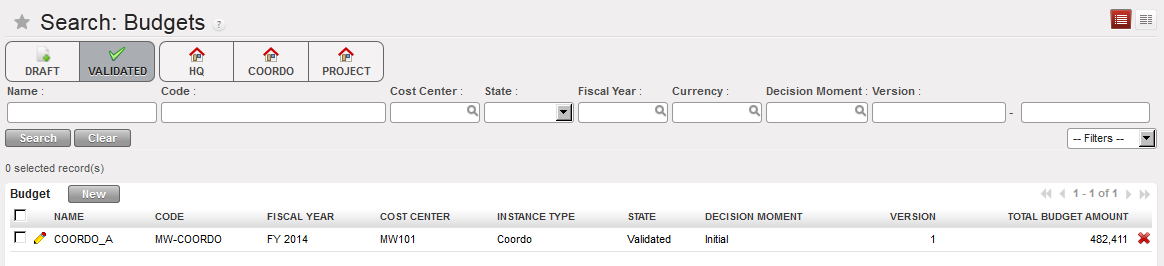
The budget displays in the Search Budgets view
How to Delete a Draft Budget
Go to: Budgets/Budgets
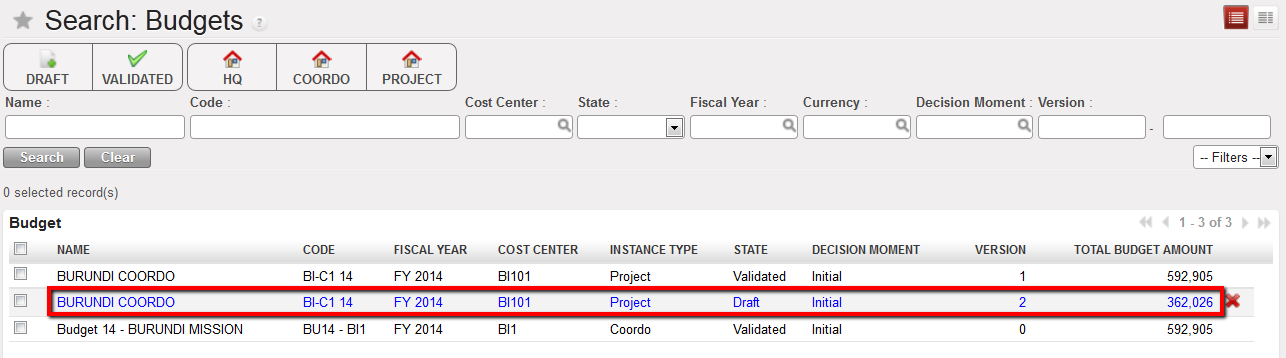
- Select the {Draft} filter. DRAFT budgets display
- In the Budget section, identify the budget you would like to delete.
- Click on the red cross.
The budget is deleted
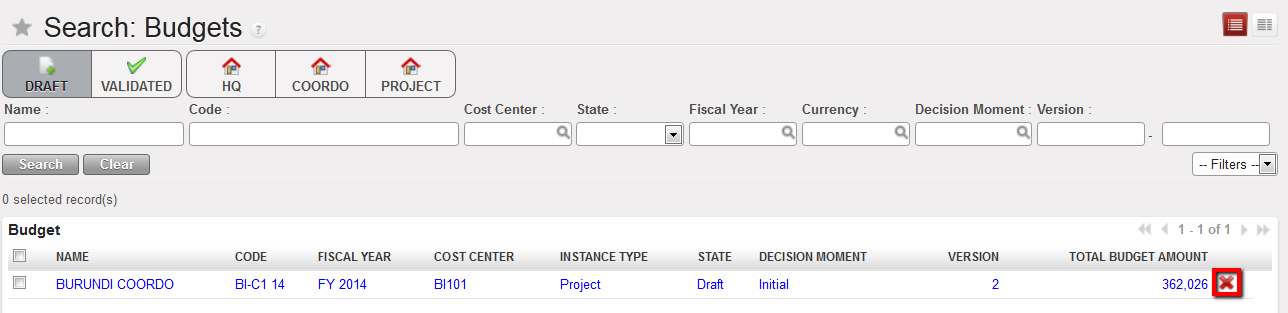
Deletion icon in the Budgets Search view
–>See the task {How to import a budget} to load the right budget and check it before validation
How to Validate a Draft Budget
Remember, you must validate a budget to display budgeted amounts.
Go to: Budgets/Budgets
- Select the {Draft} filter
DRAFT budgets display
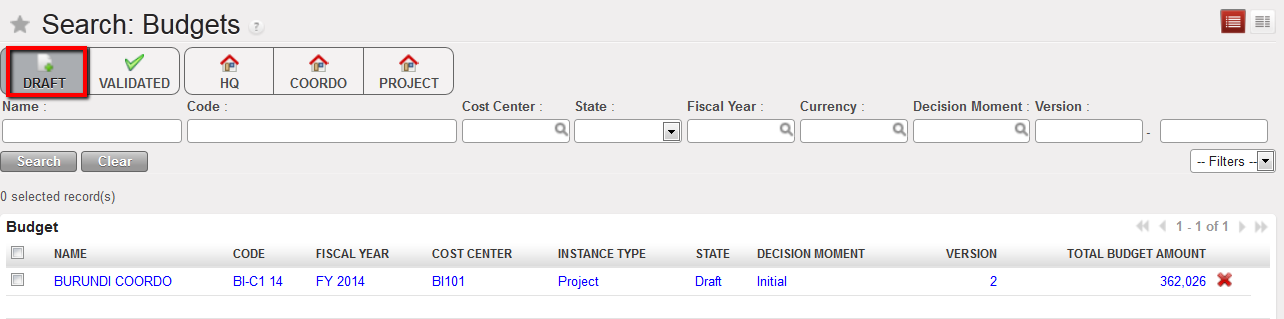
Draft budget displayed
Identify the budget to validate and click on it.
-
- The budget Form view appears
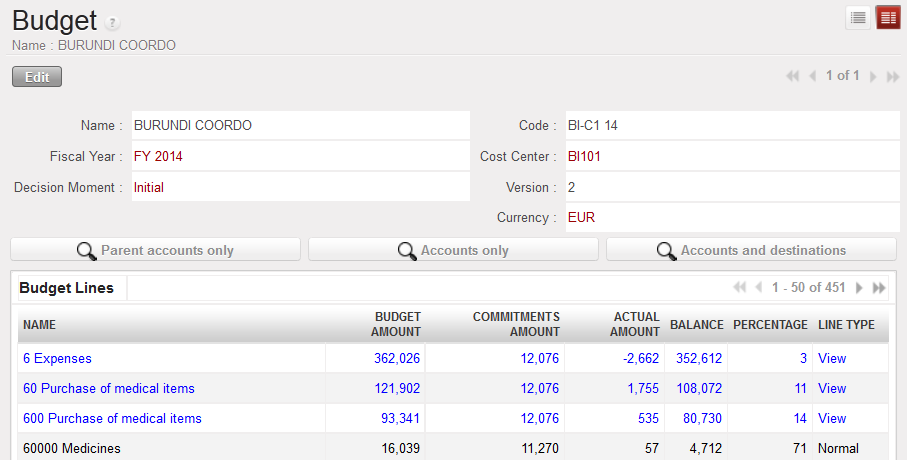
Budget Form view
Change the budget display type to help you reviewing the budget before approval
![]()
Click on the button at the bottom of the form.
![]()
-
- The budget status has changed to validated

How to Close a Validated Budget
Once a budget period or a decision moment is over, a budget can be closed in the instance where it belongs to, e.g. a project budget can be closed in project level. The status change will then synchronize upwards to coordination and HQ.
Go to: Budgets/Budgets
- Select the {Validated} filter. Select the budget you would like to close
- Review the budget. If there are no problem click on the {Done} button at the bottom of the page.
![]()
LUFI-40202 D: How to Review Multiple HQ entries
Finance User Manual ENG -> 4. Imports -> 4.2 Headquarter (HQ) Expenses -> LUFI-40202 D: How to Review Multiple HQ entries
LUFI-40202 D: How to Review Multiple HQ entries
1. Go to Accounting/HQ/HQ Entries
-
- A list of HQ entries to validate displays
2. Tick the entries you want to modify.
List of draft HQ entries displayed in the {HQ Entries List} Search view
3. If you want to allocate these entries to a new analytical distribution, go to the {Actions} menu.
4. Select {Analytic reallocation}.
{Analytic reallocation} action
5. Here you can change the fields {Destination}, {Cost Center} and {Funding Pool}. Make sure the allocation is identical for your entries and the expense account/destination is correct. Click on the {Validate} button.
{Analytic reallocation} wizard
6. The analytical reallocation is completed. If you have assigned a wrong allocation, entries will appear in red. For example: if the combination expense account/destination is incorrect.
Entries with invalid analytic distribution in red displayed in the HQ Entries Search view
7. If you want to allocate HQ entries to a new expense account, go to the {Actions} menu, and select {Change Account}
{Change Account} action
8. In the {Change Account} wizard, type a new account in the {Account} field.
{Change Account} wizard
9. Validate. The expense accounts will be updated.
LUFI-40202 C: How to Review HQ Entries Individually
Finance User Manual ENG -> 4. Imports -> 4.2 Headquarter (HQ) Expenses -> LUFI-40202 C: How to Review HQ Entries Individually
LUFI-40202 C: How to Review HQ Entries Individually
Analytical and expense account information can be changed at coordination level.
Expenses recorded in the HQ ERP system are initially allocated to cost centers. This allocation is decided at HQ based on Logistics or HR information; it needs to be reviewed at coordination level by advanced users.
Expenses recorded at HQ on behalf of the field are automatically set to the funding pool {PF – MSF private funds}. Advanced Coordination finance users complete the funding pool allocation because the funding dimension is not available or known in the HQ system.
Go to Accounting/HQ/HQ Entries ->>A list of HQ entries to validate displays
List of draft HQ entries displayed in the {HQ Entries List} Search view
1. Click on the pencil ![]() to edit the relevant entry line. Fields in blue are mandatory and editable. Fields in white are also editable.
to edit the relevant entry line. Fields in blue are mandatory and editable. Fields in white are also editable.
2. Change the account, destination, cost center or funding pool by deleting the field content and browse or type in the field the right input.
Editing an HQ entry
-
- Note! Some sections have decided to set some accounts as not correctable/editable. Please see the financial procedures from your section for further details. However, the analytic distribution on such accounts can still be updated.
{Other staff costs} account set as not correctable by HQ
In the above example, the account {66250} is not correctable. If you try to change this account when it is imported in your instance, an error message will appear. If you need to correct an entry on such an account, contact your financial manager in the Headquarter office.
3. Save the entry line by clicking the floppy disc.
Account changed from 64100 to 64110
4. Proceed to validating the entries
LUFI-40202 Headquarter (HQ) Expenses
Finance User Manual ENG -> 4. Imports -> 4.2 Headquarter (HQ) Expenses -> LUFI-40202 Headquarter (HQ) Expenses
LUFI-40202 Headquarter (HQ) Expenses
LU Introduction
The booking of HQ entries in UniField consists first in importing these entries into the UniField HQ instance. They are then synchronized down in {Draft} to the coordination instance for revision and validation. Thus in the coordination interface, we will have coordination and project’s expenses.
Once Coordination validates HQ entries, it sends them to the projects through synchronization (only those allocated to project cost centres).
Sometimes HQ entries need to be split to track expenses per invoice number. This task is also addressed in this LU.
How to Import HQ Entries into the HQ Instance
Go to Accounting/HQ/HQ Import
⮡ A wizard {Import HQ Entries} displays

{Import HQ Entries} wizard
⮡ An {HQ Entries Import Confirmation} wizard displays

{HQ Entries Import Confirmation}
- Click on {OK}
- ⮡ A list of imported entries to validate displays in the {HQ Entries} sub-module.

List of draft HQ entries assigned to {PF}
Once entries have been imported in the UniField HQ instance, they must be synchronized to the UniField coordination instance. They synch in {Draft} state. Once they are received at coordination, they can be reviewed. You can review entries individually or group multiple entries for a mass re-allocation.
You can import both, BS and P/L entries at HQ, kindly note the following regarding that:

- HQ BS entries shall be imported only with CC, no destination and no FP. When importing the HQ entries at the mission level, the CC of the B/S entries will be erased automatically.
- Cost Centre is a must for P/L HQ entries.
- If no Destination is set in P&L HQ entries, default ones from account code will be considered.
- If wrong AD in P&L accounts (combination Destination vs Account), import is rejected.
- HQ entries (All P&L and B/S) shall not be editable neither split at HQ level, only import file can be editable.
How to Review HQ Entries Individually
Analytical and expense account information can be changed at coordination level.
Expenses recorded in the HQ ERP system are initially allocated to cost centers. This allocation is decided at HQ based on Logistics or HR information; it needs to be reviewed at coordination level by advanced users.
Expenses recorded at HQ on behalf of the field are automatically set to the funding pool {PF – MSF private funds}. Advanced Coordination finance users complete the funding pool allocation because the funding dimension is not available or known in the HQ system.
Go to Accounting/HQ/HQ Entries
-
-
- A list of HQ entries to validate displays
-

List of draft HQ entries displayed in the {HQ Entries List} Search view
- Click on the pencil
 to edit the relevant entry line. Fields in blue are mandatory and editable. Fields in white are also editable.
 - Change the account, destination, cost center or funding pool by deleting the field content and browse or type in the field the right input.
Editing a HQ entry

-
- Note! Some sections have decided to set some accounts as not correctable/editable. Please see the financial procedures from your section for further details. However, the analytic distribution on such accounts can still be updated.

{Other staff costs} account set as not correctable by HQ
In the above example, the account {66250} is not correctable. If you try to change this account when it is imported in your instance, an error message will appear. If you need to correct an entry on such an account, contact your financial manager in the Headquarter office.
Save the entry line by clicking the floppy disc.

Account changed from 64100 to 64110
- Proceed to validating the entries
How to Review Multiple HQ entries
- Go to Accounting/HQ/HQ Entries
A list of HQ entries to validate displays
2. Tick the entries you want to modify.

List of draft HQ entries displayed in the {HQ Entries List} Search view
- If you want to allocate these entries to a new analytical distribution, go to the {Actions} menu.
- Select {Analytic reallocation}.

{Analytic reallocation} action
- Here you can change the fields {Destination}, {Cost Center} and {Funding Pool}. Make sure the allocation is identical for your entries and the expense account/destination is correct. Click on the {Validate} button.

{Analytic reallocation} wizard
- The analytical reallocation is completed. If you have assigned a wrong allocation, entries will appear in red. For example: if the combination expense account/destination is incorrect.

Entries with invalid analytic distribution in red displayed in the HQ Entries Search view
- If you want to allocate HQ entries to a new expense account, go to the {Actions} menu, and select {Change Account}

{Change Account} action
- In the {Change Account} wizard, type a new account in the {Account} field.

{Change Account} wizard
- Validate. The expense accounts will be updated.
How to Split HQ Entries
You can also split entries one by one if you want to link the cost to various invoice references.
Go to Accounting/HQ/HQ Entries
A list of HQ entries to validate displays
- Select an entry and go to the Actions to choose the Action {Split}

Split Action in the Actions menu
2. In the HQ Entry split wizard, Select {New}

New Button to split the original HQ entry
- The original line displays and can be modified
- Once the original line is modified, click on the {New} button to proceed to the creation of the lines.
You can not edit the {Description} but you can edit the {Reference}, {Account}, {Amount}, and analytical accounts. Save each line.

Creating an additional HQ entry to split the original one
- click
 when you are finished.
- The original HQ entry displays in grey. The lines created in black.

Original HQ entry in grey and created split lines in black
If later on you need to retrieve original HQ entries which were split, you can select the button:
![]()
![]()
If later on you need to retrieve split HQ entries, you will select the button

Original HQ entries

Split HQ entries
How to Validate HQ Entries
When HQ entries have been reviewed, an authorised user can validate (Hard-post) and synchronize them.
Once the HQ entries are validated at Coordination level, they become validated at the HQ instance in the HQ entries sub module so that HQ can follow which HQ entries have been validated by each mission.
 HQ entries mass or individual validation at coordination will trigger one Journal Item per HQ entry. There will be no more entry sequences containing several HQ entries in the same sequence. (one entry sequence per HQ journal entry)
Go to Accounting/HQ/HQ Entries
- A list of HQ entries to validate displays

List of draft HQ entries displayed in the {HQ Entries List} Search view
- Tick the checkboxes of the entries you want to validate. Note that selecting one split entry will lead to validation of lines involved in the split (original entry and all related split entries).
- Go to the {Actions} menu and select {Validation}.

{Validation} action
⮡ A {Validation} wizard displays


{HQ Entries Validation} wizard
- Select {Validate}
⮡ HQ entries are validated. From this moment they become accounting entries and are reflected in the {HQ} journal. After this step changing entries is only possible through accounting corrections.
HQ entries mass or individual validation at coordination will trigger one Journal Item per HQ entry. Same for Analytic Journal Items (one entry sequence per HQ journal entry)

Validated HQ entries displayed in {Journal Items} Search view

Validated HQ entries displayed in {Analytic Journal Items} Search view
 When an HQ entry is corrected before validation for account or analytical distribution or when the entry is split, automatic correction entries in OD journal are created. This means that the original HQ entry is reversed and corrected with a separate entry. The original entries have the correction history wizard available
.

Corrections History viewed from the Analytic Journal Items
LUFI-40201 C-F: Commitment Vouchers.
Finance User Manual ENG -> 4. Imports -> 4.2 Headquarter (HQ) Expenses -> LUFI-40201 C-F: Commitment Vouchers.
LUFI-40201 C-F: Commitment Vouchers.
C. How to Set a Commitment Voucher to Done
A commitment voucher is set to {Done} once expenses are fully recognized and entries received from HQ are validated at coordination.
Go to: Accounting/Commitments/Commitment Voucher
- Search for the validated voucher by selecting the {Validated} filter or any other filters located at the top of the Search view.
- When you have located the voucher, click on the pencil
 to open the form.
 - Set the {Amount left} to {0}.
Setting the {amount left} to {0}
4. Save the entries by clicking the floppy disc}.
5. Click {Save & Edit} button.
6. At the bottom of the Form view, select {Done}.
{Done} function in a commitment voucher Form view
7. The voucher is set to {Done}. The voucher is no longer reflected in the {Engagement Lines} section of the budget because the corresponding accounting entries were received and validated.
Commitment voucher set to {Done} and total left is nil
D. How to Configure the International Commitment Import*
This functionality was designed to meet OCA and OCB requirement but could also be used by other OCs in the future. It’s a way to automatically integrate commitments corresponding to international orders in the budget follow-up at field level.

It is available through a new {Import Intl Commitments} link under the {Commitments} menu.
OCs willing to use it should activate it otherwise it will not be displayed as a transaction on the left-hand side menu.
Each import will erase the previous import and entries are recorded in a new analytic journal: {International Engagements}. You must therefore make sure this journal was created in your database before proceeding to the import.
Go to Administration/Configuration/Reconfigure
Administration business application and {Reconfigure} function
In the {Activate International Commitments Import} window, check the box of the statement {Manage commitments corresponding to international order through specific import}.
Activating the International Commitments Import
E. How to Create an International Engagement Journal*
Go to Accounting/Configuration/Analytic Accounting/Analytic Journals
1. Complete the blue fields as below. Make sure to call the Journal Code {ENGI} otherwise it will synch to all instances like any other analytical journals.
International Engagement Analytic Journal
2. Click {Save} button.
F. How to Use the Import Commitment Voucher Function*
Go to Accounting/Commitments/Import Intl. Commitments –>>A wizard {Import Intl Commitments} displays
1. Click on {Add Attachment} and {Browse} the file you want to import
{Import Intl Commitments} wizard
2. Select {Import} button.
3. Entries are booked in the international engagements journal.
Engagement entries booked in the ENG journal. Third parties are displayed but this field in the import file remains optional
How To configure “Customer Commitment Vouchers” :
Go to : ADMINISTRATION > CONFIGURATION > Parameters > Reconfigure:

Go to: Accounting > Commitments > Customer Commitment Vouchers:

LUFI-40201 B: How to Edit a Headquarter Expense Commitment Voucher
Finance User Manual ENG -> 4. Imports -> 4.2 Headquarter (HQ) Expenses -> LUFI-40201 B: How to Edit a Headquarter Expense Commitment Voucher
LUFI-40201 B: How to Edit a Headquarter Expense Commitment Voucher
Go to: Accounting/Commitments/Commitment Vouchers
A list of vouchers displays
- Search for the validated voucher by selecting the {Validated} filter or any other filters located at the top of the search view.

{Commitment Voucher} Search view and {Validated} filter
- When you have located the voucher, click on the pencil to open the form.
![]()
- On the voucher Form view, click on the pencil to edit the line.
![]()

{Commitment Voucher} Form view and {Edit} function
- In case of a partial delivery, change {Amount left} to be equivalent to the cost of goods still to be received.
- Save the line (floppy disc).

{Amount left} updated in a commitment voucher
- Click the {Save} button at the top of the form.
- The commitment amount is now updated and reflected in the engagements journal.

Updated commitment lines
4.0 CHAPTER OVERVIEW: Imports
Finance User Manual ENG -> 4. Imports -> 4.1 CHAPTER OVERVIEW: Imports
4.0 CHAPTER OVERVIEW
The first part of this chapter concentrates on HR and payroll related transactions. For most missions’ national staff management, the national staff database and payroll calculations are managed in an application called Homere. In order to have a full overview of a mission expenses, you need to import the data from Homere into UniField.
This chapter explains how to import the Homere files into UniField. The Homere import contains one file related to the national staff database and another one to the monthly payroll.
In order to track costs properly, the payroll booked on expense accounts has to be allocated to an analytical dimension. To avoid recurrent allocation task at every payroll import, the national staff employee can by default be assigned to an analytical dimension (destination, cost center and funding pool). It helps following up on national staff costs per cost center and to create financial reports accordingly. The same applies for the expatriate staff; you will learn how to import Expat employee at Coordination or HQ level and assign them an analytical distribution.
In case your section does not use Homere, this chapter will present the various options of registering the HR and payroll information in UniField.
In the second part of this chapter we explain how to book HQ entries in UniField. HQ Entries are accounting entries representing field expenses recorded and paid at HQ level. They encompass for example international orders (and associated commitment vouchers) as well as expatriate salary expenses.
There is a specific section for OCA and OCB which addresses the automatic import of international commitment vouchers. The section is identified with a *.
The last aspect covered in this chapter is the Budgets. Budgets are created outside UniField and imported into UniField in order to properly track expected expenses against actual expenses. You will learn how to import a budget into UniField and produce the different kinds of budget reports available in the system.
After reading this chapter you will be able to:
- Set the national staff database and allocate an analytical dimension to it
- Manage the national staff payroll booking and the salary payment
- Manage entries from international orders and expat salaries
- Follow-up actual expenses vs. budgeted expenses if your section decides to import the budget files into UniField.
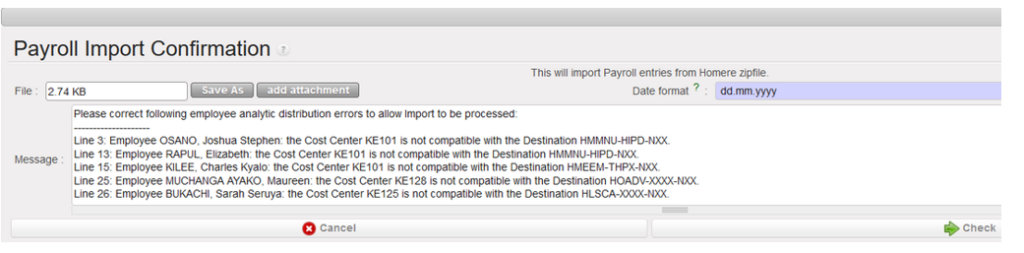
PAYE_UNIFIELD and PAYE_SAGA Import: request to have all the import error messages at once
When we import the payroll file in Unifield, the file import can be unsuccessful because of errors in Budget lines in the import file and Unifield was reporting the error messages one by one bringing confusion for the users
In this request we have requested to have all the wrong messages at once when the import fails:
This will help to spot the errors to correct in HOMERE.