1.8 Connection to the UniField local instance
Open your browser (Firefox).
In the address field, type https://[IP-address]:[port number] and press Enter.
Examples:
https://192.168.0.1:8061localhost:8061
The UniField login page appears!
Open your browser (Firefox).
In the address field, type https://[IP-address]:[port number] and press Enter.
Examples:
https://192.168.0.1:8061localhost:8061The UniField login page appears!
The same way you created an inbound rule, create the outbound rules so that the instance can perform synchronizations with the Production synchronization server.
The port to be open is: TCP-443 (XMLRPC protocols)
| Click on the Windows Start menu at the bottom left. In the Search programs and files field, enter firewall 1 without pressing enter. Click on Windows Firewall with Advanced Security 2 | 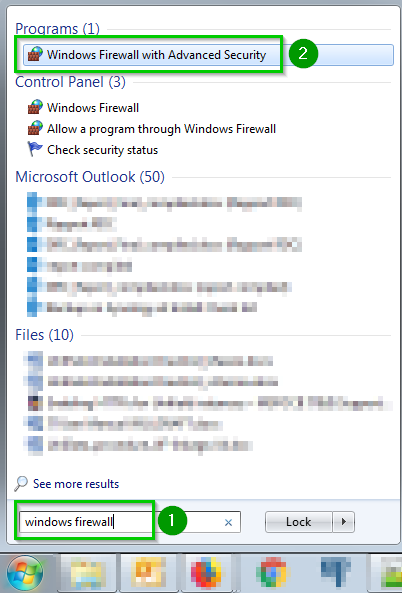 |
| Click on Inbound Rules 1. The inbound rules will now be listed. Click on New Rule… 2 A new wizard will open | 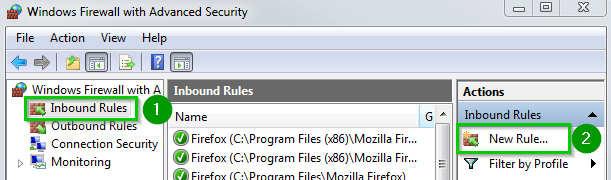 |
| Select Port 1 Click Next 2 | 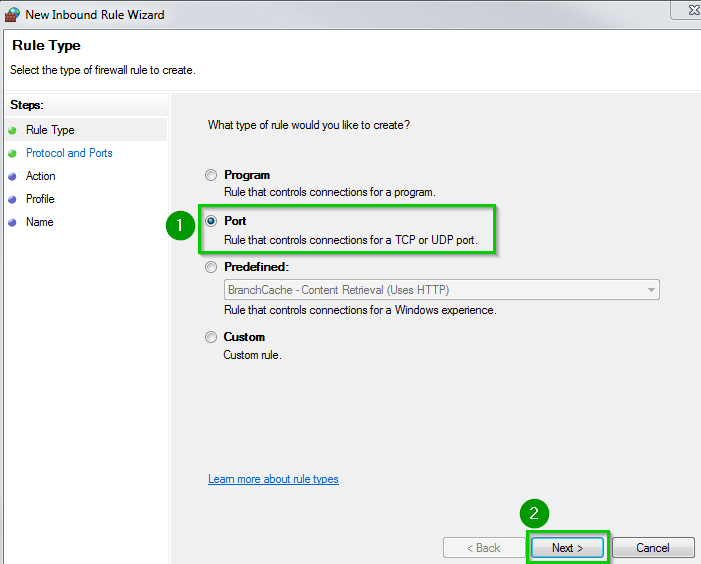 |
| Select TCP 1 Specific local port 2: enter 8061.If you will be using a different port (i.e. 80) set that instead. If you will be enabling HTTPS (section 1.9) add port 443 (separated with a comma).Click Next. | 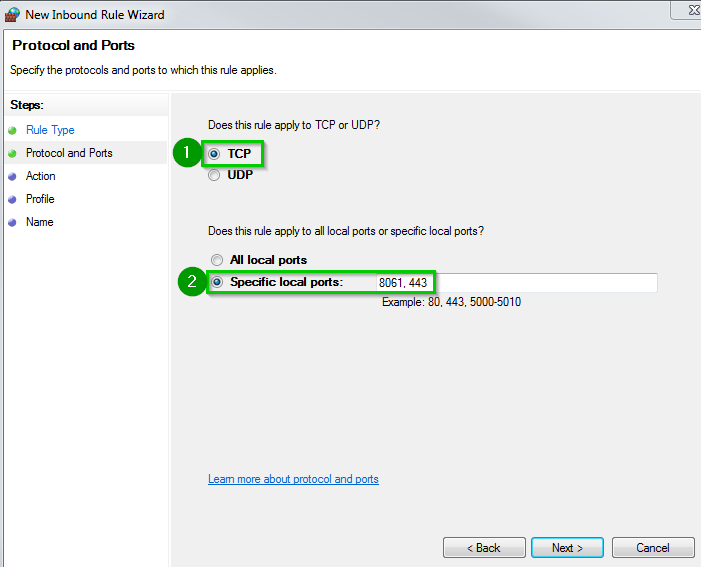 |
| Select Allow the connection 1 Click Next 2 | 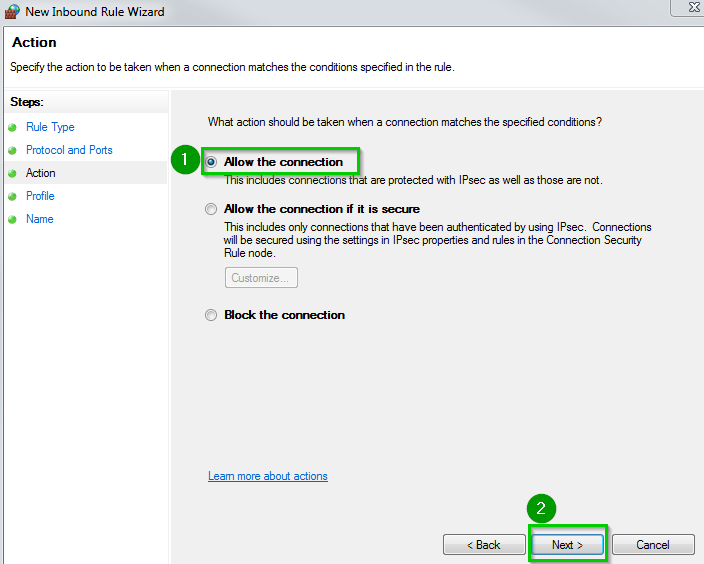 |
| Select the appropriate options 1 regarding your network configuration. By default select Domain, Private and Public. Click Next 2 | 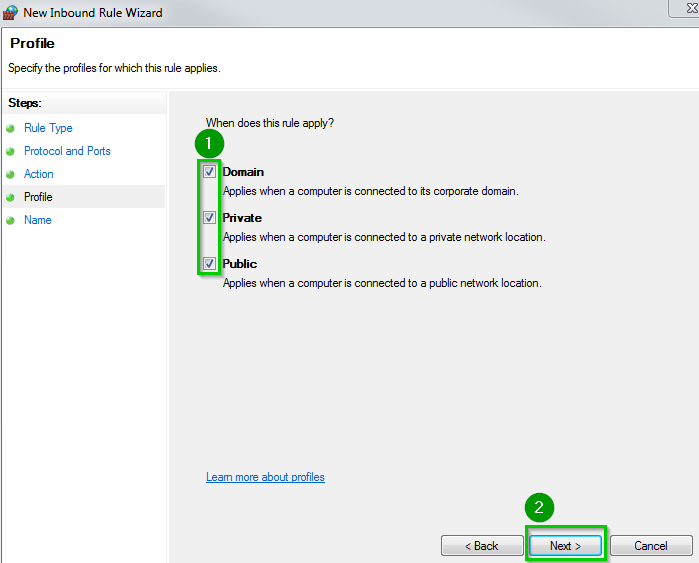 |
Enter a name 1 such as Inbound port TCP:8061 UniField WebClick on Finish 2 | 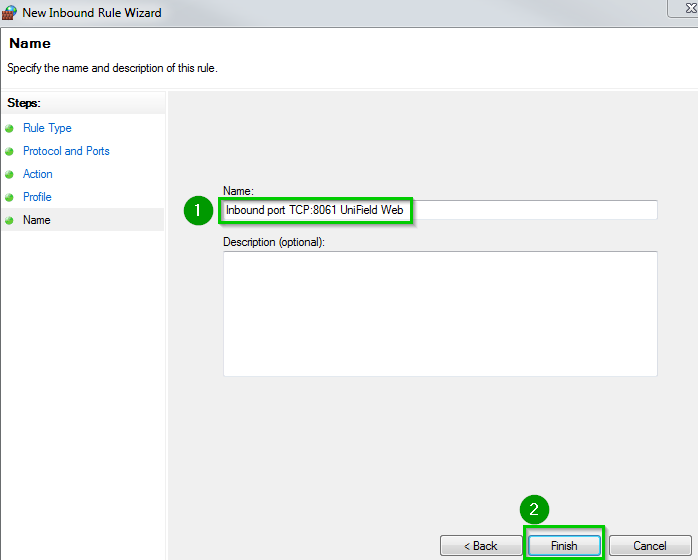 |
| Remote connections for the web access are now accepted by the Firewall. | 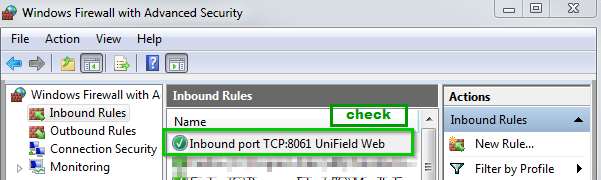 |
UniField installed, it’s not the time yet to create the database or restore one. First, the super admin password must be changed.
This password is used to create databases. It is very important and should not be communicated.
Connect to UniField with a browser: http://localhost:8061
| Click on Databases 1 | 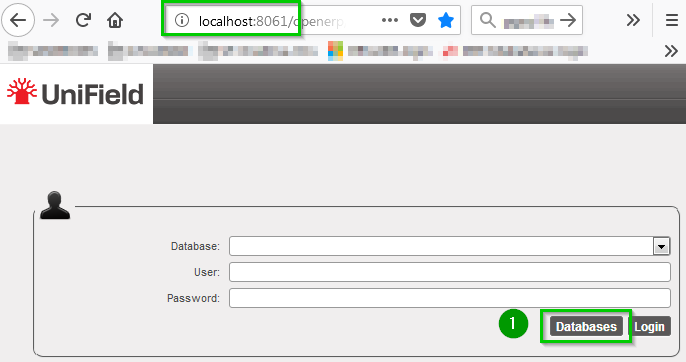 |
| Click on Password 1 |  |
| Enter the old password 1. If it’s a first installation, you must enter the default super admin password. Enter the New super admin password and confirm it. Click on Change Password 2 | 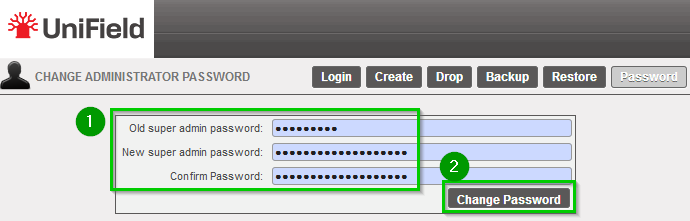 |
The super admin password is now changed. Keep it somewhere safe because you will need it every time you need to do something regarding the databases (especially backup and restore).
Once UniField is installed, you must create a safe place where to put the:
The UniField machine is the worst possible place as the objective is to be able to restore the instances in case of crash
| Use Windows Explorer to browse to the directory where the UniField installer is located. Double click on the installer e.g: openerp-allinone-setup-UF10.0-20180914-083009-r1.exeIn case the window User Account Control appears, allow the program from an unknown publisher to make changes. Click Yes. The following window appears: Click on OK 1 | 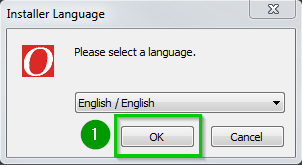 |
| Click Next 1 | 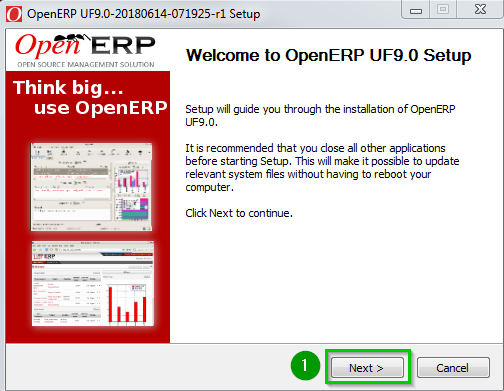 |
| Click I Agree 1 | 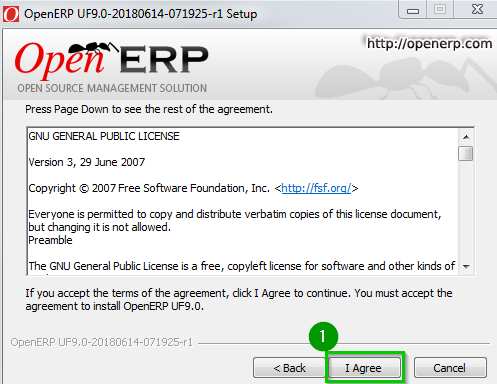 |
| Select 1 All In One as type of install Leave all the boxes checked Click Next 2 | 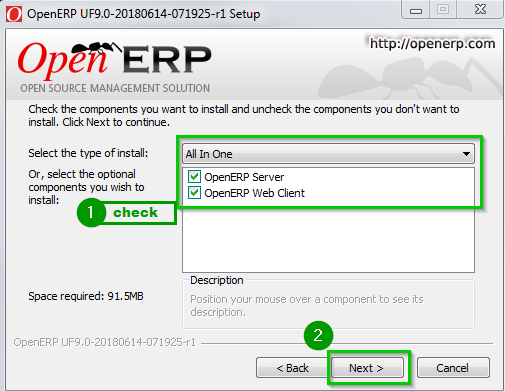 |
| Click on Browse 1 if the standard path does not suit you. Otherwise, Click Next 2 | 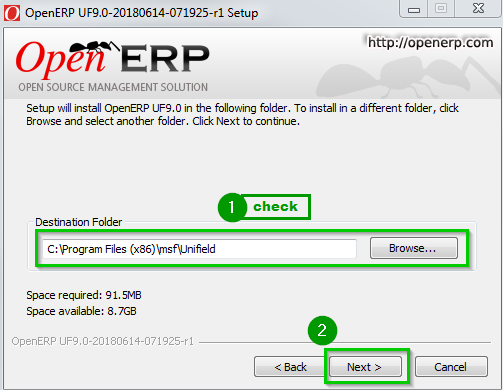 |
| You need to define different passwords 1 to drop backup and restore the database. Click Next 2 | 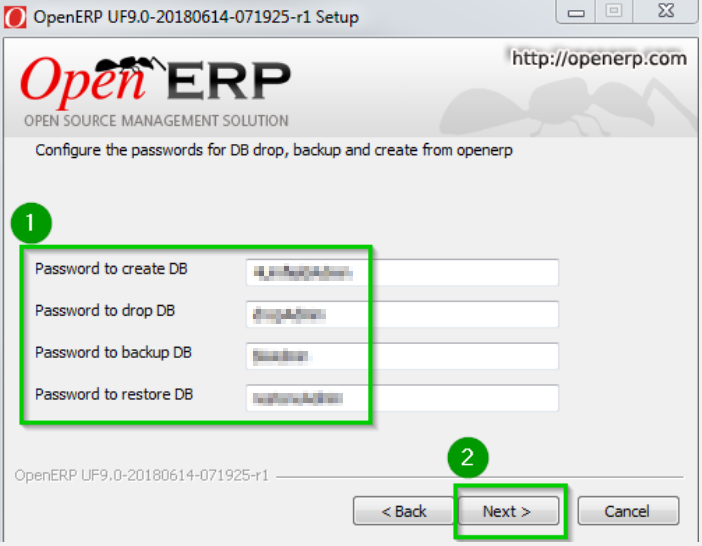 |
| Click on “…” 1 if the standard path does not suit you. Leave all the fields as shown except for the Password. For security reasons, you should not leave this default value; change Password 2 to something that will be remembered. This value will never be changed. Click Install | 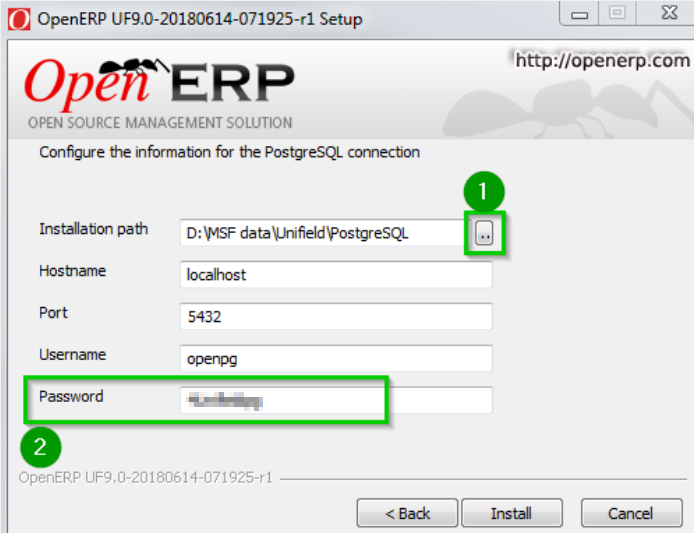 |
| The installation starts running and the following screens will appear during the installation, wait until it is completed | 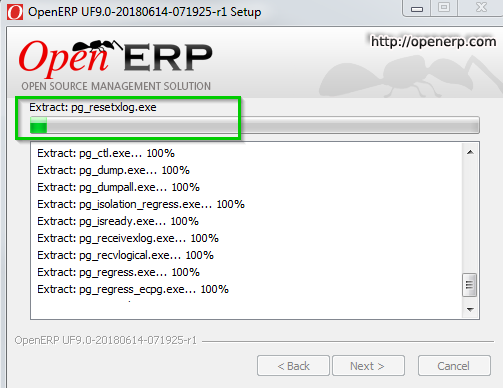 |
When it finishes you will see at the bottom of the text area a Completed notification 1 meaning the installation is now done.Click Next 2 | 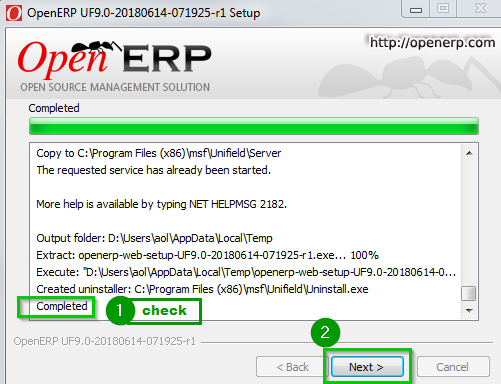 |
| Leave the Connect to OpenERP Web box checked 1. Click on Finish 2 | 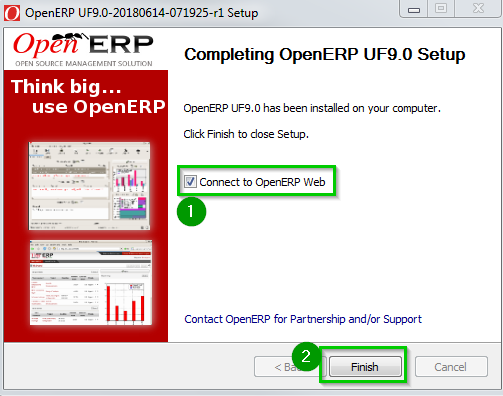 |
| The default browser starts running and connects locally to UniField 1 A warning message 2 is displayed on the homepage to ensure that your regional settings are set to “English (United States)”. If it is already done, you can omit it and proceed. |  |
UniField is correctly installed and will start automatically when the computer boots up.
On the computer where UniField has been installed, you can later connect to the UniField Web Interface using the address http://localhost:8061
Use the following command for silent installation: openerp-allinone-....exe /S
In this example: openerp-allinone-....exe is the AIO
By default:
C:\Program Files (x86)\msf\UnifieldD:\MSF Data\Unifield\PostgreSQLC:\Program Files (x86)\msf\Unifield\pgsqlUniField is correctly installed and will start automatically when the computer boots up.
On the computer where UniField has been installed, you can later connect to the UniField Web Interface using the address http://localhost:8061
The AIO must be delivered by the OC deployment team. Please always use the latest version.
It is available in SharePoint here
The All-In-One (AIO) is targeted to be installed on Windows 11 or on Windows Server versions 2019 or 2022.
The AIO installation requires administrative rights as it is going to install:
Other important considerations:
1.5 Change the super admin password
1.6 Allow the UniField web port on Windows 7 Pro Firewall
1.7 Allow UniField to contact the synchronization server on Windows 7 Pro Firewall
1.8 Connection to the UniField local instance
1.9 Secure passwords between browser and server with TLS
Contents
1.  Installation / Un-installation of an Instance

2.  Initial setup

3.  User management

4.  Synchronization

5.  Synchronization Instance Monitoring

6.  Upgrading the instance

7.  Setup a new language

8. Procedures for Backup / Restore

9.  How to create a sand box

10. Troubleshooting

11. Automated tools

12. IT Frequently Asked Questions

13. Annexes

14. Change log