9. How to Create a Sand box

How to Create a Sand box

There are various options to create a Sandbox:

  • Requesting the Support Team to create a Sandbox – please refer to the Service Card here. If you choose this option you could discard the next Sections
  • Restoring your own backups on your Sandbox
  • Creating from scratch your instances – please refer to Section 2.5 and following

No matter the option you choose the latest AIO should be installed on your Sandbox computer.

8.6 Deleting (dropping) a Database

8.6 Deleting (dropping) a Database

This function should be used with extreme care as there is no way to recover deleted data (unless a backup has been created).

To delete a database go on the UniField login page and click on Databases 1
Click on Drop 1
Select 1 the database to drop>br>Enter the Drop password 2
Click on Drop 3
A popup window opens to confirm your intention of dropping the database.
Click OK 1

8.5 Restoring a Database

8.5 Restoring a Database

To restore a database go on the UniField login page and click on Databases 1
Click on Restore1
Click on Browse 1 and select your backup file – .dump extension.
Enter the Restore password 2
Click on Restore 3

Important Note: if you restore a backup on a different machine and try to connect to the sync server, you will face an error (error 17); this is due to a security check. You have to contact the Support Team in order to activate your instance on your new machine. Section 9.5 explains how to update it if such error happens in a sandbox.

8.4 Backing up a Database

8.4 Backing up a Database

To back up a database go on the UniField login page and click on Databases 1
Click on Backup 1
Database: Select 1 the database that needs to be backed up.
Enter 2 the backup password
Click on Backup 3
A pop-up appears asking you to Save 1 the backup. Press OK 2 to start downloading the backup from the local instance server to the computer you are currently executing this action.
Copy this backup (.dump) to a safe location.

8.3 Restoring the Configuration Files

8.3 Restoring the Configuration Files

This procedure is almost the same as backing up, except the files must be pasted and not copied.

  • Restoring the OpenERP Server configuration file: Copy openerp-server.conf file from your backup location. Paste it into C:\Program Files (x86)\msf\Unifield\Server to replace it.
  • Restoring the OpenERP Web configuration file. Copy openerp-web.cfg and openerp-web-oc.cfg files from your backup location. Paste it into C:\Program Files (x86)\msf\Unifield\Web\conf to replace it.
  • Restart the Openerp services to finalize the replacements.

8.2 Backing up the Local Instance Configuration Files.

8.2 Backing up the Local Instance Configuration Files.

This step must be performed each time the super admin password has been modified. It should be the case right after the installation.

Copy the configuration file openerp-server.conf in your backup directory. The file could find it in C:\Program Files (x86)\msf\Unifield\Server
Copy the configuration file openerp-web.cfg and openerp-web-oc.cfg in your backup directory. The file could find it in C:\ProgramFilesx86)\msf\Unifield\Web\conf

8.1 Recommendations

8.1 Recommendations

Thanks to the synchronization rules, not all the data are synchronized with the synchronization server. This means that the synchronization server is not a backup solution. To avoid data loss because of a crash or any other problems, backups must be created to save 2 kinds of data:

  • Data not supposed to be synchronized
  • Data not pushed yet

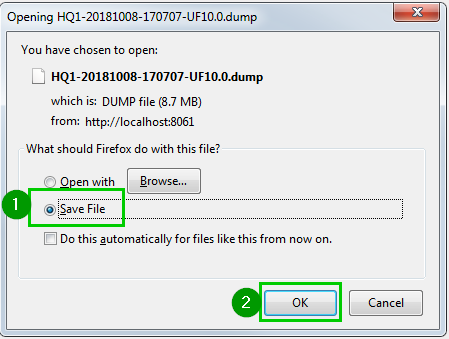
Backups must not be saved in the local instance’s hard drive as it could be lost if the hard drive crashes or if the machine gets stolen.
As for confidentiality issues, if one comes into possession of a backup, she/he would have access to all the information saved into the database backup and would be able to read it.
However, she/he will not be able to synchronize data with the synchronization server if she/he does not also possess the synchronization password or if the instance has been invalidated at the synchronization server level.
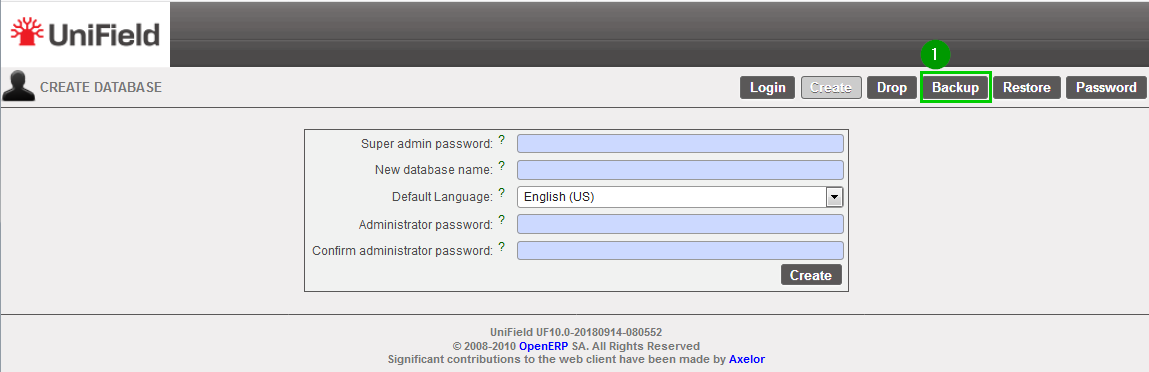
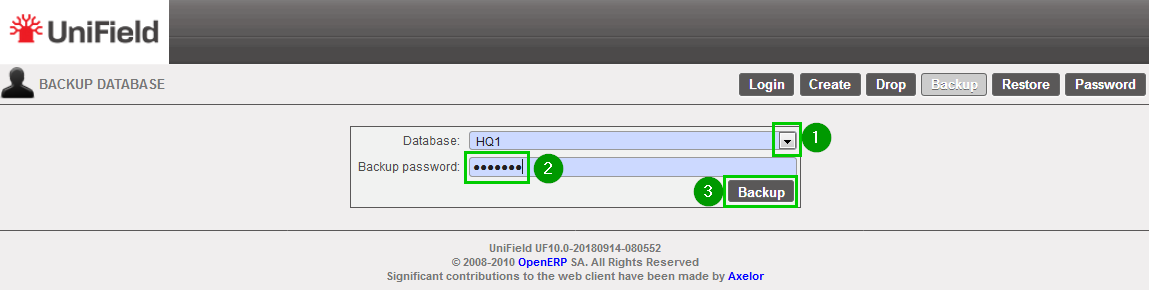
The UniField backup and restore password should be complex and be transmitted only to key staff.
There should be a safe place with:

  • the All-in-one used for the installation
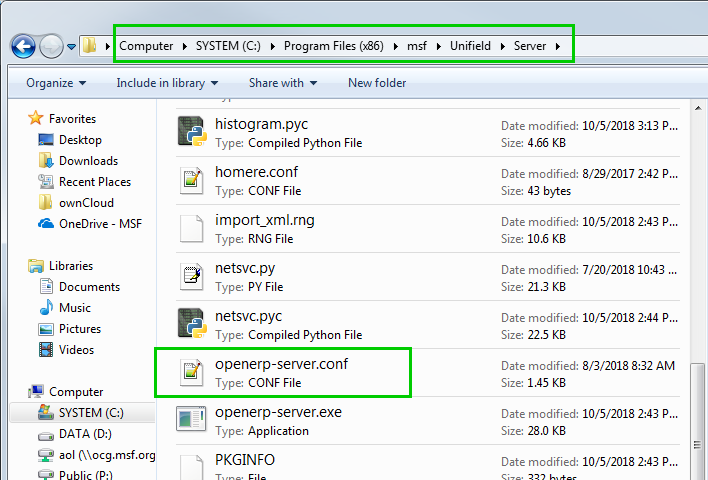
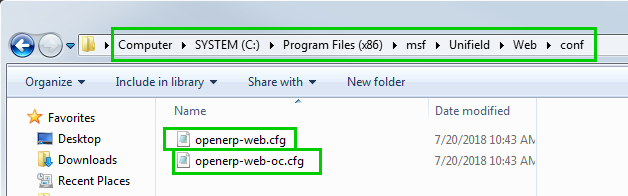
  • the configuration files after having changed the super admin password (normally done after the installation)
  • the backups

8. Procedures for Backup / Restore

8. Procedures for Backup / Restore

To be able to backup and restore the database, one must possess the UniField backup and restore password.
PLEASE NOTE backups are under OCs responsibility according to their respective policies.
The Support Team is not responsible for any lost backup.
It is strongly recommended to configure the automatic backup in your instance to avoid running manual backups.

7.1 How to Activate a New Language

7.1 How to Activate a New Language

Click on Menu Administration 1, Translations 2, Languages 3
Choose the language you would like to activate by clicking on the blue arrow 4
Click Ok 1 to validate the activation of this new language.
Installing a new language takes time. The interface won’t be fully translated before the translation process is over.
You can check that the language is fully translated in menu Administration 1, Translations 2, Import / Export 3, Translations Requests 4. Only translation requests displayed in this interface can be considered as finished.
Then open UniField’s preferences by clicking at the small cogwheel icon 1 at the top right of the screen.
Select the language you would like to use – in our example “MSF French” 1. Only the active languages are available in this select box.

7. Setup a New Language

7. Setup a New Language

UniField has only one active language. However, three languages are loaded by default. You can activate another one in the interface. This section describes how to activate and use a different language.