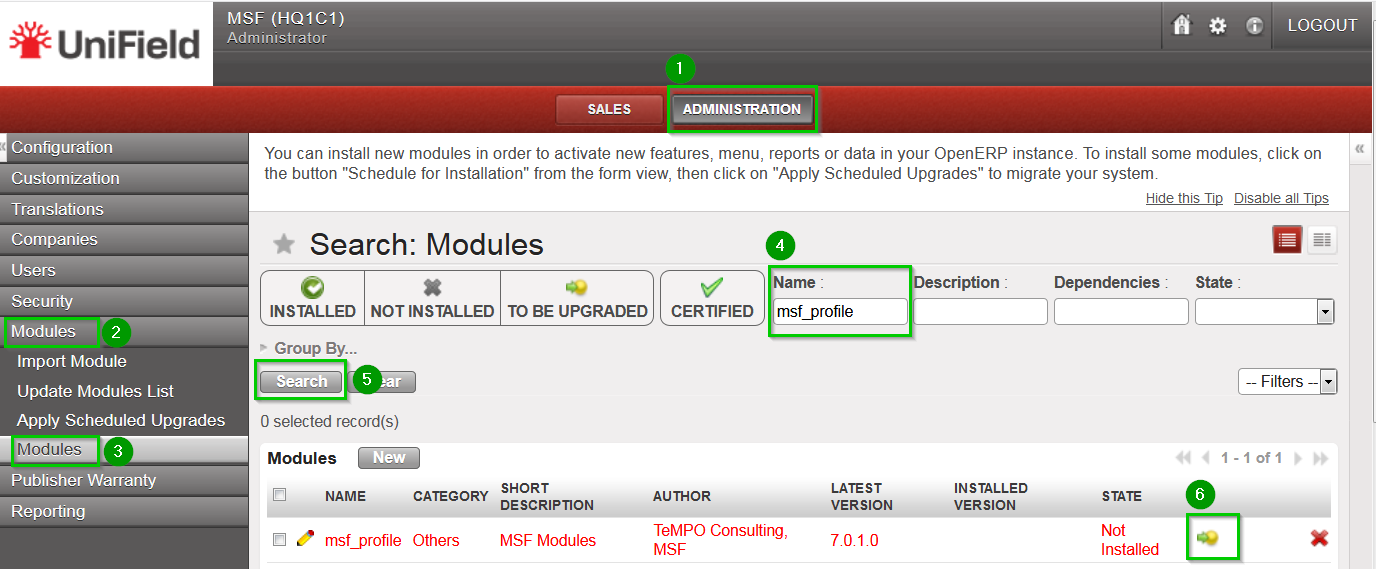
This chapter describes how to install a module in a UniField instance. It is only for reference.
Click on Menu Administration1, Modules2, Modules3 Type the module’s name in the Name4 field and click on Search5 The module will appear in the list. Click on the Schedule icon6
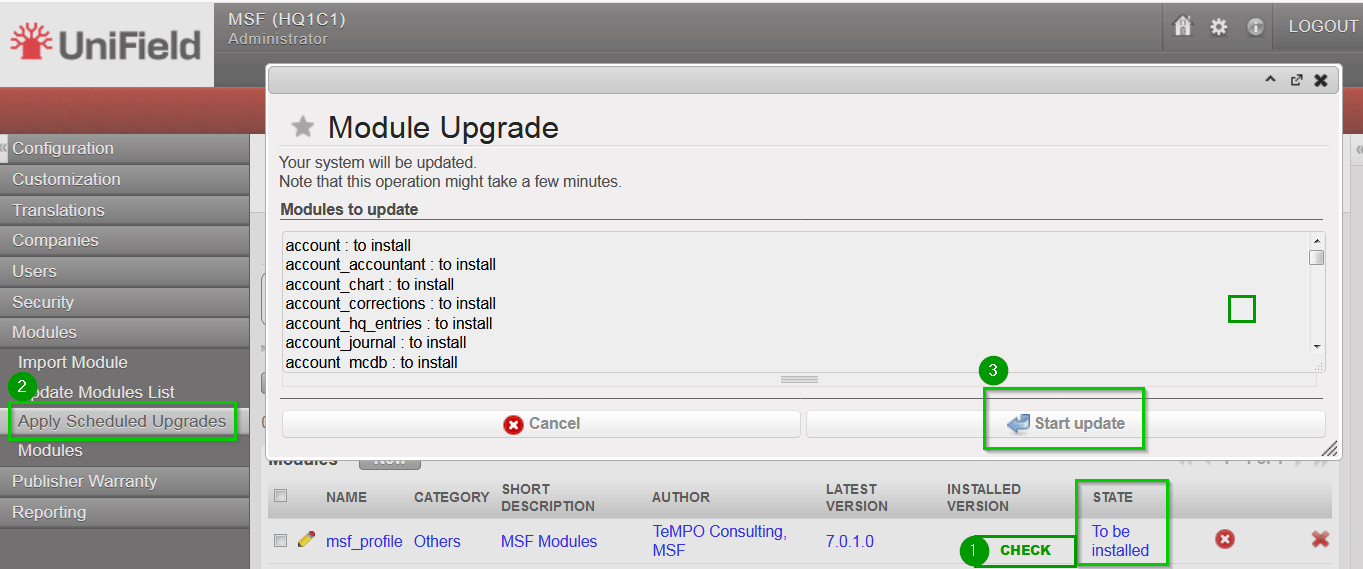
The state changes from Not Installed to To Be Installed1 Click on Apply Scheduled Upgrades2 The wizard Module Upgrade will open. Click on Start Update3 Once the wizard is completed click on Cancel (do not click on Start Configuration)
2.6.1 Modules to install in the HQ, Coordination and Project instances
Follow the procedure described above and install the following modules. The order is very important and must be respected. Install module:
msf_profile
ONLY AFTER the module msf_profile is installed, install modules:
sync_so
sync_client_web
update_client
2.6.2 Modules to install in the Synchronization Server
Follow the procedure described above and install the following modules. The order is very important and must be respected. Install module:
msf_profile
ONLY AFTER the module msf_profile is installed, install modules:
The Installation Checklist file proposes the following:
A template for listing all the pre-requisite Proprietary Instance data
A template for listing all the pre-requisite Cost Centres data
A checklist of all the files needed for data upload.
We strongly suggest you to use the template Installation_Checklist_OCX_XX1_to update.xls . Your Finance referent should validate this file and have it ready before starting the installation. Please log a ticket in Jira – Request Step1 checklist validation – for its double check by the Support Team.
It is key prior starting the setup that the target network is well known and defined. All required files for data upload should be prepared and ready before starting the setup. It is highly recommended to prepare the following data for each instance that would be created:
Instance type: to choose among HQ, Coordination, Project or SYNC_SERVER
Instance code: the code that would be used for identifying the instance through synchronization
Parent instance: code of the parent; for HQ=none / for Coordination=HQ / for Project=Coordination
Proprietary Instance Code and Name: The proprietary instance is unique per instance and is used for tagging certain objects that are sent to other instances through synchronization. It is recommended to use for Proprietary instance code the same code as the Instance Code. Example: We create a bank register at project level. This bank register is tagged in automatic with the project’s proprietary instance code. Once synchronized to coordination, the project’s bank register keeps its original proprietary instance code.
<li
>Mission: (Only for Coordinations and Projects): Name of the mission. This name will also be used as group name in the Synchronization Server.
Account Move Prefix: Used for accounting purposes, should be unique per instance. For tests purposes, you may choose any alphanumeric value.
Reconciliation Prefix: Used for accounting purposes, should be unique per instance. For tests purposes, you may choose any alphanumeric value. For each Coordination instance, it is also necessary to define which cost centres should be linked to the instance. This list is automatically replicated in all the project instances belonging to the same mission. For each Coordination and Project instance,
One or several Target cost centres that are used for sync purposes; in case of a coordination one must select the top cost centre representing the mission (eg HT1), the coordination cost centre (eg HT101) and any other cost centre managed from coordination like Eprep or Explo (eg HT190). A cost centre can be set as “Target” in one and only one proprietary instance.
The Top cost centre that will be used for budget consolidation.
The cost centre that will be used in all PO/FO identification (eg HT101). System uses this parameter as a reference in all PO/FO codes. It is a key reference on the supply side that could be used for international orders billing (from Supply Centre to HQ).
This manual references several .CSV files used in various instances to setup either your instance (Production or Sandbox). Please refer to the Annexes section to find these files represented by this icon throughout this manual.
This chapter will guide you on the set-up of a local installation for a UniField environment. If you are seeting up Porduction instances please skip the sections/steps with this icon as it only concerns Sandbox environment. It is assumed that a full UniField AIO installation has already been done on the target PCs (as per chapter 1 – Installation). A full local installation consists of the following:
If you need to you set up a new time zone on your Windows computer there is a need to check and perform the following steps in order for Postgres to take into account your update.
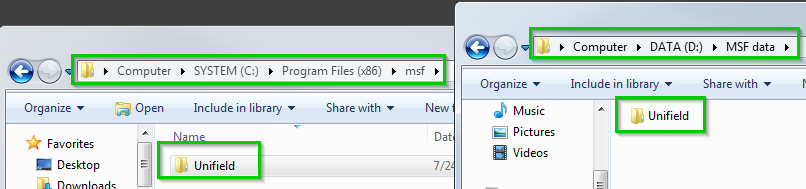
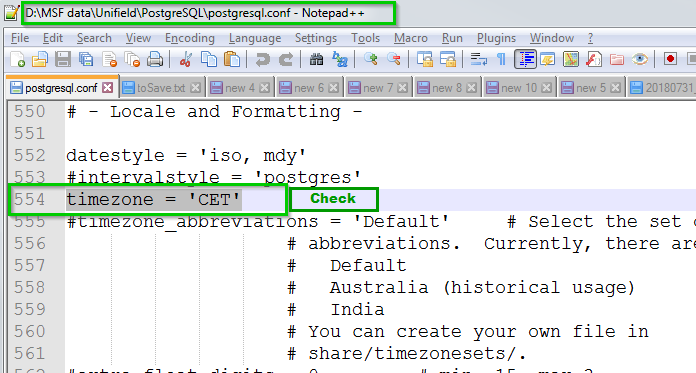
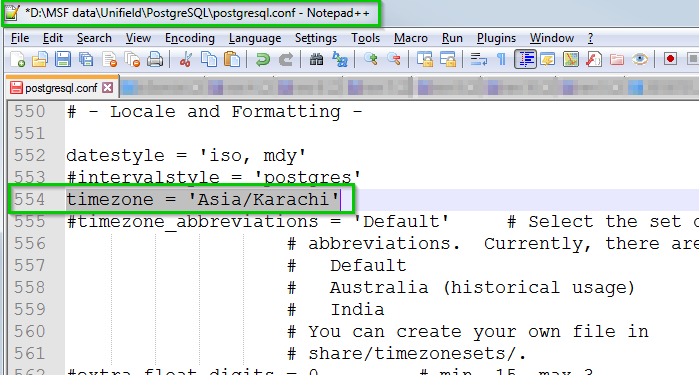
Check first the current time zone information set by Postgres: File path: D:\MSF data\Unifield\PostgreSQL File name: postgresql.conf line: timezone = 'CET' In our example it is set to: CET
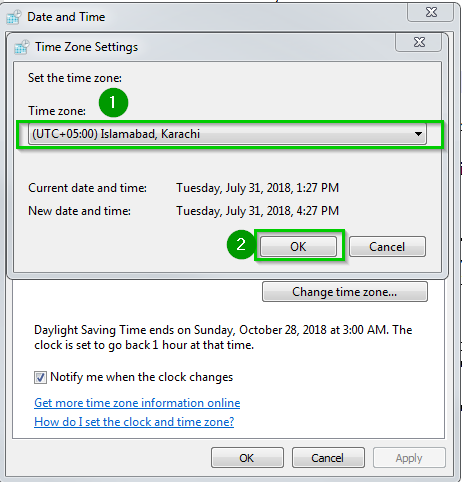
Now for the example we would like to set the time zone to (UTC+05:00) Islamabad, Karachi Select this new time zone on the Windows Time Zone Settings 1 Click on OK 2
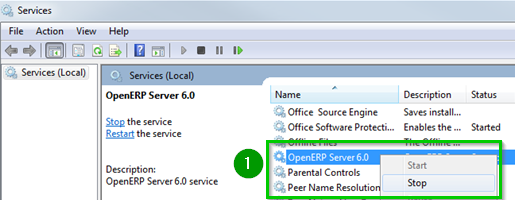
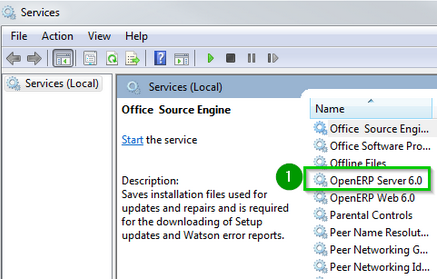
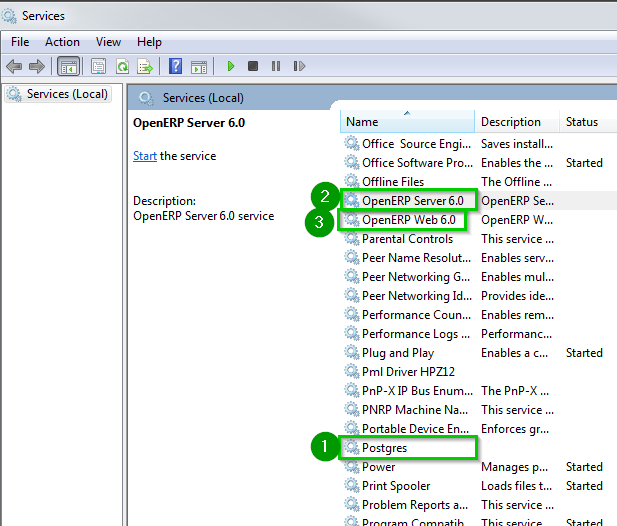
Stop to the following service:
OpenERP Server 6.01
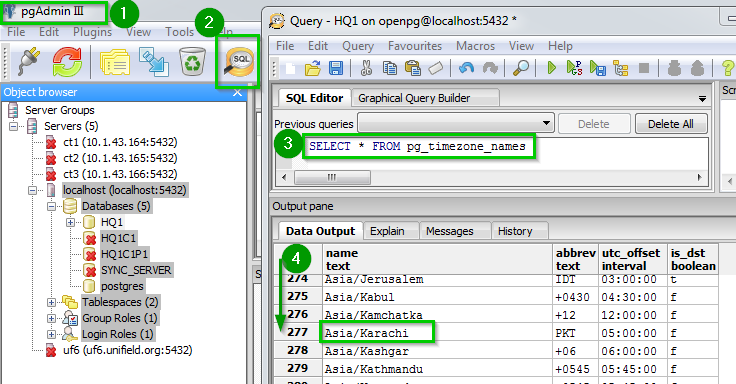
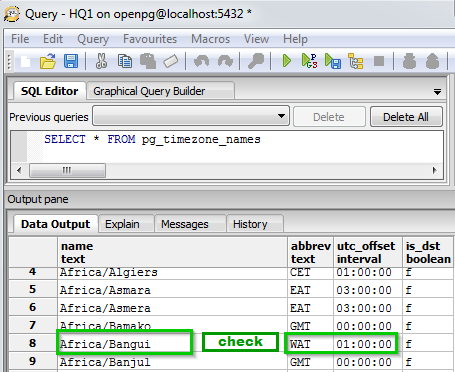
Open pgAdmin 1 Open a SQL query window 2 to check the list of availalbe Postgres time zone Run the following sql query 3SELECT * FROM pg_timezone_names; Scroll down 4 the list to find Karachi Copy this information to your clipboard.
Edit your file postgresql.conf at line: timezone = 'CET' Replace ‘CET’ by ‘Asia/Karachi’ Save the file
Restart to the following services. The order is very important:
Postgres 1
OpenERP Server 6.0 2
OpenERP Web 6.0 3
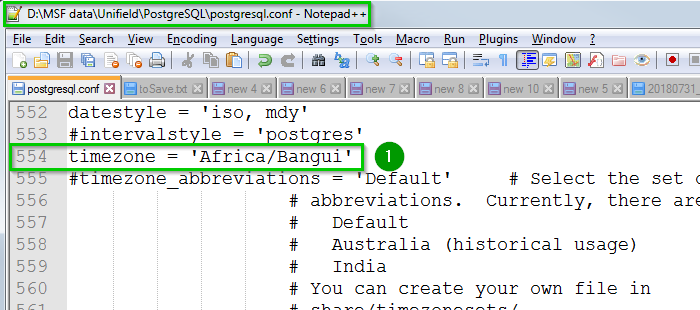
In few cases pgAdmin cannot find a time zone from its list that matches the (nonstandard) time zone name used by Microsoft. E.g.: you would like to use the Windows time zone (UTC+01:00) West Central Africa but it’s doesn’t appear in the pgAdmin list of timezone.
As above look at the pgAdmin time zone list that would suit the (UTC+01:00) West Central Africa In our case timezone would be 'Africa/Bangui' which is UTC+01:00 -without daylight savings- just like Micosoft’s West Central Africa time is.
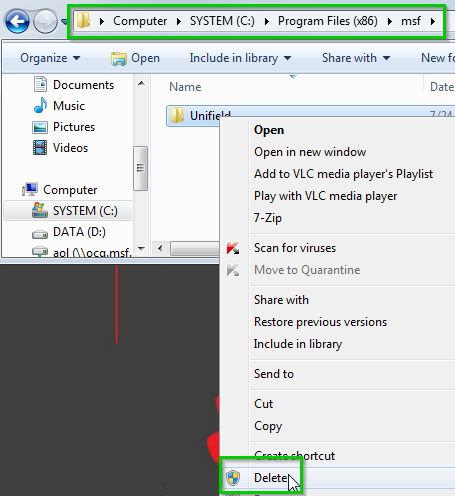
Edit the file 1postgresql.conf the same way as above. Restart the services Postgres and OpenERP Server 6.0
1.9 Secure passwords between browser and server with TLS
The best practice for web applications like UniField is to encrypt usernames and passwords on the network. It is strongly recommended to enable HTTPS security, doing so via a progressive rollout in coordination with the UniField Support team. In a future version, HTTPS will be recommended for all sites, and will be the default. Enabling HTTPS has no impact on how the end users will open UniField in their browsers as UniField will automatically redirect users arriving on HTTP to HTTPS. Each HTTPS server needs a certificate, which shows that a third party guarantees the connection between the server’s public key and the DNS name it is using. There are three choices for how to get a certificate:
Option 1:
Allow UniField to get a certificate via the Certomat system operated by the UniField Support team, which fetches certificates from LetsEncrypt on behalf of your server. This is the recommended configuration.
Pros: Simple, free and automatic, works with servers that are not on the public Internet.
Cons: The name must be of the form “prod.unifield.org”. You must use local DNS or the hosts file to point the name at your server’s local IP address.
You need to choose one word and put it before “prod.unifield.org”. If your server has one instance inside of it, then you should use the instance name, so for example in Osh Kyrgyzstan, it would be “OCG_KG1_OSH.prod.unifield.org”.
C:\Windows\System32\drivers\etc If your server will have several instances inside of it, make a name for it starting with your OC and ending with a description of what the server is for. For example, a training server in OCG might be called “ocg-training.prod.unifield.org”. Check with your site network administrator that your local DNS (or the hosts file on all client machines if local DNS is not available) maps the name of your server to its local IP address.
Option 2:
Tell UniField to fetch and renew certificates directly from the LetsEncrypt CA automatically. This option is not recommended, but supported.
Pros: You can choose any name for your UniField server, as long as you control the DNS for that name. Simple to configure. Free.
Cons: Your server must be continually available on the public Internet so that during renewals LetsEncrypt can connect and confirm that you still control the DNS name.
You must use the public DNS name for the public interface of your server (ask your network/server admin to help you find it and/or set it).
Option 3:
Generate a Certificate Signing Request (CSR) and submit it to a certificate authority. Complete whatever checks they require and pay them a fee. Install the certificate on the Unifield server. Remember to pay the fee again in a year or two years when the certificate expires. This option is not recommended, but supported on a case by case basis.
Pros: You can choose any name for your UniField server, as long as you control the DNS for that name.
Cons: cost and operational complexity.
You may choose any name that you can buy a certificate for (check with your certificate provider for their rules). When using a certificate from a certificate authority, the private key and certificate must be placed into c:\Program Files (x86)\msf\Unifield\Web as $server_name.key and $server_name.cer. They must be in PEM format.
1.9.1 Procedure
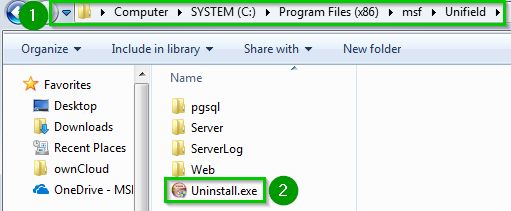
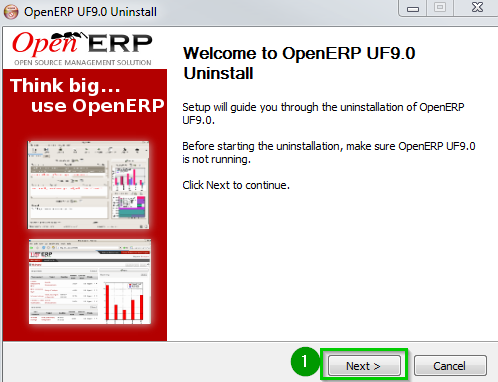
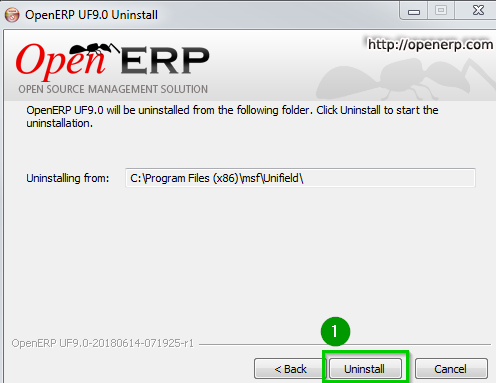
Prerequisite: AIO version 4.0 or later is installed in your server/machine.
If your UniField version is running on 4.0 or after skip the next unistall/install of the AIO first steps below.
If your UniField version is running on 3.1 or before you would need to install the latest AIO version (minimum v4.0)
Once your UniField version is in 4.0 or later you can follow with the below steps
Choose an HTTPS server name, which is the name that will be in the certificate, and shown in the URL bar of the web browser. The way that you choose the server name depends on which option you have chosen for how to get the certificates (see above).
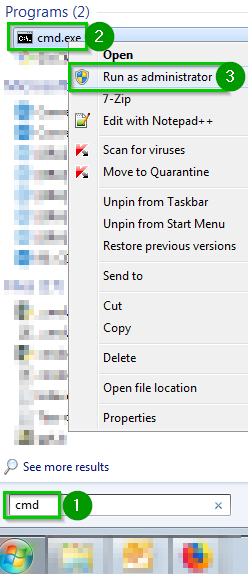
Click on Start 1 and search for cmd Right click on cmd.exe 2 and Run as an administrator 3
The terminal opens, launch notepad by typing notepad++.exe1
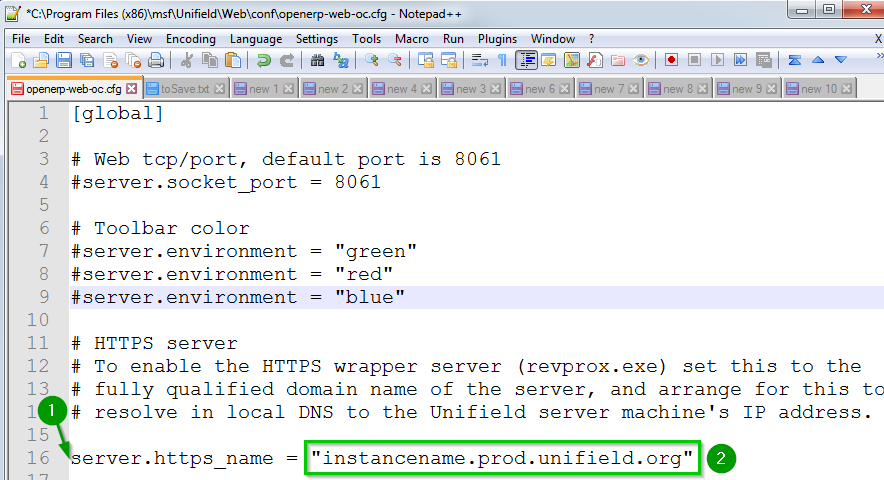
Open the following file on Notepad: File > Open…: c:\Program Files (x86)\msf\Unifield\Web\conf\openerp-web-oc.conf. Uncomment 1 the line server.https_name Set the name 2 as previously selected: e.g. instancename.prod.unifield.org Save the file
Depending the option you choose do:
Option 1:
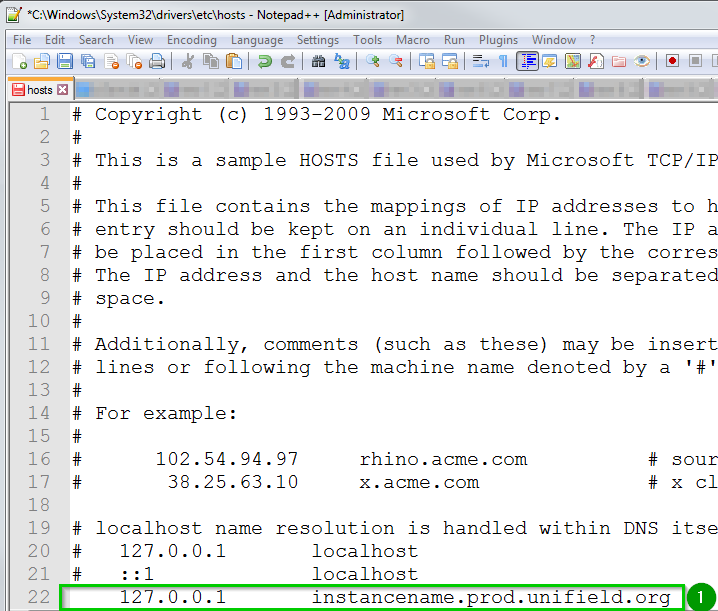
Edit the hosts file in C:\Windows\System32\drivers\etc on all client machines ONLY if the local DNS is not available and add the connexion line 1.
Option 2:
No other configuration is needed you can continue the procedure.
Option 3:
Place the key and Certificate file in c:\Program Files (x86)\msf\Unifield\Web as $server_name.key and $server_name.cer. They should be in PEM format.
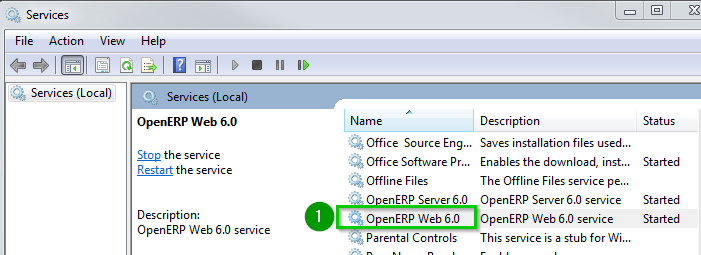
Restart OpenERP-Web service 1 by right clicking on the service.
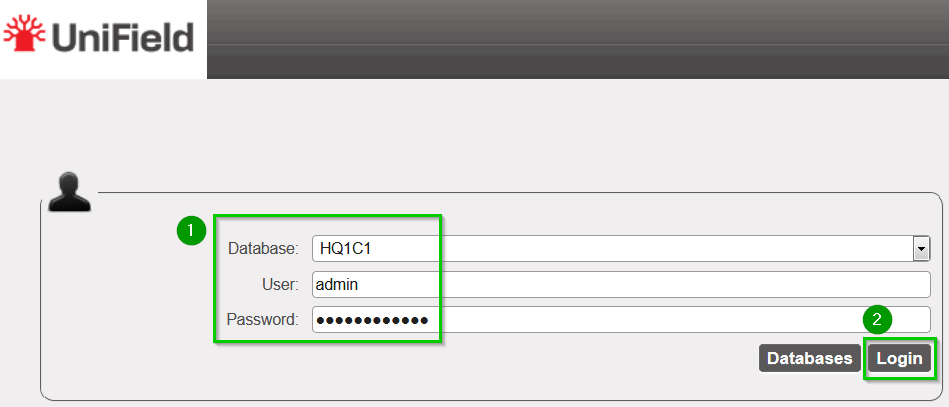
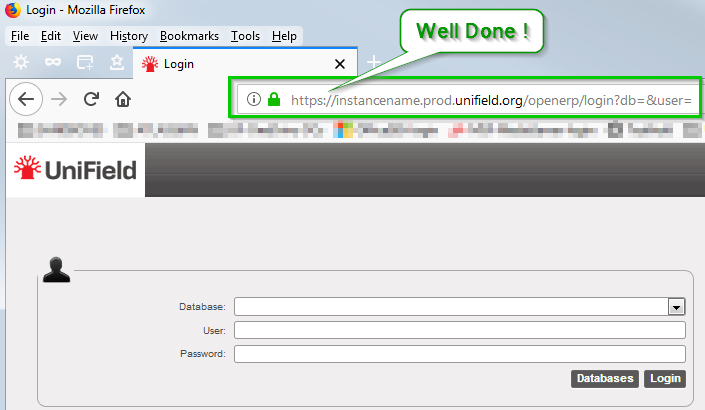
Wait a few seconds and then go to http://localhost:8061 You should be redirected to the HTTPS site.
In addition please find here an internal OCB procedure complementing the manual on how configure the DNS.
1.9.2 Troubleshooting
Below few troubleshooting tips for known issues:
If going to http://localhost:8061 does not result in redirect to HTTPS Read the openerp-web.log Look for A server is already running on Port 443. Is it Skype? If you are running Skype, do the following: a. tools > options > advanced > connections b. uncheck “listen on port 80 and 443“ c. save and close d. restart skype
Bad Certificate: If you are using Windows and Chrome or IE, and you get a certificate trust error, it might be because root certificate auto-update is disabled. You can use regedit.exe to check this key: HKEY_LOCAL_MACHINE\SOFTWARE\Policies\Microsoft\SystemCertificates\AuthRoot\DisableRootAutoUpdate If it is 1, then the CA certificate that LetsEncrypt depends on is not getting loaded automatically. You need to set it to 0. If you are using Firefox (the supported UniField browser) this problem does not occur.
We use cookies to ensure that we give you the best experience on our website. If you continue to use this site we will assume that you are happy with it.